
Are you loving these fun Mother’s Day gift ideas this week? I sure am! Thanks so much to Morena’s Corner and Wait Til Your Father Gets Home for sharing tutorials Tuesday and Wednesday! And to wrap things up, I have one more idea to share.
Here’s what I’ve been working on this week: gift pots with plantable seed paper tags!
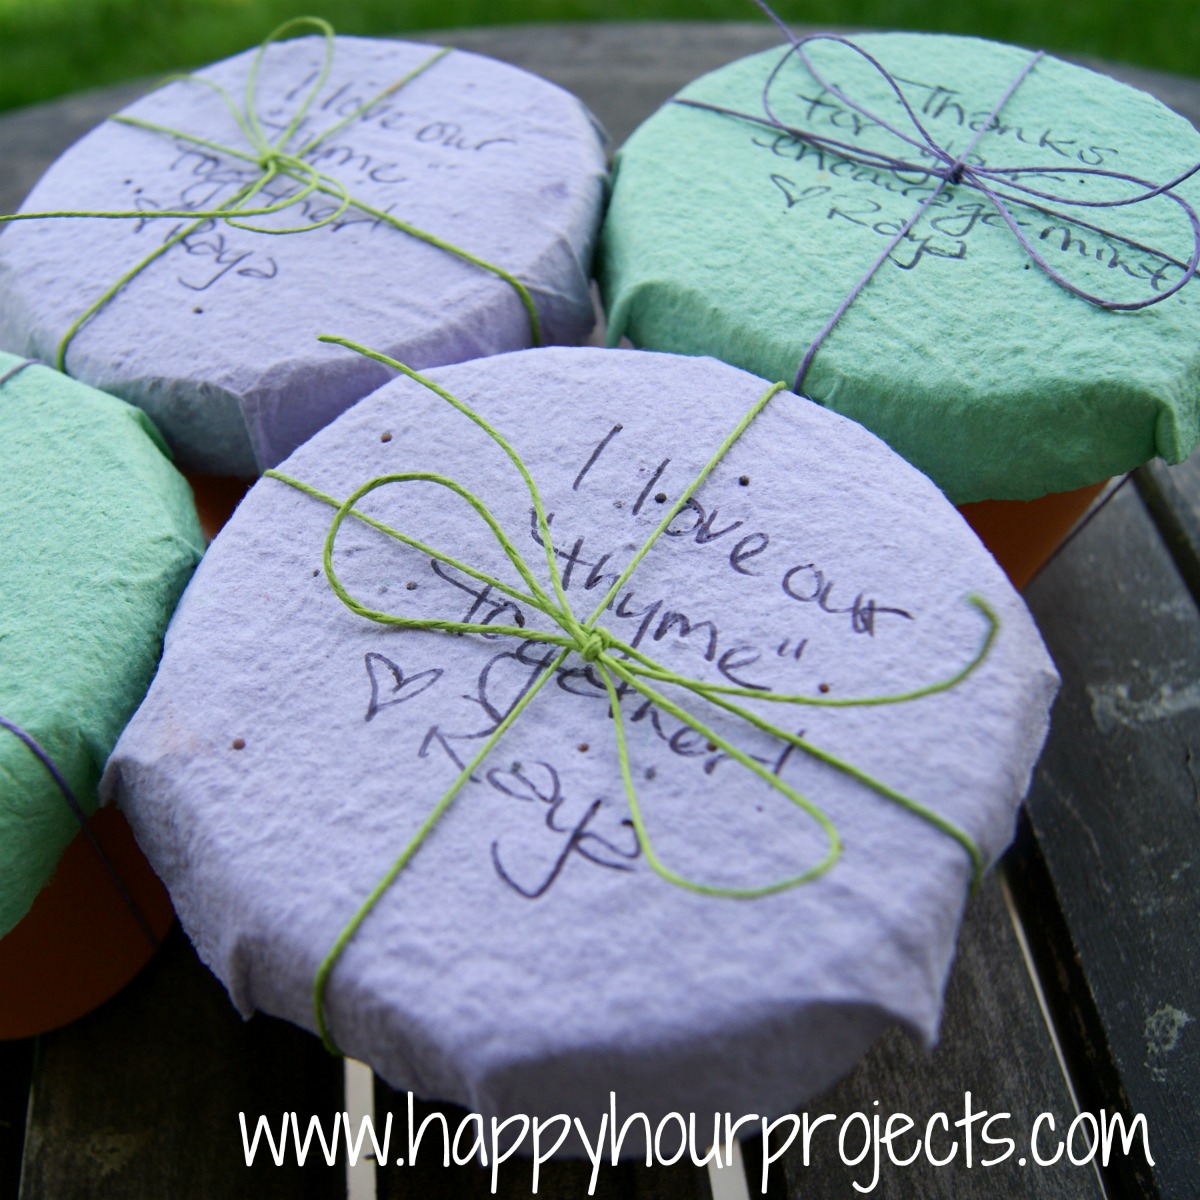
The pots already contain the potting soil, and the paper cover can actually be planted directly in the pot, as-is. (My thinking is that if you are going to gift a pot, it should come with everything you need to make it grow – just add water and sunlight!) If you look closely above, you should be able to see the seeds embedded in the tags!

You can make this as simple or as involved as you want. Because we’re nearing the Mother’s Day deadline, there’s probably not enough time left to order custom tags, or seeded paper for making your own tags. What you can do is to use a regular paper to cover the pot, and tie on a little seed packet. Or… you can make your own seeded paper – which is what I did!

The pots themselves are fairly simple. If you want to see how I assembled mine, scroll all the way to the bottom of the post, because today’s tutorial is going to focus on how to make the tags, so that you can make your own plantable or recycled paper.
Disclaimer #1: Even with heavy editing, I am going to be very wordy in this post. I have a lot of explaining to do to fill on for what I felt the other tutorials were missing. But please just ask if you still have questions!
There are extra pots pictured because we are also giving these to Raya’s teachers today for Teacher Appreciation Week, along with a special Teacher Wish Bracelet. (She’s only at preschool on Thursdays and Fridays, so this is the first chance we’ve had to thank her teachers!) And as you can see, I wrote something punny on each of them – the paper with mint seeds embedded say, “thanks for your encourage-mint!”and the ones with thyme seeds say “I love our thyme together!” I had considered doing a third batch with basil, and since I couldn’t figure out how to use “basil” in a clever way I was just going to say, “Thanks for helping me grow!” However, once I discovered how many tags I was going to end up with after just two batches, I quit at just the mint and thyme.
Disclaimer #2: I focus on projects here that are an hour or less. My first batch of tags took me nearly 2 hours from start to finish (though you bloggers know that the photography slows you down a bit). I recycled 2 pieces of paper, and made 9 tags from it. Once I had the hang of it by the end, my second batch (2 sheets, 11 tags) took me just less than 30 minutes from starting my pulp to having everything cleaned up. I couldn’t find a really detailed tutorial out there for what to expect, so I had to learn as a went along. I’m going to be heavy on the explanation and the photos here for you in the hopes that you don’t have to wing it like I did! So this will look like a much longer tutorial than it actually is. There is also overnight drying time involved, so make sure you allow for it!
Before you get started – put a used blender on your list-to-look-for when you hit up the thrift stores and yard sales. I lucked out and found mine at a thrift store for $6. It’s in great shape, but it’s a light duty cheap plastic one that someone probably discovered wouldn’t blend ice, so they cast it off. :) That’s ok – you don’t need a heavy duty blender for papermaking, you just don’t want to use your food blender for this project because of the chemicals in paper. (Or at least, you don’t want to use it for food again after you’ve made paper pulp in it.) You could always go the Walmart route – a cheap blender is about $15 – but that’s still kind of steep for a project you may not know if you want to try again.
Anyway – I browsed a lot of tips preparing for this, but the source I found most helpful to get started was at makeprojects.com. Their Papermaking 101 tutorial has some really good information about how to make a mold and deckle so that you can recycle paper into rectangular sheets – great for binding into journals! But for today’s project, I didn’t need whole sheets – I only wanted tags. So rather than make a large deckle only to cut the tags down for my purposes, I reduced the amount of supplies necessary and the work involved and made my paper tag-sized to begin with.
Seed Paper Gift Tags
What you’ll need:
- Blender or food processor that you won’t be using for food
- Piece of adjustable screening (or scrap loose screen, and a frame to mount it on)
- Cookie cutter(s) – basic shapes are best
- Plastic tub that your finished mold fits into – you might be able to use your sink, depending what size you settle on
- Piece of wool felt that is larger than your cookie cutter
- Sponge
- Newspaper, sheets of felt, or interfacing (I used newspaper and thought it worked well)
- Paper to recycle into tags (colored cardstock, junk mail, etc.) – the better quality paper you use, the nicer your tags will be
- Seeds
Your first step is to acquire or make your screen mold. I had every intention of making mine, but when I went to Lowe’s, I discovered they only had large rolls of screening. It wasn’t terribly priced at $6.50, but it was just SO much more than I needed. I was about to end up with a whole lot of extra screening, until right next to the rolls, I spotted small adjustable screens for $5 that were already splined on a frame! So I bought that instead and took the adjustable sliders off, giving me two fully assembled paper molds (you’ll see them below).
It was a lot easier to start with something fully assembled, but if you don’t find an adjustable screen, or if your hardware store will sell you just a small piece of screening (or you have a screen at home with a tear in it that needs to be replaced anyway), you can just make your mold by stretching and stapling some screening tightly onto a canvas stretcher or even an old picture frame. It only needs to be large enough for making one tag at a time. I was going to make a 5″x7″ size on an old picture frame originally, until I found the adjustable screening. Just make sure if you go this route that your screen is at least 3-4″ bigger than your frame – I’d suggest 9″x11″ for a 5″x7″ frame. If you’re using old screening, wash it well first.
Because of the larger-than-expected size of my mold, I re-appropriated an under-bed storage bin that was a good fit. Here’s another “pro” if you have a small mold – you only need a small bin. Your sink might even work if your mold is small enough!

Now, I’ll be using my green and purple paper shots pretty interchangeably here. There were a couple places where I forgot to take photos or I found a better way of doing it, so I made up for missing steps on my second batch. So don’t let the switching around mess you up. :)
First, I raided my scrap paper. I found nearly a whole sheet of lavender cardstock. I supplemented it with about a 1/2 sheet of a darker purple and some regular printer paper leftover from a coupon I had printed earlier. I tore my paper up into smaller squares.
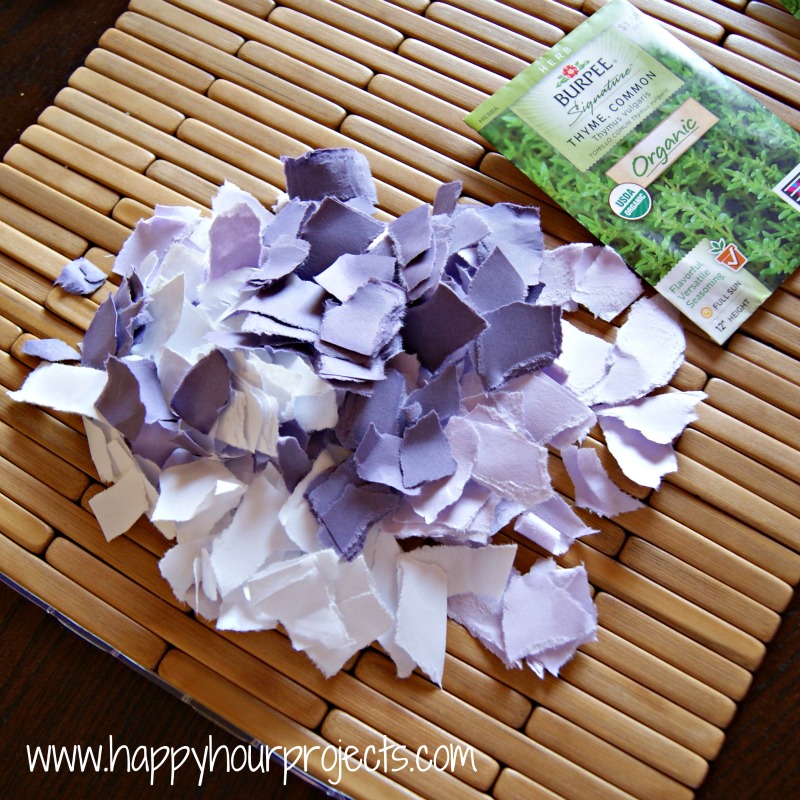
I was hoping that this would give me a nice tri-color paper, and that each color would be visible individually, but surprisingly – they are not! When you get your pulp fine enough to work with, it really blends together. So you can mix and match colors about the same way as you do paint. If you want to have visible larger pieces, reserve a few for the very end of your blending (I’ll show you below).
I was nervous about accidentally adding too much water, but after testing it out, it turns out that the more water you use, the easier it is – both to blend, and to pour. I finally found that about 1 cup of water per sheet of paper worked the best for me. Think smoothie texture, or even slightly thinner. You don’t want to have to stop your blender to shake down your scraps, go ahead and keep adding water until they blend freely on their own. I also soaked the paper scraps for a few minutes before blending them so that they would break up easier and go easier on my blender motor. I can’t imagine it matters whether you use hot or cold water, but because I was using my hands, I used warm water throughout the project so as not to freeze my fingers. :)
Now, if you want those larger pieces to be visible in your tags, toss a few more scraps in now, and run your blender just one or two seconds more. They blend fast!

(Technically your screen is your mold and your cutter is your deckle, but for simplicity’s sake I’m going to say “screen” and “cutter” in this tutorial since none of us here are pro papermakers. Yet, of course.)
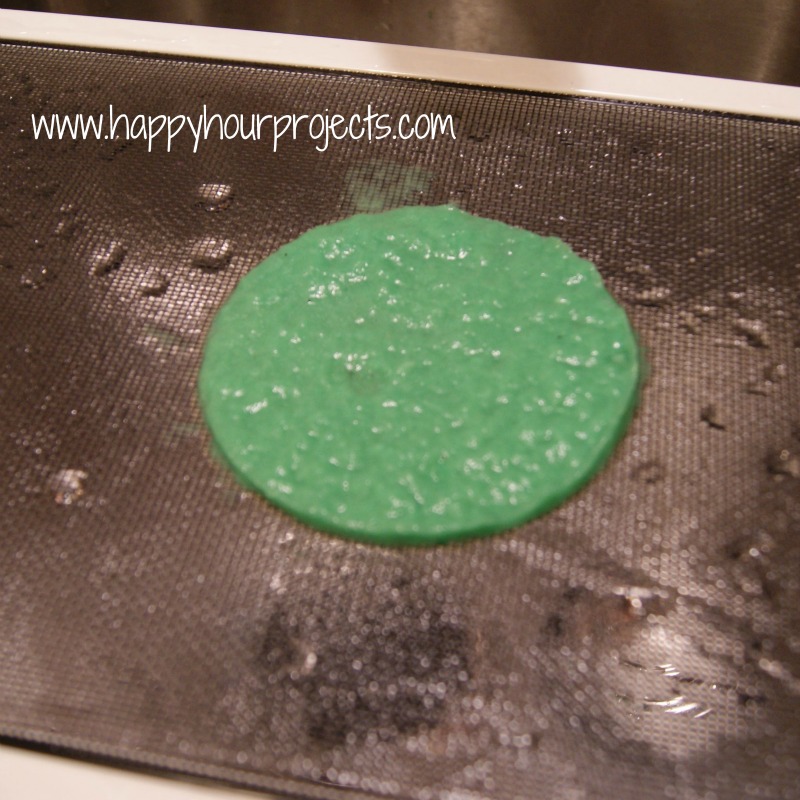
Now, put your screen into your tub (sink, etc.) and fill it with enough water to fully cover the screen by about 1/2″ – just make sure the water isn’t over the top edge of your cutter. Place your cutter anywhere in the middle part of your work surface. Don’t mind my extra cutter there… I thought it would be a fun shape, but I discovered pretty quickly that simple shapes would work best.
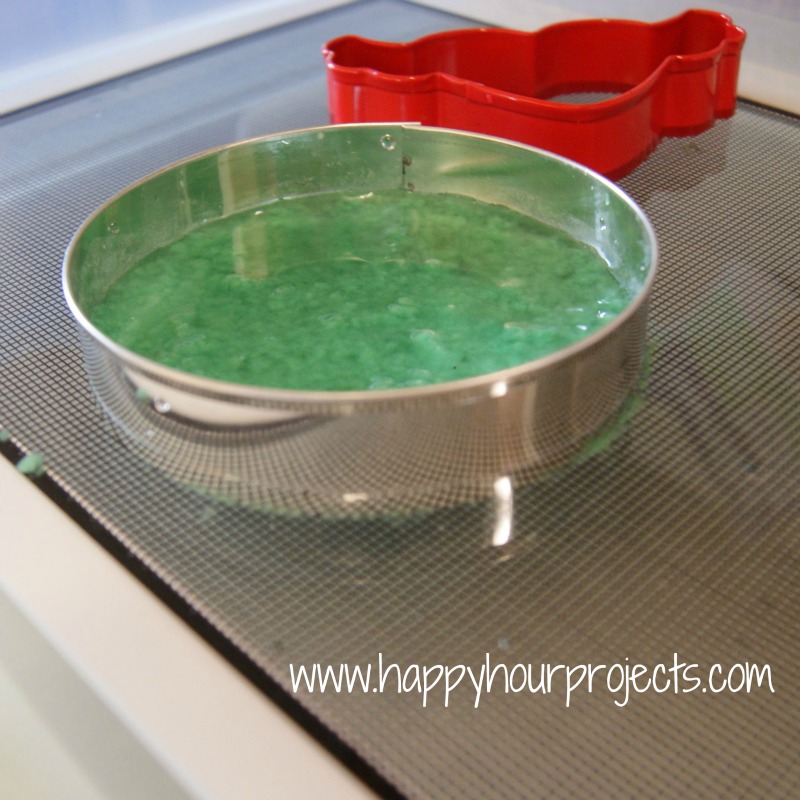
Now, pour your pulp. It’s really hard for me to explain how much to use, because it will depend on how much water is in your mixture. But what you are trying to do here is pour enough pulp mixture so that it covers the entire area as thinly as possible with no holes. The best way to spread it around is to pour some, then stir it in the cutter with your fingers. Let it settle, then see if you need more. If so, add a little, and stir again. Pretty soon you’ll just be able to tell how much to pour.
The stirring is key, here. Paper is formed by the fibers overlapping in random ways, so by keeping your pulp well-watered, it will move around more freely. If you find there’s a hole that just doesn’t want to get covered, you can add just a little more water, and stir it up again.
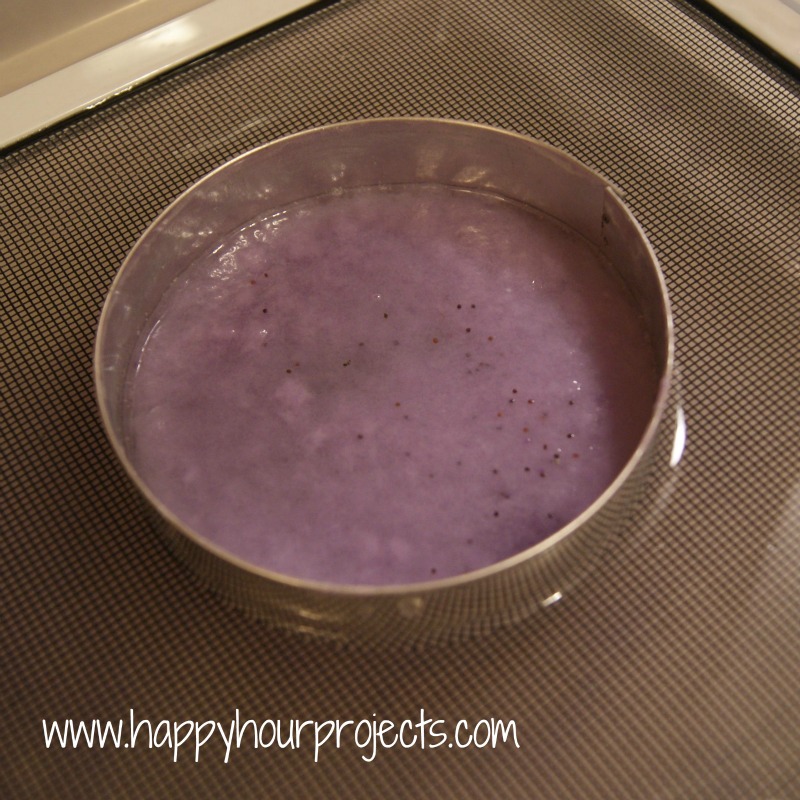
It’s here that I would recommend adding your seeds. In my first (green) batch, I stirred them into my pulp mix in the blender. But as I stirred my pulp inside my cutter, the tiny mint seeds just started falling through the screen! So do all your stirring first, then once you’re happy, sprinkle in a few on top like the above photo.
Now, remove your screen from the water and place it over a sink or another area where you can squeeze water out. If you’re already using your sink, consider adding some blocks or something to support the edges of your screen and keep it slightly elevated to do this part – perhaps in the other side of your sink. For me, my screen was too big for the sink anyway, so I just worked over the sink by balancing my screen over the edge of the counter and the sink divider.
Once a little bit of water drains out, you can remove your cutter. Your pulp should stay in place.
Now, cover it with your wool felt, and squeeze some water out through the bottom of the screen. (A note – I also tried using the polyester felt to see if it would work. It didn’t. I have no idea why, but you will need to use wool felt for this!)

The water from the paper will begin soaking into the felt. Take your sponge, and sponge as much water out of the wool felt in the area of your paper tag as you can.
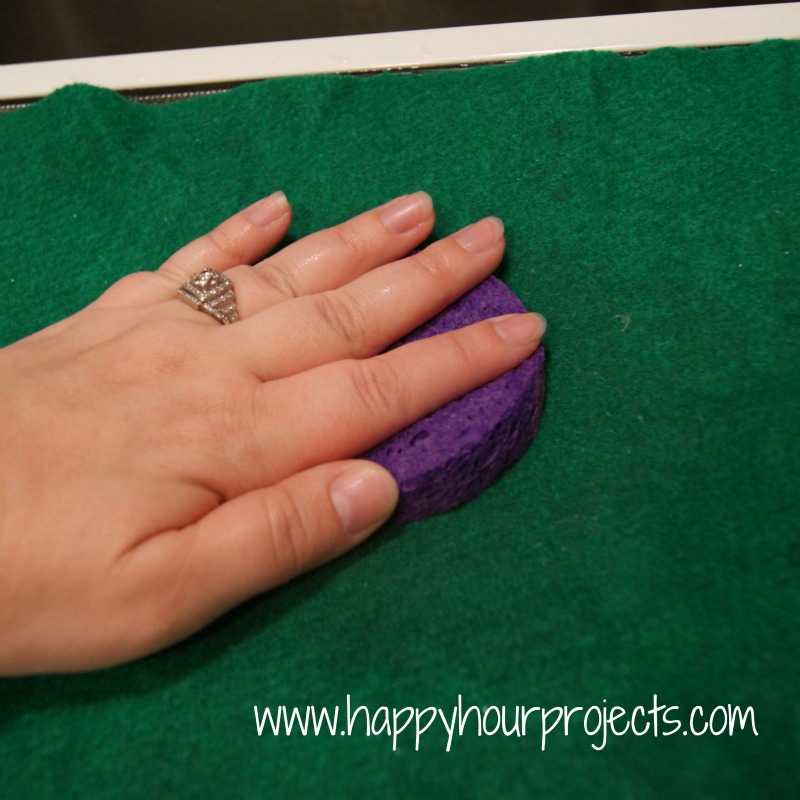
I found that about three rounds of blotting and squeezing my sponge out was all I needed for this to work well. The next part was pretty surprising to me… gently lift your felt up and off the screen. If you’ve blotted enough water out, the paper should come with it! If you’re nervous, you can turn your screen over and pull it away (I did it that way at first), but once I found that it worked, I didn’t have to be so careful. If you find it doesn’t cling to the felt straight away, just try sponging a little more water off the top of the felt and try again.

You’ll be able to see the lines from the screen. If that bothers you, there’s one more thing you can do to smooth it out in just a minute. I liked it textured, though!
Now, you’ll need to transfer it. I put mine out on newspaper, and aside from one tag that transferred a faint little bit of a headline, I was really pleased with how this worked. You can also use other sheets of felt or even some interfacing, but I already had newspaper so I gave it a try – and after using it, I’d do it that way again.
Just put your felt, paper tag down, on the paper. Press it down. Use your sponge to sponge of the water from the felt one last time. This is where you can do a little more smoothing of your paper – if you have a small rolling pin, you can roll it out just a little more, which should help smooth those screen marks out.
Here’s where the newspaper will start soaking up the water, and that’s good. As long as the newspaper is wetter than the felt, you should be able to carefully peel the felt away, leaving the paper tag on the newspaper. I’m certain that there are some kind of actual physics involved here, but I have no idea what they are. I just know – it worked. ;)

And that’s it! Of course, you’ll want to keep going until you are out of pulp and/or have enough tags for your project.
I was using my kitchen floor to lay these out… it’s the only place in my house that has enough room. But instead of letting them dry there, I carefully transferred my sheets of newspaper outside to finish drying.
Then, because it’s me, despite weighting them down with stones on the edges, the wind picked up overnight and the next morning, I found my sheets… in the bush. Doh.
Amazingly, though, they stuck to the newspaper so I didn’t lose any. I just had some very funky bends from the paper drying wrinkled.
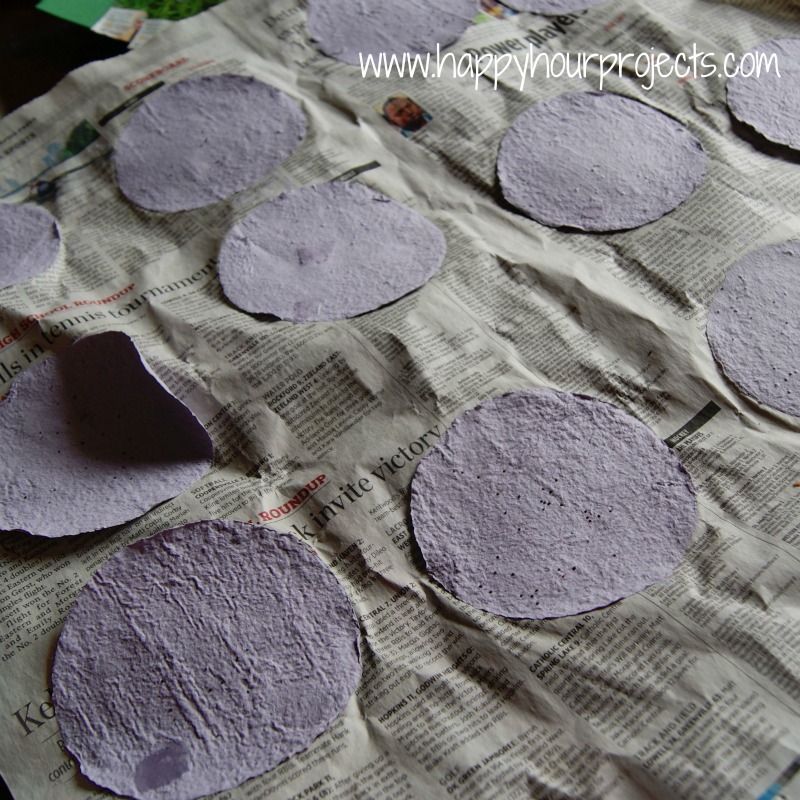
I peeled them off. Do be careful and go slowly, but I didn’t find them susceptible to ripping at all. Every single one peeled off clean – if wrinkled!
So to fix that, I pressed them between a few heavy books for an hour or so.
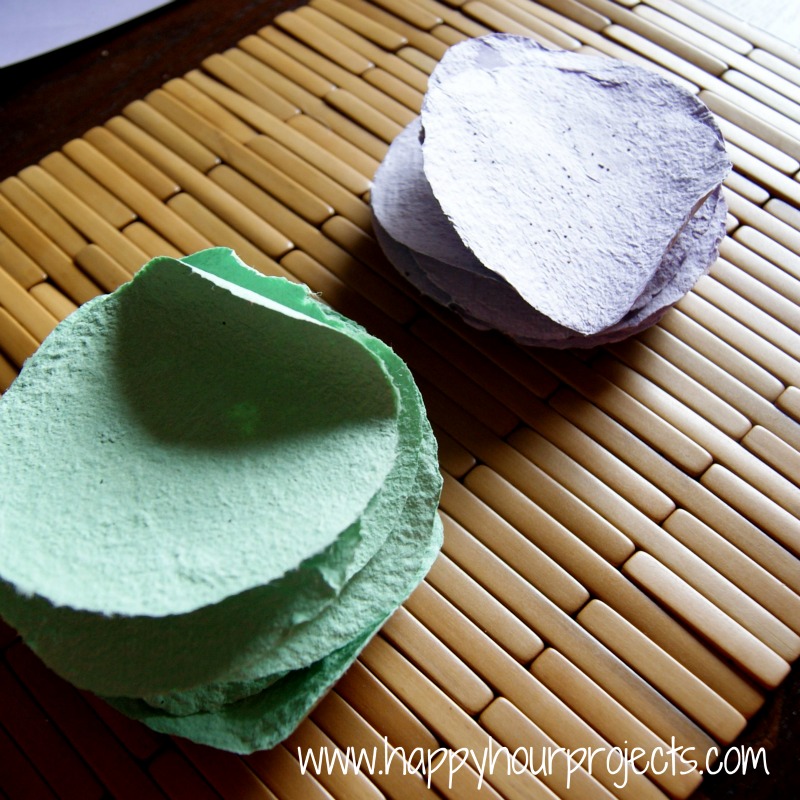
Now, I mentioned in the beginning of this post that there was a little bit of a learning curve. Let me show you my very first tag (the green one), compared with one from the second batch:
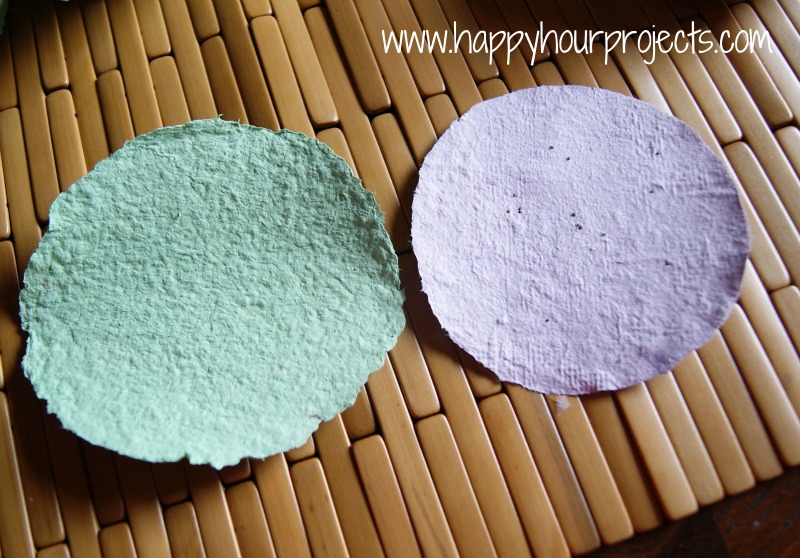
After just a couple tags, I got the hang of it, though! Most of my green ones looked much better than this.
But now that I had my finished tags, I was on to making my pots. I just wrote a note on one side:
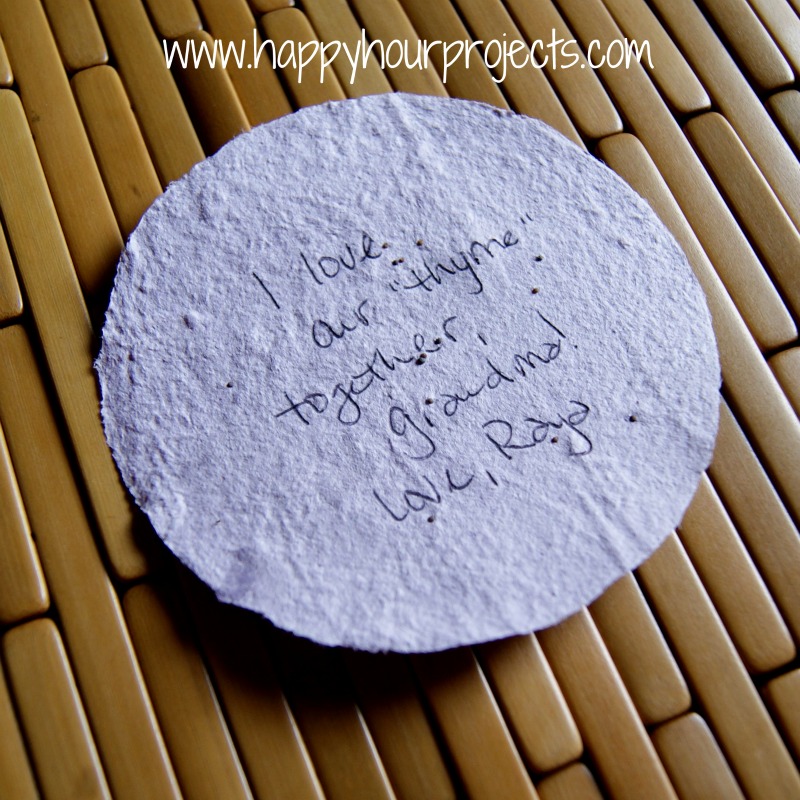
and then the instructions for planting from the seed packet on the other side.

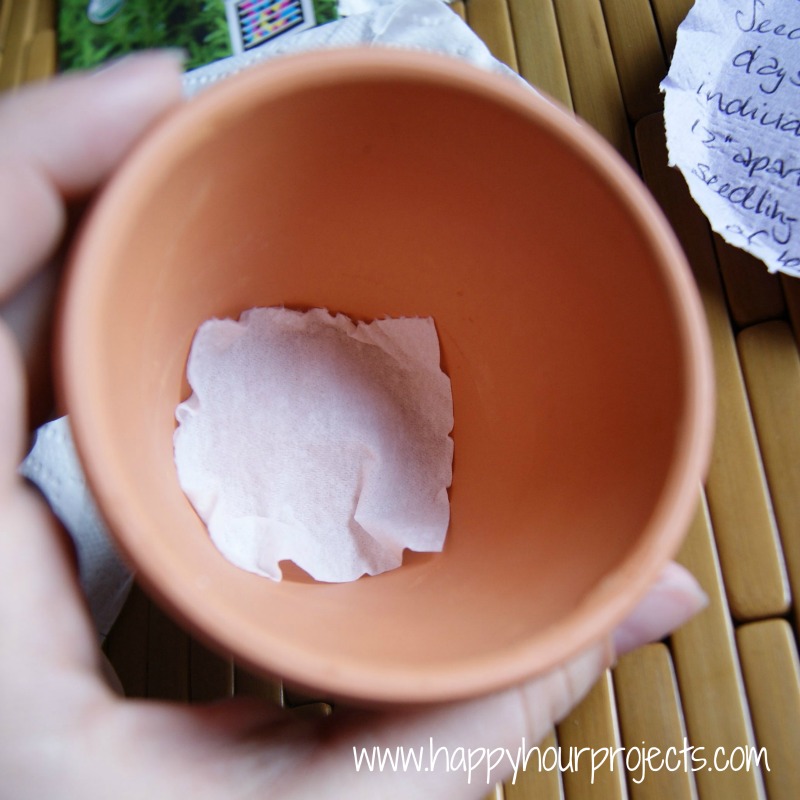
Now, to make the gift pots! I made sure to buy pots with drainage holes. I wanted to fill them with soil so that the recipient didn’t need to do anything but put the paper in the soil and water it. But to keep the soil from falling out, I have to figure something out…
…so I put a tiny square of toilet paper in the bottom. Something that will break apart as soon as it gets wet, but something that will hold the soil in as long as it’s dry!
Then, I filled it with potting soil –

And tied the paper lid/tag on top with a bit of twine.
I know this was a really long tutorial today, but this was a really fun project and I’m so excited to share it! Did you make anything for Mother’s Day this year?
I link up to these great parties! ~ Adrianne
we are looking for a supplier that will be able to produce seeded hang tags for all of our items.
we have already received a prototype of our design from several businesses. we want the most variety of seeds and a very long business relationship
20nine 80nine-six474
Sincerely
C. Parks.
Love this idea!
Super excited to try this! Just have to track down a screen and blender!
this week i saw a hint to use coffee filters in the bottom of pots instead of rocks or in place of your TP.
This is a great gift for the teacher's! Thanks so much for sharing at Mix it up Monday :)
Th We are so happy that you linked up to our “Strut Your Stuff Saturday” and we hope you see you back next week!! -The Sistersese are so fun and this is a great tutorial!
Thanks so much for linking up to Freedom Fridays! This was such a great tutorial especially for spring:) See you next week:)
What a great gift idea! And they look pretty too.
What a fantastic tutorial! You are totally brave to make your own paper! Can't wait to try it for next year. I have to mail my mom her gift so no pot but we could send her the paper.
This is so cool! I've heard of the seeded paper, but had no idea how to make it. I'm putting this on my list of things to try. What a neat gift!
That is such a neat idea. A lot of work, but what great results!
Ahh these are adorable!!!! Love it! :)
I love this! We made plantable seed paper last year and turned them into Earth day cards since our paper was blue and green. I totally love the idea of actually packaging them with the pots for gift giving – brilliant! Thanks for stopping by my blog, and I'm now following you too! :)
Yeah, this is fabulous. It's such a great idea and you did a great tutorial. I'm definitely pinning this for someday. Love it.
Oh so lovely! I'm never going to do this in time for Mother's Day, but they'll make great gifts any time! You did a really great tutorial here with awesome pictures! Thanks for sharing it. Now…where did I pack all of my paper-making stuff…because that's where my screen is!
Wow! What a fun idea! It looks a bit time consuming, but definitely worth while in the end.
Thanks so much for including me in the tutorial collection this week!
Meredith @ http://www.waittilyourfathergetshome.com