
Hello, friends! I’ve gone mixed media crazy this week, layers and chains and metal and beads… I guess it’s just what’s on my mind right now. I’ve been doing a bit of stamping lately (in case you somehow haven’t noticed?) and I’m really excited about how this piece came out. I was thinking on the expression, “Without change, there would be no butterflies” (which I can’t find attributed to anyone in particular, but it’s certainly an inspiring quote). It’s a constant battle to keep up with the changes in life, but so often, they’re good for us, and pushing us toward what we’re supposed to be.
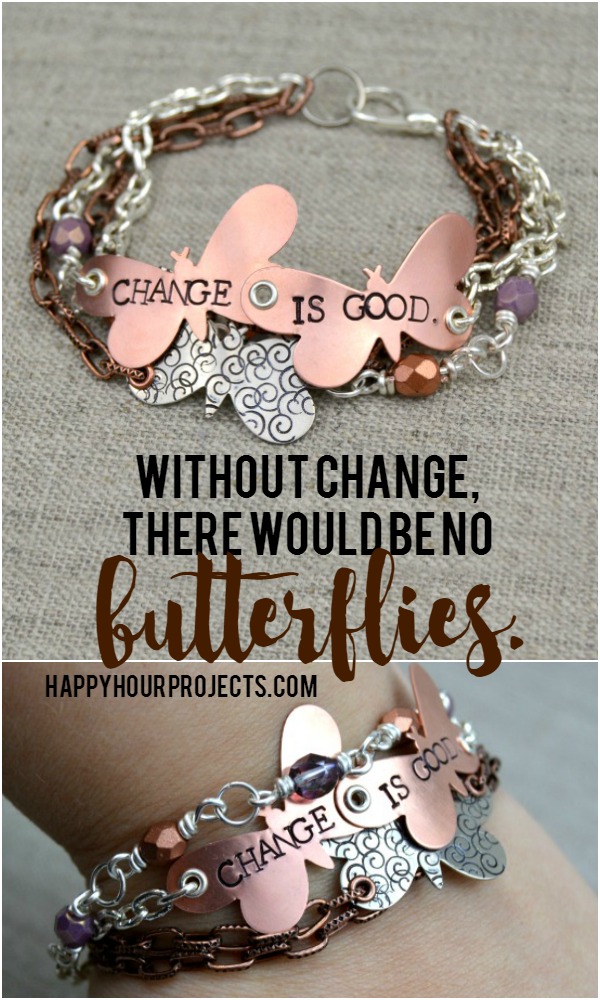
Or at least, that’s what I tell myself when I’m getting overwhelmed. :) Anyway – today’s piece incorporates metal stamping, riveting, and some beginner’s wire wrapping, so we have several steps, BUT – once you stamp your butterfly blanks, most of the rest of it is totally optional. Just do what appeals to you! I’ll be walking you through my process so you can learn right along with me, but as always, the beauty of DIY jewelry is making it your own.
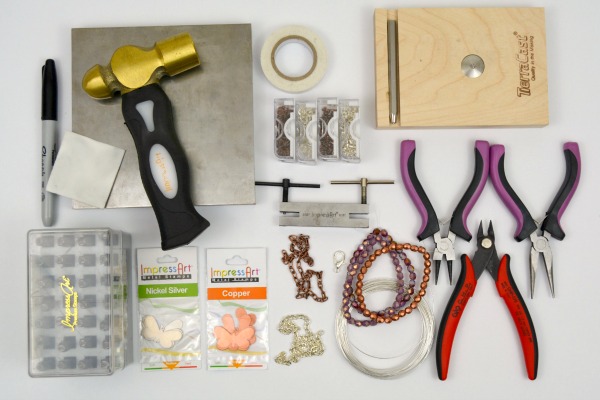
I’ll leave you links to the ImpressArt products I used today, and they’re generously sponsoring today’s tutorial, so feel free to click through and explore more of their product line at ImpressArt.com! Here’s a list of my supplies:
- ImpressArt Uppercase 3mm Newsprint font
- ImpressArt 3mm Boogie Swirl design stamp
- ImpressArt 1-5/16 butterfly blanks in copper and nickel silver
- ImpressArt stamping hammer and steel bench block
- ImpressArt stamp straight tape
- Polishing pad and permanent marker
- Two-hole punch with 3/32″ hole
- Bracelet bending pliers
- 3.7mm eyelets (I used both silver and copper to mix metals on my blanks)
- Eyelet setting tool and optional base block
- 5mm chain in silver and copper – roughly 12 inches of each
- 7mm jump rings in silver and copper
- 18-gauge silver plated copper wire
- 6mm crystal beads (I’m using copper finishes and shades of purple)
- Wire cutters
- Round nosed pliers
- Chain nosed pliers
- Large lobster clasp (at least 12mm)
- 12mm jump ring
A quick note about a few of my choices, here – the premium stamps aren’t necessary for stamping on copper and nickel silver. But because you can stamp so many more types of metal with the premium stamps (including stainless steel, and the premium stamps are guaranteed), it’s a worthwhile upgrade in the fonts you can get it in, in my opinion. I opted for upper case, which means that each letter is exactly the same height. If you choose lowercase for a more understated look, then just be sure when you plan your stamping that you allow for letters with descenders (in particular, the “g” in today’s message) to take up more space.
Also, you guys ALWAYS ask about my bench block. Always. Let me be clear: ImpressArt’s bench block is perfect. But I still chose to upgrade to a larger block that I found on Amazon earlier this year. For the same reason that people like a bigger desk, or a bigger car, or whatever – I LIKE having more space to spread out while I work. It’s considerably more money than you need to spend to get started stamping; the 6×6 size is just me, being ridiculously indulgent. AHHHH. :)
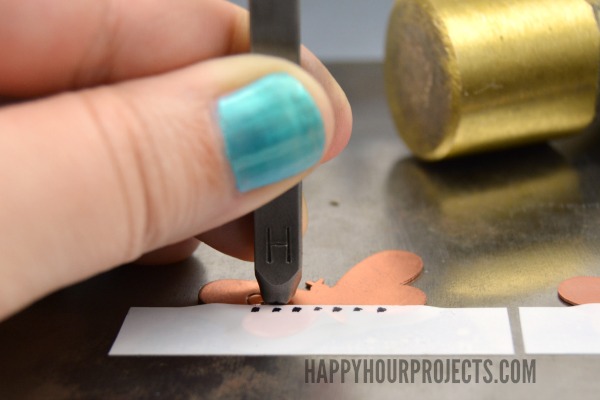
Now, to stamp! My favorite method is to mark off where I plan to stamp, so that I can properly center my word or name on my blank. Then I stamp from left to right, just like I write. There are other schools of thought out there – some people begin at the center and work outward, or begin at the ends, stamp the center, and fit the other letters in around. There’s no right or wrong way. But for me, I found that I tend to space my letters differently if I’m working to the left or to the right, which made for some really wonky words.
By using the stamp straight tape, you can gently drag the stamp toward the tap, and you can feel when it catches the edge. This way, you know that each letter will be the same vertical alignment. Hold the stamp perfectly vertical (you’ll get a feel for this, too – you’ll be able to feel when it contacts the blank correctly once you’ve stamped for a while) and give the end of your stamp one firm tap to make each impression. (And if you want more detail on this process, you can also check out my beginner’s metal stamping tutorial! Lots of FAQ there.)
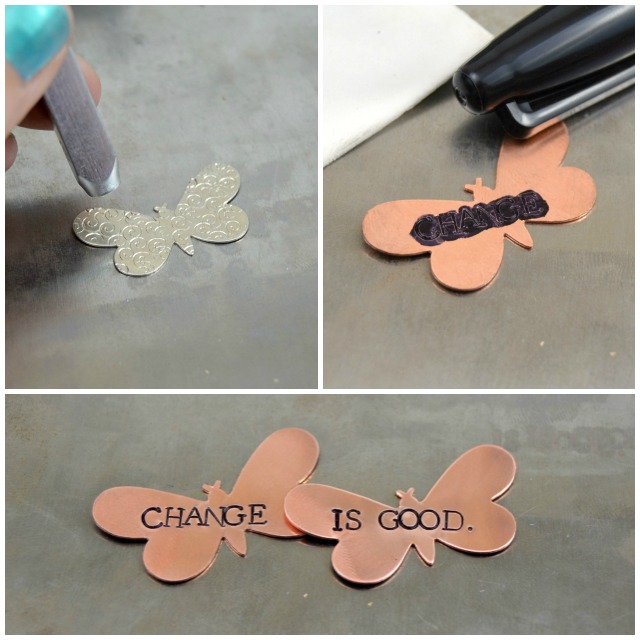
I used a 3mm swirl to stamp an all-over pattern on the silver blank. It gives it texture without committing to a specific message, and I just plain LIKE how an all-over pattern looks, personally. On the copper blanks, of course I couldn’t fit it all onto one blank – so I planned to rivet them together.
You can darken the impressions by coloring the blank with a permanent marker or with acrylic paint, and buffing it with a polishing pad to remove the excess ink.
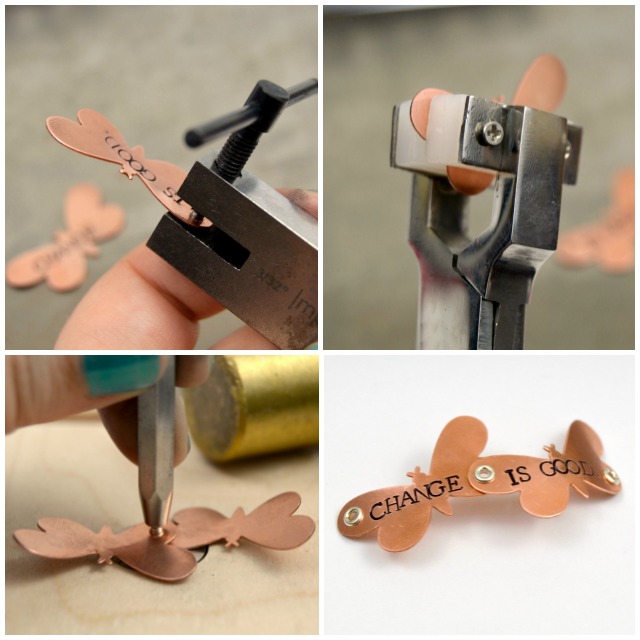
Next, I punched my holes with the 3/32 inch screw down punch, and I also used bracelet bending pliers to bend the blanks gently so that they’d fit nicely over my wrist. I needed to overlap the blanks, and also to punch holes in the sides to connect my chain. I used 3.7mm eyelets – first, because I like how they finish raw holes, though it’s not totally necessary. But in the case of the center rivet, I wanted it to match the two sides.
Most eyelets and rivets are quite easy to set. When you line them up, use the appropriate tool for what you’re setting. The base of the rivet should face down on the correct block (rubber for crystal rivets, or steel for metal) and you tap the end of the tool with your hammer a few times over the backside to set it.
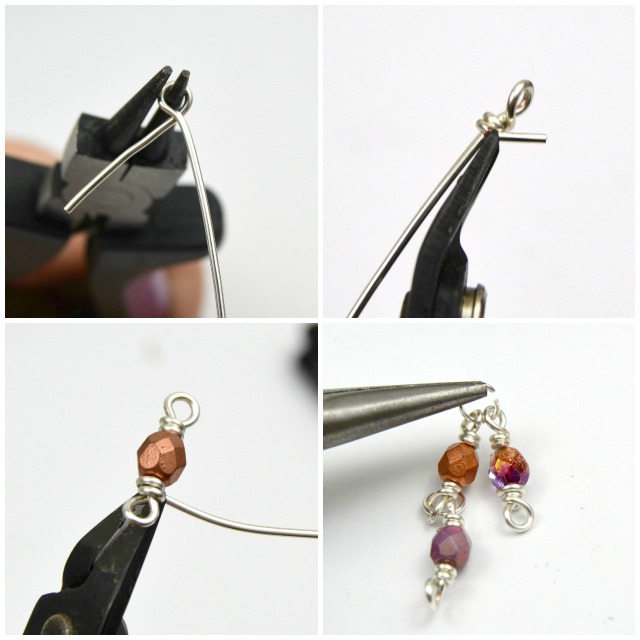
I had chain, and I had butterflies, but I also wanted to incorporate a few beads into my design. So to create beaded chain, I whipped up a few wire-wrapped bead connectors. Cut a length of wire about 2-3 inches long (or, be lazy like me and just work right off the spool of wire) and using your round-nosed pliers, bend a length of wire about an inch long around one of the sides, forming a loop. Wrap the tail around the wire 2-3 times, closing off the loop. Add a bead (or two, or a few, whatever you like) and close off the other side with the same wrapping technique.
You can then connect these beads together using jump rings and chain.
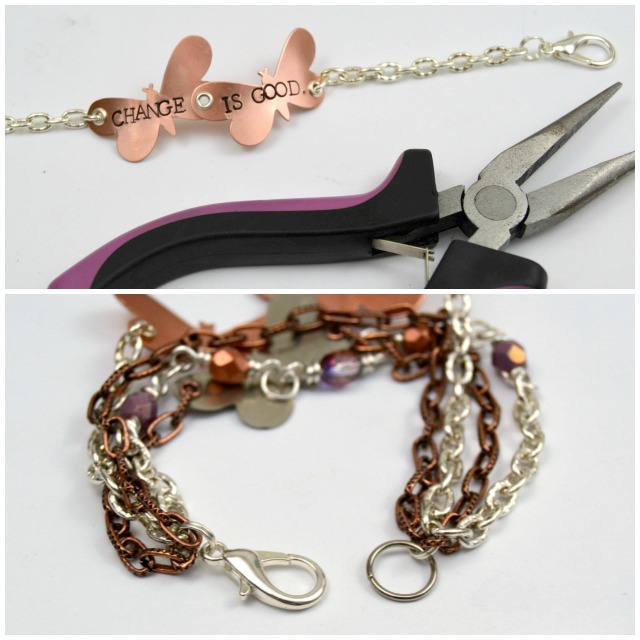
Finally, assemble your bracelet, adding lengths of chain to each side of your components. You will want finished lengths of embellished chain about 7 inches long (the clasp will add a little bit of length as well). The amount of chain you will need to add to each component will vary depending on what you’ve made, so rather than measuring each individual piece, try connecting the chain and cutting it off to a final 7-inch length.
Connect your strands (I used 4 chains in my piece) to a 7mm jump ring on each side, and then to these jump rings, connect your clasp and large ring.

All that’s left to do now is to enjoy (or give!) your one-of-a-kind creation. Thanks for joining me today, and happy stamping!

Not only me but so many my friends using this tutorial to understand how to change the synchronization setting of windows 10 OS computer and this is exactly teach all ideas for free.
I was previously suggested this site through my cousin. I’m now not sure whether or not
this publish is written by way of him as no-one else know such
special approximately my problem. You’re incredible!
Thank you!
Really like metal bracelet however it may be hard 4 me to make cause I am 64 + hard 2 hold tools.
So beautiful! I love the mix of coloured metals you’ve used looks really striking.
Claire xo
This is fantastic! I love the swirl-stamped butterfly too. I can think of so many sayings I would wear on my wrist.
Change is good is an excellent one.
I love this bracelet!!! And I love the phrase you used. Honestly, change freaks me out, so this is a great reminder. :)