
I have another fun guest this week, Carlee from Ladybird Ln! I’m always so excited to work with Carlee because she’s the fabulous friend who talked me into starting my blog in the first place – everything you find here at Happy Hour is here because Carlee convinced me that I could do this. :) So before I turn it over to her, I just have to give her a public thanks – for sharing this today and for all the support she has given me! Thank you, Carlee!!
I am so excited to be at one of my favorite blogs today! I just love Adrianne, and her fun blog! My name is Carlee, and I blog over at Ladybird Ln! Every month or so I highlight a different charity organization we can all get involved with to make a difference using our crafting talents. This month I am teaming up with a couple other blogs to participate in a blanket drive called the LINUS PROJECT! I would love it if you would take a look!
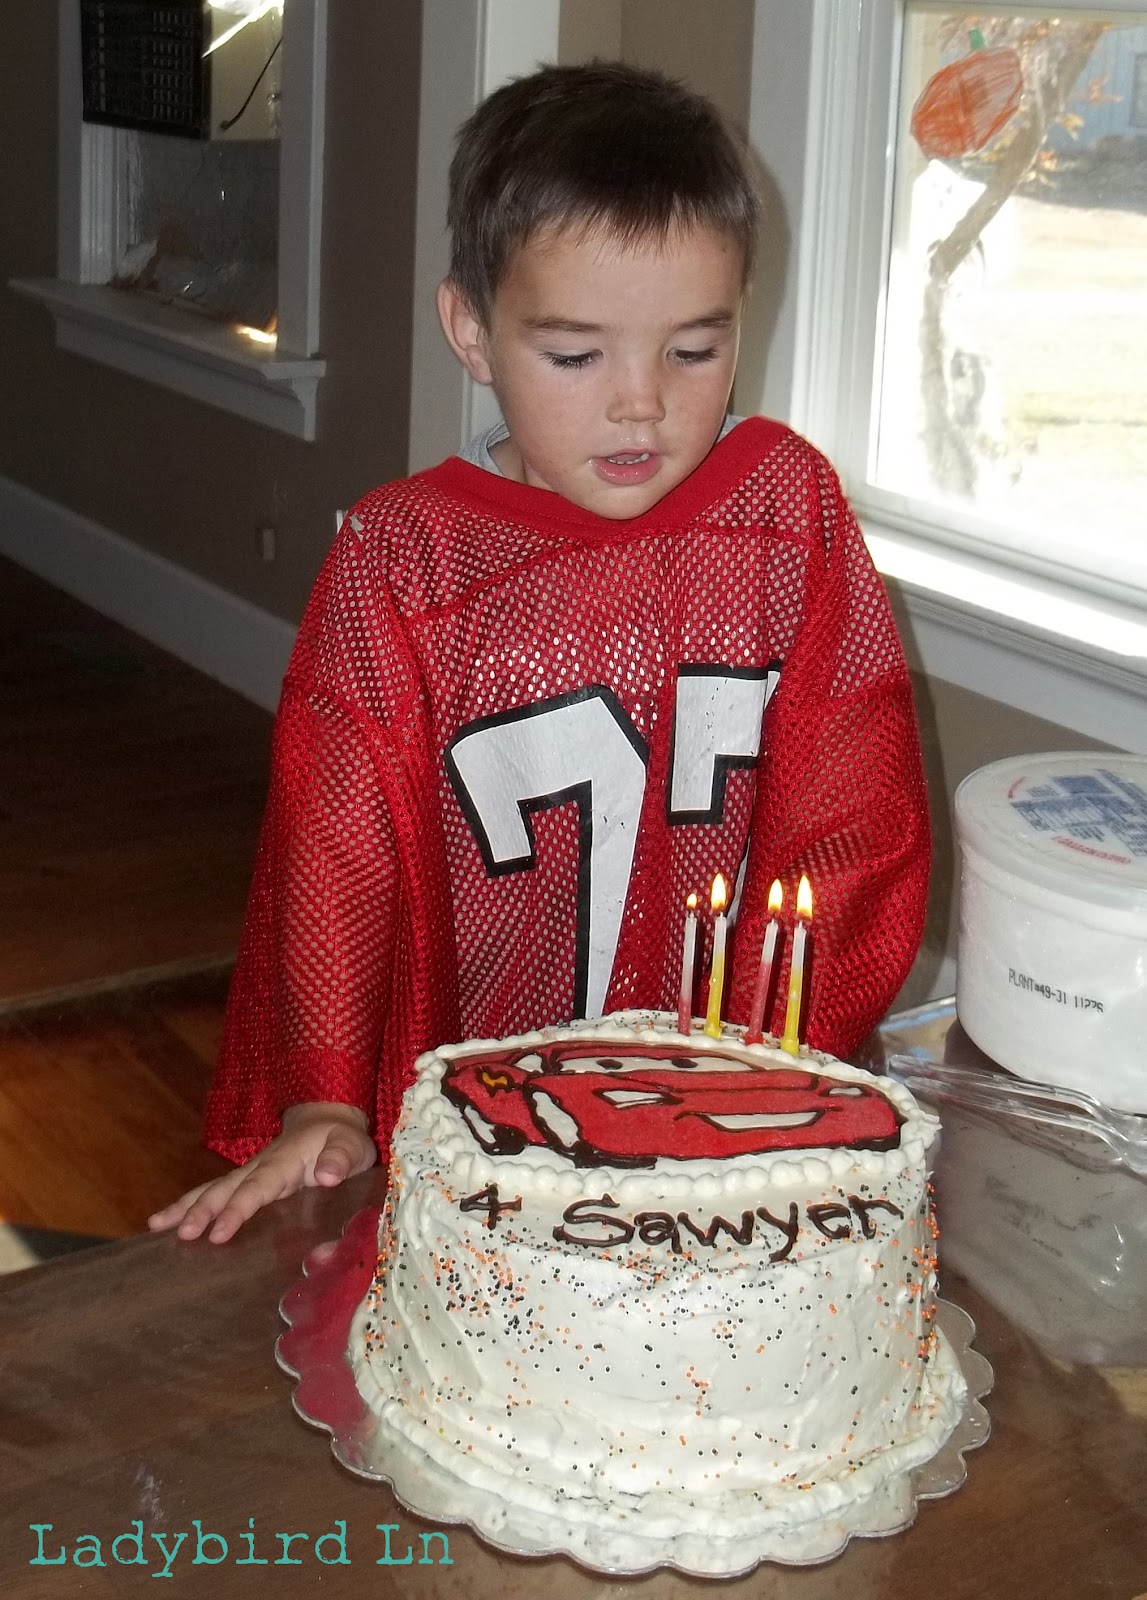
I am definitely not a cake decorator. But I do not like to pay a huge amount of money for a yucky grocery store cake, so I usually attempt to make my kids birthday cakes. I was a little stumped this year, when my four year old wanted a Lightening McQueen cake for his birthday…. for the second year in a row! My friend, Jenifer, who is an INCREDIBLE cake decorator taught me this fun little trick on how to make frosting transfers for your cake.

As you read this post you will probably think one of two things a) Wow, she was right, she does not know a thing about cake decorating… Or hopefully b) If this girl can make a cake transfer so can I! So let’s get to it.
Item’s Needed for Transfer:
Chipboard, or something flat like a clipboard.
Black and white copy of the image you would like to transfer (You may need to copy a reverse image of your picture depending on if there is lettering on it.
Wax Paper
Masking Tape
Round Cake decorating tips, a smaller one to outline, and a larger one to fill.
Cake decorating bags.
Butter cream frosting
Chocolate fudge frosting (I used store bought) for the outline.
Step 1:

Find an image of ANYTHING you would like to transfer on your cake, I went with Mr. McQueen, naturally. Try to find the simplest image you can, mine is a coloring page. Your image will be a reversed, so if your image has words on it, print out a reversed image. Tape the paper to a chipboard, or clipboard. Place Wax paper over the copy. I taped everything to the counter so it would not wiggle.
Step 2:
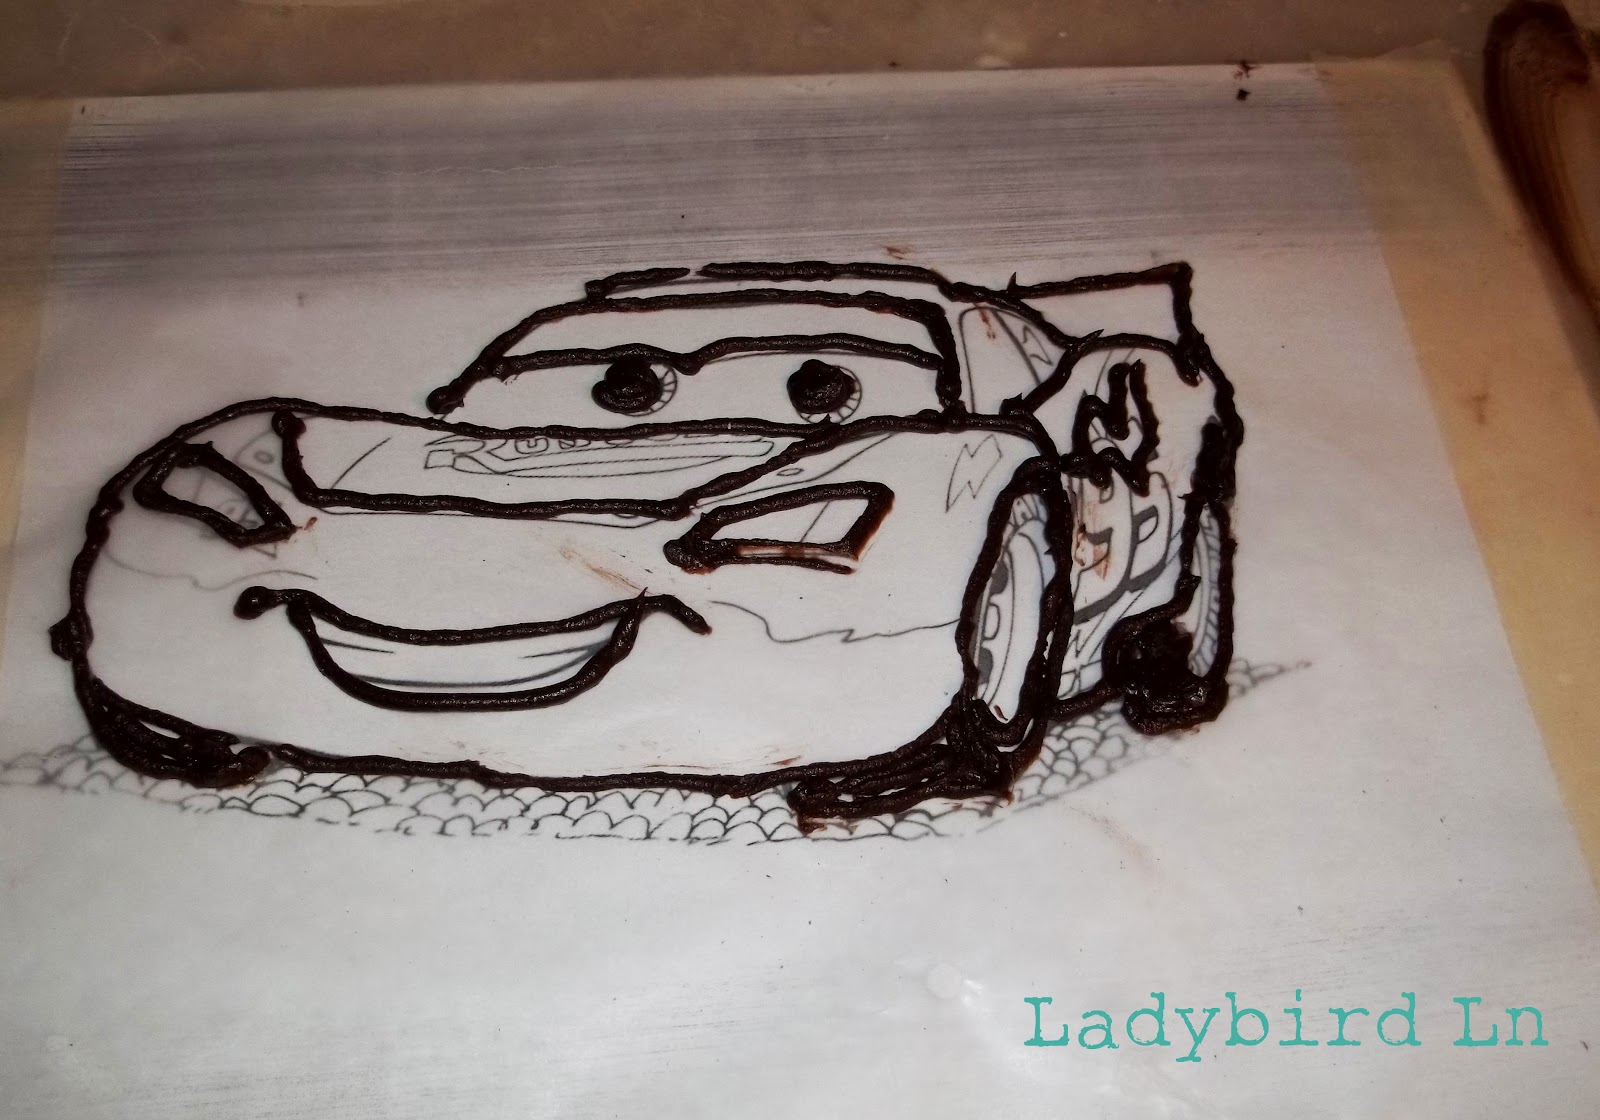
Using your small round tip, and chocolate fudge frosting, trace the outline of your image. You could make black frosting, but that grosses me out a little, too much dye.
Step 3:
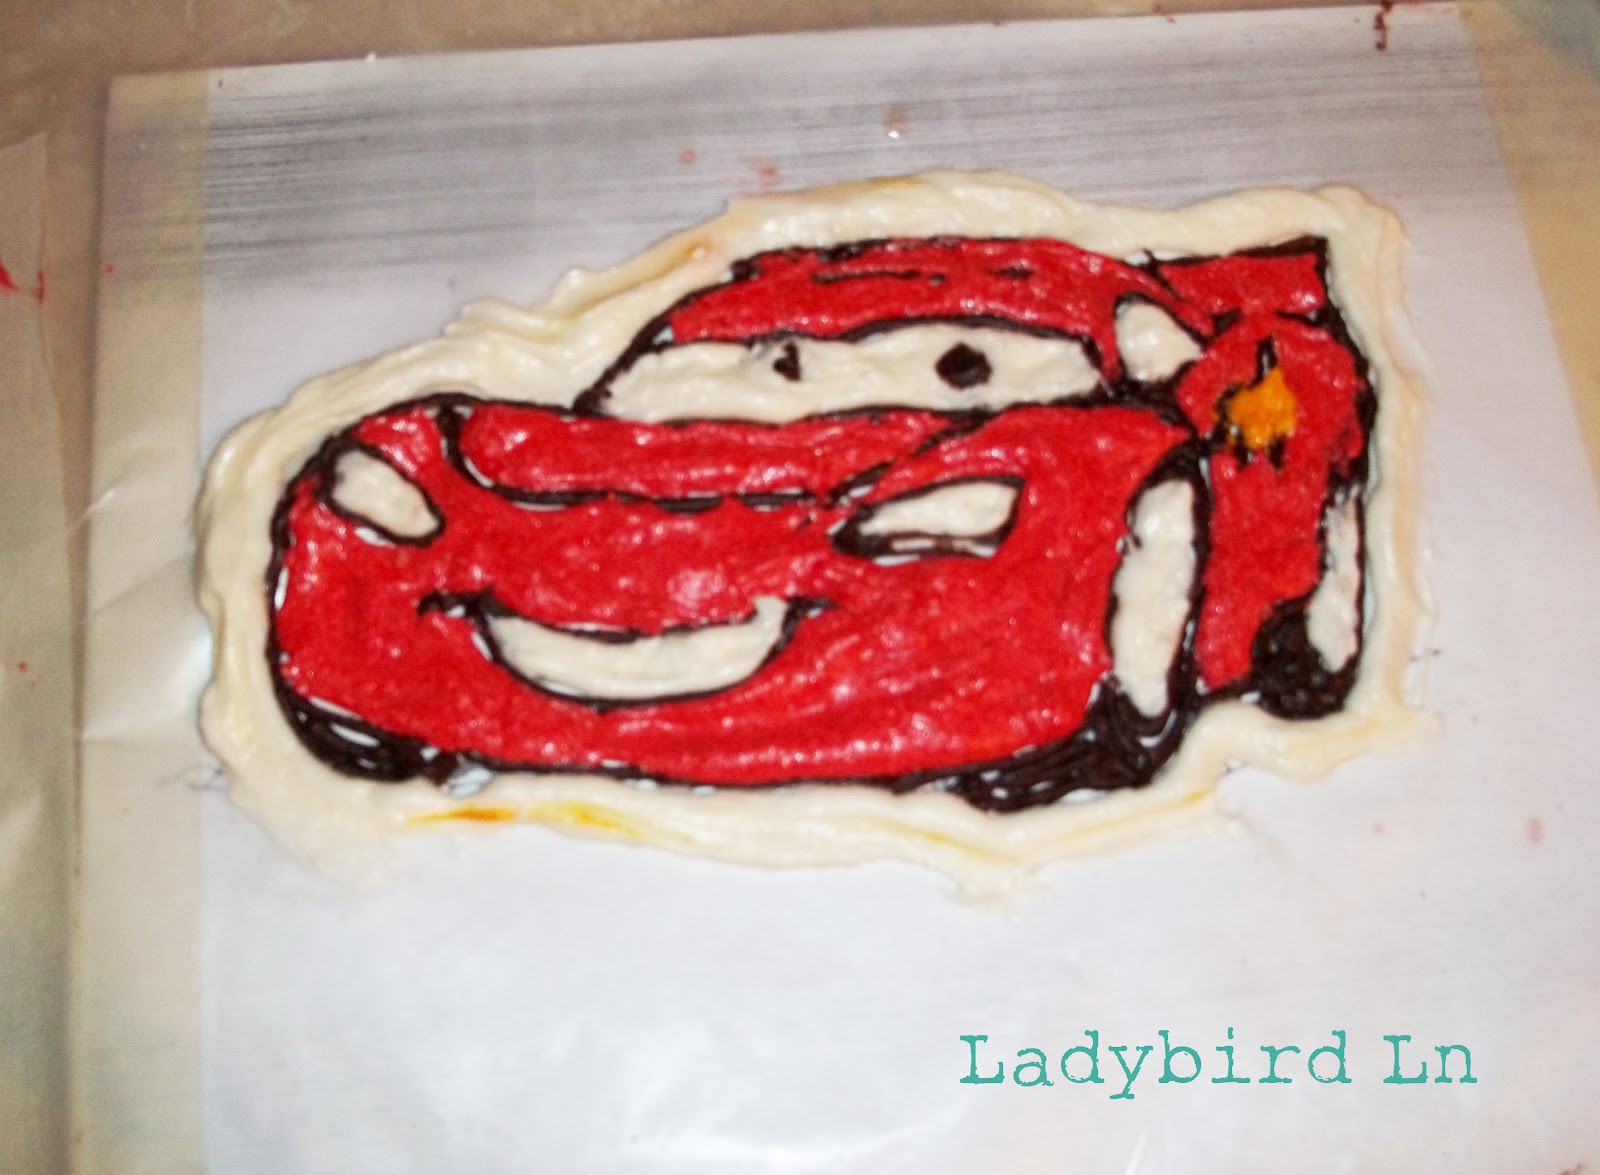
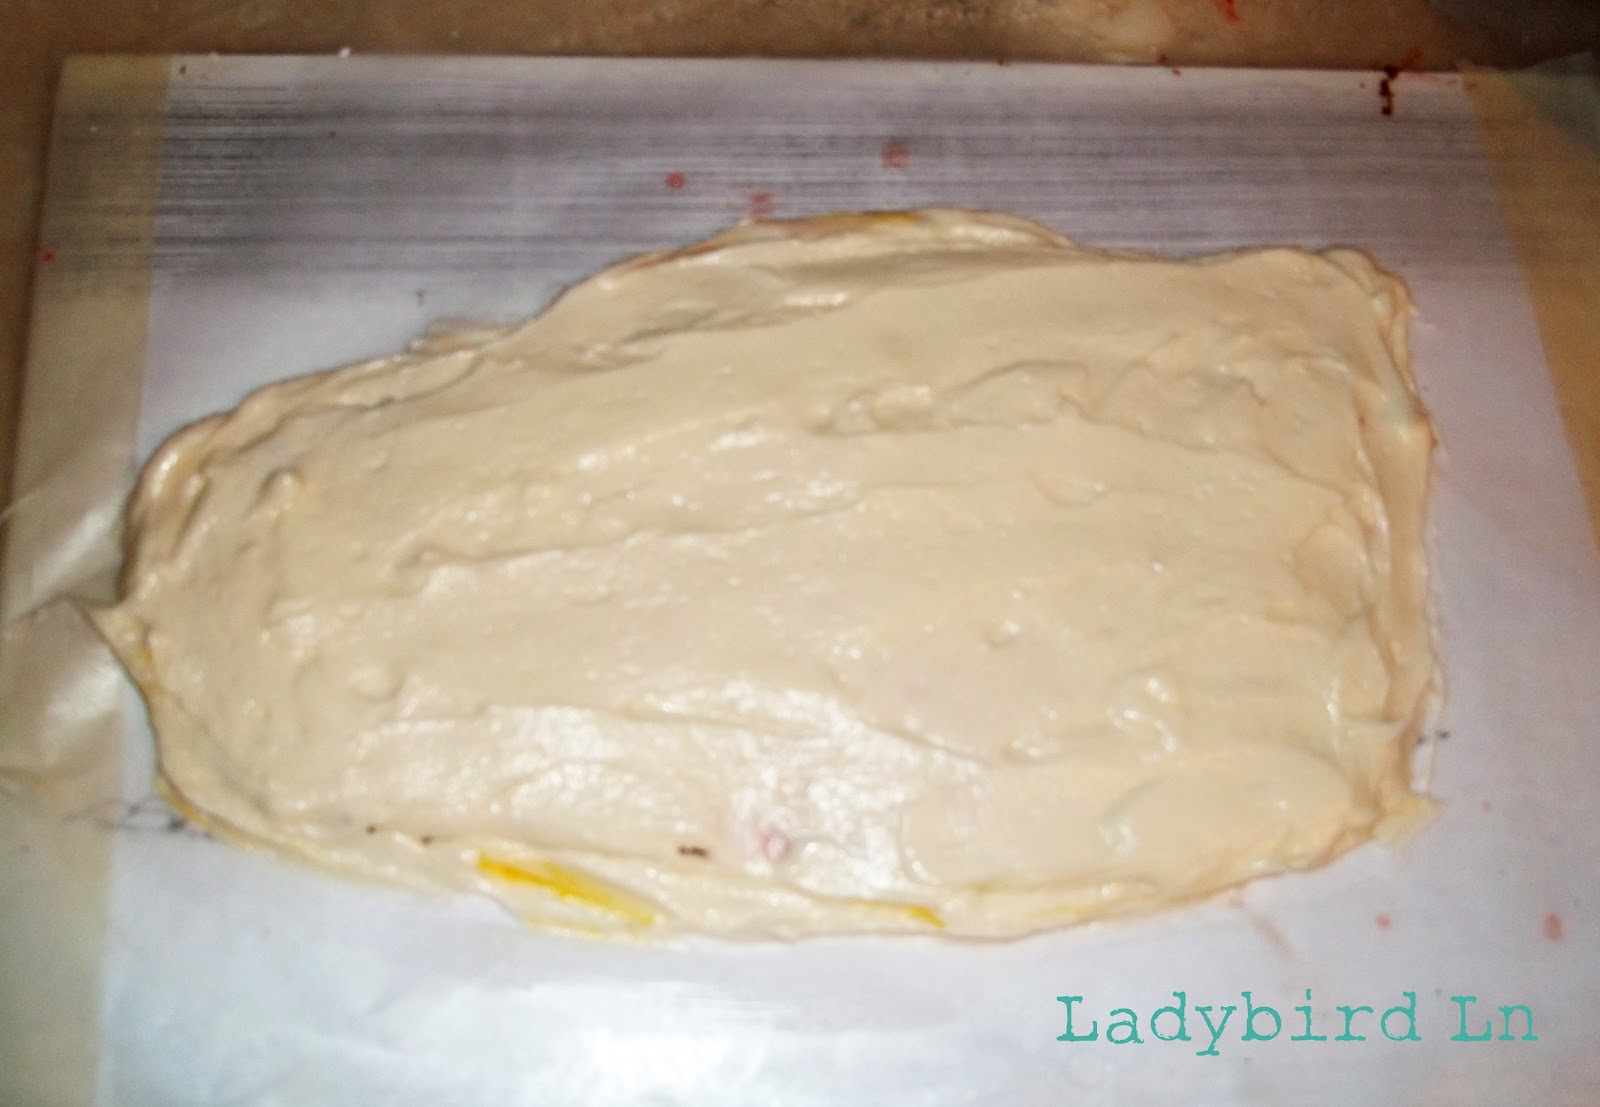
Using your larger round tip, fill in your images with appropriate colors. If you get it over the outline a little, no worries, because this will be the BACK of the cake transfer.
Step 4:
Step 5:
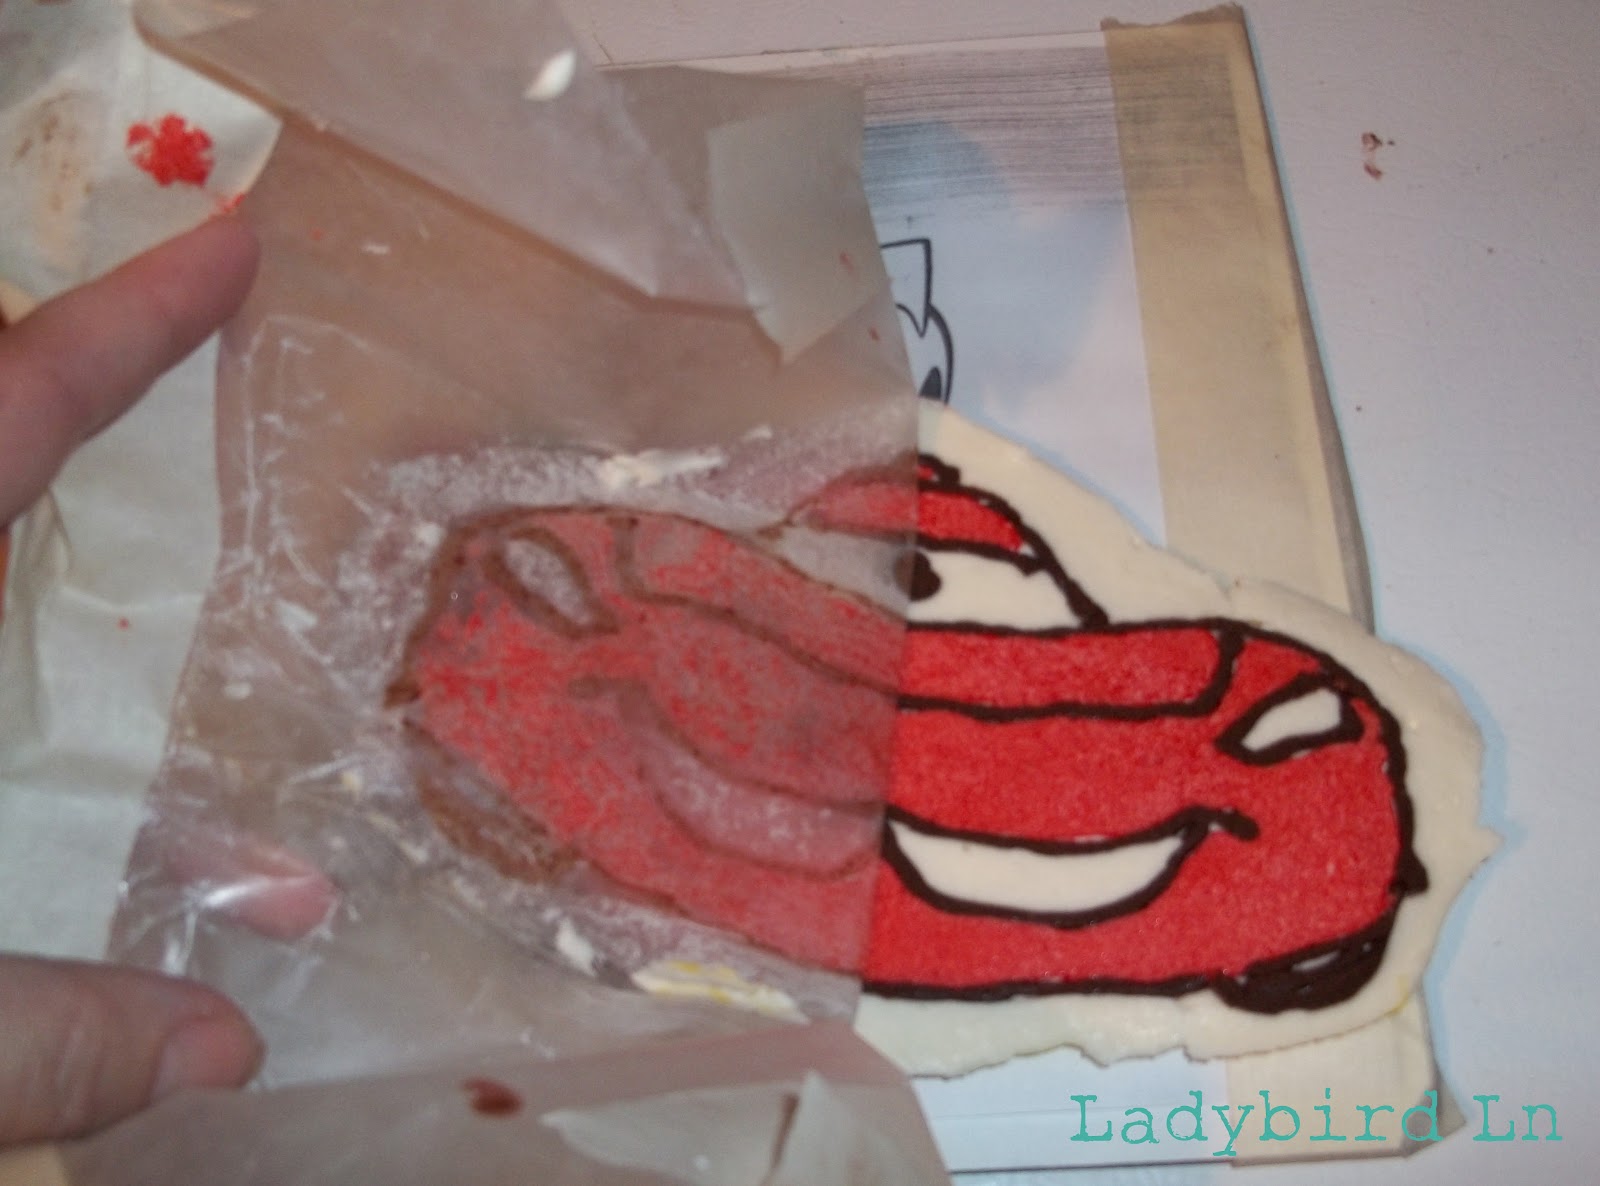
Let image freeze for at least an hour.. or longer. I did this project at midnight, so I left it in the freezer until the next morning. Carefully remove the wax paper from your frosting. Place on your cake!
Step 6:

The cake transfer might be a little jagged around the edges, so using your round cake decorating tip make a bead around the image.


Thanks everyone for the sweet comments! And thank you Adrienne, for letting me crash your blog!
Carlee
http://www.ladybirdln.com
WOW! Your son's birthday cake turned out amazing!!!
Dee
I am going to cake decorating class and I'll tell you this is a great tutorial that I intend to use. Thanks for posting.
Dolly
Woo Hoo! Awesome Lightning McQueen! Looks great!
How cool!! I have always wanted to know how to do this!! Good thing we have so many b-day at our house. I will get lots of practice!
Wow, this is like a whole new world of tips and tricks I know nothing about. I'm sure your cake was well-received – it turned out great.
so fun, I gave up on ever being able to do this stuff and bought an edible printer, but you know, I envy you and your talent:)