
I opened up my Blueberry Cove Bead box over the weekend and couldn’t wait to dive in! I made up these earthy leather and stone bead bracelets with a side clasp. They’re quite easy to make, and don’t require a lot in the way of supplies. I really like the side clasp (to me, it makes the bracelet easier to put on and take off) but of course, if you don’t, this design is easily adjusted for a more traditional bottom-clasp.

I loved the colors in this month’s box. I did use leather, wire, and findings that weren’t included – but that means that whether you subscribe to the Blueberry Cove Beads service or not, you can still make up this design! The fun of the service is getting the surprise collection each month and letting it inspire you. They sponsor my monthly subscription so that I can share what I got, and show you what I’m making with it. It’s a really fun service, so if you’re a bead lover (or have one on your gift list!) then you can look into joining in on the monthly fun, too. Boxes are available to U.S. and Canadian bead fans.

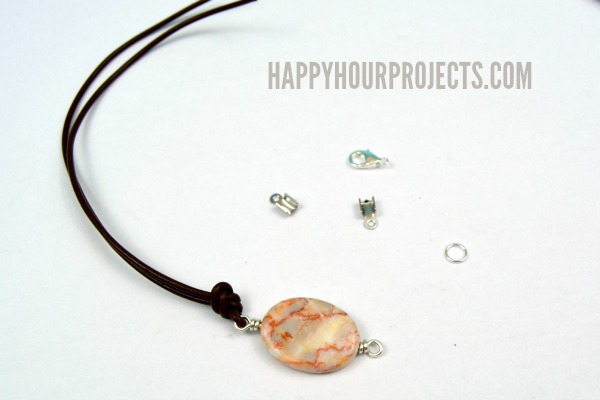
In addition to a few of the gorgeous stone and glass beads you see in this haul, I also used the following supplies in each bracelet:
- 8 inches of 18 gauge silver plated copper wire
- 14 inches of 2mm brown leather
- 2 fold-over end caps
- 1- 7mm jump ring
- 1 – 9mm lobster clasp
- Round nosed pliers
- Wire cutters
- Chain nose pliers

First, I created beaded connectors, which requires some simple wire-wrapping. About 3 inches down along the wire, bend it slightly to the left, then wrap it over the right side of your round pliers, forming a loop. Then, take the tail end and wrap it a couple times around the main part of the wire. Cut off the excess tail with wire cutters.
Add your bead (or beads), and repeat the process to form a loop on the other side. A few mm from the bead, create a loop, and wrap it around the main part of the wire until it fills the space between the loop and bead. Trim off the excess wire. Make as many connectors as you like.
These connectors are about 1.75 inches long, which is a good size for a bracelet. I wouldn’t go any longer than 2 inches.
Next, thread your leather cord through one loop, and tie it tightly in an overhand knot. You will lose a little bit of length tying your knot – but trim up your ends evenly so that you have about a 6-inch length of leather cord. Combined with the beaded connector you made, you will end up with a bracelet length of roughly 7 inches.
(If you decide you don’t want a side clasp, and prefer a bottom clasp, then you can tie two 8-inch cords onto each side, and trim them up so that each is about 3 inches long.)
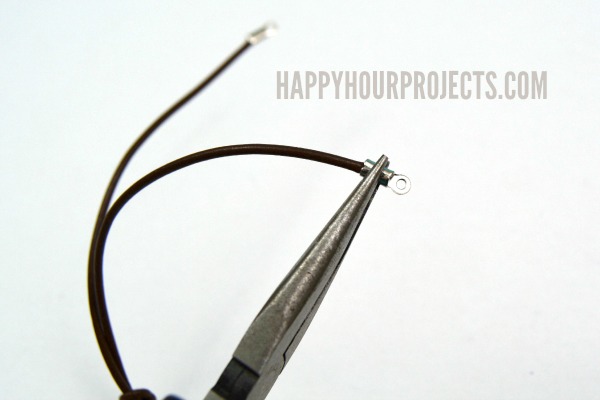
Crimp your fold-over end caps onto the ends of your leather using jewelry pliers. Make sure it’s snug!
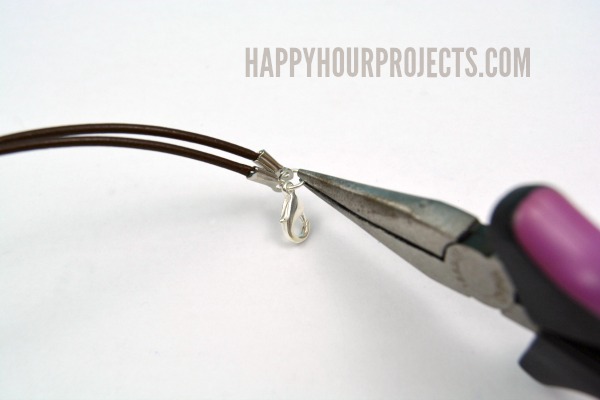
Finally, twist open a jump ring and connect a lobster clasp to the two holes in your end clasps. The lobster clasp will connect directly to the loop in your beaded connector.
(If you’ve decided to employ a bottom-clasp, then you will use 4 end clasps, and attach a jump ring to each pair of cords, attaching a lobster clasp on one of the sides.)
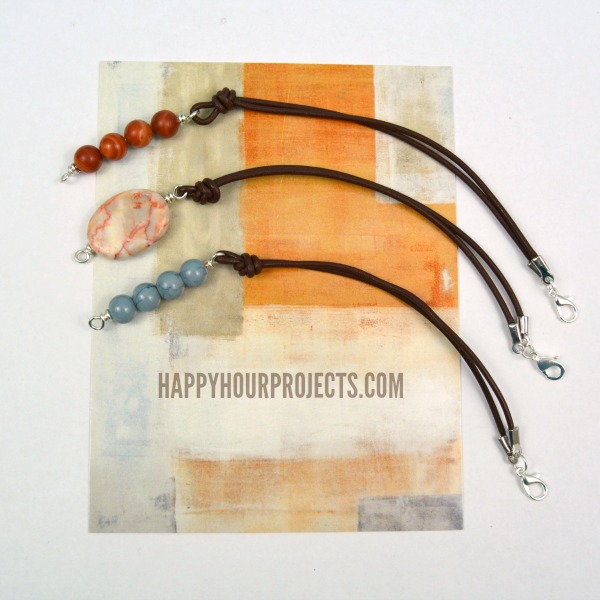
This set of bracelets is my take on this month’s themed challenge, which is just to be inspired by the photo included in the box! I loved the clean, simple lines in the photo – and so I opted for a nice and simple design myself. Each bracelet makes up in about 10 minutes!

I hope your week is off to a great start – thanks for joining me today!

How can I get one of your bead boxes?
Just beautiful! I love your projects; thank you.
1
Very nice, a great way to use up odds and ends from leftover projects. Thanks for sharing!!
Very cute! What if I wanted it to be adjustable? Was thinking to just add chain, but would the leather cord need to be shorter?
Love them all.
Thank you for your great directions to create some thing beautiful, simple and a great stash buster.
Very, very nice! I have all the supplies to give this a go.
Thanks for sharing!
I love these as stacking bracelets. As usual, a well written and photographed DIY. I just read your linking terms in the sidebar – I may have missed them before, or they are new. So I’m writing to tell you that I’ve posted the bracelet on truebluemeandyou.tumblr.com. I can always count on your blog for wonderful DIY jewelry content!
Creative thinking I must say. It looks so cute. You always create the amazing designs.
Love this bracelet design! Super cute and super easy. Thanks for sharing!
One thing I have trouble with is knowing what size findings to buy. What size end caps did you use or did these come in the kit, too? Thank you…Very cute bracelet!
I had to go measure but they are 11mm fold over end clasps. They’re designed to fit cord up to about 3mm, and they did not come in the bead box. It’s a fairly standard size for the type of clasp, so craft stores with a jewelry section should all sell this type of clasp.