
So I spent some time in the kitchen over the weekend – I know, I know – unusual. But I saw these Oreo Pops on Mrs. Fox’s Sweets’ blog, and Christina tends to say, “It’s easy!” Christina, I love you, but you and I are going to need to exchange words about the definition of “easy”.
For my attempt, I went a bit more basic than the gorgeous designs at Mrs. Fox’s Sweets, but take a peek at how my chocolate Oreo pops turned out:
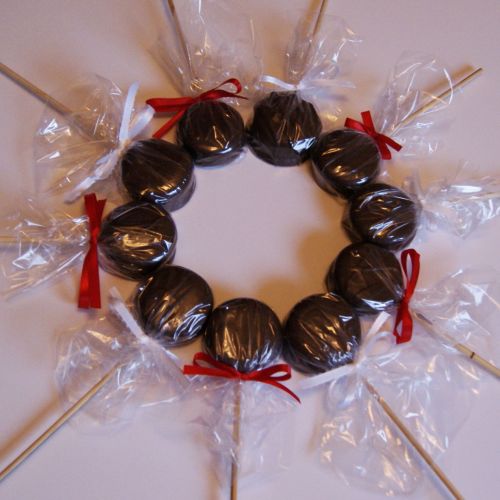
Pretty, right? I sure thought so (especialy with my skill-level and patience level, LOL!) It turns out that with some practice, even a beginner can make these. So with proper disclosure – I would encourage even a newbie to give it a try! They are certainly impressive-looking in relation to the amount of work they take. I was able to make them in less than an hour. Always a plus. :)
I am going to share a few things I learned that weren’t in the original recipe. I’m sure the pro foodie mamas jut know these things, but we beginners have to stick together – and if I can do it, there is hope for anyone on this project!
First of all, go take a peek at the original tutorial. Then come back and get some tips from my kitchen!
Ready?
All right, so the first part I took issue with was the fact that I couldn’t find sucker sticks at the grocery store, and I didn’t want to make another trip to a specialty store (the weekend after Thanksgiving, especially!) if I could help it. So I made the executive decision that surely, the bamboo skewers I already had in my kitchen would be good enough. (I stand by that. Not as lovely, but I was never going to rival the pros anyway. They are sturdy and cost-efficient. I did trim my skewers down to 6 inches before I got started.)
A note about yield, here, I got the package of double-stuf oreos. I had 29 cookies. Some were broken. Those went into my eat-pile. Yum. I also may have bribed the baby with half of one so that I could get to work uninterrupted.

Given the ones that were already broken, and the ones that I broke attempting to insert sticks, and the ones that I totally botched – of 29 in the package, I had 14 presentable pops at the end. I would advise you about the same – plan on about half turning out right your first attempt. One package of Candiquik coats probably 20 or so cookies. So plan on getting a 16 oz. package for each package of Oreos you plan you use.
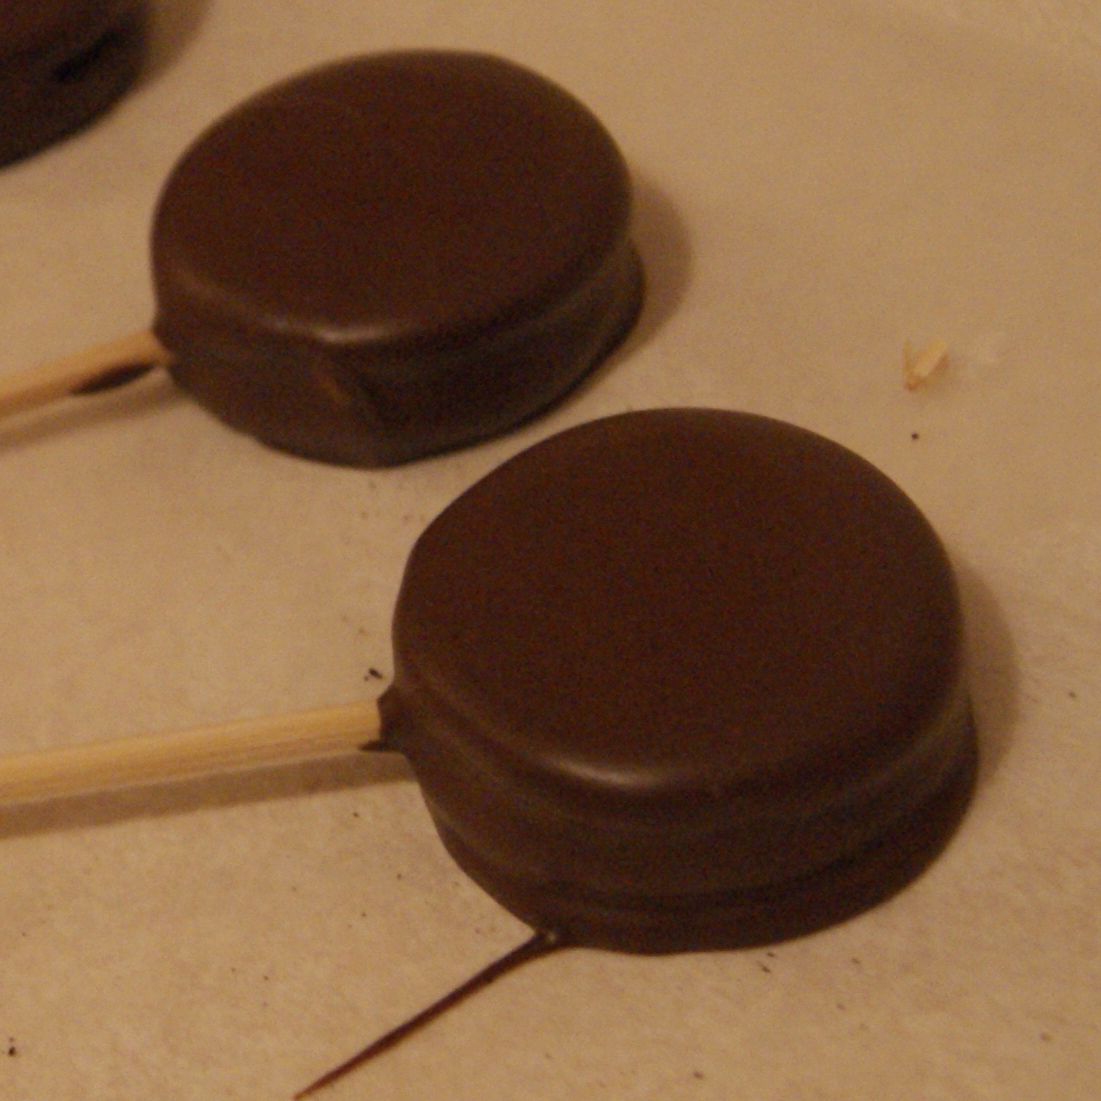
So first, I discovered how difficult it actually is to insert your sticks into your Oreos.

Go really slowly. If you break your cookie at all when you are inserting the stick, this is what your pop will end up looking like:

I thought I could salvage them by pressing them back together, but I really couldn’t. The weight of the chocolate coating tends to put some stress on the cookie, so breaks will break. So be really gentle with the sticks!
I know the tutorials I referenced used vanilla Candiquik. That might look prettier, but I knew my husband would be much happier with the chocolate version, and as he is the one who eats the majority of my experiments, I tend to cater to his tastes. Vanilla would give you some better decoration options too – although, I can envision a cute little snowflake piped onto chocolate pops too. (After my last piping project, I opted for plain.)
All right, so I melted up the Candiquik and did not take photos, since it was a two-handed job. The best suggestion I can make is to use a spoon or something similar – otherwise the weight of the Candiquik can pull the halves of the cookie apart. I had that happen a LOT while I was getting started. So once it was totally coated, I supported the bottom of the cookie with my spoon. Once I dipped it and the excess chocolate dripped off, I used the spoon to transfer each cookie to the wax paper.
If there’s any excess chocolate around your pop, it will dry that way, so move each pop well away from drips, spills, and puddles.
(Don’t worry, you can eat your mistakes!)
Then I just let them dry! I had a few really good-looking ones (and yes, that string of chocolate at the bottom dried that way and had to be broken off):
And… a few less-good ones. But oh well. We have enjoyed eating those.
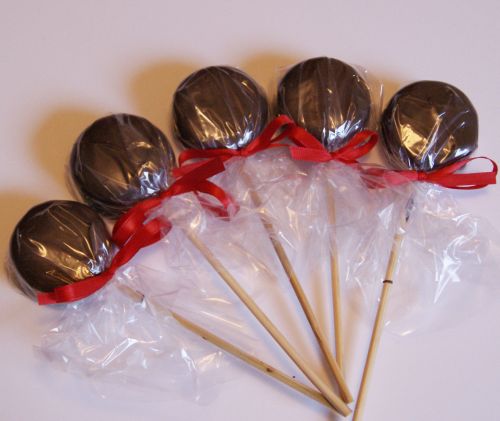
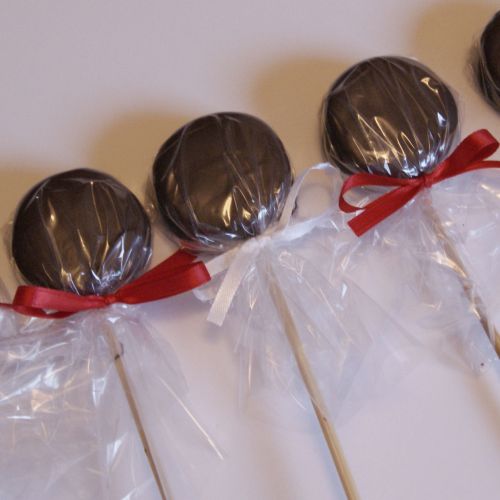
Since these are going out as giftables, I wrapped mine in plastic baggies and tied them off with ribbon.

My husband wants to keep them all, so he has more for himself… something about non-distributable chocolatey goodness.

But, I am sharing with my writer’s group tonight. We all deserve a treat after this month’s writing frenzy!
On the whole, I liked this project and would do it again! I’m really glad I spotted it and gave it a try.
I link to these fabulous parties!
Thanks for these detailed instructions. It really helps to know where you had problems and what the “real world” yield is!
Cute! I love oreo pops – have you tried the mint oreo's?! OMG – love them! Check out these versions of my pops – Red White and Blue Oreo Pops and Holiday Oreo Lollipops.
http://blog.candiquik.com/?p=2537
Sarah @ Miss CandiQuik
Popped by from a link you left (after commenting on someone else's blog)
I appreciate your candor and will be popping by again :)
These are such a great treat, I made them for my step-son's class for a bake sale – sold out quickly.
If you put the oreo's on a plate and microwave them for 10 seconds or so, they soften up enough to put the lolly pop stick in nicely, then let them sit a bit before coating. I used coloured sugar on mine. Happy Eating :)
Featured you tonight!
http://polkadotsonparade.blogspot.com/2011/12/foodie-friday.html
I love this idea I've love you to add it to my what we wore and made party over at http://raegunwear.blogspot.com
hi, fun idea. tks for sharing it!
I am visiting from Chef in training Party.
rgds, dalys
http://www.burundanguitas.blogspot.com
What fun read! And your pops turned out great. Visiting from the Creative Paige.
:) crafty texas girls
Thanks for the reply, I did not know i could set it to get one:) Thanks for following.
I think you did a great job!
LOVE this.. So festive for Santa! Yummy.. Looks really awesome. : )) I would LOVE if you could please stop in and linky this terrific feature via my Pin’Inspirational Party happening today pweease… http://theartsygirlconnection.blogspot.com/2011/11/pininspirational-thursdayslinky-party.html .. THANK YOU SO MUCH.. Wishing you an incredible start to your weekend.. Sincerely ~
Yum! These would be great neighbor gifts :) Thanks for sharing!
Love them! They look great. Love your blog :) I think I am going to have to try these!
Susan
http://www.theweeklysweetexperiment.blogspot.com
I called them Jesus on a Stick! They were amazing!
Oh this is so tempting!!! Good kob, they looks so good!!!
I would love a follow back, newest follower!
XO
Isabelle
http://lechateaudesfleurs.blogspot.com/
This is really cute, and sounds delicious. I think I am going to have make these for my tacky sweater party! Fun treat! I would love for you to share it at my linky party Totally Inspired Tuesdays going on now! Hope you will stop by and link up!
Kelli
http://www.theinspiredcollection.blogspot.com
They look great! So cute all wrapped up and I do think yours look smoother than mine! I bet they tasted so much better with chocolate too! My stuff is “easy” compared to the crafts you do, and your writing thing, I would have died! I didn't have all the breaking problem so not sure about that, but there were quite a few broken already in the package to start. Did your husband at least get one? I am sure he wouldnt mind more of your practicing…but you really dont need it, the ones in your picture are perfect! Can't wait to see what you make next!
I am glad someone else struggles with covering things with candy coat. But I am so doing these for Christmas this year. Thanks for sharing.
http://junkintheirtrunk.blogspot.com/2011/11/link-it-up-wednesday-5.html
Found & followed you via Welcome Wednesday!
These pops are adorable — so many possibilities with colored chocolate choices. YUM.
Brooke
http://cupcakecucumber.blogspot.com
PS – I also have a giveaway going on too!
http://tinyurl.com/7xmmjll
Those look so good…I think I may try some of the mint oreos and make some of these for the holidays:)
I love them! You did a great job. Thank you for sharing your “oops” moments too! It keeps it real ;)