
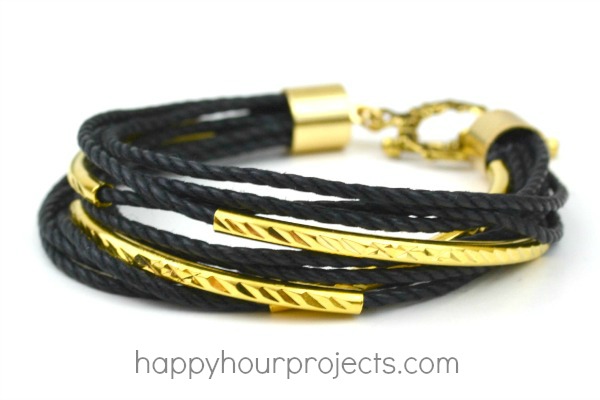
So gold is hot right now. I’m seeing gold accessories all over the place! Which ties right into a fun little St. Patrick’s Day theme I have with some fellow bloggers for a great giveaway… it’s a Pot O’ Gold party this week with some fabulous gold projects and a chance to win some cash! First – let me show you how to make this simple gold layered bracelet!
What you will need:
- 1mm cotton cord. You can choose any style, any color. In fact, 1mm leather would work well too. You will need about 6 feet for this bracelet.
- 10mm end caps and clasp. <– I’m going to link to where I got this (consumercrafts.com), because it’s such a specialty item. That’s not an affiliate link and I don’t get paid if you decide to buy it, I’m just making it easy for you to find these gold components if you like them.
- 1.75 inch curved tube beads. <– Same deal, these are also from consumercrafts.com because I shop there ALL the time, haha. I used one package. If you want more bling, you can always use two. ;)
- Jewelry Glue (I like Aleene’s, but any superglue should work fine)
- Scissors
First things first, cut about 10 lengths of cord about 6.5 – 7 inches long. (If you have larger or smaller wrists, aim for the longer or shorter end of that range). This will look snug for now, but your clasp will add a some length, too. The set I linked to above adds just over 1/2 inch to the finished bracelet.
Group them all together and to a trial-run, fitting them into your end cap. You may discover that you need more or less, but it’s better to figure that out before you involve any glue. When you’ve got the right fit for your end cap, squirt a bit of glue in there. Then, add one end of all the cords. I group them together and fit them all in at once.
Once that dries (it should be set enough to work within a minute or two), add your tube beads onto a few strands. If you find that your cords are beginning to unravel then a tiny dot of glue on the end will work wonders – just ensure that it’s dry before you string your beads.
When you’ve added on your tube beads, arrange the opposite ends of the cords how you like (I like to make sure mine aren’t too twisted), trim up the ends evenly (because you may find some are off by a few mm) and glue on the remaining end cap.
Finally, just add your clasp, and it’s ready for wear!

If you love the gold look, be sure to check out these other great projects too!
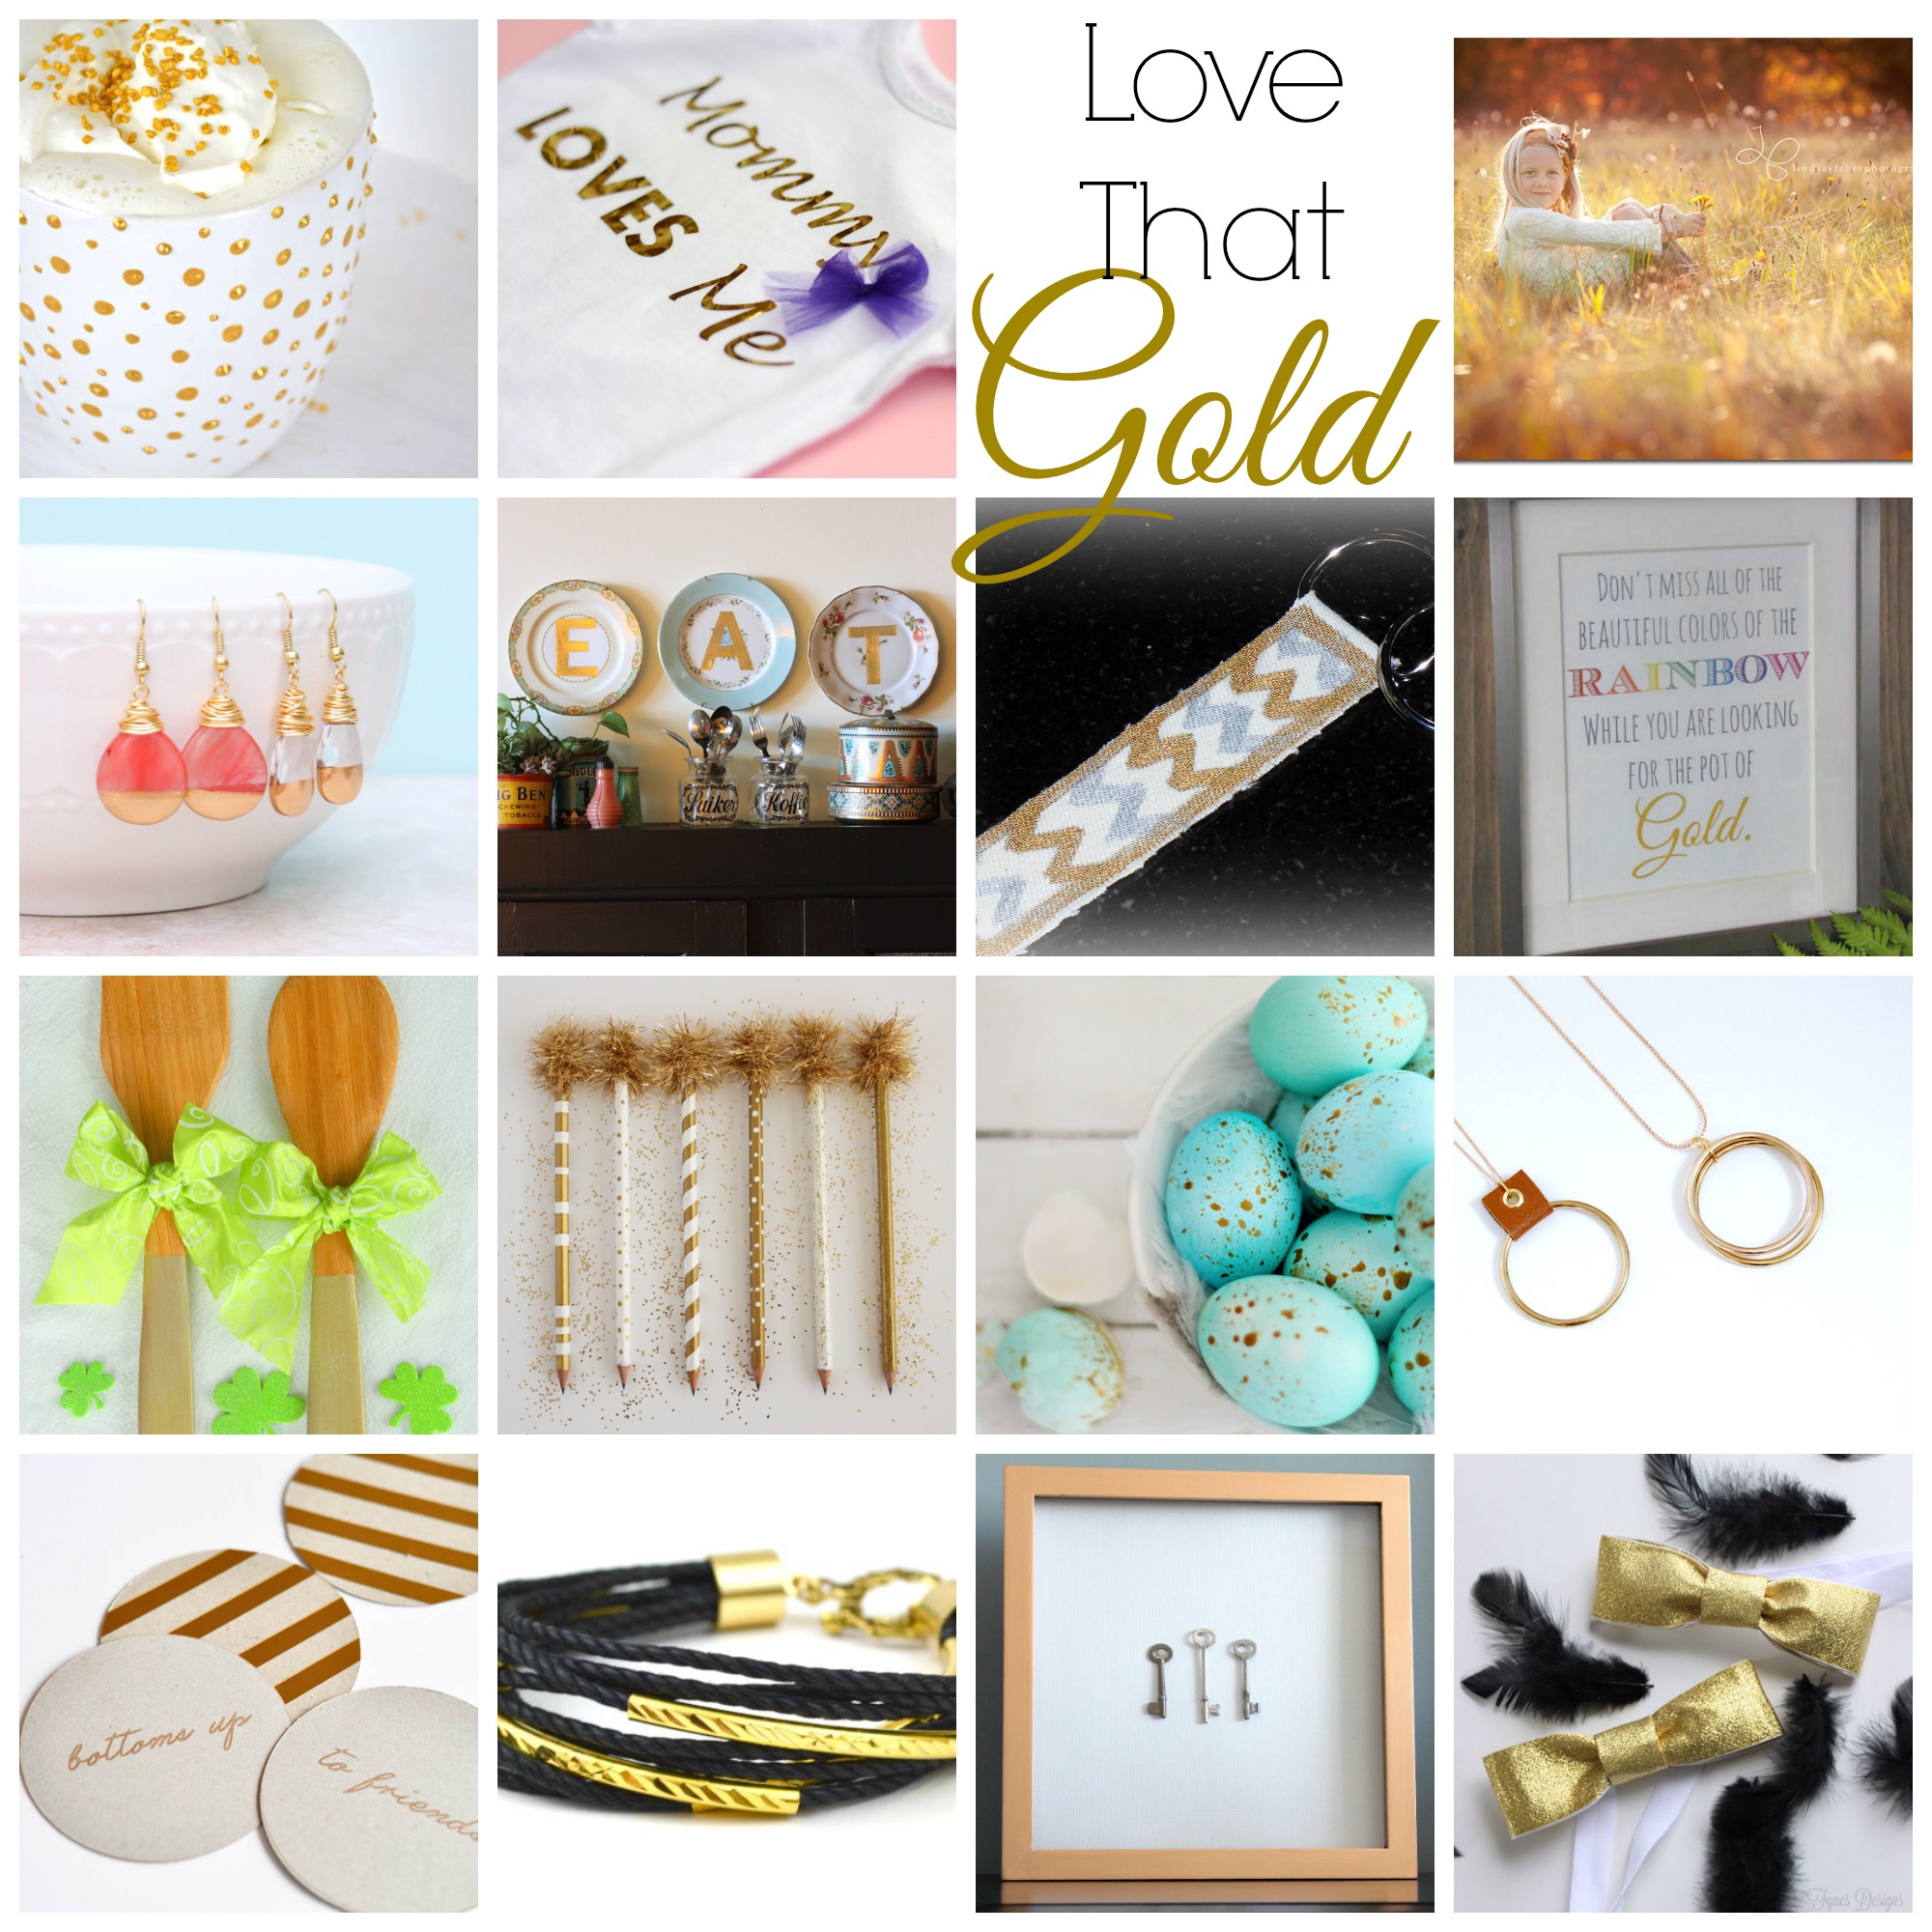
Get more “golden” inspiration from these 14 other talented ladies:
From left to right, they are:
DIY Gold Polka Dot Mug & Irish Coffee Recipe from A Pretty Life in the Suburbs
“Mommy Loves Me” Heat-Transfer Onesie by It Happens In A Blink
How To Take Pictures During The “Golden Hour” by Lindsay Faber Photography
Gold-Dipped Tear Drop Earrings by Happy Go Lucky
Gold Lettered Vintage Plates by The Sweet Escape
DIY Gold and Silver Key Fob by 4 You With Love
“Don’t Miss The Colours of the Rainbow” Printable by Clean and Scentsible
Gold Dipped Kitchen Utensils by Echoes of Laughter
Golden Pencils by The DIY Dreamer
Gold Speckled Eggs by Craftberry Bush
Gold Circle Pendants by Northstory
Kate Spade-inspired Coasters by Suburble
Gold-and-Black Layered Bracelet by Happy Hour Projects
Vintage Key Art by Satori Design for Living
Gold Bowties by Fynes Designs
Now – onto the giveaway! It’s open worldwide with a Paypal cash prize of $300 (void where prohibited, of course) and it runs through 11:59pm EST on St. Patrick’s Day, March 17th 2014! Good luck!
Giveaway is open worldwide where no prohibited by law, and ends at 11:59pm EST on March 17th, 2014. Number of entries received determines the odds of winning. Retail value is $300.00. One winner will be selected. Winner will drawn by random.org from all verified entries, contacted by email provided, and announced on this page at the end of the contest. Winner has 48 hours to respond or prize will be redrawn. Entrant is responsible for the email address they provide, whether through typing it directly or through the Facebook entry method. Happy Hour Projects and participating bloggers are not responsible for lost, misdirected, or undeliverable emails. All prizes will be awarded. No prize substitutions allowed. This promotion is in no way sponsored, endorsed, administered by, or associated with Facebook and we hereby release Facebook of any liability. Information is not provided to Facebook by logging in, and your information is never sold or shared. Prize is sponsored by participating bloggers and delivered by Suburble; Happy Hour Projects is not responsible for prize fulfillment. Protected tweets do not count as an entry method for tweeting. Tweets must come from a public account. No purchase necessary. Void where prohibited by law.
This has just that kind of rock n’ roll edge with jewelry that I love. I would totally wear this!
Adrianne, I am always totally blown away by your jewelry projects. You are so incredibly talented!
Love this, Adrianne! I haven’t ever used end caps before, but something tells me that I should.
And of course – love love LOVE the gold! Was there ever any doubt!?!? ;)
These are so cute and might even make me look hip if I wore them…which is saying a lot.
Positively gorgeous bracelet! Both my daughter and I would love these! So hip & cool too! Have a lovely week! Angie xo
Looks awesome! I would like this with the leather. I’m in a leather bracelet phase right now. Have you seen the pink from Goody Beads?
Love the layers and chunkiness of the bracelet- so fabulous!
Love this bracelet! What a simple & pretty tutorial!
Absolutely stunning bracelet!!!! WOW!! Pinned!
Love this!! Looks so great. Gold and black is my favourite combo these days.