
I’ve been having so much fun with these different jewelry projects this week. I hope you’re not getting tired of them because I have one more for you today before tomorrow’s big jewelry giveaway! Today, I made a simply-styled stamped washer necklace.

The disc is silver, and the washer is copper, and I’m going to talk to you a little about using liver of sulfur to darken your pieces.
I want to say, first of all – I am clearly NOT a stamping expert. The people who are beautiful stamp artists practice a lot and have a lot of experience. Personally, I’m trying to get more practice in (if you do a lot of stamping, well… you know this piece is amateur!) and I do like to show you all what I’m working on, even if I’m not nearly as close to perfect as I wish I were. ;) (Besides… imperfection lends charm, right? RIGHT? Right. LOL.)
Stamping is NOT hard to do! But experience is what sets designers apart, so if you’ve been itching to try stamping as a hobby, I would encourage you to go for it! I wrote a tutorial last spring about Jewelry Stamping for Beginners. I’m not going to go into a lot of detail in this post because that one covers a LOT. Anyone can make a beautiful keepsake piece with no experience, but be prepared to do a lot of practice stamping before you’ll have the steady hand and even rhythm that it takes to sell quality pieces.
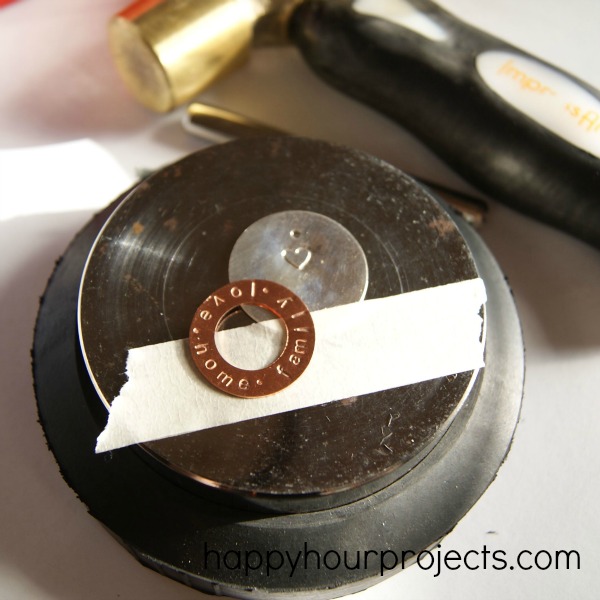
Stamping on washer shapes is an easy way to stamp curved text. You’ll just center your stamps vertically when hammering them, and they should line up pretty well. I stamped a little message for myself: love, family, home. Then, I found where the washer would be centered over my disc, and stamped a little heart. I also punched a hole in the blank in a place where my washer and disc would line up nicely.
Next, I ventured out in the 30 degree weather to oxidize my pieces. The reason for going outside is that sulfur smells just awful. I don’t need my house to smell like it for three days, LOL. Copper and silver will both oxidize. Aluminum will not. I don’t know all the reactive metals off the top of my head so I could be totally wrong and overlooking one – but I’m pretty sure copper and silver are the only two you can darken this way. Alloys will also oxidize to a certain extent, but it will depend on the silver or copper contents of that particular alloy.
When I take things outside to oxidize, I have a 3-cup method that I use. First, I clean my pieces really well, and put them pieces in a cup of hot water to warm up. It seems to take a patina the best this way. The second cup is where I will dilute my liver of sulfur – that’s cold water. And third, I have a full cup of cold water for rinsing.
It will depend on which form of liver of sulfur you are using, and what the instructions are for that particular concentration. I like to use the liquid because I find it easiest, but everyone has their own preference.
I take my disc(s) out of the hot water and drop them into the sulfur cup for about 30 seconds – but this will depend on the instructions for whatever form and concentration you are using. I fish it out with a plastic spoon (that is NOT for eating), and drop it into the cold water rinse cup. You will still need to rinse your oxidized discs really well in cool water, but because I go outside (and away from the sink), the rinse cup is sufficient to stop the oxidation process, and won’t stink when I bring it back indoors to finish the job.
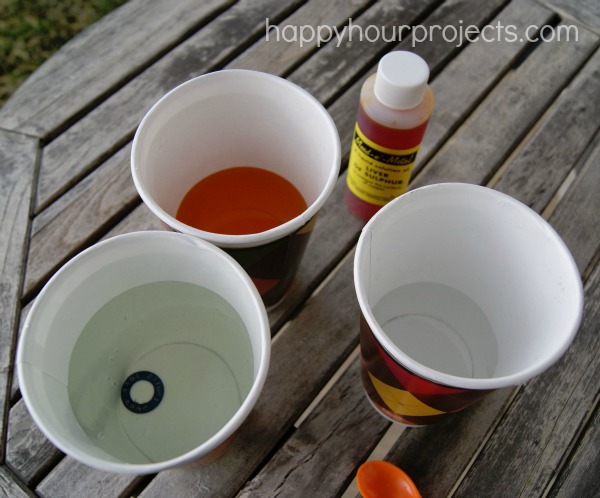
I usually seal up my leftover sulfur in a plastic jug (like a used milk carton) and throw it out. I have to confess, I don’t know if that’s a bad way to dispose of it, but I can’t imagine it’s good for pipes or yards. If you have a safe method for disposing of yours – I’d love to hear about it, leave a comment! You could always let it evaporate and throw it away when dry, but the would require stashing it somewhere that you don’t mind if it smells like sulfur for a while. Yuck.
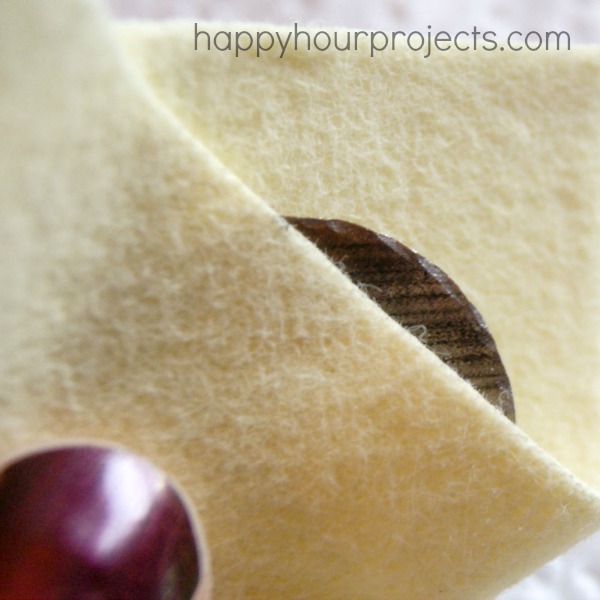
The cold water rinse cup is diluted enough that I don’t mind dumping that water. Then, just dry them off and prepare for LOTS of polishing with a soft cloth. :)

When your hand feels like it might fall off, you should be about halfway done polishing. ;) But once you’ve finally buffed it back to a beautiful shine, it’s ready to assemble and string on a chain!
If you love hand-stamped goodness, then you will definitely want to check out Amy at One Artsy Mama’s post today for Spring Bling Week – this gorgeous hand-stamped aluminum ring!

Drop by these other fabulous blogs for even more jewelry projects this week – and stay tuned for tomorrow’s big giveaway!!


Hi! I love your website, your beginner stamping post is actually what got me into it. I was hoping that you could tell me what size washer you used for this project? It looks like it would work for what I wanted to do but I’m ordering washers offline and have no idea what size to pick!
You can use anything you like. In my case, I just chose one 1/4 inch smaller than my disc. I believe these are a 1-inch disc and 3/4 inch washer, but if you need to stamp more letters just size up!
Thanks Amy!! I have always wanted to do some stamping and you have inspired me.
The Geometry Dash controls are straightforward; but, learning the timing, particularly in more challenging levels, requires practice.
Gorgeous! Where did you get the washer and disc? I’m not finding any blanks like that at my local craft store. :-(
I love anything stamped!!!! Just gorgeous girl….