• Skip to primary navigation
  • Skip to main content
  • Skip to primary sidebar

  • home
  • about adrianne
  • buy the books
    • DIY T-Shirt Crafts (2015)
    • DIY Stamped Metal Jewelry (2016)
    • Rock Painting for Beginners (2019)
  • videos
  • crafts
    • diy beauty projects
    • kids’ crafts
    • paper craft projects
    • polymer clay
    • sewing projects
  • jewelry
    • bracelet projects
    • earring projects
    • necklace projects
    • jewelry tools & supplies
  • metal stamping
    • beginners’ tutorial
    • video tutorial
    • project ideas
    • metal stamping supplies
  • recipes
    • cocktail recipes
    • appetizers
    • main and side dishes
    • sweets and treats
  • by season
    • birthdays
    • new year
    • valentine’s day
    • st. patrick’s day
    • easter and spring
    • mother’s day
    • patriotic
    • fall
    • halloween
    • christmas
    • thanksgiving
  • privacy

Happy Hour Projects logo

08/07/2012

Sunflower Necklace with Polymer Clay

Well, as much as I have LOVED working on my quilt squares the past week or so… I’m ready for something different!  I have been enjoying the effect of stamping on polymer clay recently, so I started playing around with some other items in my stash to create different looks.
I made this pendant by using a cabochon as a stamp, and I love how it turned out!  
If you haven’t worked with polymer clay before… be warned, it’s really addictive. :) It’s inexpensive, easy to work with, and for small projects like jewelry, one package really goes a long way!  Next time I have time I’m going to have to add a navigation button for polymer play projects (if you’re looking for something in the meantime, you can search for projects tagged Polymer Clay).
So to try this project, check your stash for pretties.  Think cabochons, buttons – anything with a pattern or texture that you like.  Then, gather the following:
Polymer Clay (I only used a pinch out of a package of silver clay I opened several projects ago)
Clay gloss glaze & a paintbrush
Roller – a dowel would work well if you don’t have a clay roller.
Cutters – either for clay, or for cookies – as long as you don’t use them for food after you’ve used them on clay.  Anything jewelry-sized will work.
Wax paper or parchment paper
Cabochon(s) – or whatever you found
Toothpick(s)
Baking sheet
Basic jewelry findings (jump ring or bail, and a chain to string it) and optional charms
First, roll your clay into a ball, and then roll it out with your roller to 1/4″ thick.  I rolled mine out on wax paper, and then transferred the whole sheet onto my baking sheet to put in the oven.  It protects all the surfaces and makes moving it easy.  Parchment paper would accomplish the same thing.

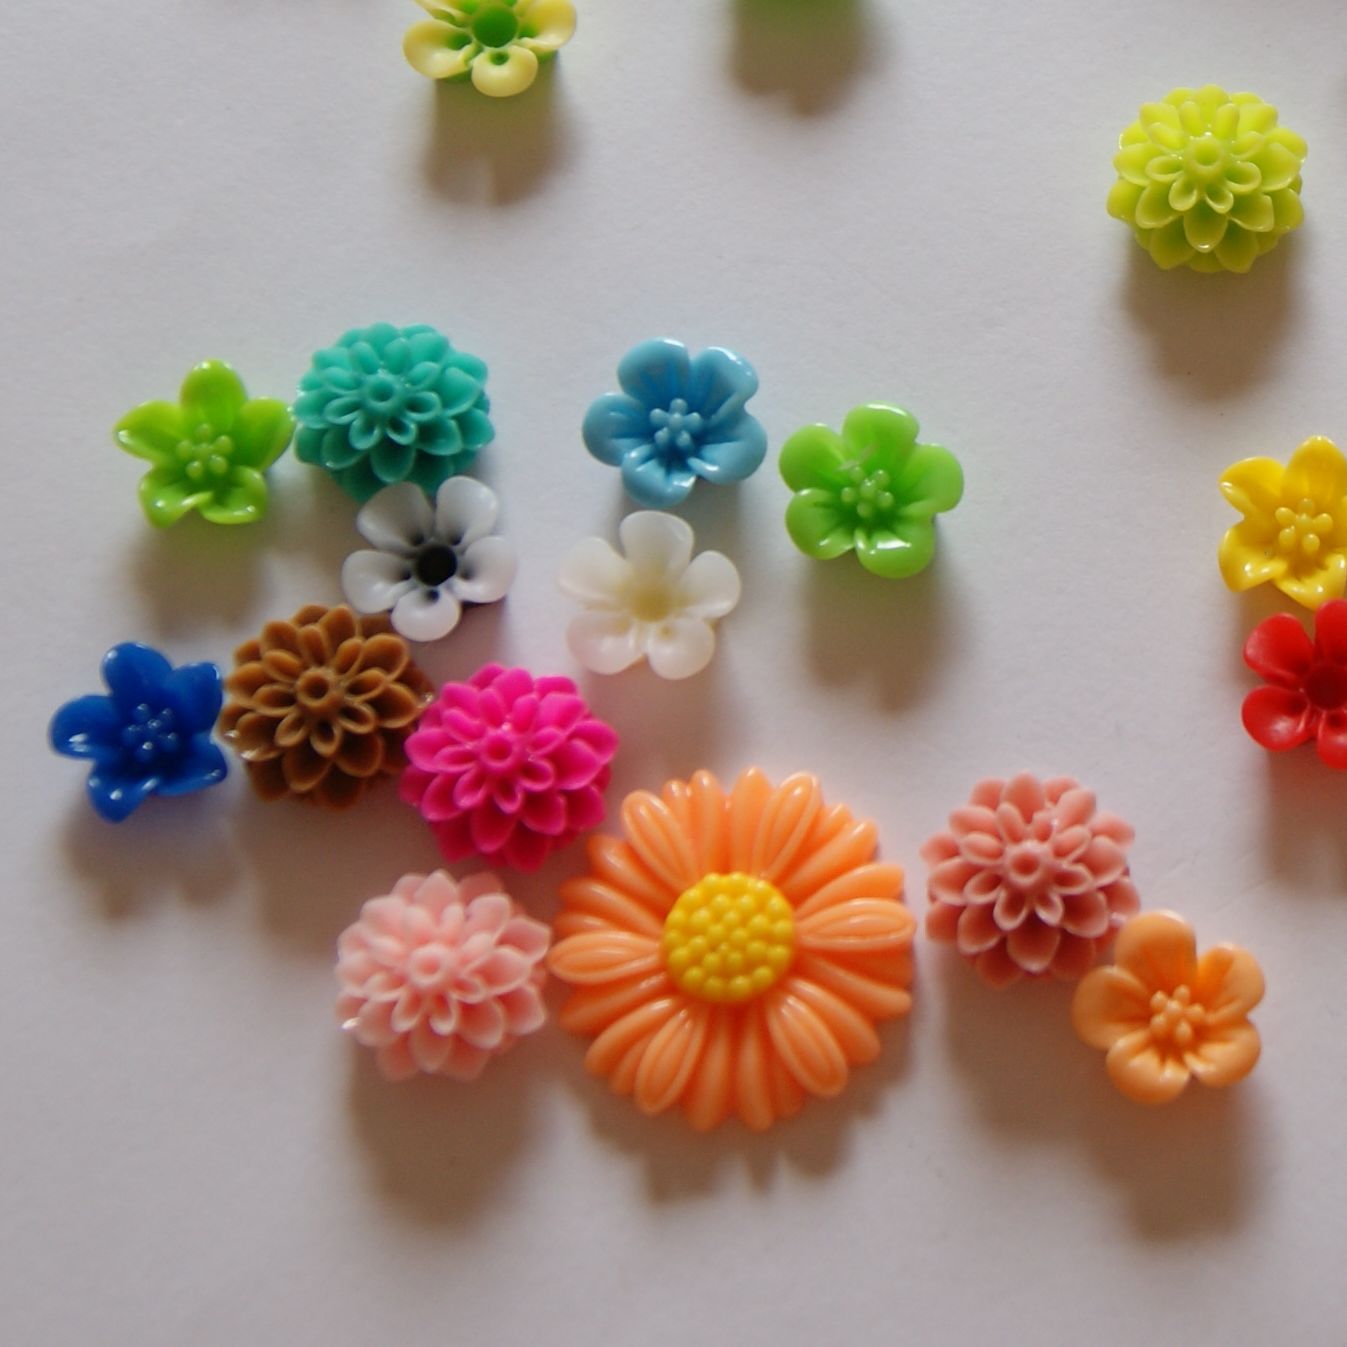
Pick your cabochon/button/etc.  I had all these lovely ones to choose from in my last Pick Your Plum goodie box I ordered.

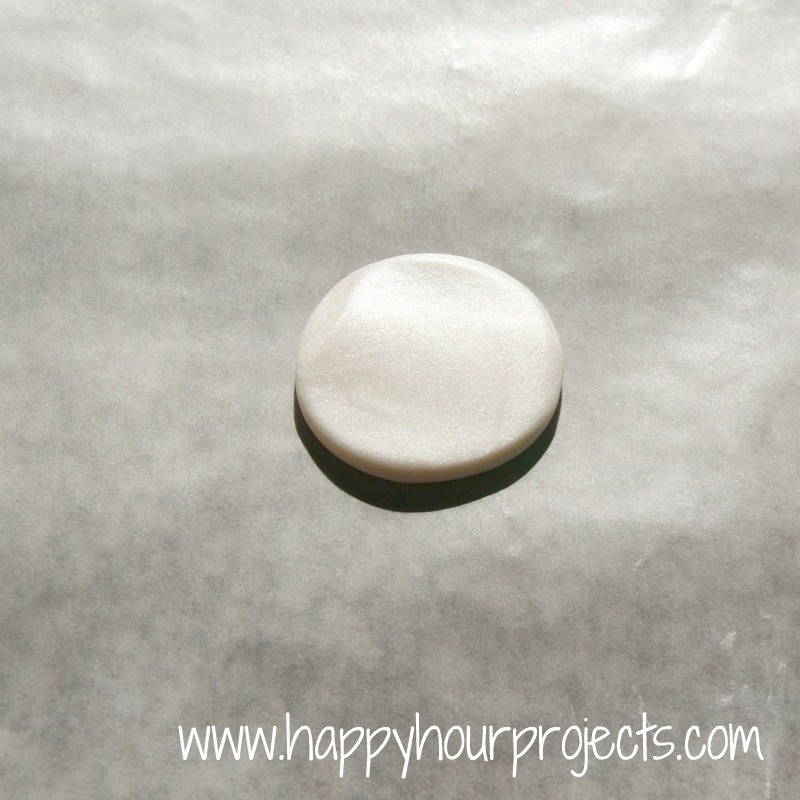
Press it into your clay.  Experiment with whether you like a deep or shallow impression.  I was going for a bolder look, so I pressed deep.

I decided I liked that off-center look.  So when I used my little round cutter, I made it even more off-center.  You want to stamp first and then cut, because the stamping will squish your clay.  If you cut it first, it will end up misshapen.  Although, if you enjpy that sort of look – feel free to try it out.  There are really no rules here!

I used a toothpick to poke a hole in my pendant, so I could add a jump ring.

Now, bake it in the oven according to the package directions.  Different brands and formulas may have different directions, so be sure to do what your package says.  Generally, though, a 1/4″ thick pendant is going to bake for 30 minutes.

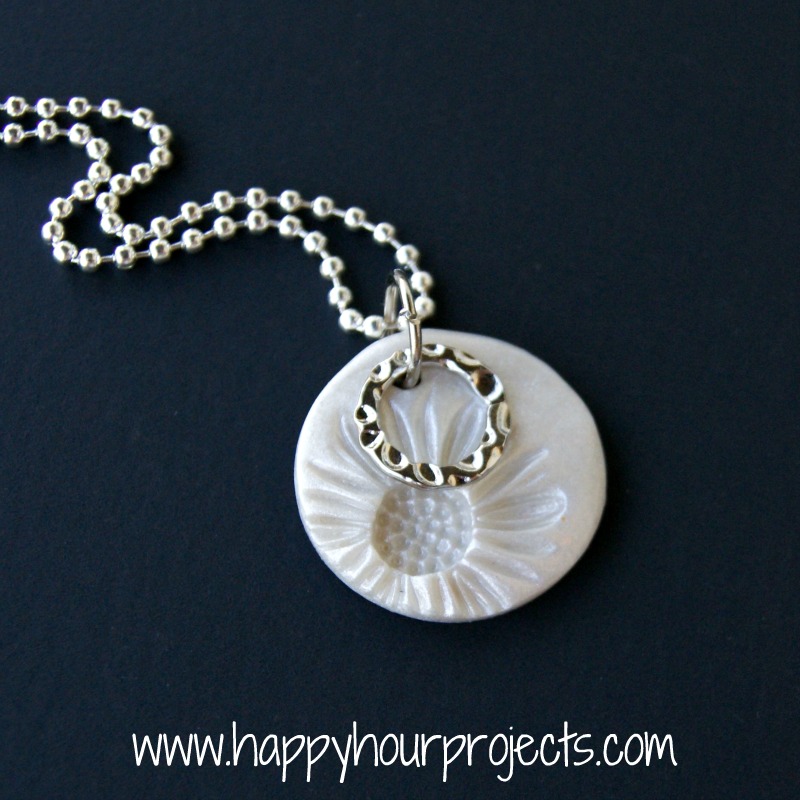
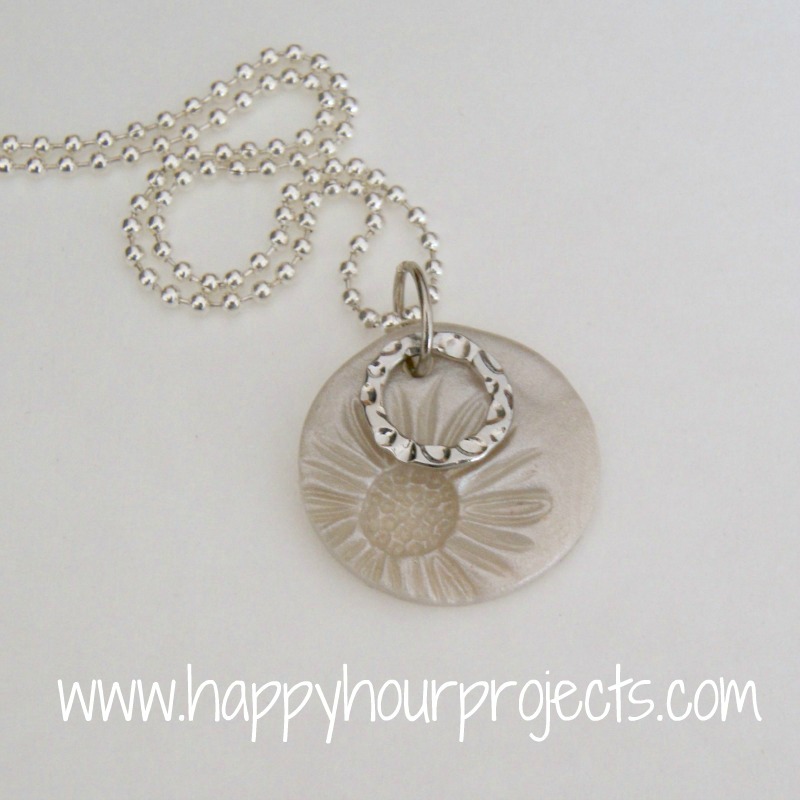
Once it’s done and cooled, brush a coat of gloss glaze on it.  This will help protect it, and make it shiny.  You could probably skip this step if you like a matte-finish look, but to me that looks unfinished.

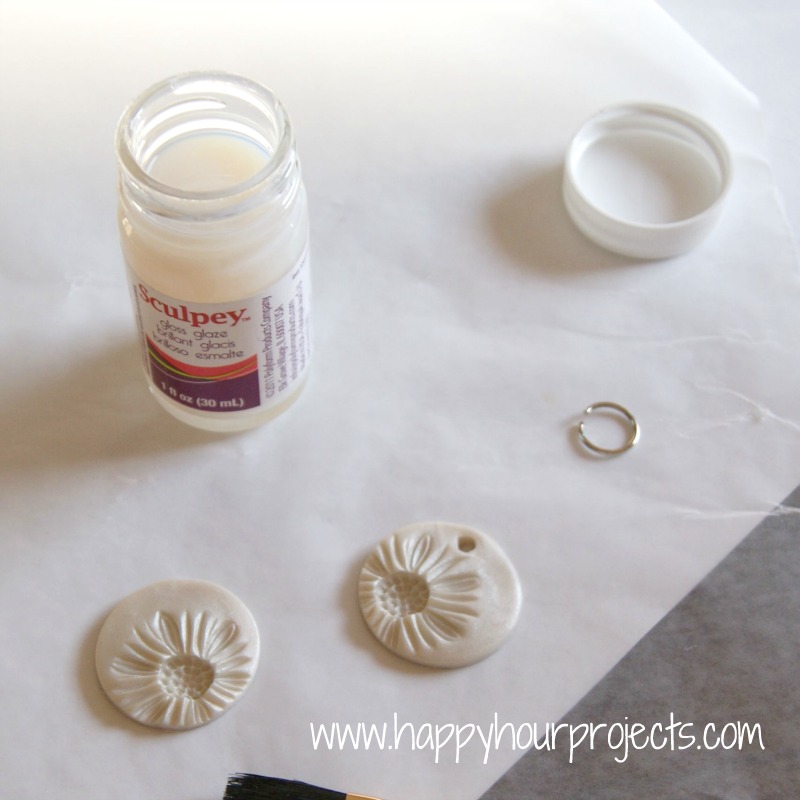
You’ll note I made two – I couldn’t decide whether I wanted to glue a bail on the back of it, or put it on a jump ring, so I made one with a hole and one without.

I decided it looked a little plain on its own, so I raided my bits-and-pieces and paired this ring with it.  That’s why I opted for the jump ring.

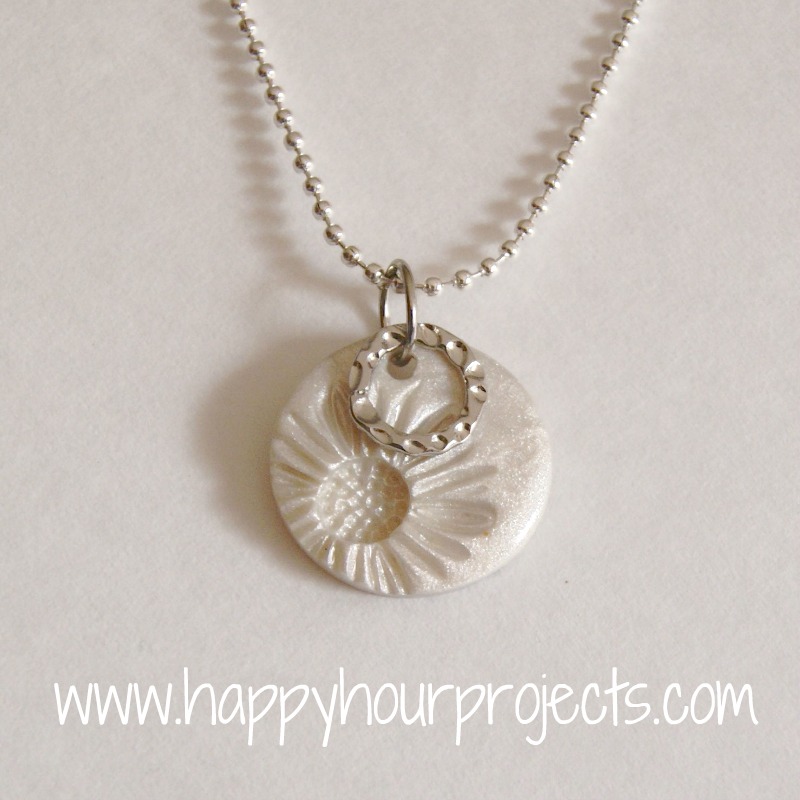
It makes for a fun, summery piece!  What kinds of experiments have you been working on lately?

I link up to these great parties!

Filed Under: Jewelry, Necklaces, Polymer Clay, Tutorials

copyright policy and terms of use

I love it when you love my work! All tutorials and photos published at Happy Hour Projects are copyrighted. If you would like to feature my tutorial on your website or share it on your social media you may use one photo to feature, as long as you provide a link back to the original post.

If you feature a photo, it may not be accompanied by the project tutorial or recipe, whether in my own words as it originally appears or paraphrased by you. This also includes personal sharing on social media and Pinterest. Publishing multiple photos from a project, or including instructions with an accompanying photo are not permitted and you will be asked to remove them.

I love to share my projects, and my tutorials, recipes, and e-books are ALL free for your personal use. However, photos and ideas that are published to this site are my protected intellectual property. You may print them at home, but please do not copy or distribute them. I also allow all designs to be made and sold at fundraisers, craft fairs, etc. If you are selling a piece made from one or more of my free tutorials in your online shop, I require that you use your own, original photography, and include a link back to my website to credit me as the designer.

I hope you enjoy what you read here, and please be fair when you share!

Reader Interactions

Comments

  1. Maxwelry says

    07/26/2019 at 7:38 am

    Sunflower is a flower that yearns for light, symbolizing health, happiness, and vitality.

    Reply
  2. Vivian says

    05/25/2014 at 10:19 pm

    I love your polymer craft works and I really want to try them out. But I have yet work much with clay before, can I know what brand and type of silver clay are you using for reference because some I saw looks darker than yours and that is not what I want.

    Reply
    • Adrianne says

      05/27/2014 at 9:13 am

      This is Sculpey Premo, I’m not sure what the color is called but it is a really light silver, like a shimmery white rather than a gray tone. I like it a lot, I use it for a lot of my projects.

      Reply
  3. Joyce says

    03/01/2014 at 2:07 am

    I love this project and plan to try and duplicate it. Were those actually buttons you impressed into the clay? Really very nice.

    Reply
    • Adrianne says

      03/02/2014 at 4:37 pm

      I used cabochons, which are very similar to buttons but the backs are flat to adhere to things. You can use buttons though or really anything you like to look or texture of.

      Reply
  4. Victoria says

    04/05/2013 at 11:17 am

    Omigosh! So simple, and just beautiful!

    Reply
  5. Kara at Petals to Picots says

    08/16/2012 at 3:00 am

    I am featuring you this week at my I {heart} Fridays party :)

    Reply
  6. Kristin says

    08/15/2012 at 8:38 pm

    I love this! I have a friend that is crazy about sunflowers and this would be a perfect little gift to make for her =) Thanks for sharing!

    Visiting from Tip Junkie

    Reply
  7. Amy says

    08/14/2012 at 11:26 pm

    love love LOVE this!! Pinning it right away. I have that same flower set from PYP…so going to try this if I can find some clay in my stash!

    Reply
  8. Sarah says

    08/14/2012 at 2:59 am

    So cute! I love the sparkle of it.

    Thanks for sharing at our Keep Calm & Link Up Party… hope to see you again this Thursday :)

    Reply
  9. Mackenzie says

    08/12/2012 at 3:13 am

    What a awesome idea! We would love to invite you to join us on Saturday Show & Tell on Cheerios and Lattes! I know my readers would love your awesome ideas! Have a great weekend!
    Mackenzie :)
    http://www.cheeriosandlattes.com/saturday-show-tell-23/

    Reply
  10. Jill says

    08/10/2012 at 5:34 pm

    Beautiful! Thanks for sharing at the Pomp Party! Pinning!

    Reply
  11. Kara says

    08/10/2012 at 1:38 pm

    I LOVE this!

    Reply
  12. Jessi Wohlwend says

    08/10/2012 at 2:31 am

    Way cute, and it looks great off center like that! Thanks for sharing at The Fun In Functional!

    Reply
  13. hilljean says

    08/09/2012 at 7:03 am

    Ooooh! I wanna try this! Great tutorial. I feel like this is something I could go crazy with :)

    Reply
  14. Valerie says

    08/08/2012 at 2:52 pm

    I love it! It's gorgeous! Thanks for sharing.

    Reply
  15. Liz says

    08/08/2012 at 5:22 am

    Lovely!!

    Reply
  16. Toodie says

    08/08/2012 at 3:33 am

    Wow, that is totally cute! I might actually be able to do that! I love the off center look; it's so original.

    Reply
  17. Jamie says

    08/07/2012 at 6:17 pm

    That is seriously so beautiful!

    Reply
  18. Sherry says

    08/07/2012 at 5:52 pm

    Cute as a button! I really love the shimmer finish on it.

    Reply
  19. Jess says

    08/07/2012 at 5:48 pm

    I LOVE this idea! Thank you so much for sharing it with us!

    Reply
  20. Shannon says

    08/07/2012 at 5:09 pm

    Super duper cute. I may make some later. Thanks for sharing this with us :)

    Reply
  21. Leslie Marquez says

    08/07/2012 at 4:18 pm

    So cute!! I made something similar recently, but I didn't use the sculpty glaze, I used Lisa Pavelka's Magic Glos (https://www.lisapavelka.com/Magic-Glos.asp) It gives a really good shine and gives it kind of a doming effect, very cool. And you just have to set it in the sun to set it. I love the results, you should try it!!!

    Reply
  22. Danielle says

    08/07/2012 at 2:56 pm

    this is great!!! I love it..

    Thanks for linking up to the HOP today!

    Reply
  23. Cait says

    08/07/2012 at 2:06 pm

    wow! this is awesome! stopping by from the link up! so glad i did because your blog is super cute! cant wait to read more :)

    Reply
  24. Dot says

    08/07/2012 at 1:21 pm

    Very pretty!

    Reply
  25. Artsy VaVa says

    08/07/2012 at 1:20 pm

    Love it!

    Reply
  26. Kadie says

    08/07/2012 at 1:01 pm

    I love that you used a cab as a stamp!! So clever and it turned out so cute. I really need to pull mine out and give it a try!:)

    Reply
  27. Terry says

    08/07/2012 at 12:38 pm

    I agree about the off-centered look. This is really sweet.

    Reply
  28. Melanie says

    08/07/2012 at 12:25 pm

    I like the off centered look, too!

    Reply

Trackbacks

  1. Happy Hour Projects - F | Pearltrees says:
    05/17/2017 at 4:20 pm

    […] Polymer Clay Bowl – Happy Hour Projects. Basic Sliding Knot Bracelet – Happy Hour Projects. Sunflower Necklace with Polymer Clay – Happy Hour Projects. Stamped Leather Cuff – Happy Hour Projects. Bead & Leather Bracelet – Happy Hour Projects. […]

    Reply
  2. 30+ Stunning Sunflower Crafts - Red Ted Art's Blog : Red Ted Art's Blog says:
    08/25/2015 at 5:03 am

    […] Sunflower Necklace […]

    Reply
  3. cambiar bombin cerradura barcelona says:
    09/28/2014 at 2:04 am

    cambiar bombin cerradura barcelona

    Sunflower Necklace with Polymer Clay

    Reply

Leave a Reply Cancel reply

Your email address will not be published. Required fields are marked *

Primary Sidebar

Hello, and welcome! I'm Adrianne, an artist, author, designer, and blogger in mid Michigan. I work from home, chase my two kids, and this once-city-girl is learning how to care for chickens and adjusting to life out in the country. I have a compulsion for daily creativity... sometimes it's jewelry-making, paper crafting, metal stamping, mixing and baking, or giving new life to recycled items. But with 2 young kids, time is short! My goal here at Happy Hour Projects is to share projects and tips that you can do in an hour or less. The ideas you find here are designed to add a little creativity in your day, no matter how much (or how little) time you have!

BUY MY BOOKS!

Copyright © 2023 Happy Hour Projects on the Brunch Pro Theme