
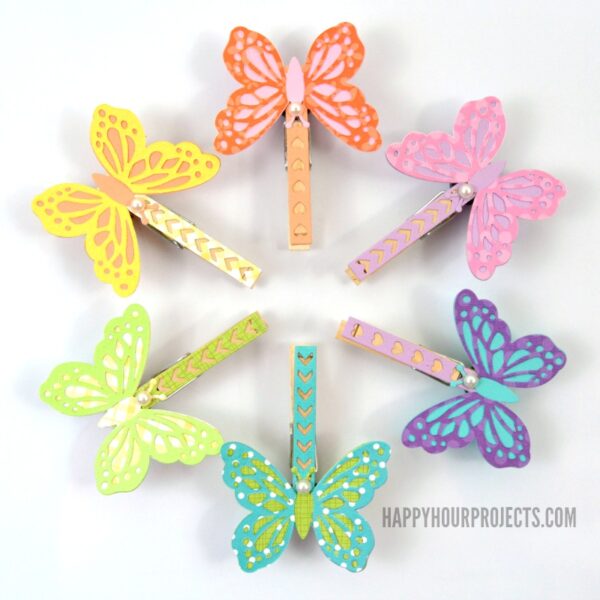
We finally had ABOVE FREEZING temps this weekend, and I’ve gotten spring fever!! So I whipped up some pretty spring magnet clips to use in my office with a rainbow butterfly theme, and I’m going to show you today how to make butterfly clothespin magnets of your own! This project is a great scrap buster.

The set adds such a sweet pop of color to the white board in my office. I love the clothespins, because they can hold a lot more that what a magnet can hold up on its own. And hello, they’re just plain pretty!

If you’ve got a Sizzix machine already, you hardly need any supplies to make up this project. I’ll leave links below to make it easy to shop, in case you’ve got your eye on picking anything up that I used today! These are affiliate links, which means if you do your shopping through them, then it supports my blog at no extra cost to you (and thank you, by the way!) If you’ve had a Sizzix on your wish list, and you decide to make the plunge, then be sure to use this special coupon code when you check out: SZB2015. That will get you 15% off your purchase, just for being an awesome reader. :)

- Sizzix Big Shot & cutting pads, magnetic platform
- Sizzix Thinlits Butterfly & Flower Clothespin die set
- Various rainbow colored papers (these are the Core’dinations new patterned card stock and Core’dinations pastels
)
- Wooden clothespins
- Magnets
- Quick drying paper glue
- Heavy-duty adhesive (I’ve been trying out Elmer’s ProBond
instead of E6000
, and I’m liking it, but both would work)
- Self adhesive flat back pearls

To die-cut your butterflies, layer the Thinlits on the paper, sandwiched between your cutting plates. Positioning them on a magnetic platform is ideal because it helps them stay put exactly where you mean to cut. Roll them through your Big Shot on the platform.

To die-cut your butterflies, use two coordinated patterns or shades in each color paper – one for the base, and one for the wings. You can combine coordinated colors or you can mix and match. Be sure to die cut the clothespin covers to match, too.

I assembled mine by mixing and matching similar colors – blue and purple, green and yellow, pink and orange, you get the idea. Add the clothespin cover to the clothespin first, then wrap the butterfly base around the clothespin with paper glue. Attach the wings. Then, with heavy-duty glue, add a magnet to the backside. (The magnet is optional – these would also make fun clips for around the house our classroom, too!)

Embellish the butterflies to suit your style! I’m a minimalist, personally… I don’t use a lot of inks or distressing. I just added a flat-backed pearl at the head, and let the paper be the star of the show.

So fun, right? Spring is in the air, and I just can’t wait! What are you making for your spring decor?
![]()

Outstanding project ! Very impressive job , thinking spring here trying to welcome warmer temps ! Going to make these with Childrens church class THANK YOU ? ??
Hi,
Such a cute project. What is the board/frame that you’re using that has the ability to hold magnets?
Hi! It’s a magnetic whiteboard from the office supply store. I’m not sure if all whiteboards are magnetic, but it seems like it’s a pretty common feature these days, and should be quite easy to find!
Darn so sorry for typos. iPad changed the words and they were spelled right, not now lol.
love these so much!!! just beautiful. I have pinned these
Your butterfly clothespins are so cute! It’s been so cold here too…in fact, yesterday, the thermometer at the bank said it was 45 degrees…my youngest then said, Mom is was 70 degrees colder here just a week or so ago! ;)
Hello Adrienne! I love your butterflies, they are so full of Spring. So colourful and lovely.
I have a huge problem with your -and other- blogs including Pinterest that I have no time to DIM.
All my time goes adoring these beautiful pics. :D
Happy week to you!
<3
Greetings from Finland!
Cute project Adrianne! Btw Love your new hair and profile pic!