
In case you missed it, I have a little project I put together for Rachel’s 13 Crafts of Christmas over at Lines Across My Face. There are some impressive projects over there! If you haven’t visited already – go check it out!
My husband just loves counting down to Christmas. Being married to him has made me far less grinchy about the whole season. Last year, I was having a baby in the midst of December, so this year, Miss Raya is a fun ONE year old! I would like to get really ambitious and make a nice advent calendar – you know, one of the supergorgeous ones that you can put treats in each day – but as it turns out, there really aren’t enough happy hours left this month to get it done in time. What I did have time for, however, is still a cute little countdown! Let me show you!
DIY Christmas Counter
Time: One hour to 90 minutes. Really only 30 minutes of work, with some drying time in between.
Supplies:
Wood, or other smooth-surfaced blocks/plaques
2 cube-shaped blocks
Paint, stickers, and/or Mod Podge and paper
There are a lot of ways to achieve the same end result. I will show you a step-by step on what I did, but if you are handy with a saw (or have someone in your house who is!) you can likely do an even better job with some wood scraps, or upcycle something sad. Alas – I live in a condominium, so there is no place for a workbench here!
What I found were these plaques at Michael’s. They happened to be on clearance, so I went ahead and got the 25-pack for $3.99, knowing that I will eventually use my leftovers in other projects. :) I picked up a couple of wood cubes to go along with it.
While I was there, I was on the hunt for something with a reindeer pattern (per my husband’s request, and I enjoy humoring him every time he takes an interest in my projects!) and I found some cute 10-pack stationery in the dollar section, and trimmed up two of the reindeer-themed sheets as my print for this project.
I played with the different shapes of plaques until I found a layout I liked.
I measured the pieces I would be using against the paper, and trimmed up my pieces.
If you’re making yours like mine… I ended up one piece short here. Doh. Not to worry, there was still plenty of paper left – I didn’t even need to trim up a new sheet.
Then, it was time to paint the raw edges that I wouldn’t be covering with paper. I also painted my cubes.
Now, depending on whether you will be nailing your pieces together or gluing them, you may want to do all your decorating after you have built your piece. You will certainly want to cover up any nails with your paper/paint/etc. But because I opted to glue mine (I craft when my daughter is sleeping, so hammering generally doesn’t go over well), I did my Mod Podge next.
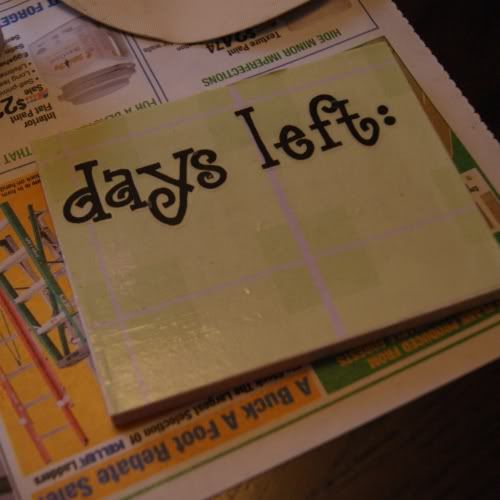
I also took a moment to add some scrapbooking letters, since I’m terrible at freehand painting. I gave it another coat of Mod Podge to secure them. Make sure your lettering will show above/around your cubes!
The cubes are a little tricky, because to be able to do the numbers 1-25 (assuming you’ll be starting on December 1) both cubes have to have 1’s, 2’s, and 0’s (unless you prefer to go down to just one cube once you hit single digits). You will need to label your cubes like this:
Cube 1: 0, 1, 2, 3, 4, 5
Cube 2: 0, 1, 2, 6 (which will invert to be your 9), 7, 8
You can even begin counting down with as many as 32 days left with this configuration. Again – I used stickers for my numbers, and then finished them off with a coat of Mod Podge.
Then, I finished up my construction and Mod-Podged the back:
Once your last round of drying is done, you can get ready to start counting down!!
Merry Christmas crafting!! ~ Adrianne
I just wanted to let you know I featured you today over at Blissful and Domestic:> Stop by and grab a button:>
http://blissfulanddomestic.blogspot.com/2011/11/pinning-it-wednesday-christmas.html
Super cute! Thanks for linking up with us and hope you join us again this Wednesday! Have a happy Thanksgiving!
Marie
mylilpinkpocket.blogspot.com
Great idea! Saw it on the Blissful & Domestic Linky and it caught my eye immediately! Well done!
What a super cute idea!! I love this! I would love for you to come link up at our link party…junkintheirtrunk.blogspot.com/2011/11/link-it-up-wednesday-3.html
so cute love it! pinning ti for a roundup during my homemade Christmas bash:>
adorable! I bet the kids love it.
this is super cute!