
Okay, okay, I know I said I was done cutting bottles for a while, but while I was in Chicago, I picked up a bottle of water while we were shopping at Eataly (which could be a whole post by itself, but I’ll spare you) and it was just such a cool bottle that I couldn’t bear to throw it away. So I did the most basic of bottle cutting projects, and I took the top off. If you haven’t gotten bored reading my posts about cutting bottles yet, let me take just a moment to show you how to cut bottles the easiest way I’ve ever tried, and how to repurpose a glass bottle into a vase.

Cutting a bottle really just takes a couple elements. First, you need to score a line where you want it to break. Then, you need to rapidly change the glass temperature between hot and cold to get it to crack – along that scored line. The science is pretty basic, but getting your bottle to break cleanly is easier said and done – unless you’ve got a tool to help you (which I do, and I can’t stop using).

I use the Kinkajou from Bottle Cutting, Inc. which comes with a pair of rings to help focus where you’re heating and cooling your glass. You use the tool to score a line, then you slide the rings over either side of that line. By alternating very hot water and cold tap water along that line, it will crack and just literally falls apart. For thin glass like this, it actually only took about a minute to cut my bottle.

Use medium grit and fine grit sandpaper (I use 100 and 180 grit) along the sharp edge of the bottle to prevent cuts. I also use the sandpaper to remove the glue from under the label. Then just rinse it, and you have gone from trash to vase – in just a minute or so.

This bottle says “Lurisia” and it’s such a cool shape, with a little bit of flare at the bottom. It’s an Italian import that I hadn’t seen before, so I held onto our bottles. Because, you know, DIY-ers can’t throw anything away. Sigh.

It’s nothing fancy – but it will always make for a fun memento from our trip, so I love that I can re-use it. You could use any type of bottle you like the looks of – this is roughly the size of a beer bottle, and held just under 12 oz.
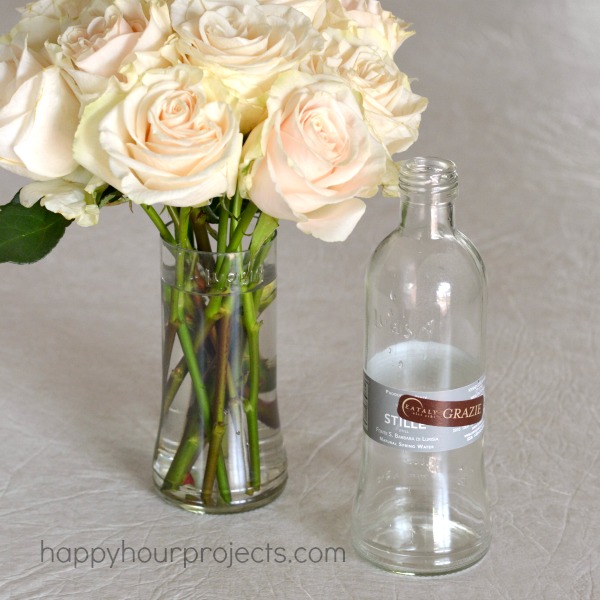
I know this is a very basic project, but I was just so thrilled with the way it turned out. Even if it isn’t a wildly original idea, it’s still worth sharing – and I especially love that it only took a couple of minutes. In fact, arranging the flowers took longer than making the vase!

And best of all – it was free. (Well, technically, it was an overpriced water, but it was going to be that anyway, when I drank it.) Haha. For $2, I got to keep the cool bottle and turn it into something cute and practical!

So – do you turn your empty bottles into craft projects? What have you been working on, or what are you dying to try?

I have to try this! I have so many pretty glass bottles that I just couldn’t bear to throw away!
Thats really cool! Is the cut edge sharp?
It is when you first cut it, you need to sand the cut edge with sandpaper. I use a medium grit for a minute or so, then a fine grit. After sanding you shouldn’t have any trouble at all.
I love anything that involves keeping things out of the bin and turning them into lovely useful things. What a clever little gadget.
LOVE this. Recycled projects are the best.
Such a pretty vase! I really think that I need one of these!