
I have the worst time trying to pick out cards for my husband. I think part of the problem is that my only two main choices are humorous (as in, making fun of him) or sappy romantic. The sappy romantic ones just never get all the details right, so I usually pick the plainest card I can find, and write my own message. It’s kind of a waste of $3, frankly.
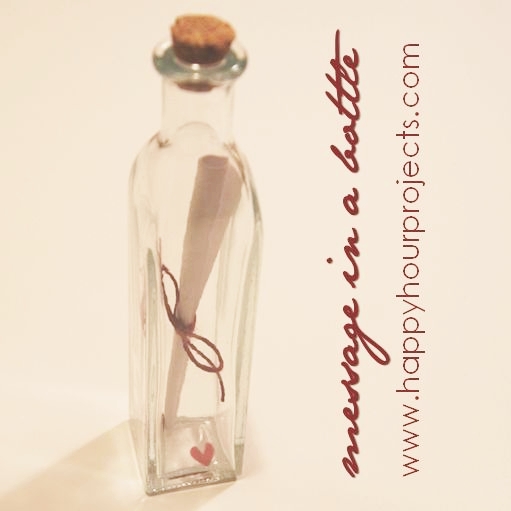
This year, I spotted a glass bottle when I was shopping at Michael’s, and thought to myself that it would be a cool bottle to toss into the ocean with a message. I know I’ll never actually do that, but still, the idea of putting a message in a bottle was really appealing to me.
So, it’s nearly Valentine’s Day, which seems like the perfect opportunity. :)
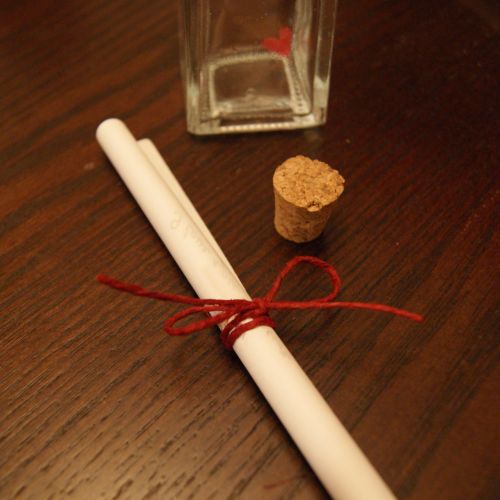
I wrote a nice note. I didn’t hand-write it, though I probably should have. But instead I found a fun handwritten font (if you’re a font-collector, it’s Jane Austen) and said what I had to say.

I know it doesn’t look like much. I’m really not terribly romantic, though I am trying!
Anyway, I trimmed it down and rolled it up, and tied it off with some twine. Make sure before you put it into your bottle that your note can be retrieved out! Mine has a really narrow neck, which means he’ll need to use tweezers, but I was able to fish it back out without too much trouble.
Then, I just popped it into the bottle. I had paper punched some hearts, so I tossed one of those in for good measure.

Now, I just have to decide where to leave it for him. I’m thinking his jacket pocket, so he won’t find it until he heads to work. :)
In other Valentine greeting news, I’m putting the finishing touches on a few things for my Valentines for the Valentine Exchange. I had one participant who hadn’t heard back from her partner, which was the perfect excuse for me to adopt a second partner! So since we’re making handmade packages, I thought I’d carry that into the cards I’m including as well. (Carlee and Elaine, you should maybe stop reading right now, though there are no actual gift spoilers here, don’t worry!)

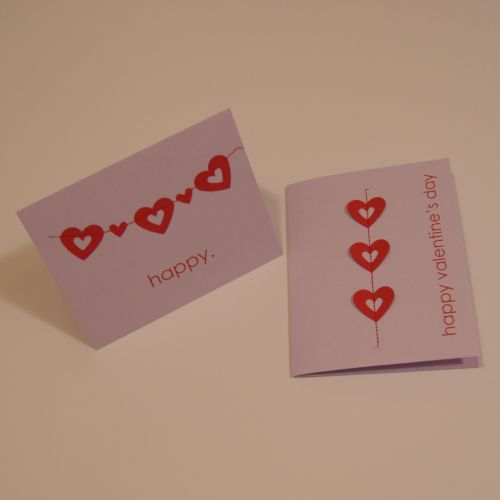
I don’t have the eye for paper crafts like some people do, but I knew if I kept it simple, I’d probably be able to pull off a decently cute card. This is the first time I’ve tried stitching on paper, and I really like the look it creates!
All I did was print up my front-of-card greetings on a sheet of cardstock, and trimmed it in half for my two separate cards. Then I folded them. Pretty basic. :)
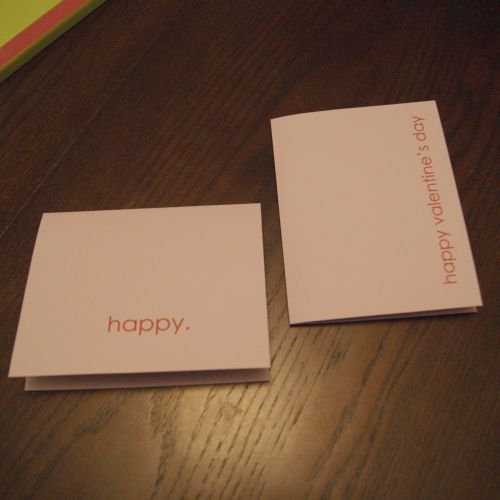
I tried one horizontal and one vertical. I can’t decide which one I like better! Anyway, then I played with my heart punches and some scraps and finally settled on some embellishments.
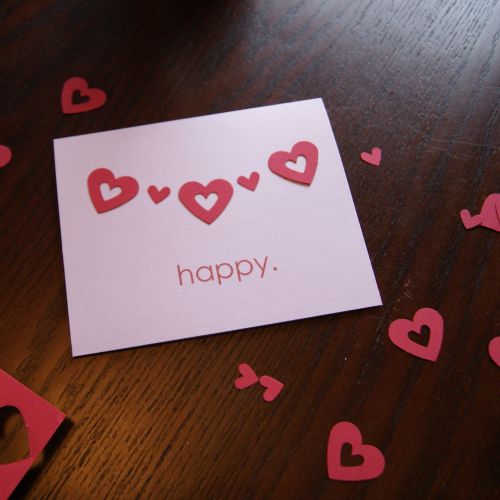
I adhered the hearts with a tiny bit of glue – just enough to make sure they didn’t scoot around while I stitched.
Then I ran a line of stitching to resemble a heart garland on this one to make it seem sort of whimsical:

And I did a simple vertical addition to the other one for a clean, geometric sort of look. What do you think?
I even had envelopes they would fit in leftover from our Christmas cards. And I’m quite pleased with my handmade greetings this year! And the best part is, I had everything but the bottle in my stash already, for a grand total of 99 cents invested. Are you DIY-mamas making your own Valentine greetings this year? Or perhaps a few dozen for the kiddos to give away? :)
I link up to these great parties!
~ Adrianne
So cute! You're so creative! Thank you so much for sharing at Taking A Timeout Thursday! Hope you had a wonderful Valentine's Day!
Really lovely.
Thank you for linking it up at our Valentines party. A new party will open today, and we hope you will submit new projects/tutes and show off your wonderful work!
Rose
http://www.finecraftguild.com/party/
so stinkin cute! and the cards are amazing too!
i have a creativity party going on at my blog right now; i would love it if you linked up this or any other amazing project you might have!
http://letbirdzfly.blogspot.com/2012/02/exodus-35-creativity-party-19.html
thanks so much for sharing!
I love the bottle card…very romantic. And those hearts sewn on the card are so cute! Thanks for sharing at Thematic Thursday.
I love the cards. They are simple and clean-looking but really adorable. I think that the sewing makes them. Your message in a bottle idea is a great one. I would have forgotten to make sure you could get the message out! (for sure I would have, lol).
Darn, I was hoping for more spoilers:) The cards I didn't peak at look darling!
Carlee
http://www.ladybirdln.com
Love the card ideas!! I'm following you know via Linky tools, too!!
Love the idea – so romantic!
SO I totally forgot to leave the link to my space in blog world LOL http://thoughtsfromtiffani.blogspot.com :)
I love the message in a bottle idea!! So cute!!
I am a new follower from the hop! I hope you can find time to check out my space in the blog world!!
Tiffani
Oh wow! Love these ideas! The message in a bottle is my favorite, that is just a super romantic classic thing to make….and easy! Looks like I will have to grab a bottle when I am at Michaels today!
Love these ideas! I would love to do the message in a bottle for my hub, but I bet he would get so frustrated trying to get the message out that it wouldn't be much fun!