• Skip to primary navigation
  • Skip to main content
  • Skip to primary sidebar

  • home
  • about adrianne
  • buy the books
    • DIY T-Shirt Crafts (2015)
    • DIY Stamped Metal Jewelry (2016)
    • Rock Painting for Beginners (2019)
  • videos
  • crafts
    • diy beauty projects
    • kids’ crafts
    • paper craft projects
    • polymer clay
    • sewing projects
  • jewelry
    • bracelet projects
    • earring projects
    • necklace projects
    • jewelry tools & supplies
  • metal stamping
    • beginners’ tutorial
    • video tutorial
    • project ideas
    • metal stamping supplies
  • recipes
    • cocktail recipes
    • appetizers
    • main and side dishes
    • sweets and treats
  • by season
    • birthdays
    • new year
    • valentine’s day
    • st. patrick’s day
    • easter and spring
    • mother’s day
    • patriotic
    • fall
    • halloween
    • christmas
    • thanksgiving
  • privacy

Happy Hour Projects logo

09/06/2012

Gifting Homemade Breads

Yesterday, I shared my favorite pumpkin bread recipe, and today I have a fun way of packaging it up for gifts.  (This is a very gift-able recipe – not only is it really yummy but it makes up a LOT of bread.)  I have only done this for small loaves, but I’m sure you could do it with larger ones as well (you’d just need a bigger fabric scrap).

What you’ll need:

A fresh small loaf of fully cooled sweet bread
Plastic wrap or tin foil (optional)
Freezer paper
Fabric scrap at least 8”x18”
Iron
Ribbon
You may want to test what size you need against your loaf by doing a test run with just paper, before cutting your fabric.  Once you’ve determined how big it needs to be, trim your fabric and freezer paper to the same size.  If the freezer paper is a little bigger, that’s ok, you can trim it down later.

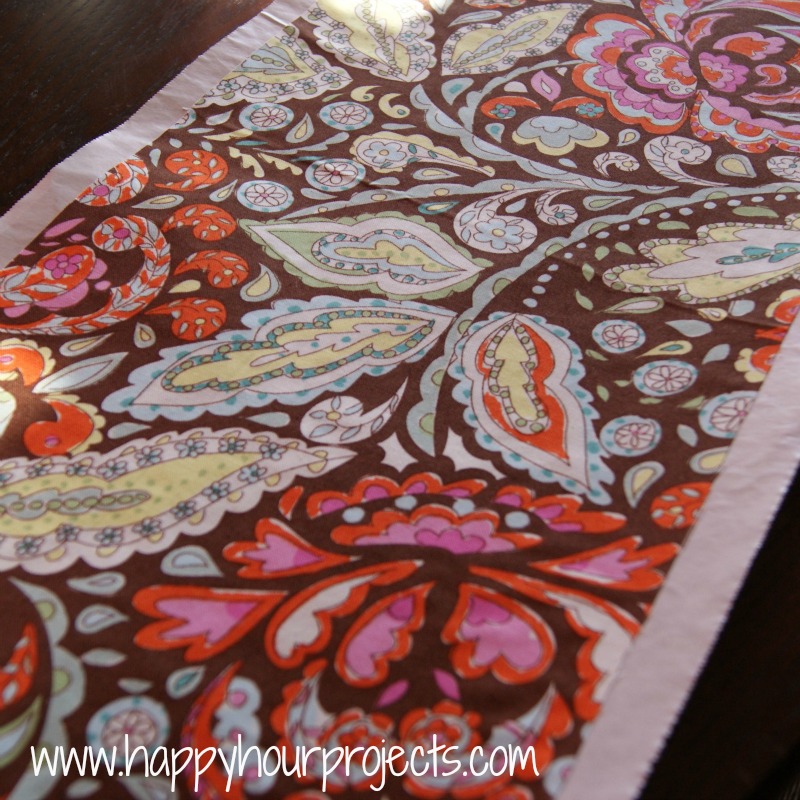
Iron the waxy side of your freezer paper to the back side of your fabric on a medium setting.  


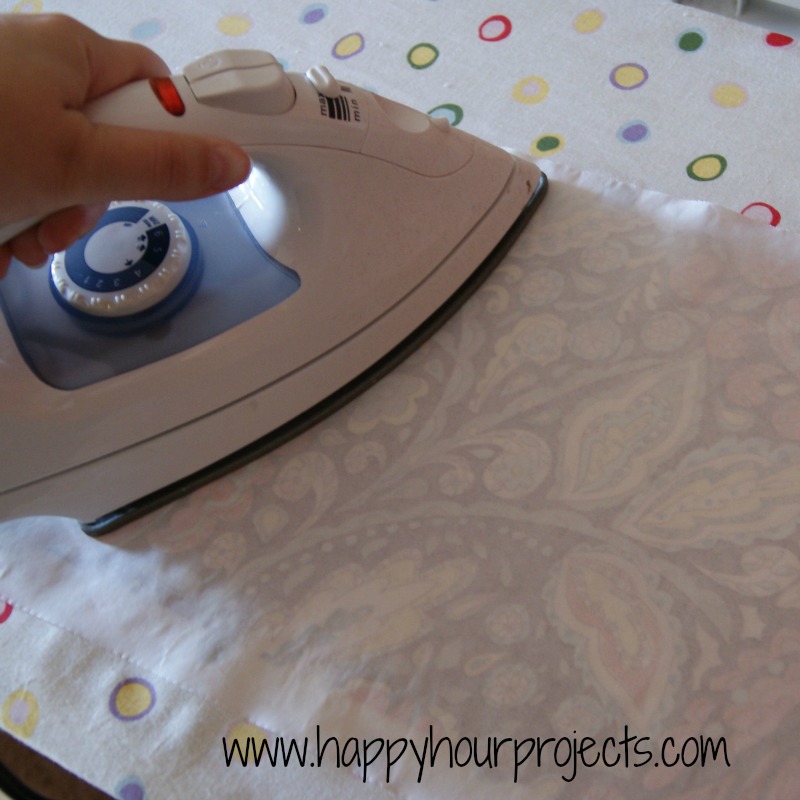
Once it’s stuck, trim any excess paper.


Depending on how long it will be before you gift it, you might want to first wrap it in plastic or foil as an extra layer of protection.  If it’s just going to be a day or so, this shouldn’t be necessary.
Gently place your loaf top-side down on the paper, so that the long direction of the loaf matches with the long part of your paper.

Do you see off to the right where the bread has already made a little grease spot on the paper?  That’s why we lined the fabric with it – the waxy side protects the fabric from getting any little ugly grease spots on it.

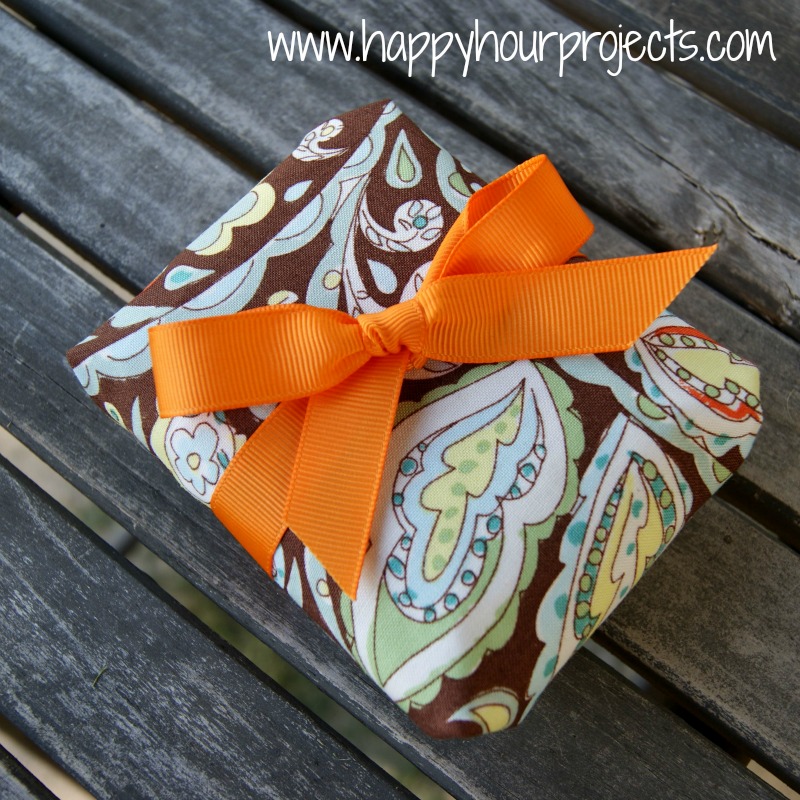
Now, bring the ends up, line them up together, and fold/roll them down like you would do to a lunch sack, until the fold is flat against your bread.  You can tape it temporarily if you want to, if you are finding this difficult to do.  We’re going to wrap the open ends like a present, so if you’re good at that you can probably managed just fine without taping it.

Now, fold the sides in to make triangles (as I mentioned, just like a present) and ultimately fold them down around the bottom of your loaf.  Tie a ribbon around it to hold those ends in place.  


The waxy/plastic layer of the freezer paper will help to keep it fresh for a few days, and the fabric gives it a fun and personal touch (because it’s all in the presentation, right?)  You can also tie on a little note with what kind of bread is inside if you like!


I link up to these great parties!

Filed Under: Tutorials

copyright policy and terms of use

I love it when you love my work! All tutorials and photos published at Happy Hour Projects are copyrighted. If you would like to feature my tutorial on your website or share it on your social media you may use one photo to feature, as long as you provide a link back to the original post.

If you feature a photo, it may not be accompanied by the project tutorial or recipe, whether in my own words as it originally appears or paraphrased by you. This also includes personal sharing on social media and Pinterest. Publishing multiple photos from a project, or including instructions with an accompanying photo are not permitted and you will be asked to remove them.

I love to share my projects, and my tutorials, recipes, and e-books are ALL free for your personal use. However, photos and ideas that are published to this site are my protected intellectual property. You may print them at home, but please do not copy or distribute them. I also allow all designs to be made and sold at fundraisers, craft fairs, etc. If you are selling a piece made from one or more of my free tutorials in your online shop, I require that you use your own, original photography, and include a link back to my website to credit me as the designer.

I hope you enjoy what you read here, and please be fair when you share!

Reader Interactions

Comments

  1. Terry says

    09/25/2012 at 11:40 pm

    I love this idea. It looks so adorable in the small loaf size.

    Reply
  2. Jessi says

    09/16/2012 at 6:12 pm

    What a great idea! Totally perfect. :-) Thanks for sharing at The Fun In Functional!

    Reply
  3. Meredith says

    09/14/2012 at 2:56 am

    Hi friend! Just wanted you to know we're featuring you today at our party and hope you'll stop by to link up again (and grab a featured button)! Congrats!!

    Reply
  4. Joan Hayes says

    09/14/2012 at 1:43 am

    I love this! I'm always giving bread as gifts but finding and attractive way to package it…well, lets just say, at least my bread always looks good. Can't wait to give this a try! And Hancock fabric is having a huge sale and I'm headed there tomorrow!

    Reply
  5. Barbara Hiatt says

    09/11/2012 at 5:02 am

    Great idea Adrianne, and so pretty! Love the fabric you chose! These will make very nice favors come Thanksgiving! Thanks for joining the party at Keep Calm and Link Up!
    Barbara at Chase the Star :)
    chasethestar dot net

    Reply
  6. PlayEat Grow says

    09/08/2012 at 6:18 pm

    That's so easy to do but it makes such a big impact. Thanks for the idea!

    Reply
  7. Anna says

    09/08/2012 at 2:04 am

    Great idea! Thanks for sharing!

    Reply
  8. Linda Bouf says

    09/08/2012 at 12:55 am

    This is a great idea!! I love the fabric, too. I've always got fabric (lots and lots of fabric). Thanks, Linda

    Reply
  9. Ann says

    09/07/2012 at 10:58 pm

    That is super adorable!! Now I know what I'll be doing with my leftover fabric!! :) (And I never knew there was such a thing as freezer paper! Will have to get some!) Thanks for the tutorial!

    Reply
  10. Dayna at Precut Paradise says

    09/07/2012 at 6:29 pm

    Such a cute idea!

    Reply
  11. Jess from Coxs Corner says

    09/07/2012 at 7:30 am

    I LOVE this!

    Reply
  12. Colleen says

    09/07/2012 at 4:58 am

    Adorable! I just did a DIY jam hostess gift on my blog. This would have been a nice pairing :)
    Building Paisley

    Reply
  13. TJParmele says

    09/07/2012 at 2:29 am

    I just gave away two loaves for a housewarming gift. I soooo wish I had seen your adorable idea!

    Reply
  14. Kara says

    09/06/2012 at 2:47 pm

    Very pretty idea! Love that fabric too :)

    Reply
  15. Pam Fields says

    09/06/2012 at 12:41 pm

    Adorable and it does make it seem more personal! Love the idea.

    Reply
  16. Heather says

    09/06/2012 at 12:31 pm

    This is a great idea, Adrianne. I love it! I'm always looking for new ways to wrap up a loaf – have used cello (of course) and a tea towel, but love the bright colours of some fabric. Didn't know the freezer paper would stick to it. Another use for my roll of freezer paper.

    Reply
  17. Kadie says

    09/06/2012 at 11:45 am

    What a cute fun idea! You could even put the recipe on a note and tie it on. It would be great for Christmas neighbor gifts. Because that's the only time I make and give bread. ha,ha

    Reply
  18. Sarah Carletti says

    09/06/2012 at 10:35 am

    Great idea! Love it

    Reply

Trackbacks

  1. Friday Finds:15 Great Ideas for Quick and Easy DIY Hostess Gifts says:
    12/13/2013 at 6:01 am

    […] can also make up your own favorite bread recipe to share.  I have a great way to present homemade breads as gifts to help keep it fresh while making it […]

    Reply

Leave a Reply Cancel reply

Your email address will not be published. Required fields are marked *

Primary Sidebar

Hello, and welcome! I'm Adrianne, an artist, author, designer, and blogger in mid Michigan. I work from home, chase my two kids, and this once-city-girl is learning how to care for chickens and adjusting to life out in the country. I have a compulsion for daily creativity... sometimes it's jewelry-making, paper crafting, metal stamping, mixing and baking, or giving new life to recycled items. But with 2 young kids, time is short! My goal here at Happy Hour Projects is to share projects and tips that you can do in an hour or less. The ideas you find here are designed to add a little creativity in your day, no matter how much (or how little) time you have!

BUY MY BOOKS!

Copyright © 2026 Happy Hour Projects on the Brunch Pro Theme