• Skip to primary navigation
  • Skip to main content
  • Skip to primary sidebar

  • home
  • about adrianne
  • buy the books
    • DIY T-Shirt Crafts (2015)
    • DIY Stamped Metal Jewelry (2016)
    • Rock Painting for Beginners (2019)
  • videos
  • crafts
    • diy beauty projects
    • kids’ crafts
    • paper craft projects
    • polymer clay
    • sewing projects
  • jewelry
    • bracelet projects
    • earring projects
    • necklace projects
    • jewelry tools & supplies
  • metal stamping
    • beginners’ tutorial
    • video tutorial
    • project ideas
    • metal stamping supplies
  • recipes
    • cocktail recipes
    • appetizers
    • main and side dishes
    • sweets and treats
  • by season
    • birthdays
    • new year
    • valentine’s day
    • st. patrick’s day
    • easter and spring
    • mother’s day
    • patriotic
    • fall
    • halloween
    • christmas
    • thanksgiving
  • privacy

Happy Hour Projects logo

07/10/2012

Ten-Minute Knotted Ankle Bracelet

I have another quick jewelry project for you this morning.  This is a variation on a popular style going around right now, but if you read here often, you know I’m ALL about simplifying.  Making designs easier, faster, and less expensive to make.  Today’s project is all of those – it’s a perfect summer ankle bracelet!

My friend Maureen and I were discussing a suede bracelet using this same technique over at My Own Road over the weekend.  I had to check out Jen’s post on her recommendation, and found that it’s really cute, really simple – and very much like the gorgeous Jute and Pearl bracelet that Terry from These Peas Taste Funny made for me last fall.  Both are totally different looks using this same basic method – different types of beads, different types of cords.  So what I’m showing you today is certainly nothing I invented, I’m just showing you an alternative that you can make for different twist.  Be sure to check out the other versions I’ve linked to above and see for yourself what difference it makes to vary your beads and cord!

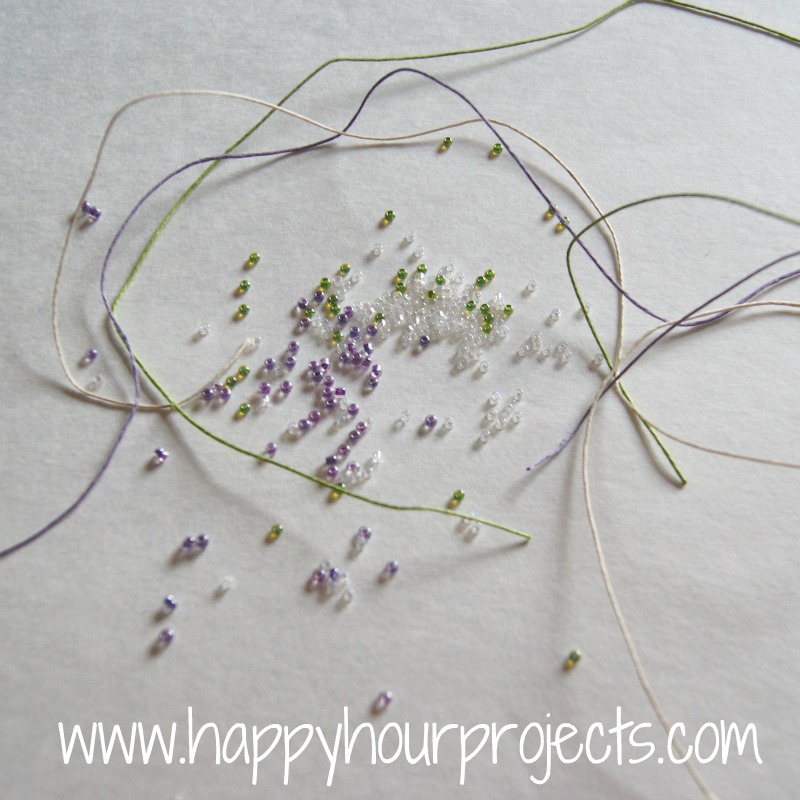
Of course, for mine, I got out my supply of hemp twine and a few seed beads.  I think I’m just trying to prove to you all just how far one package of hemp can go, and all of the different designs you can make with it!  That’s right – I am still working on using up the $5.99 assortment of pastel hemp I found at Michael’s in the spring.  I’m nowhere near out yet, even after all of the woven bracelets I’ve made – so if you decide to buy some, rest assured that it goes a long way!  I will just have to keep coming up with more ideas, LOL.  But I am sharing a few of my other tutorials below, in case you didn’t catch them the first time around.  They are, of course, all in the same color scheme coming from the same package. :P

(Just click the thumbnail to get to the tutorial.)

This particular hemp from Michael’s is a very fine cord, size-wise.  It doesn’t say what size it is, I’d say it’s 1mm or smaller, though.  I was able to use the little seed beads for this, but test them out before you haul everything out.  You may need to use the next size bigger beads if you’re using a different brand than the Bead Landing brand, because hemp comes in lots of sizes.

For an ankle-length, I cut three 18″ strands in three different colors.  I raided my bead stash and found seed beads in the same colors.  For a bracelet length, you could get away with 15-16″ cords instead.

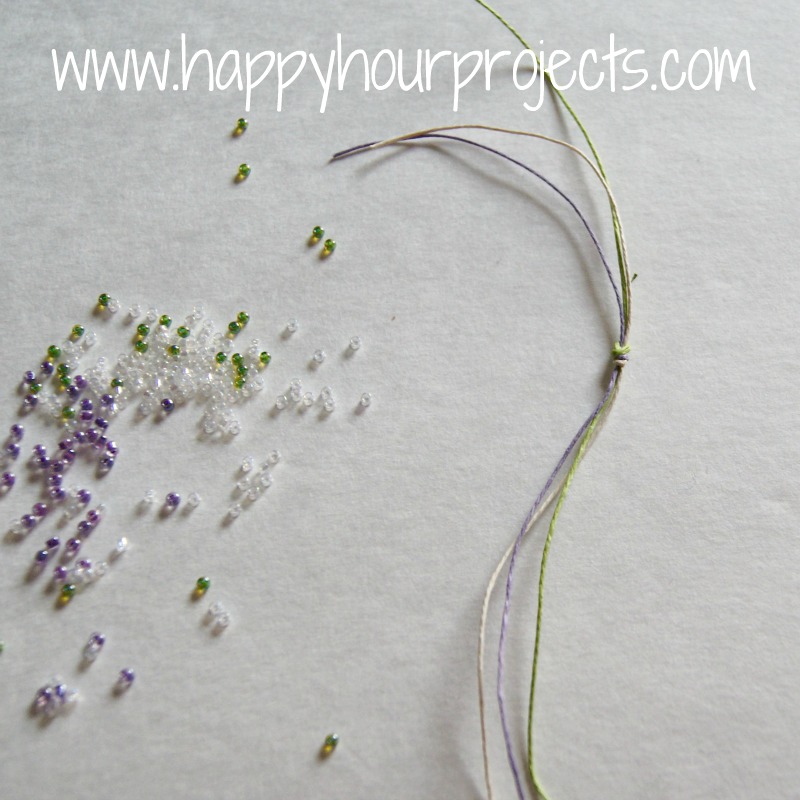
Measure down about 3″ from the ends, and tie an overhand knot.  Because I am not bothering to attach a clasp (this will just tie on, like a friendship bracelet), I need enough length to make tying it on easy.  If you would rather attach a clasp – feel free.  The other tutorials I mentioned above were for bracelets, and they included a button closure so it was removable.

Now, just thread a few beads onto each strand.  I tried to mix mine up – I used anywhere from 1-3 beads on each strand in varying colors.  The clear ones don’t show well in the photograph, but they do give it a little bit of shine. :)

Then, I spaced down about an inch, and tied another overhand knot.

This keeps the beads on this section of the bracelet.  Then, I did the same thing, knotting it off every inch or so.  Once I had a length of 9″, I stopped.  (A good length for an ankle bracelet is generally between 9″-10″.)  If you have any trouble with the beads not quite wanting to fit on, or if your end of your hemp starts getting frayed, you can trim it down – just trim as little as possible.  You don’t want to take more than about 1″ total off the ends if you can help it.

Once you get to the last knot, you should have about 3″ left for your “tails”.  This is why we started with twice as much length as you need for the bracelet portion – you have to account for losing some length each time you tie a knot, trimming your ends if they start to fray, and the tails for tying.

The only thing left to do was, of course, to tie it on. :) I love this one!

I link up to these great parties!

Filed Under: Bracelets, Jewelry, Tutorials Tagged With: 10-minute project, hemp, twine

copyright policy and terms of use

I love it when you love my work! All tutorials and photos published at Happy Hour Projects are copyrighted. If you would like to feature my tutorial on your website or share it on your social media you may use one photo to feature, as long as you provide a link back to the original post.

If you feature a photo, it may not be accompanied by the project tutorial or recipe, whether in my own words as it originally appears or paraphrased by you. This also includes personal sharing on social media and Pinterest. Publishing multiple photos from a project, or including instructions with an accompanying photo are not permitted and you will be asked to remove them.

I love to share my projects, and my tutorials, recipes, and e-books are ALL free for your personal use. However, photos and ideas that are published to this site are my protected intellectual property. You may print them at home, but please do not copy or distribute them. I also allow all designs to be made and sold at fundraisers, craft fairs, etc. If you are selling a piece made from one or more of my free tutorials in your online shop, I require that you use your own, original photography, and include a link back to my website to credit me as the designer.

I hope you enjoy what you read here, and please be fair when you share!

Reader Interactions

Comments

  1. stolen jewelry says

    01/16/2013 at 9:42 pm

    I am planning to do like this on my own. Thanks for the tutorial anyways.

    Reply
  2. jelly andrews says

    01/02/2013 at 5:45 am

    So cute! I love this DIY idea. Thanks for sharing it.

    Reply
  3. Full Circle Creations says

    07/12/2012 at 11:33 pm

    So cute! Thanks for sharing!

    Holly

    Reply
  4. Candace Jedrowicz says

    07/11/2012 at 2:20 pm

    I love the colors you chose! Lovely work!

    Reply
  5. Maureen Hayes says

    07/11/2012 at 3:02 am

    I am honored to be your friend! I still need help learning to tie knots, especially the overhand knot! This is a beautiful anklet, I wanna make one, or buy he from you! :-)

    Reply
  6. Melanie says

    07/11/2012 at 2:30 am

    Another cute one!!

    Reply
  7. Altair Astor says

    07/11/2012 at 1:24 am

    wow! so happy to have found your blog from the blog hop. new follower via GFC. Would love if you can check out and hopefully follow :)my blog!

    That Chief's First Lady
    http://inhighheelsanddogtags.blogspot.jp/

    Reply
  8. Tricia Tennery says

    07/11/2012 at 1:19 am

    Love these, can't wait to make them with my daughter!

    xoxo

    Reply
  9. Melissa Enault says

    07/10/2012 at 10:47 pm

    Thanks for linking up at the GFC Blog Hop today!!

    Reply
  10. Evelyn says

    07/10/2012 at 10:15 pm

    I love this, I used to wear anklets all the time. I can do this:)

    Reply
  11. Jen says

    07/10/2012 at 4:28 pm

    This turned out really cute! I'll be posting a link to your project on my FB page so people can come check it out!

    Reply
  12. Morena Hockley says

    07/10/2012 at 2:57 pm

    Very pretty! I bought some hemp cord at Marshalls so I can finally make ome of your bracelets. I can't wait to try this one!

    Reply
  13. Terry says

    07/10/2012 at 12:21 pm

    I love this one too. So summery and sweet. I love anklets too, but never wear them. Now I have the perfect excuse – to give your tut a try. (and thanks for the shoutout)

    Reply

Trackbacks

  1. Easy Best Friend Forever Bracelets - The Inspiration Network says:
    11/03/2013 at 8:01 am

    […] you would like some other ideas for friendship bracelets, Adrianne at Happy Hour Projects has some great […]

    Reply

Leave a Reply Cancel reply

Your email address will not be published. Required fields are marked *

Primary Sidebar

Hello, and welcome! I'm Adrianne, an artist, author, designer, and blogger in mid Michigan. I work from home, chase my two kids, and this once-city-girl is learning how to care for chickens and adjusting to life out in the country. I have a compulsion for daily creativity... sometimes it's jewelry-making, paper crafting, metal stamping, mixing and baking, or giving new life to recycled items. But with 2 young kids, time is short! My goal here at Happy Hour Projects is to share projects and tips that you can do in an hour or less. The ideas you find here are designed to add a little creativity in your day, no matter how much (or how little) time you have!

BUY MY BOOKS!

Copyright © 2026 Happy Hour Projects on the Brunch Pro Theme