• Skip to primary navigation
  • Skip to main content
  • Skip to primary sidebar

  • home
  • about adrianne
  • buy the books
    • DIY T-Shirt Crafts (2015)
    • DIY Stamped Metal Jewelry (2016)
    • Rock Painting for Beginners (2019)
  • videos
  • crafts
    • diy beauty projects
    • kids’ crafts
    • paper craft projects
    • polymer clay
    • sewing projects
  • jewelry
    • bracelet projects
    • earring projects
    • necklace projects
    • jewelry tools & supplies
  • metal stamping
    • beginners’ tutorial
    • video tutorial
    • project ideas
    • metal stamping supplies
  • recipes
    • cocktail recipes
    • appetizers
    • main and side dishes
    • sweets and treats
  • by season
    • birthdays
    • new year
    • valentine’s day
    • st. patrick’s day
    • easter and spring
    • mother’s day
    • patriotic
    • fall
    • halloween
    • christmas
    • thanksgiving
  • privacy

Happy Hour Projects logo

01/30/2014

How To Make Mod Podge Paper Beads

Did you make paper beads as a kid?  I loved cutting up magazines to make my own beads.  I was thinking back on it recently, and decided I wanted to re-visit the classic craft.  I have a book that I wrecked the binding on that won’t hold its pages anymore, so I’ve been repurposing it for crafts, little by little.  I thought it would be fun to turn a book I love into one of my other loves: handmade jewelry.  With a bit of Mod Podge, I took paper and made my own beads!

Mod Podge Paper Beads at www.happyhourprojects.com

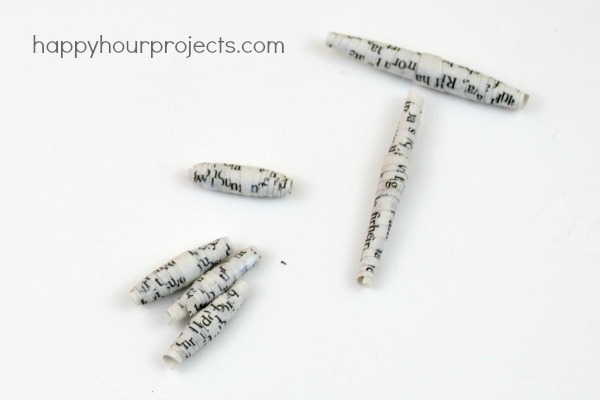
I know, they don’t look like much.  Yet.  But beads always become something better!

What you will need to make paper beads:

Mod Podge Paper Beads at www.happyhourprojects.com

  • Paper and scissors
  • Mod Podge and brush
  • Bamboo skewer

You can experiment with the shape and size you cut your papers.  I made mine the length of a book page (what is that, like 8 inches?  I think?) and 3/4 inch wide.  (Well, I tried 1-1/2 inches first but it wasn’t fat enough.)  But test this out for yourself, and see what you like!

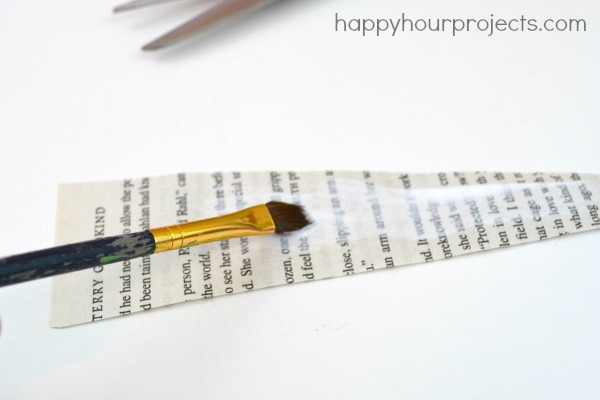
They’re simple to make.  Brush it with a bit of Mod Podge.  Not right at the widest point, but about an inch or so in.  You want to focus your Mod Podge toward the narrower end of the triangle.

Mod Podge Paper Beads at www.happyhourprojects.com

Now, wrap your triangle round the bamboo skewer.  Start it at the widest part.  Roll it up, and it will start to take on an oval shape.  It’s okay if the Mod Podge starts squeezing out – we’re going to coat it thoroughly at the end anyway.

Mod Podge Paper Beads at www.happyhourprojects.com

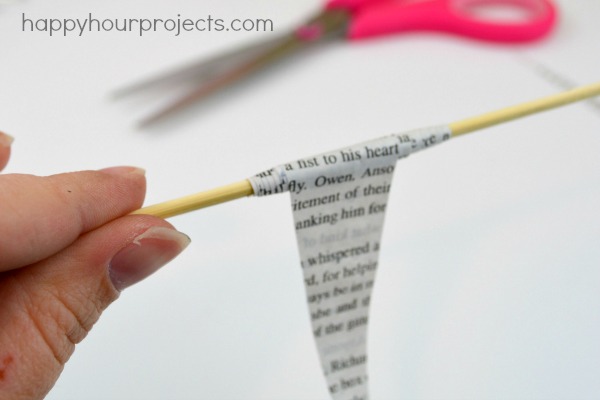
When it’s all rolled, give it a final coat of Mod Podge to seal it up.  Slide it off the skewer, and allow it to dry.  Overnight works well!

Mod Podge Paper Beads at www.happyhourprojects.com

Using different colors and different lengths of paper will give you different looks – but this is the basic technique you will use.  It’s super easy – I used to make these when I was 8 – so feel free to get your kids involved!

When you’re done, you can string them into basic jewelry.  Or…

…you can stay tuned to see how I turned them into this wire-wrapped bracelet. ;)

Mod Podge Paper Beads at www.happyhourprojects.com

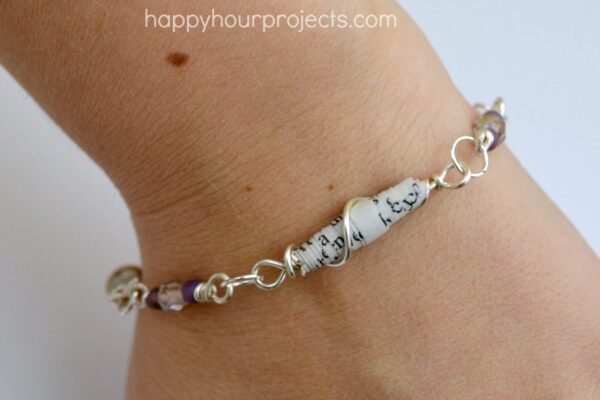
I’ll be sharing that in the next few days!  But I’ll give you a chance to make up some beads of your own, first.  Have fun!

Adrianne Signature


Filed Under: Jewelry, Paper Crafts, Tutorials Tagged With: 10-minute project, beads, book crafts, book page crafts

copyright policy and terms of use

I love it when you love my work! All tutorials and photos published at Happy Hour Projects are copyrighted. If you would like to feature my tutorial on your website or share it on your social media you may use one photo to feature, as long as you provide a link back to the original post.

If you feature a photo, it may not be accompanied by the project tutorial or recipe, whether in my own words as it originally appears or paraphrased by you. This also includes personal sharing on social media and Pinterest. Publishing multiple photos from a project, or including instructions with an accompanying photo are not permitted and you will be asked to remove them.

I love to share my projects, and my tutorials, recipes, and e-books are ALL free for your personal use. However, photos and ideas that are published to this site are my protected intellectual property. You may print them at home, but please do not copy or distribute them. I also allow all designs to be made and sold at fundraisers, craft fairs, etc. If you are selling a piece made from one or more of my free tutorials in your online shop, I require that you use your own, original photography, and include a link back to my website to credit me as the designer.

I hope you enjoy what you read here, and please be fair when you share!

Reader Interactions

Comments

  1. hack delta says

    09/19/2025 at 1:31 pm

    This is such a cool idea! I love how you’re repurposing an old book into something new. Can’t wait to see how the wire-wrapped bracelet turns out!

    Reply
  2. basket random says

    10/07/2024 at 12:44 am

    What I like most about this article is the combination of detailed instructions and encouragement for creativity. The author goes beyond just instructions and suggests many ways to turn paper beads into unique jewelry.

    Reply
  3. Cuphead says

    02/14/2023 at 8:41 pm

    I wonder how long these papers can last with water?

    Reply
  4. Jennifer says

    05/08/2014 at 8:55 am

    Love the wrapped bead! I’ve been busy making 5mm “Pandora-style” beads for a few weeks, but this makes me want to switch things up!

    Reply
  5. Marilyn says

    01/30/2014 at 2:04 pm

    I used to LOVE making those beads when I was a kid….I usually used old magazines or gum wrappers!

    Reply
  6. Judith W says

    01/30/2014 at 11:00 am

    why bother with messy Modge Podge when a glue stick slapped on the very end works just as well; then some quick varnish afterwards. Voila.

    Reply
  7. Terry says

    01/30/2014 at 9:29 am

    I was just at a local ladies craft group and someone shared this. I am 55 years old and had never seen this before! Chalk it up to my Air Force Brat childhood of moving so much. I am so happy to see it now and absolutely adore your bracelet!

    Reply

Leave a Reply Cancel reply

Your email address will not be published. Required fields are marked *

Primary Sidebar

Hello, and welcome! I'm Adrianne, an artist, author, designer, and blogger in mid Michigan. I work from home, chase my two kids, and this once-city-girl is learning how to care for chickens and adjusting to life out in the country. I have a compulsion for daily creativity... sometimes it's jewelry-making, paper crafting, metal stamping, mixing and baking, or giving new life to recycled items. But with 2 young kids, time is short! My goal here at Happy Hour Projects is to share projects and tips that you can do in an hour or less. The ideas you find here are designed to add a little creativity in your day, no matter how much (or how little) time you have!

BUY MY BOOKS!

Copyright © 2026 Happy Hour Projects on the Brunch Pro Theme