
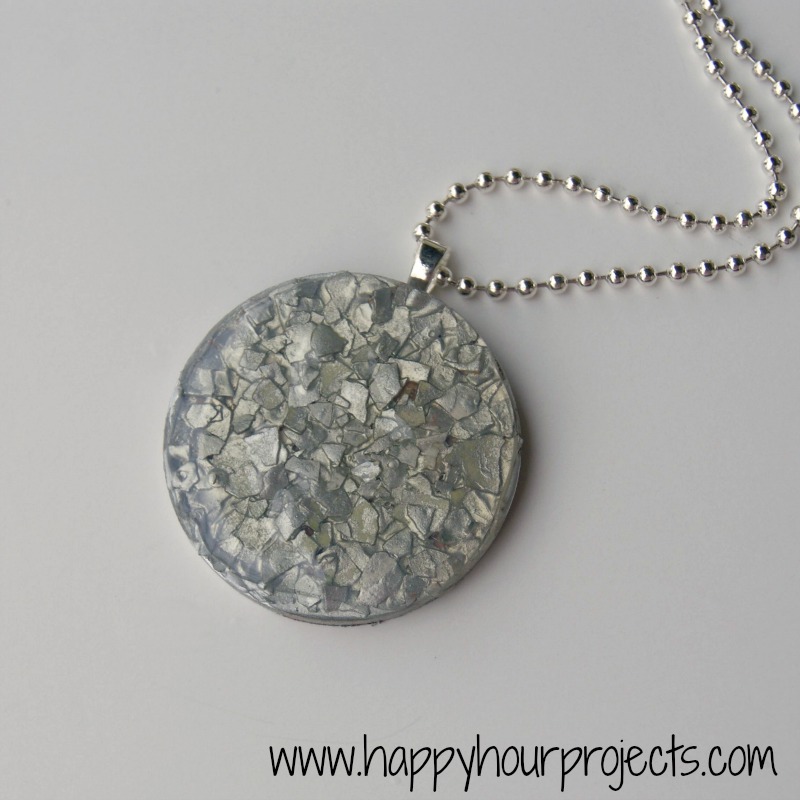
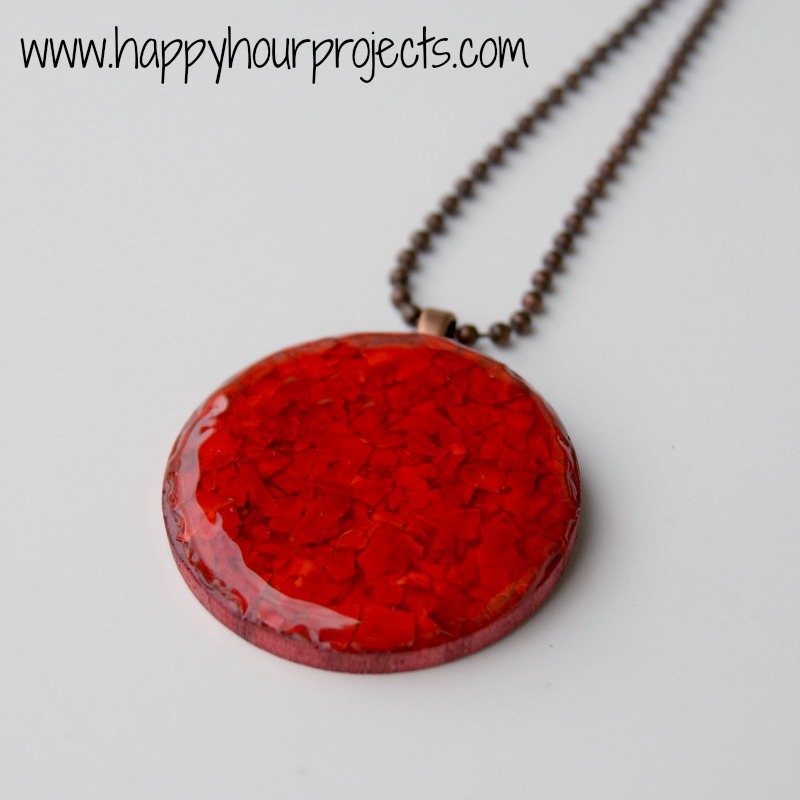
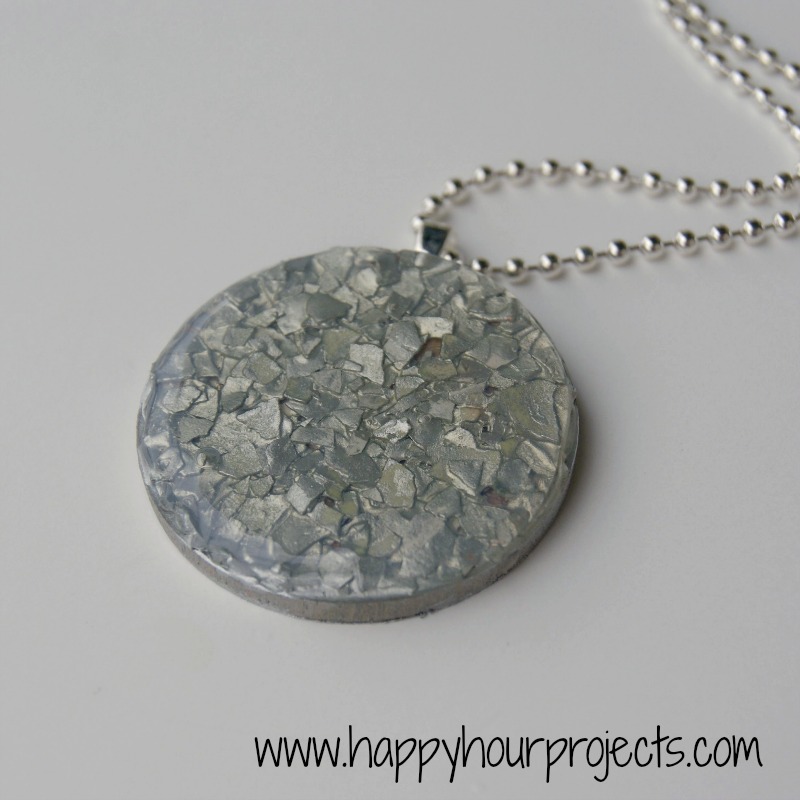
In fact, it worked so well, I made two. A silver one, and a fun one in red.
What you’ll need:
Eggshell (one egg is plenty, you could make 6 or 8 from one egg)
Dimensional Glaze like Mod Podge Dimensional Magic
Wooden Tags
Alcohol inks in your choice of colors (available in the scrapbook/stamping section of most craft stores)
Toothpick for arranging
Bail, chain, and heavy-duty adhesive (like E6000)
I started soaking my eggshell in hot water so the membrane could be removed. It needs about an hour – maybe more if your eggs are very fresh. You’ll know when it’s long enough – when you crack the shell, you should be able to peel the membrane off the inside of the piece of your shell in somewhat of a sheet. You can just rub off anything that doesn’t peel, as long as it’s soaked properly.
While my shell was soaking, I browsed through my tags. I honestly don’t even know when or what I bought these for. Do you ever have that, where you find surprise supplies? ;)

Once my shell was clean and dry, I gave my tag a coat of Dimensional Magic. You can spread it out to the edges with a toothpick. It’s very much like glue, except that it dries much more slowly, making it ideal to work with when you’re arranging your eggshell pieces.
I found the easiest thing to do was honestly to crumble the eggshell into tiny pieces in my hand, and sprinkle the pieces onto the base. This is WAY faster than trying to piece it precisely. It does mean you’ll end up with some overlap, and some pieces will land right side up and some upside down. I happen to like how that looks, but you may want to do it differently to suit your own tastes. For the very edges, dip a toothpick in the glaze, and you can use it to pick up and place pieces on the edge. Apparently I was really into it at this point because I don’t have a photo – fortunately, it’s pretty self-explanatory.
Let that dry. It will be at least a few hours, or you can leave it overnight. Then, add a few drops of alcohol ink. I wanted to try out silver.

You can brush it on for an even coat.

Get the edges too, and when it’s dry enough, the back as well. I wasn’t sure how I liked the silver at first, because it’s a very even, opaque color. So there’s no variation in shades. I tried red as well, and I liked that a little better:
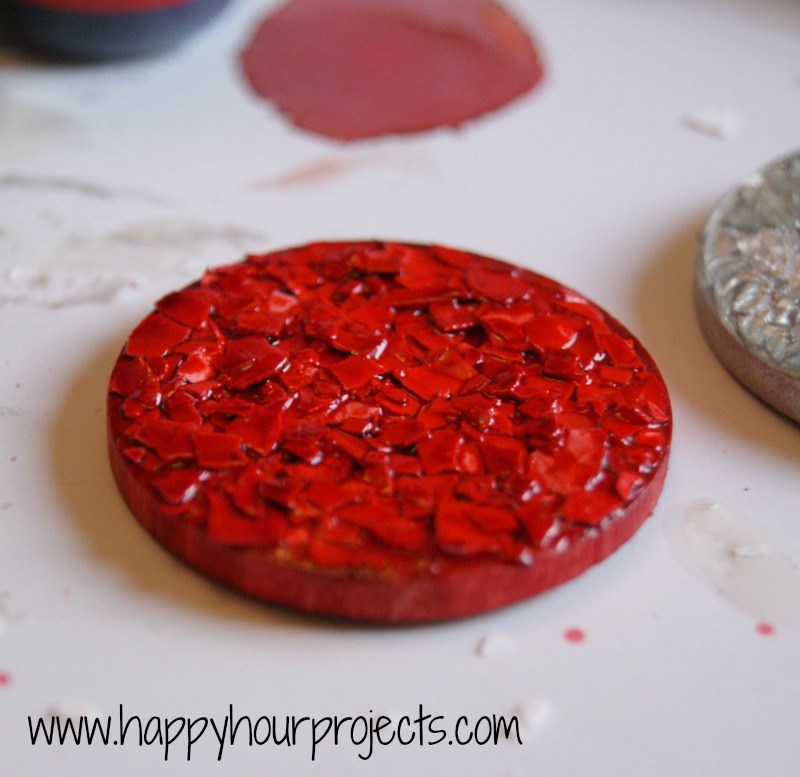
The next step once the ink is dry (which only takes just a few minutes) is to give the top another coat of glaze. I just squirt it on, and use a toothpick to spread it for even coverage. If you encounter any bubbles, either pop them or move them to the edge of your base. Any bubbles will dry that way.

I let that dry overnight, but a few hours is probably sufficient. I worked on these a little at a time whenever I had a couple minutes. It goes fast – it just needs to dry.
Then, all you will need to do is add a bail. You could also drill a hole here instead, and use a jump ring, but that would require getting out the tools. So I just used a dot of E6000 to glue the bail on. (I used silver for the silver one, and copper on the red one for a different look.)

Then once that dries, you can just string it on a chain and it’s ready to wear!
So which color do you like better? I can’t decide!
I link up to these great parties! 
I always knew there was something I could do besides use those shells in the garden. I wonder what (or if it would work) to have a complimentary color added, by taking a few shell chips and coloring those and then dotting over the fully painted but not mode podged yet
I think I will try that.
Just gave you a shout out..Happy National Craft Month!
http://4you-withlove.blogspot.com/2013/03/march-is-national-craft-month.html
Beautiful! So different and original! Thanks for sharing!
What a great idea! I went and bought some ink, and I plan on using little clay shapes. Gonna make some aqua colored ones. Can’t wait! One stupid question though – raw egg shells or ones from hard boiled eggs? I know you say to soak in hot water to peel off the membranes but does that kill salmonella etc as well? Or am I thinking about it too much? Either way, thanks for sharing and thanks for the inspiration!
Okay, this is something I need to try my alcohol inks out on! Thanks for the inspiration! :D
Marilyn
The mosaic effect of the eggshells is so cool! I have no idea how you came up with that, it's so creative! I'd totally try this if I weren't jewelry challenged. I can just imagine you trying to make matching earings now, cuz you alrady have the bracelets!
Thanks so much for taking the time to link up at my Greener linky party, it means so much to me!!
I love them both!! Genius, I say!! :)
Oh wow, I love them both! The red is just fabulous and striking but the silver is very classy. Thanks for sharing at The Fun In Functional!
I'm loving the red one! :o)
Thanks for partying with us @ Keep Calm & Link Up this week!
xo, Meredith @www.waittilyourfathergetshome.com
Thanks for sharing at the Pomp Party! =)
Love the silver one, and can't believe it's made from egg shells. Brilliant!
Truly creative and both colors are so good.
these look great! i like both of the colors…..the final result-is it rough in texture or does it come out smooth on the top?
Wow! I really like how they turned out. I've never really ventured into jewelry making, but I like the idea of the dimensional glaze and alcohol inks you used. Nice work!
Jess @ tupelo creative
I love the red one! They are both very pretty!
I LOVE the red one. These are the coolest things i've seen yet. I seriously am in shock that they're made with eggshells. SO creative!
OOOooo so pretty!! I LOVE the red one! Still can't believe these are out of eggshell!
Those are so awesome! I love the silver one! (Only because I have nothing to wear the red one with!)
Love it! I totally need to make some of your jewelry!
These are stunning! Great idea – never heard of it before!
Karen @ quintonwench