• Skip to primary navigation
  • Skip to main content
  • Skip to primary sidebar

  • home
  • about adrianne
  • buy the books
    • DIY T-Shirt Crafts (2015)
    • DIY Stamped Metal Jewelry (2016)
    • Rock Painting for Beginners (2019)
  • videos
  • crafts
    • diy beauty projects
    • kids’ crafts
    • paper craft projects
    • polymer clay
    • sewing projects
  • jewelry
    • bracelet projects
    • earring projects
    • necklace projects
    • jewelry tools & supplies
  • metal stamping
    • beginners’ tutorial
    • video tutorial
    • project ideas
    • metal stamping supplies
  • recipes
    • cocktail recipes
    • appetizers
    • main and side dishes
    • sweets and treats
  • by season
    • birthdays
    • new year
    • valentine’s day
    • st. patrick’s day
    • easter and spring
    • mother’s day
    • patriotic
    • fall
    • halloween
    • christmas
    • thanksgiving
  • privacy

Happy Hour Projects logo

10/29/2012

Polymer Clay Gift Tags

I love dressing up packages.  At Christmas time, every gift is special enough to spend the time on making beautiful, to me.  I’ve accumulated a few fun tie-ons in my little collection to make gifts fun.  Some of may favorites are when you see the tiny ornaments printed with someone’s name.  I have a couple that say “Kevin”, and “Mom” and “dad” are easy to find too.  You know what you can’t find?  “Adrianne”.  Or “Raya”.  So the logical solution?  I will make my own!

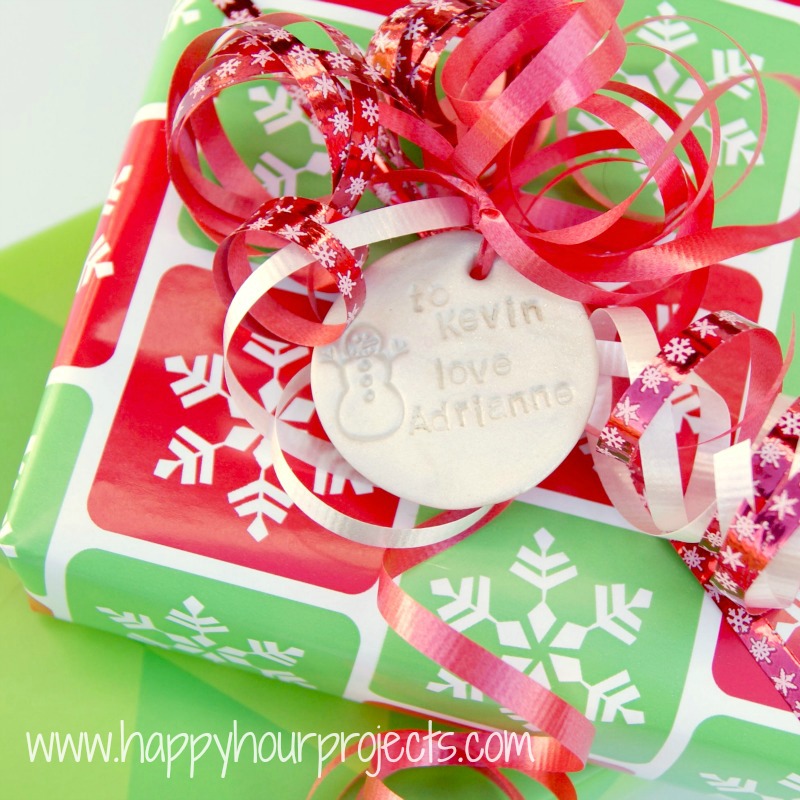
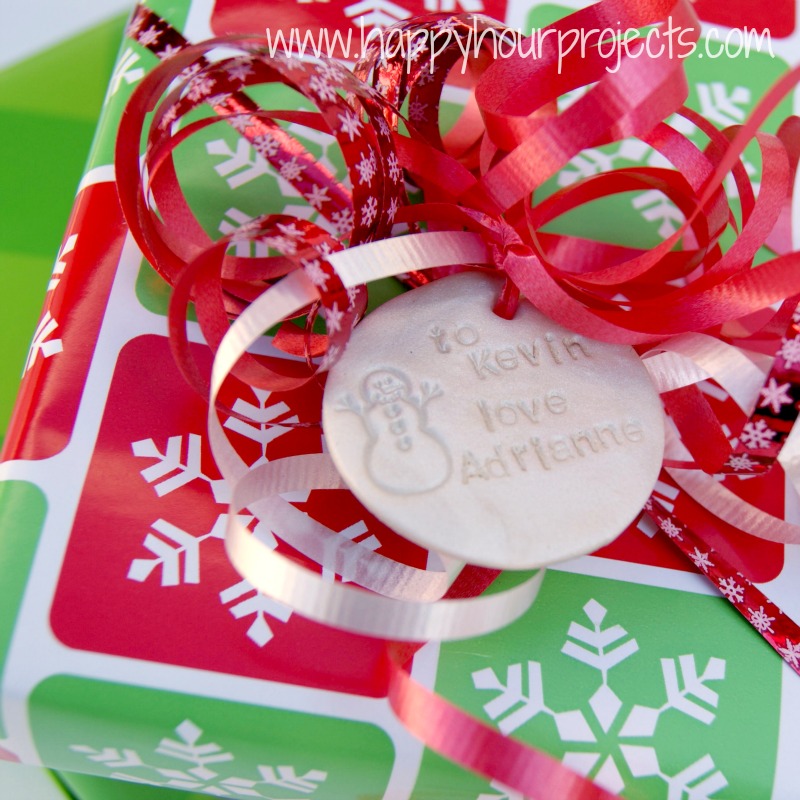
These were made from polymer clay, small cutters and stamps.  If you already have stamps, this is a very inexpensive project.  I am constantly looking for reasons to get out my metal stamps, personally!  But if you don’t have any, you can also use rubber stamps (I used both, for this project) or you can just draw or write with a sharpie marker on it after it’s baked, too.

One thing I note every time I show you a clay project – do not inter-mix your clay supplies and food supplies.  You can certainly use cookie cutters, rolling pins, baking sheets, etc – especially if you find them at a thrift store or yard sale – baking supplies work great!  But once you use them for clay, they are now your clay supplies and should not go back to your baking drawer.

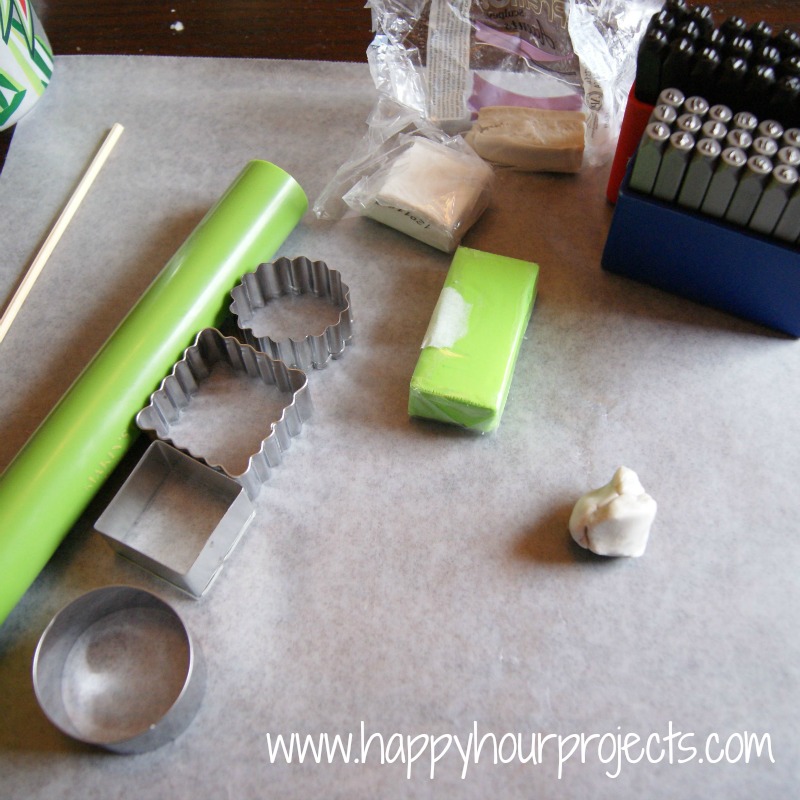
You make these just like cookies, really!  Just roll out your clay (I work on wax paper to protect my table) to about 1/4 inch thick.  Especially if your stamp is larger, it can really squish your clay, so it’s best to stamp your design and then cut it.

I stamped with some holiday-themed stamps, and I also used my metal stamps to spell out a few things.  If you are using metal stamps, you may want to keep a paper towel on-hand to wipe off your stamps because they can retain oil, which can be transferred to your clay.  What you don’t want to do is wash them (unless you dry them very thoroughly) because without the protective oil, they can rust – which is worse. :)

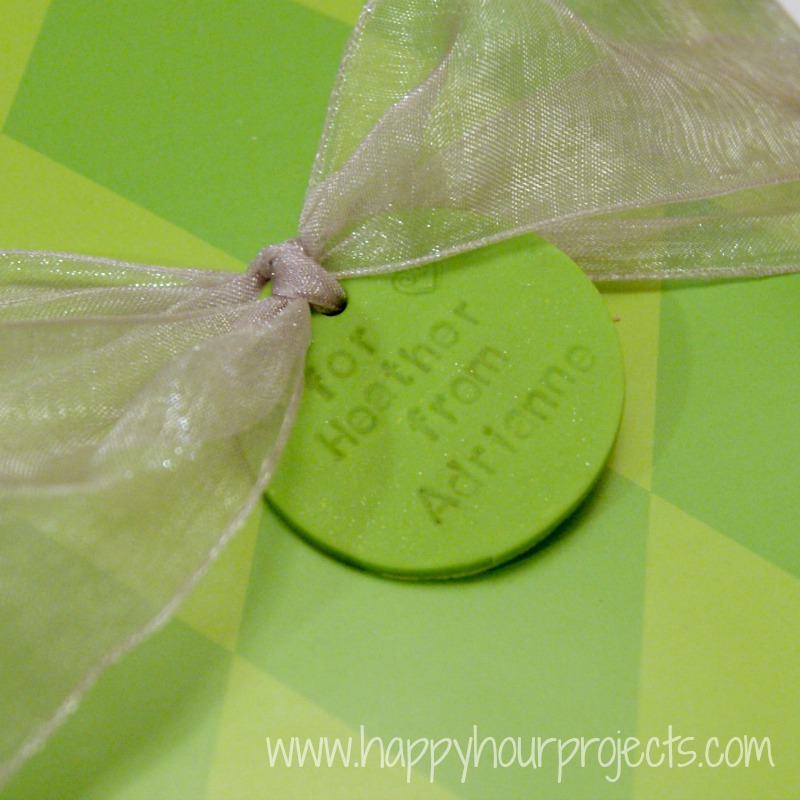
There will certainly be gifts for Raya, and for my husband – so it’s easy do do up a few in advance.  I know a few generic to- and from- tags will come in handy as well – you can just write the names in with a fine-tipped sharpie marker like you would on a paper tag.  I picked pretty neutral colors – except that bright green, LOL.  It matches a few rolls of wrapping paper we already have, so I know I can use it.  Polymer clay comes in lots of colors including fun metallics – you should be able to match just about anything!

And you don’t have to limit yourself to Christmas themes, of course – I sent this little tag off on a gift to a blog-friend of mine a couple weeks ago.

The nice thing about working with clay is that if you goof – you can start all over.  Once you like the way your tags look, be sure to poke a decent-sized hole in them (I used a bamboo skewer) and then you can just bake them according to the package directions.

I made these fairly small, but if your stamps are bigger, you can absolutely make the tags bigger.  Polymer clay is pretty tough, so it should hold up all season and beyond!

Filed Under: Christmas, Polymer Clay, Tutorials Tagged With: gift tags, ornaments, personalized

copyright policy and terms of use

I love it when you love my work! All tutorials and photos published at Happy Hour Projects are copyrighted. If you would like to feature my tutorial on your website or share it on your social media you may use one photo to feature, as long as you provide a link back to the original post.

If you feature a photo, it may not be accompanied by the project tutorial or recipe, whether in my own words as it originally appears or paraphrased by you. This also includes personal sharing on social media and Pinterest. Publishing multiple photos from a project, or including instructions with an accompanying photo are not permitted and you will be asked to remove them.

I love to share my projects, and my tutorials, recipes, and e-books are ALL free for your personal use. However, photos and ideas that are published to this site are my protected intellectual property. You may print them at home, but please do not copy or distribute them. I also allow all designs to be made and sold at fundraisers, craft fairs, etc. If you are selling a piece made from one or more of my free tutorials in your online shop, I require that you use your own, original photography, and include a link back to my website to credit me as the designer.

I hope you enjoy what you read here, and please be fair when you share!

Reader Interactions

Comments

  1. Ruth says

    12/04/2012 at 8:07 am

    These are awesome. What a great way to dress up and personalize a package.
    I voted for you at 4 You With Love.
    This is my first time stopping by.
    Ruth

    Reply
  2. Marilyn says

    12/03/2012 at 5:32 pm

    I think this is such a great project because you can actually re-use these tags from year to year…or you could turn them into ornaments after the packages are opened. Brilliant! Thanks for sharing at the homemade holiday party.

    Marilyn
    4you-withlove.blogspot.com

    Reply
  3. fiona anderson says

    10/31/2012 at 11:02 pm

    So cute, absolutely love these – thanks for the tutorial.

    Reply
  4. Jessi says

    10/31/2012 at 9:38 pm

    Awesome, how cute are those! I can never find my name either, all of the pre-named things say “Jessica” :-( Thanks for sharing at The Fun In Functional!

    Reply
  5. Crystelle Boutique says

    10/31/2012 at 5:42 pm

    What a fun idea! Would be great to do with the kiddos!

    Happy Halloween! hugs ~ Crystelle
    http://www.crystelleboutique.com

    Reply
  6. MrsFoxsSweets says

    10/30/2012 at 5:48 pm

    These look amazing and such a neat keepsake too!

    Reply
  7. runtspickins says

    10/30/2012 at 2:32 pm

    What a great idea!!

    Reply
  8. Ami Allison says

    10/30/2012 at 2:13 pm

    OH!! I love these! They look awesome and so sweet!!

    Reply
  9. Nowl says

    10/30/2012 at 5:28 am

    lovely

    Reply
  10. Monica says

    10/30/2012 at 1:43 am

    love these! I too have metal stamps…but was surprise how difficult they were to use for my purposes…polymer clay looks way more fun to work with! Thanks for sharing…they look great!

    Reply
  11. MelissaKaylene says

    10/29/2012 at 5:09 pm

    LOVE this! Pinning it now :)
    Melissa

    Reply
  12. Lynne says

    10/29/2012 at 4:58 pm

    Adorable….and I love Kadie's idea that the person getting the gift now has an ornament too.

    Reply
  13. Kadie says

    10/29/2012 at 3:20 pm

    How clever!! I love the idea and the tags! You could even take the tags and use them for ornaments the next year. Great Job.:)

    Reply
  14. Scarlet Bluefield says

    10/29/2012 at 12:16 pm

    I can never find my name, either. I did, once, on a ceramic pin, and I bought it immediately :) Love the idea–thanks for sharing.

    Reply
  15. Bonnie and Trish says

    10/29/2012 at 11:42 am

    This is so adorable! A great winter break project for the kiddos, too! Have a good one!

    Take care,

    Trish

    Reply
  16. Sarah Carletti says

    10/29/2012 at 11:13 am

    Such a cute idea!

    Reply
  17. Cocalores says

    10/29/2012 at 10:57 am

    Cute! What kind of stamps did you use for the snowflakes and such? “Normal” stamps?

    Reply
  18. Amanda says

    10/29/2012 at 10:32 am

    This is definitely on my to do list, they look great!

    Reply

Trackbacks

  1. 25 Creative Gift Tags - Catholic Sprouts says:
    07/25/2022 at 1:09 am

    […] Polymer Clay Gift Tags from Happy Hour Projects […]

    Reply
  2. 60 No Kiln Ceramic Craft Concepts – Polymer Clay | Pure Profitz says:
    07/03/2021 at 2:49 am

    […] Polymer Clay Gift Tags […]

    Reply
  3. 60 No Kiln Ceramic Craft Ideas – Polymer Clay says:
    07/01/2021 at 5:39 pm

    […] Polymer Clay Gift Tags […]

    Reply
  4. 60 No Kiln Ceramic Craft Ideas – Polymer Clay – Household Attire says:
    07/01/2021 at 2:58 pm

    […] Polymer Clay Gift Tags […]

    Reply
  5. 10 Amazing Christmas Gift Tags Your Can Make With Clay – Polymer Clay says:
    07/01/2021 at 1:31 am

    […] Polymer Clay Gift Tags […]

    Reply
  6. 12 ötletes diy karácsonyi ajándékkísér? kártya | Pink & White says:
    11/05/2018 at 10:28 am

    […] Happy Hour Projects […]

    Reply
  7. 30+ Amazing DIY Christmas Gift Tags - DIYCraftsGuru says:
    10/25/2018 at 5:20 am

    […] Happy Hour Projects […]

    Reply
  8. Amazing Homemade Christmas Gift Tags - DIYCraftsGuru says:
    11/23/2016 at 6:03 am

    […] Happy Hour Projects […]

    Reply
  9. DIY Christmas Gift Tags says:
    11/24/2015 at 8:45 am

    […] Happy Hour Projects […]

    Reply
  10. 14 Printable + DIY Gift Tags - Moms and Crafters says:
    11/03/2015 at 8:18 am

    […] 12. Polymer Clay Gift Tags by Happy Hour Projects are  simply incredible! It’s easy to involve kids with this one too, and not too expensive to make.  […]

    Reply
  11. 34 Festive and Fun DIY Christmas Gift Tags! says:
    11/03/2015 at 4:54 am

    […] Using metal stamps, you can style some clay gift tags and create souvenir accents for your family and friends’ presents. Check out the details at Happy Hour Projects. […]

    Reply
  12. 45 Christmas Gift Wrap Ideas - Sweet Tea & Saving Grace says:
    06/20/2014 at 1:18 pm

    […] Washi Tape Tags  |  2 – Magazine Tags  |  3 – Metal Stamped Tags  |  4 – Polymer Clay  |  5 – Toothpick Trees  |  6 – Ornament Frame  |  7 – Handmade Gift  | […]

    Reply
  13. 25 Creative Gift Tags - Do Small Things with Love says:
    12/21/2013 at 5:58 am

    […] Polymer Clay Gift Tags from Happy Hour Projects […]

    Reply
  14. Top 10 DIY Christmas Gift Tags - Top Inspired says:
    12/04/2013 at 4:48 pm

    […] DIY Project and Photo credit to happyhourprojects.com […]

    Reply
  15. 26 Wonderful DIY Christmas Gift Tags says:
    12/01/2013 at 10:37 am

    […] polymer clay gift tags (via happyhourprojects) […]

    Reply
  16. 26 Cool DIY Christmas Gift Tags says:
    11/28/2013 at 1:04 pm

    […] polymer clay gift tags (via happyhourprojects) […]

    Reply
  17. 18 Original DIY Christmas Gift Wrap Ideas says:
    11/20/2013 at 2:18 pm

    […] Source […]

    Reply
  18. A Crafter’s Staple: Sharpie® Markers! says:
    09/23/2013 at 2:40 pm

    […] also recommend them for projects like my polymer clay gift tags – you can stamp and decorate lots of fun and colorful  tags with inexpensive polymer […]

    Reply
  19. Polymer Clay Gift Tags For Valentine’s Day says:
    01/15/2013 at 6:00 am

    […] at Christmas time, I made up some simple polymer clay gift tags.  They were a hit with my family, everyone saved them. So as I was playing with yesterday’s […]

    Reply
  20. AliLily – DIY Gift Wrapping Ideas Round Up and Link Party says:
    11/20/2012 at 11:35 am

    […] bit proud of my lil package!! Source list… 1. AliLily 2. Don’t Disturb This Groove 3. Happy Hour Projects 4. Whipper Berry 5. Two Shades of Pink 6. Make it Do 7. Purdy Personalized 8. The Frugal Girls […]

    Reply

Leave a Reply Cancel reply

Your email address will not be published. Required fields are marked *

Primary Sidebar

Hello, and welcome! I'm Adrianne, an artist, author, designer, and blogger in mid Michigan. I work from home, chase my two kids, and this once-city-girl is learning how to care for chickens and adjusting to life out in the country. I have a compulsion for daily creativity... sometimes it's jewelry-making, paper crafting, metal stamping, mixing and baking, or giving new life to recycled items. But with 2 young kids, time is short! My goal here at Happy Hour Projects is to share projects and tips that you can do in an hour or less. The ideas you find here are designed to add a little creativity in your day, no matter how much (or how little) time you have!

BUY MY BOOKS!

Copyright © 2025 Happy Hour Projects on the Brunch Pro Theme