
The inspiration for this one is pretty cool – a friend of mine is collecting craft donations for a booth at a local street fair for a fundraiser she is organizing. The young lady who the fundraiser is for likes butterflies – so I thought if for any reason my contributions didn’t sell, perhaps she’d like to keep them. So this piece is being donated this weekend, along with some jewelry, and I really hope it helps just a little. It’s nice to know that my passion for creating might make a little difference for someone!
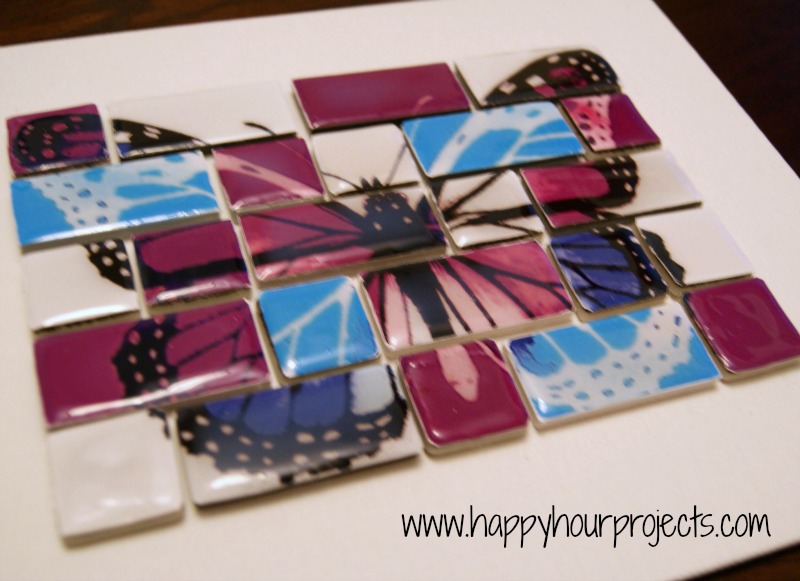
First of all – I’m not going to go into full detail here. If any of these steps are unclear, check out my original mosaic post for a more detailed explanation. What I’m going to highlight today are things that worked better than the first time around. And the first difference is that instead of using craft mosaic tiles, this time I went to Lowe’s for my tiles. WOW, do they have an excellent selection.
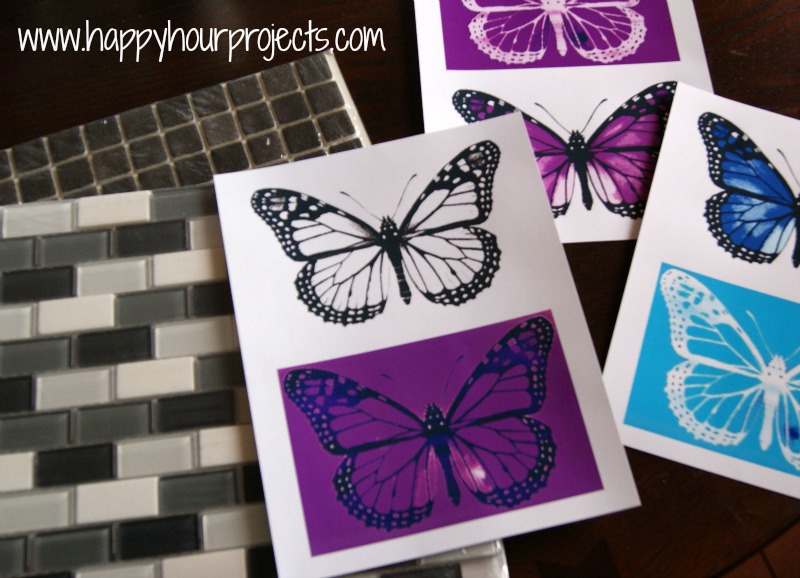
The prices are pretty similar, but the quantities are much bigger, so if you’re making a larger mosaic (or several small ones) going the hardware store route is a lot more cost-effective than buying several packages of craft tiles. I wouldn’t plan on using these tiles for jewelry, because they are mounted on a mesh backing that you have to remove, so they are rough – but that makes them perfect for something like this where you glue them down. I decided to vary my sizes this time and use two different shapes of tiles – square and rectangular. Each of these big sheets of tile (well, big compared to the craft tiles) was $4 (compared to 48 – 1″ craft tiles for $5.99). The colors don’t matter because we cover them with our graphics, though I would recommend something fairly neutral or coordinated to your picture, in case a tiny edge does show through. The black and white tones worked perfectly for this project. I also printed off 6 different versions of my butterfly in blue and purple tones. I used a 5×7 graphic this time, too.
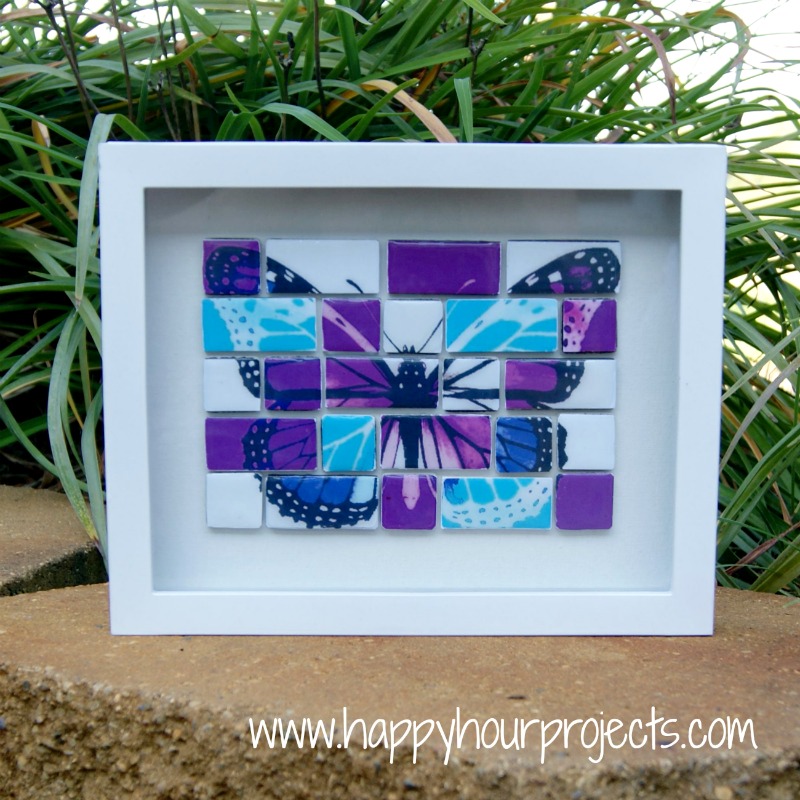
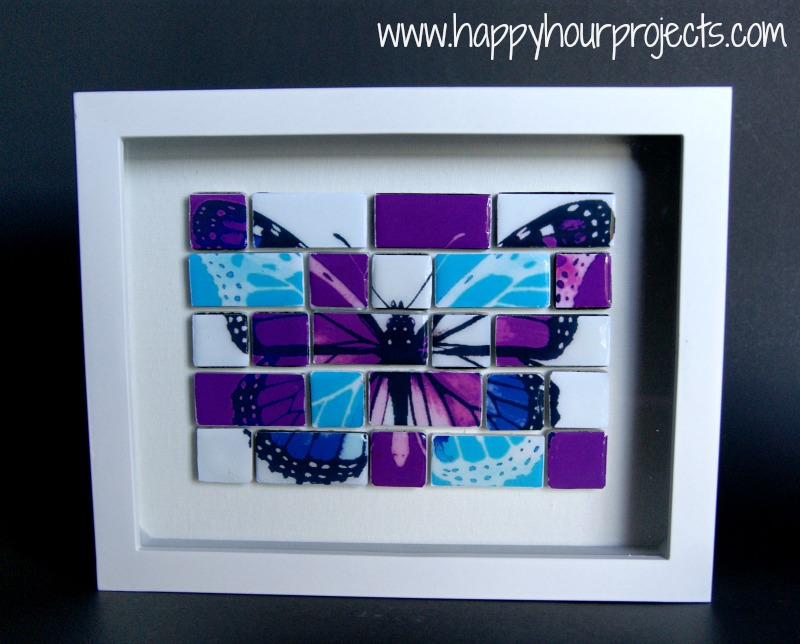
The other change I made from last time was that instead of picking up a nice wooden canvas, only to turn around and decide it needed a frame anyway, this time I got the economical canvas boards and a shadow box to put it in. I think it looks even nicer behind the extra layer of glass (though it is harder to photograph) and between the 3-pack of boards from Wal-Mart and the 3-pack of shadow boxes from Michael’s (oh – with a coupon!) – I got all three sets for less than one wooden canvas and frame. Plus, now I can still make a couple more. :) I opted for a 8×10 finished size, and the tiled area is just slightly bigger than 5×7.
The actual method is just the same as before, line up and trim all your graphics exactly the same, then switch up the colors, and Mod-Podge them onto the tops of your tiles.

When they are dry, add a coat of Dimensional Magic gloss to the tops. Let that dry overnight – it will start out cloudy, but dry clear with a shiny glazed look.
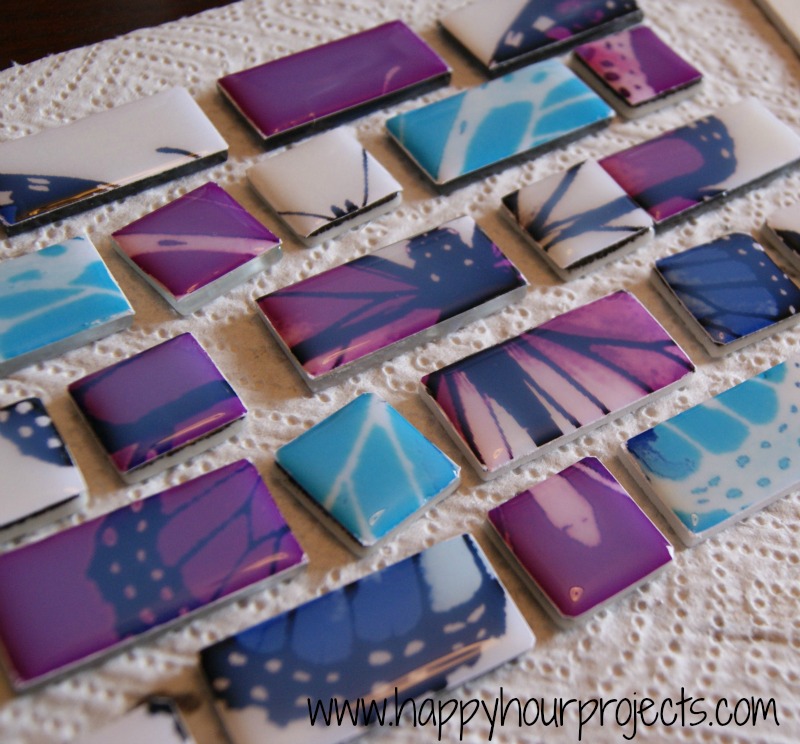
Then, use a heavy duty adhesive or superglue to attach your tiles to your canvas. I use a water-based superglue. It takes longer to dry, but it’s more forgiving if you need to re-position a tile or two, and it does dry strong.
Then, I just framed it in the shadow box!
I also made up these little butterfly necklaces:
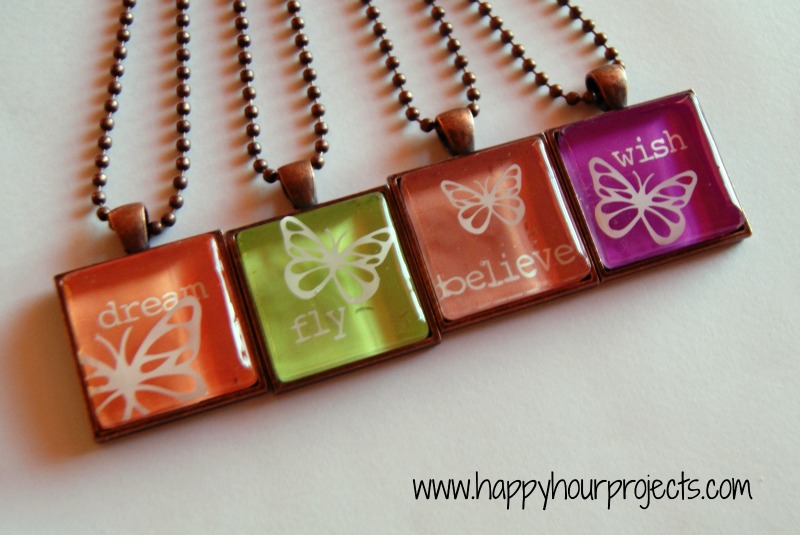
They are two-layered, which is hard to see in the photo – the words are underneath clear glass tiles, and I stuck a vinyl butterfly to the top, then glazed it with Dimensional Magic so it looks like it’s floating over the word. I mounted them into trays to make them look more finished than just a regular bail. (Nope, no tutorial for it today – maybe another day!) :)
Anyway – I hope my contribution will help just a little!
I link up to these great parties! 
Wow!!! it looks so amazing and I like your creativity too. Your imagination and the way you convert it into a form of tiles and other thing looks alive. The butterfly with beautiful colors really I want to make it. You described it, into very detailed information. Thanks a lot for sharing this information.
Please tell me where I can find the glass Mosaic butterfly tiles with the words on them …”dream” , etc that you made the necklaces with. I’m making a “gratitude” jar and want to use these.
Wow! Your mosaic looks great. Great home decoration craft, looks awesome.
I was in the process of finding the “right” art project for our school auction. This is it! Thank you!
I do have a question….how did you cut the squares of the photos so precisely? Exacto knife?
Thanks
Theresa
This is superb and absolutely creative! Thanks!
Oh my! This glass mosaic is absolutely beautiful! I love it!
Where did you find the trays for the necklaces?
Found you from {Embracing Friends} | Weekly Blog Hop. I'm a new follower. I have always liked Mosaics and I really adore the butterfly necklaces.
http://www.rockmefabulous.com/
This is so neat and beautiful! Stopping by from the We Made That Linky party :)
Love these! The mosaic and the necklaces! Beautiful work!
Oh wow, I loved that tree, but the butterfly is fantastic too! Thanks for sharing at The Fun In Functional!
I clicked on this because I love the Butterfly tile! But now I'm really loving those necklaces! They really do look so dimensional! Awesomeness on both!
Found you from the Wednesday blog hop and am now following. Can't wait to read more! You have some nice stuff, and I'm going to check out your etsy shop. I have a shop, also, at http://www.etsy.com/shop/SilverPhrase?ref=si_shop.
Check my blog out if you get a chance at http://beatnikki.blogspot.com.
Have a great day!
Nikki
BeatnikkiBlog
That is just beautiful! Thanks so much for sharing on the we made that linky!
Love it…too cute. Your newest follower from the Weds hop.
Anissa from Chasing Hailey
http://chasinghailey.blogspot.com/
I pinned it, beautiful!
I was thinking about what to say about the butterfly mosaic (which I love, pretty colours, pretty design) and then came upon those necklaces. Oh wow,…they are striking. Maybe it's the layered effect, I don't know, but I really think they are winners. Can I ask where you got the bales (is that the right word? the part that is glued on the back of the tile I mean).
GREAT post. This butterfly is beautiful. I am your newest follower over from the blog hop. Hope you have a great day.
Amanda
from http://www.mommyiscoocoo.com
How did your ever think that up….?
What a fabulous idea!
Crystelle
http://www.crystelleboutique.com/
I LOVE the new tile mosaic! Great idea to use hardware store tiles. And those necklaces are so cute! I love the floating affect! You are always so clever!
What a wonderful blog!! Thanks for stopping by mine!! It's always nice to find new blogs from welcome Wednesdays blog hop!! Thanks!!! sarah
Beautiful (as usual)! I like those necklaces too :)
Awesome!!! The butterfly mosaic is gorgeous:)
You never cease to amaze me with your creativity. Love this. I'm sure it will sell quickly at the fundraiser.
That is so cool! I love the colours