
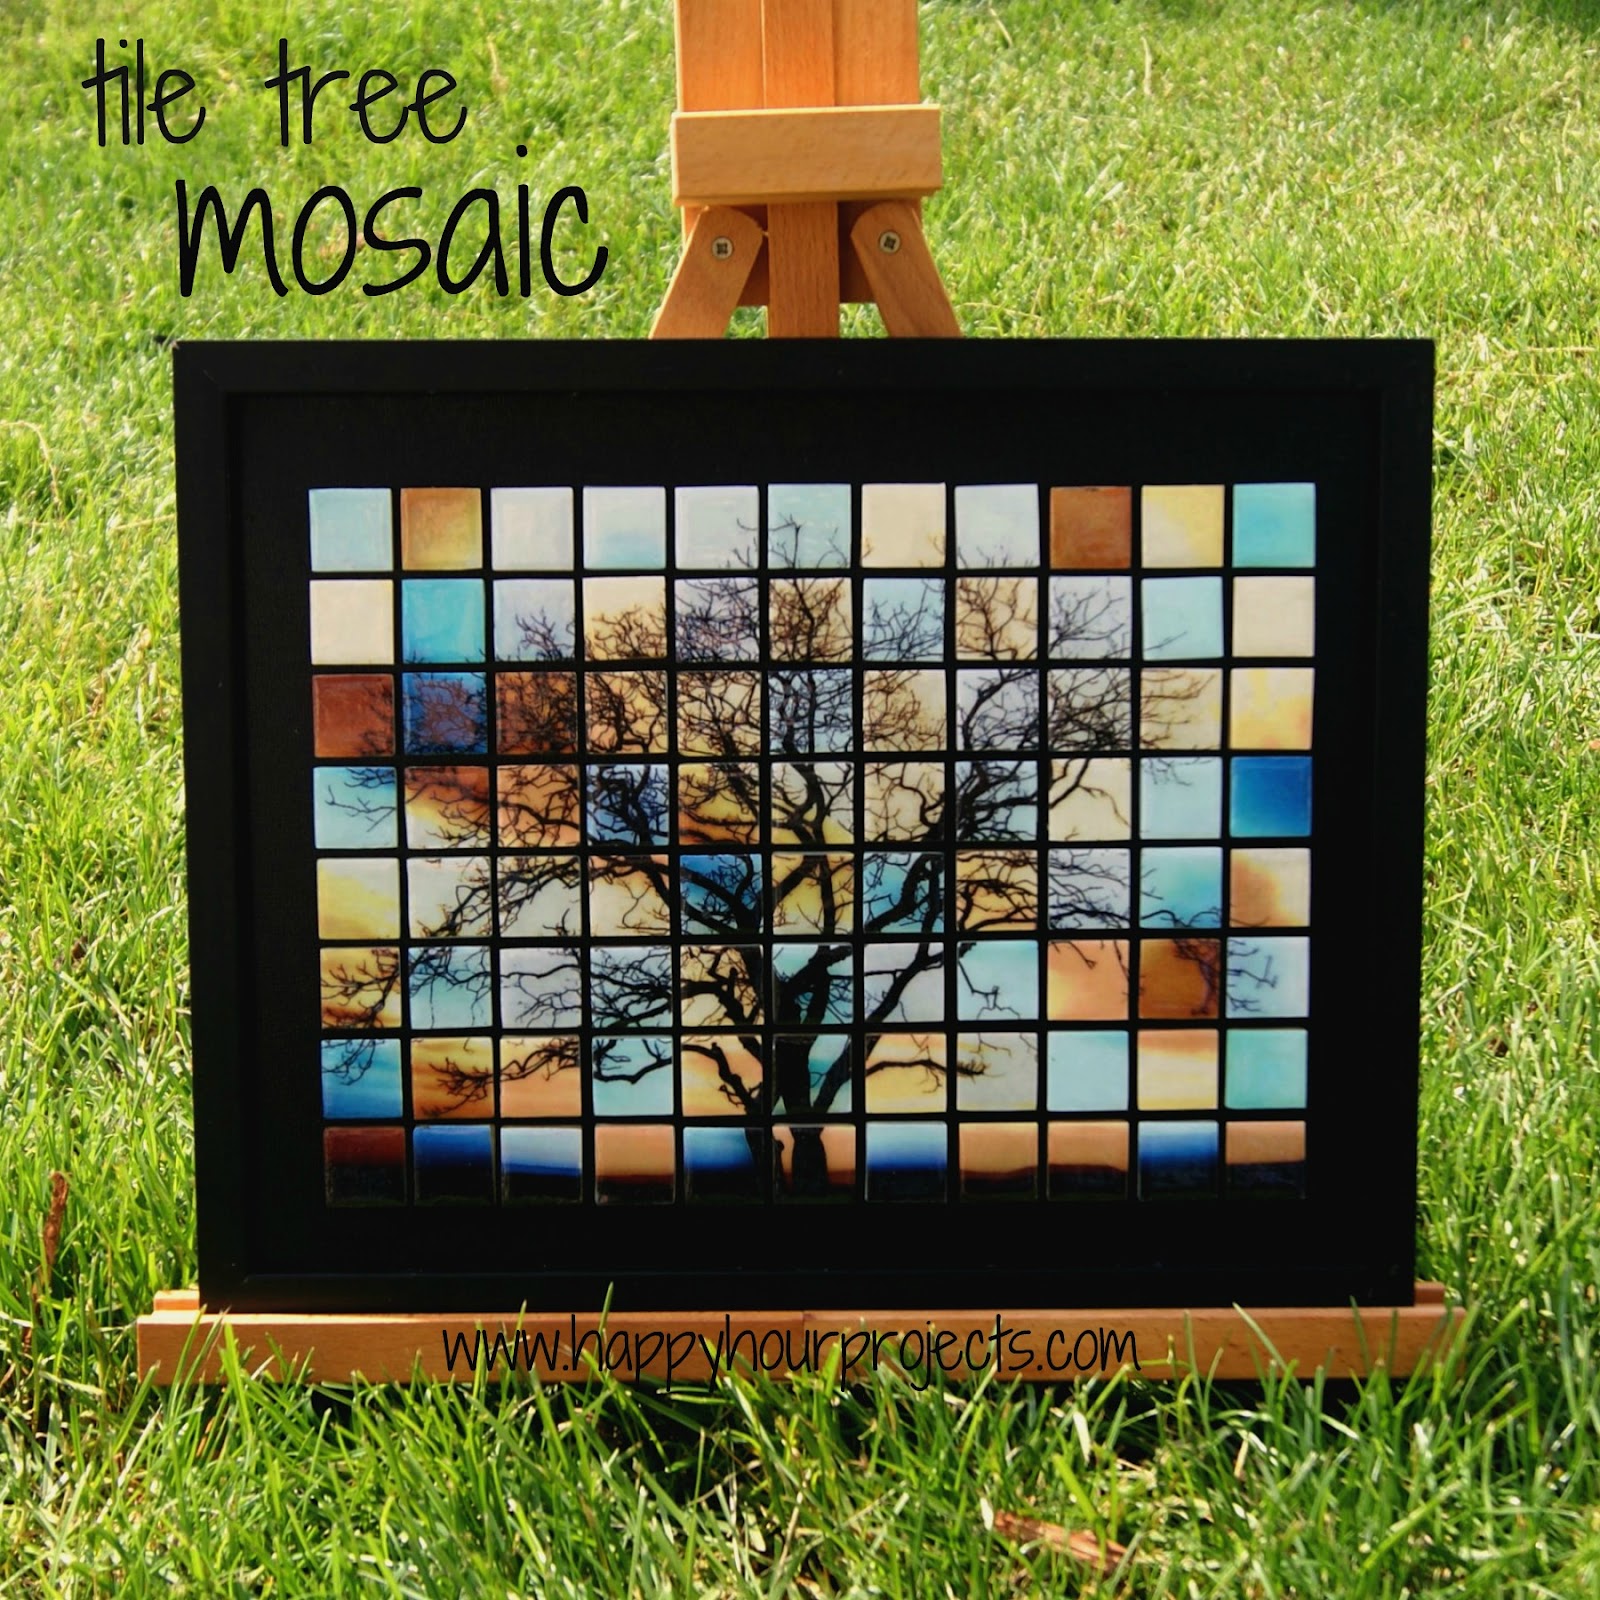
I have this hanging over my desk now, and I just love it. It was both artistic and mathematic to create, so both sides of my brain got plenty of exercise on this one. :)
Perhaps you recall the glass tile jewelry kick I was on for a while around the first of the year? I really enjoy making glass tile necklaces, and I also made them into magnets and hairpins… all of which were one-tile endeavors. This mosaic was a lot bigger project… 88 times bigger, to be precise. I did make up each tile individually and arrange them on an 11″x14″ wooden canvas. The hardest part? Keeping all the individual papers in order and straight! So this project was a challenge when it came to the final arranging, but preparing the tiles was actually pretty simple. I’ll walk you through how I did it in case you’re interested in making something similar!
First of all… how cool is Mod Podge? I wish I were more skilled with it, because it can decorate so much. This project used two Mod Podge products: the traditional matte formula, and also Dimensional Magic to give each tile a nice shine.
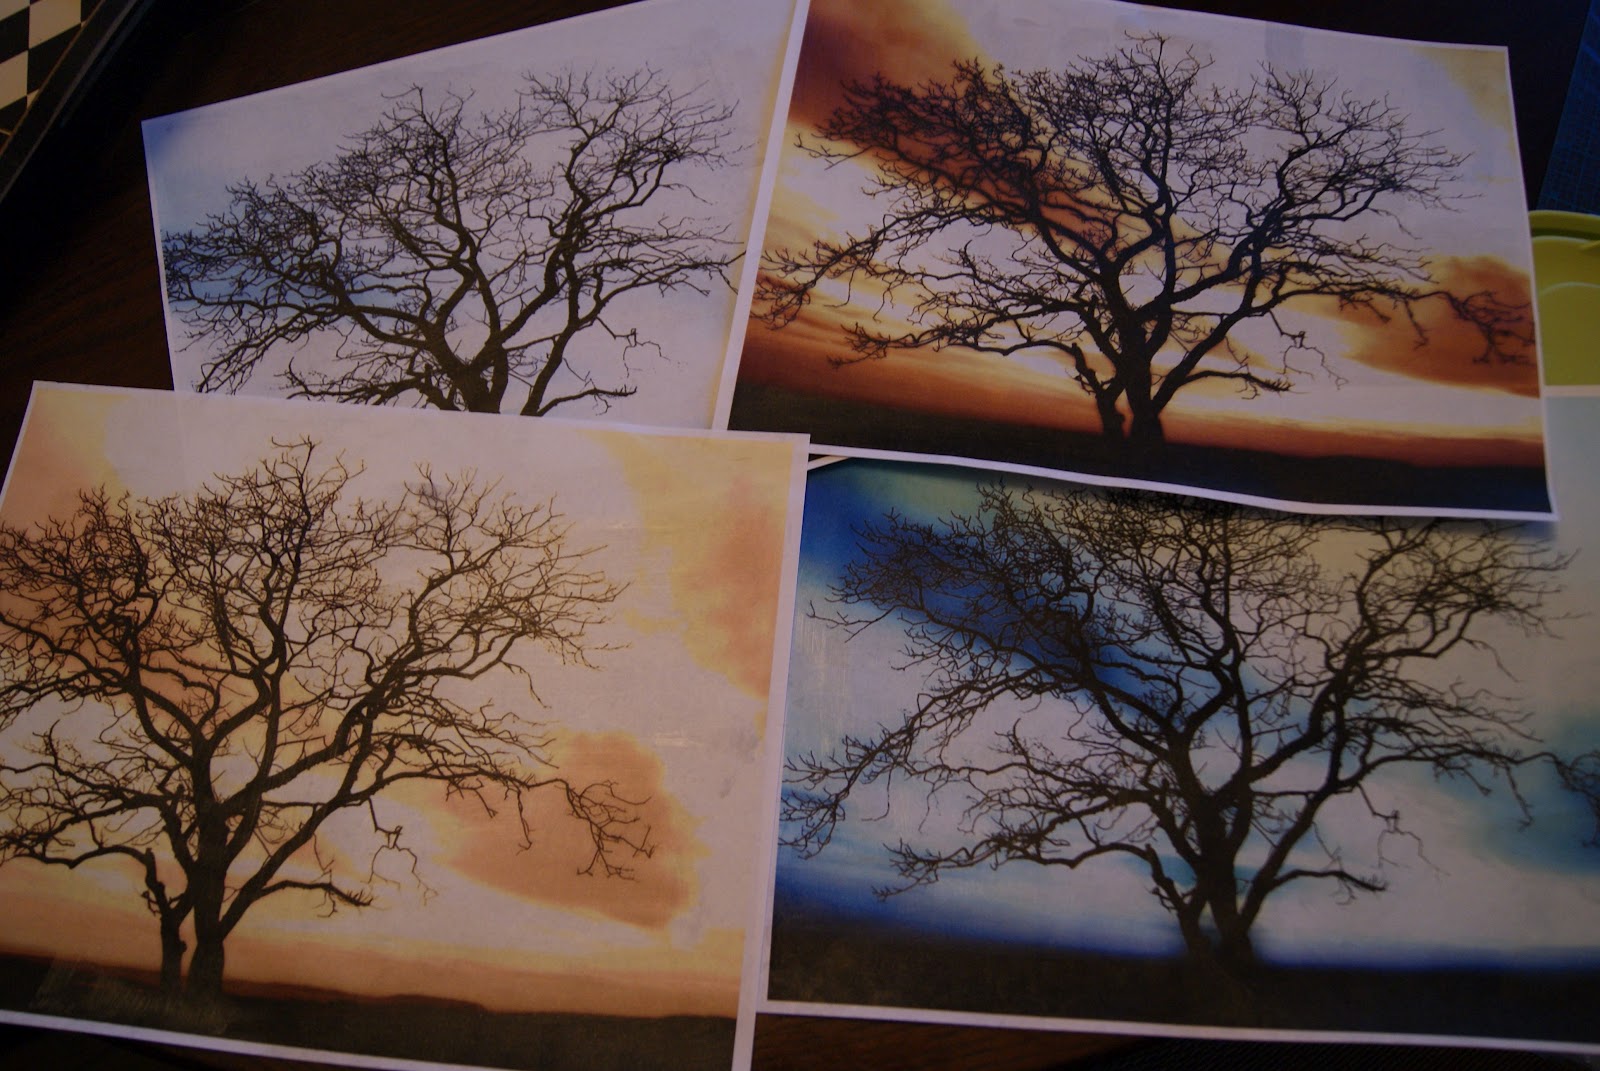
I needed to get my graphics for the tiles, so I found a photo I liked and adjusted the tone until I got a light and dark sepia, and a light and dark blue.
I lined them up together, and cut them into my 1″ squares to fit the tiles. Sorry about the lighting here, but it was pretty late and you get the idea. :)
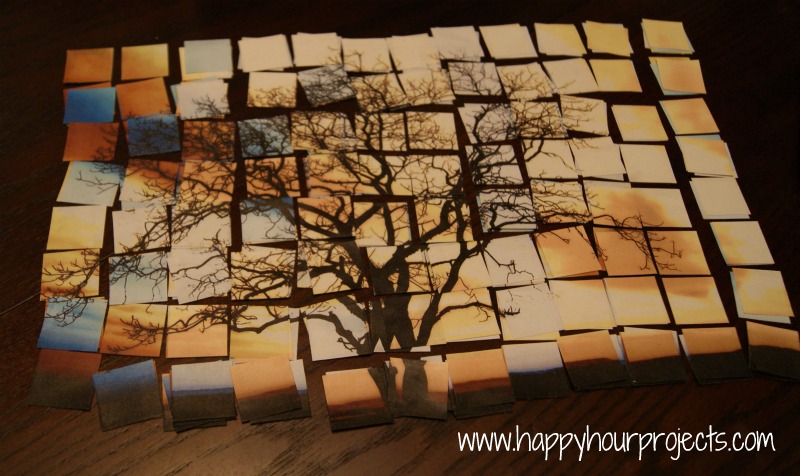
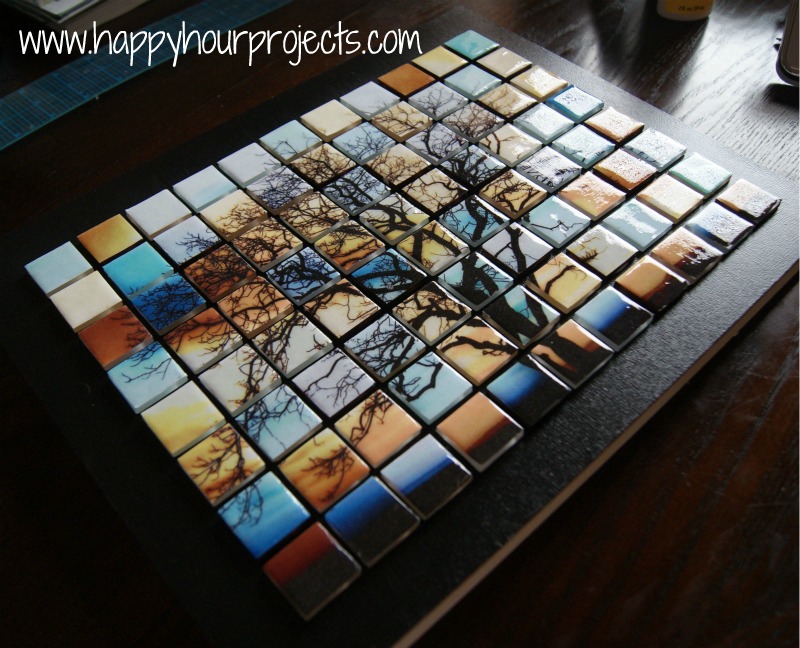
In the above photo, I had just started to choose different colors to make up the overall design. Basically, for each square, I had 4 color options. So I just picked one at random so that the overall design would stay the same, but be made up of squares of different colors.
To make my tiles, I adhered my graphic with Mod Podge. I just used mosaic tiles from Hobby Lobby, but any 1″ tile would work the same.

Once all my tiles were dry, then I added a coat of Dimensional Magic to add depth and shine. If you haven’t used Dimensional Magic before – first of all, don’t shake it. :) If you’re just bringing it home, let it sit for a while. You want to keep the bubbles out. But once it’s settled, squirt a little on. Then, I use a toothpick to smooth it all the way out to the edges. If you do end up with any bubbles, you can try just popping them with your toothpick or a pin. For really small ones, push them to the outside edge of the tile, you can usually just push them right off and they will pop.

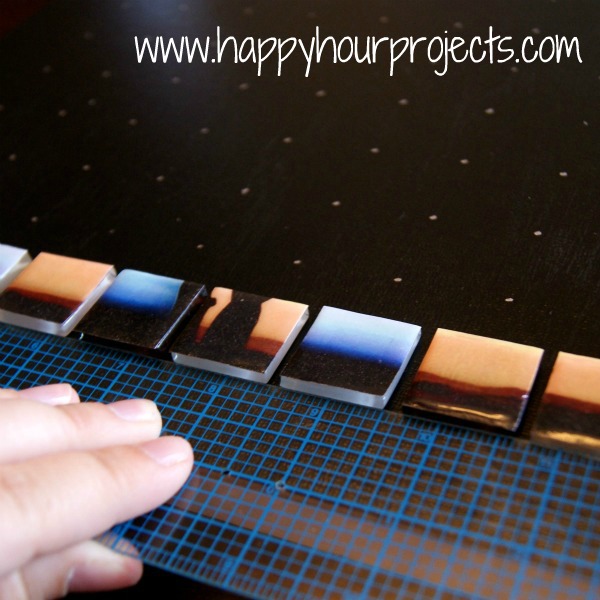
The only way to keep my design complete was to keep them lined up all the time. :) As I finished my tiles, I put them right back in order. When I left them to dry overnight, I dreamed my daughter knocked them on the floor… what a nightmare! When you set up your space, keep it in mind that you’ll need to set them aside all together so that they don’t get mixed up.
Try not to touch them while the Dimensional Magic sets… but if you do, you can always add another layer of glaze to help fill in any smudges.

I picked up a 11″x14″ wooden canvas, and painted it black. I measured it out and marked with a silver sharpie marker where I wanted all my tiles to go. Then, when everything was dry, I started gluing my tiles to my canvas, using a ruler to keep them straight.
All told, I had about 4 hours of actual work into this project – 2 hours designing and carefully cutting my graphic, and two hours of working with the tiles themselves. The drying time took up quite a bit of time in-between, so you won’t be able to finish this in an afternoon. It’s a great project if you’re like me and only get about an hour of crafting time at a time!
I had planned to leave the canvas umframed, but when I finally saw it all come together, I decided it needed a last finishing touch.
I’d love to show it to you in my office area, it’s hanging right above me as I get this post ready, but the lighting is just no good right here! (Fortunately, the rain broke for long enough for me to take it outside for a photo this weekend.)
Thanks for letting me show off, and thanks for keeping me alive for round three. :) It’s top ten now… wish me luck for next week!
I link up to these great parties!
~ Adrianne
One of my clients actually made one of these mosaics and asked me if I can install it in their bathroom! She pointed me here cause I was scratching my head, I’ve never seen such a thing but it’s so beautiful!
I think I’ll need to apply a clear epoxy resin over them so that the print can withstand grouting and installation. Wish me luck! I’d hate to ruin such lovely and priceless mosaics.
Truly beautiful. I didn’t realize home printers printed 11×14. Can you tell me what kind of printer it is. I’m looking to buy one.
Your tree is beautiful ! Thank you for all your info . Hopefully i will be able to do this one day . i will be following you to learn more ?????
Hi Adrianne!
I am also an Adrianne (I was named after my Dad) since I was first born. I do lots of mosaics and wondered if the finish would allow me to grout it just like a mosaic?
Let me just say, you should be a 4-H leader. This art work is amazing! My 10 year old daughter is in 4-H, and she got a grand champion ribbon on her paper quilling project last year and fairy garden this year in the Exploring category. Next year she will be too old to be in Exploring, where you can basically enter anything. Now she has to choose what specific category she would like to be in by .September. We both fell in love with your project and she wants to try it for 4-H for next year, besides her sewing, wool spinning, robotics, and photography. This seems easy enough for her to handle. Her photography skills are very good. She has gotten all blue ribbons on her photography for the past two years, so I believe this would be just up her alley with her skills she has. We have a HP printer and use only HP ink. You said you used just regular paper. Do you think a particular quality of the HP photo paper would work better or would their be glue issues? One more question, you said you were going to try something with the grout area a few years ago when you had time. Did you ever get to this and how did it turn out? Thanks for a truly inspirational project!!! WOW!!!
T??ay, ?hile I waas at work, my cousin stole mmy aplple
ipad ?nd tested to se? if it c?n survive a thirt? foot drop, just so
sh? can be ? youtube sensation. ?y apple ipad ?s now broken and she ?as
83 views. ? know thi? is totally offf topic ?ut I ha? to share it wijth som?one!
Now I know that usually if u print a picture and it gets wet the picture runs. So it’s there a certain type of paper or its no u used.
How beautiful. Just really started getting creative the last 6 months. I found your work on pinterest. I love your piece. Can only imagine what you have done in the last 3 years. Awesome work. Regards
Fiona
Adrianna, I’m doing a craft for our senior high school camp this summer our theme is rooted and I have been looking for this tree for several days. It would fit perfectly into our camp theme is there any way you could email me the 4 different images. Or the original image and I can change it. I would really appreciate it. Thanks
So beautiful!! But what was the original size of your photo? Thank you
I printed it full page on 8.5×11 paper.
With using all those tiles, does it make the finished product really heavy?
Yes, it is pretty heavy. :)
When cutting your image/s, did you make any adjustments to allow for the space between the finished tiles? The faux “grout” lines have such visual impact, but I wonder how to keep the spacing from distorting the finished image.
I didn’t. The 1/8 inch/3mm or so spacing wasn’t much of an issue, but it’s primarily because it’s already a silhouette. There are no “critical” elements that would be missing or distorted when you’re using an organic image like this.
That said – I’m trying another method trying to improve and simplify this. I’ve actually got all my supplies together and I’m looking for enough time to start, and for that I’m going to remove the image from the “empty” areas (like where the grout would be, if you were adding grout. That’s a great way to put it). So I will have to test and see which works better visually, expanding it like this, or removing it…
I was wondering if the gloss mod podge would work for this also using regular photo paper?
I’m sure it would, I jut keep matte in my stash for projects so it’s what I had. To give it the liquid-look you will still need to use Dimensional Magic, though (or a similar dimensional glaze). Otherwise it will look flat, even with a glossy finish.
I am having a hard time tracking down the 1 x 1 tiles…. There is no hobby lobby in my area. I did manage to find some mirrored tiles on Amazon, do you think that might work?? Thanks this is beautiful!
Really anything that is a similar size should work. Before you order anything expensive, let me share this – I have actually been getting my tiles for other projects from home improvement stores now (like Home Depot or Lowe’s). The tiles are slightly smaller, about 7/8 inch, but they are still square and the size is so similar, it works really well. It’s the same tile people use in showers and kitchen backsplashes.
WOW, that is absolutely brilliant! I do mosaic work, but haven’t ever thought of doing it this way, with my own picture. Smart (& pretty!) woman!
Hey :)
I just wondered please as to what size photograph you printed, was it A4?
Thank-you
Love the mosaic tree! Very cool!
Wow! This is so cool. I never thought to use the same image with different tones/color balances. The effect is amazing.
Thanks for the inspiration…I made mosaics as my Christmas Gifts this year. They were a HIT! Now, I need to find time to make one for myself! :)
I tried this on a photo that I loved, but seems like it works much better when using a photo like the one in the sample that is a silhouette. Mine was full color, and even when I altered it to the sepia and blue tones, and put random ones together for the mosaic, you couldn’t tell what the photo was of!!! So disappointing.
I love this idea…I wonder if I could do a pattern like this multiple times using all the squares that were cut making a series of the prints, put them in a row and grout them to make a backsplash
What a lovely creation! I love it! Your craft is awesome!
What a lovely creation! I love it!
This is a GREAT project! I have a tray that I’ve been wondering what to do with and this technique might just be the thing to bring that piece to life. I love it – thanks for sharing! :-)
I would really like to do this, did you just print the picture on a piece of regular printer paper?
I love these crafts! I love to try one of these glass tile tree mosaic for my home decor collections. Thanks!
Wow! Really breath taking! I am so excited to try this!! How big was your picture before you cut it into 1 inch squares? Also how much space did you put in-between the tiles when you glued them to the wooden canvas? I think the hardest part will be measuring it out to add the silver sharpie dots. Any tips?
Hi Dany – I use a few different sites when I'm looking for graphics & photos – http://www.morguefile.com, http://www.freepik.com, and http://www.freestockimagesite.com are some of my top places to look for free images. I can't remember where I found the tree but if you search for free image download sites, there are a lot of places out there you can find free images. Good luck!
Hy Adrianne. :) I really love your mosaic. I just wanted to ask – where did you find the picture that you used? I also want to make the mosaic, but I can not find a suitable picture. :)
love it!!
Absolutely gorgeous! Love it!
11×14 to fit the canvas.
How big was the frame you put around it?
The tiles are just under 1″ square, I did 8 rows x 11 columns.
What were your dimensions of the outline of all the tiles when you laid them?
I love it!
this is wonderful!! So inspirational. Thanks for sharing!! I pinned it!
Stunning! It is gorgeous yet so simple.
Beautiful!
I actually used a water-based superglue, because that's what I had (well, that and E6000, but that can leave those little spiderwebby strings). I would imagine that you can use any kind of heavy-duty permanent adhesive that suits both glass and your canvas medium. Mine was wood, but if you've found something else to mount it on of course check for compatibility with that.
Congratulations..this is absolutely beautiful and i want to try making one…what kind of glue did you use for the tiles? Is it just regular tile compound ??
Beautiful!!!!!
OMG its amazing… loved this .. I'm new to this blogging world.. just now saw this in craftionary… Please find some time to go thru my page
http://mycraftgallery.blogspot.in/
luv
soumya
What a beautiful project, and your tutorial instructions are very clear. Thank you for sharing it. I've pinned it to my Crafts board. :)
Thank you!! The thing is I don´t live in the US so I have to order it. Thanks for your quick response!
It's hard to estimate, but what you see in the above photo, that little squirt on the tile, was how much I used per tile. You don't need much! I'd say I used maybe… 1/8 of the bottle on this project? I started with a 2 oz. bottle. So 1/4 oz. or so??
Hi, do you know how much dimensional mod podge you used?
Stunning! The impact of your photo makes on those tiles is stunning. Thanks for sharing such an inspiring piece of art!
Oh my gosh this looks amazing! Thank you for the pictures and tutorial.
I'm a new linky follower from a blog hop, it would be great if you stopped on by and followed me at http://iheartpears.blogspot.com
That is GORGEOUS!!! Oh, I just love it! It makes me so calm just looking at it:) Thanks so much for sharing with us at Thursday's Temptation.
Jill
This is so beautiful! I would love it if you came and linked up at Well Crafted Wednesdays! Here is the link:
http://thewellcraftedhome.blogspot.com/2012/05/well-crafted-wednesdays-link-party-6.html
Beautiful.
Wow! What a great idea, and you did a wonderful job!
This is so great! Do you think you could do some sort of family photo, or maybe something like you and your babies hands in a photo or other such creative thing? I'm thinking ahead for Christmas ideas!
Love you always!
Jan from TipGarden.blogspot.com
that's soo pretty!
This is STUNNING! Love it!!
Every time I look at this I am so impressed!! It's just perfect! Defiantly has the WOW factor!! Congrats again on the win!:)
I love this!! I'm so glad you won. =) I voted for you!
Such an amazing job girl! This project is so pretty and creative! I love it!!
Following from the Blog Hop – Nice@!
WOW! That is breath takingly gorgeous!!!
To change the color, I just used some of the effects in PicMonkey! If you haven't edited your photos there before, It's awesome. http://www.picmonkey.com.
I just used my regular printer, on regular paper. You will want to test your Mod Podge if you're printing at home to see if your design bleeds – some brands of printers and ink seem to, and some don't. You can always play it safe and use a very thin layer of paraffin wax on the printed side of your paper.
I love this so much! I voted for this at One Crafty Contest and I'm so glad you won. Just brilliant :-)
I have a brand new link party going on and I'd be thrilled if you'd link this up!
http://practicallyfunctional.net/2012/05/the-fun-in-functional-link-party-1/
I was wondering the same thing as Livin#39. How did you change the color tone and what did you print it on?
This is gorgeous! For the prints, how did you print them and what kind of paper did you use? Did you use a computer printer or do it at a print shop?
This is so beautiful. I don't know if I would have the patients to make one. Would love for you to share it on my linky party!
http://www.igottatrythat.com/p/blog-hop-linky-colde.html
Thanks, Marcie
http://www.IGottaTryThat.com
Congratulations, Adrianne! And it is no wonder why … this is gorgeous! !
Phenomenal!! I love everything about it!!
This is amazing! So beautiful.
This was one of my favorites of round 2! It A-MAZ-ING! What a fantastic idea!
I am so impressed! Just beautiful!
This is totally amazing, Adrianne! I'm going to share on my FB if you don't mind! :)
Congrats on the win–I love your 4-toned printing technique!
This is so great, what a creative idea, and what a fun project, I would go crazy with all of those pieces and trying to get them just right! I love that picture!
Carlee
http://www.ladybirdln.com
This is fantastic! I pinned it and I'll make one later. Did you buy plain white tiles? Can you buy just the number you want at a hardware store or did you have extra?
Wow that looks like it was a lot of work, but it's beautiful.
This is such a great idea! Makes mosaics so much simpler… and safer! :)
Thanks for posting this. Maybe if I get up the gumption I can make me one too.
This is truly gorgeous. You did an outstanding job! Wishing you luck in the next round.
Absolutely love this! I just featured it on facebook.
http://www.facebook.com/craftykateblog
Thanks for the inspiration!
Kate
This is gorgeous, of course. I can't believe it only took you 4 hours. That is so impressive. Your right and left brains must be in tip top condition, lol.
That is wonderful, Adrianne. First of you, pat on the back for creativity. But definitely a high five for patience!
That is SO cool, Adrianne!!! Love it!!!