
All right, so I played some more with glass tiles last night and made a fun Valentine’s Day necklace. :)

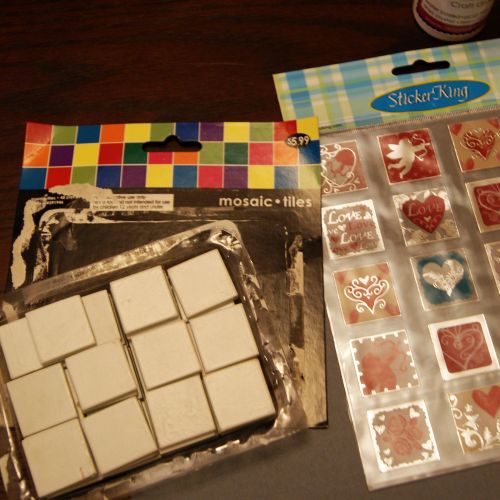
It occurred to me that some people are like me, and haven’t found the clear glass tiles everyone seems to be using anywhere in stores. (I finally broke down and got mine on Etsy from Annie Howe’s. I’d recommend her if you’re planning to shop online – the prices are good, and shipping was really fast.)
However – if you’re not into ordering online and waiting a few days, you’re kind of limited shopping at Hobby Lobby/Michael’s. I did find some glass tiles for mosaics at Hobby Lobby, though, and at 48 for $5.99 (less your 40% off coupon, of course, making these tiles about 8 cents each) these are really economical, and are something you can just run out and pick up. (I opted for white, but they have a lot of colors to choose from.) I was trying to decide what sort of graphic to use to go along with it, when I ran across some fun square Valentine stickers at my dollar store that were about the right size.
Here’s what the tiles look like from the front – clear glass, with a white backing:
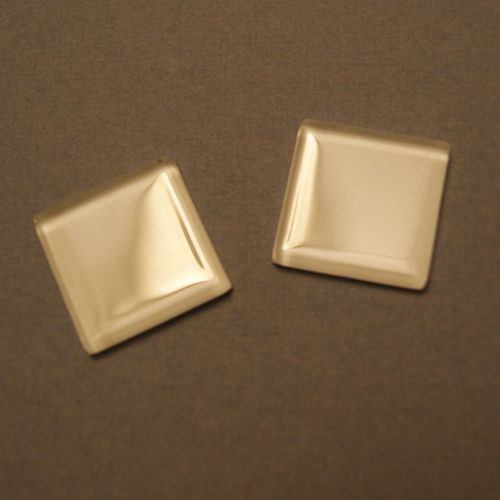
So you’re pretty much stuck with adhering your design to the front of the tile, rather than underneath the glass if you use these. That’s ok, though – because my little experiment turned out really well, I think!
I picked a design I liked from my stickers, and it did need to be trimmed down slightly. (I was thinking ahead and left myself a peel-tab, that’s why there’s still plastic backing attached on the right side.)
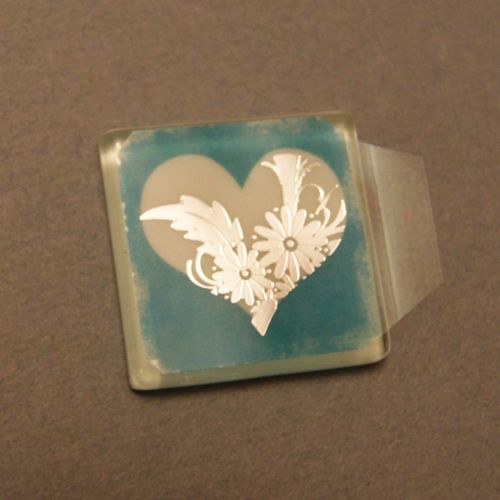
And then I just stuck it on.

Yeah. That simple.
I had planned on using some dimensional glaze (I got Glamour Glaze from Annie Howe’s, but Hobby Lobby carries Mod Podge Dimensional Magic, too, which would work the same). But as I looked at my tile and saw how well my sticker stuck – I thought I might not need it after all. These plastic stickers are really durable!
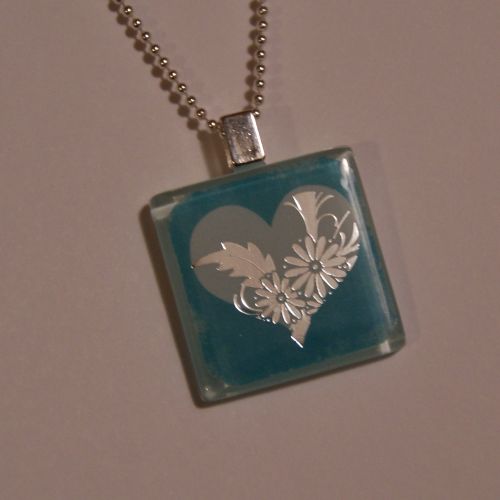
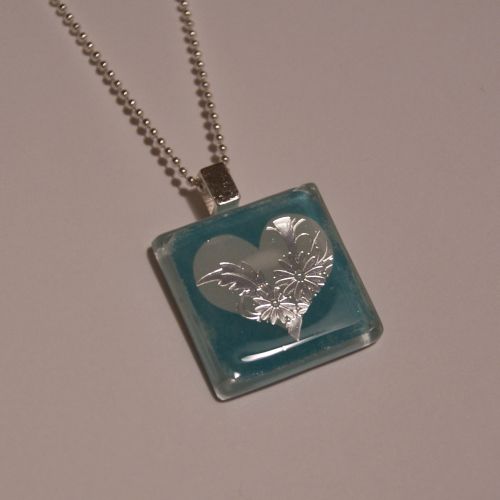
In the end, I decided that with four dozen tiles, and plenty of stickers, I’d do one each way, and decide which one I liked better. So one was left like this, and I added my glaze to the other one. I have never worked with the glaze, but it’s very easy. I just added a little to the top, and used a toothpick to spread it all the way to the edges.
Then I just added bails (and once again managed to go overboard with the E6000 – you do NOT need this much, just a drop should be adequate to secure your bail!)
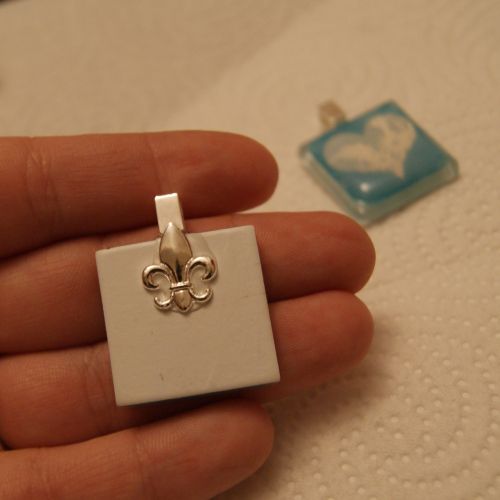
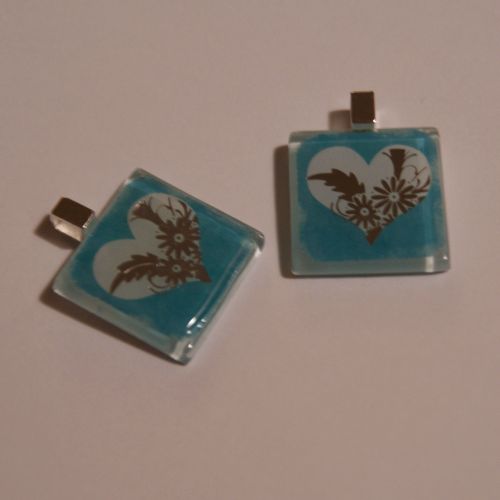
And once they dried, strung them on a chain. When they were done, you could hardly tell the difference, but I’ll show you some close-ups to see for yourself:
 |
| Unglazed |
 |
| Glazed |
I think in my case, with the fact that the stickers were printed with clear plastic instead of on paper, and had the foil accent, I think the glaze was unnecessary, though I do like the thickness of it over the foil. And if I had printed something from the computer or used another kind of paper graphic, I think the glaze would really have been necessary for a nice finished look.
Hopefully this helps you, if you’re the type who wants to shop and buy right-now-so-I-can-craft-tonight! You certainly don’t need the clear glass to pull it off – any smooth tiles should work! If you find some plastic stickers, they adhere really well and seem to be very durable, and look great on their own with no finishing – turning this into a ten-minute project (add a little time for your bail to cure and dry). If you plan to use a paper-based graphic, then pick up some glaze too. Even then, it’s still less than an hour. My kind of project!
I link up to these great parties!
~ Adrianne
Thanks for sharing! Including this in a roundup! It’s fabulous!
Oh my! This is absolutely so cute! I remembered my wife making a sort of something like this before. I think this could be a perfect inspiration!
This glass tile necklace is fantatic! Oh my! I love this creation so much! A very perfect gift for valentines!
SO fun to see this linked up!! Thanks for joining the fun! Karah
I love making necklaces like this. I never thought to look for supplies at the Dollar Store, thanks!
i like glazed better also .. adds extra protection as well . i just finished a couple with stickers on front and used the diamond glaze to seal it .. i love it ..
Very pretty necklace, I love it !
That is neat! I never knew how easy they were to do. My daughter would enjoy this. I like the glazed better!
Love this necklace!!!
These are beautiful! And a great tutorial, too!
i too ordered my clear tiles from online .. i've been making use of the multitude of catalogs at my house .. so far my favorite is from my quilters magazine .. love some of the colors and patterns .. now my question to you . with using just the sticker on the front do you think without any glaze it will stay put ? i mean down the road .. what if it were to get wet ? just a thought. but i must say i do love the foiled sticker it's very pretty :)
Beautiful!
I LOVE this project! So beautiful, and fun. I would love it if you could come by today to enter my giveaway for a $50 Lowe's gift card and to link up to my very first party! http://thespacebetweenblog.wordpress.com/2012/01/31/imagine-the-impossibilities-link-party-1/
Karah @ thespacebetweenblog
Love the tutorial! Thanks! I'm now a follower!
How cool! I have always wanted to make these. This is a great tutorial. I need to head to the store and pick up some tiles. Thanks for linking up to our party this week.
Great project! Happy you linked to Things I've Done Thursday!
http://www.bearrabbitbear.com
So cool – you are so creative! I love Hobby Lobby – always get into trouble there :)
Fabulous!!! LOVE this and how easy it that!! You always amaze me!!
Thanks for sharing! I'd love to give these a try for my girls!
Such a neat idea that maybe even I could pull off!
What a fun project! My girls would love this :)
Jaime
http://takeitfrom-me.blogspot.com/
I've always wanted to try making some of these, maybe I'll try now that I have the link to the etsy shop selling the tiles. Thanks!
Best,
Jenn from http://www.justaddwatersilly, hopping from Link it up!
(newest follower)
Just saw this over at HoH- love it, what an easy project and it looks so nice!
This idea rocks! Heading to hobby lobby this week!
You are quite the expert now on these pendants. I love them. And I would definitely be putting on too much glue also, lol.