
Good morning! Did you have a great weekend? Ours was busy, but all good news – the inspections on our new house went fabulously, AND I got some happy mail! My friends over at Happy Mango Beads sent me a a few different kinds of beads for my latest jewelry idea, and I cannot wait to show it to you how my piece turned out! Take a look:

Note – I was provided with beads to make today’s project, and I will link to the exact beads I used in Happy Mango Beads‘ store in case you’d like to make your own ring bead bracelet! It’s a chunky statement piece with simple components, and I love the combination of the wood grain and silver. Let me show you how I made it.
What you will need:
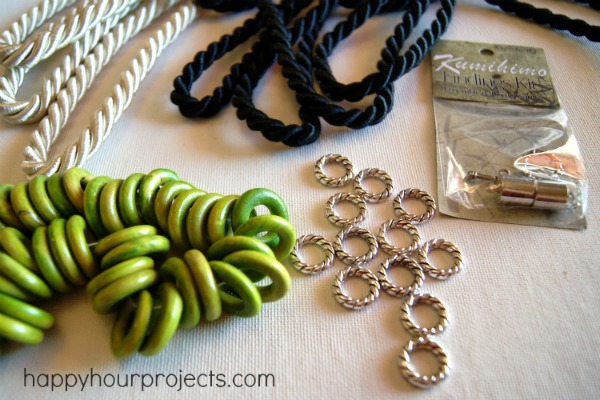
- 20mm Wood Ring Beads (mine are lime green, but other colors are available)
- 14mm pewter rings
- Upholstery cord – I bought the thickest cord my fabric store had and it fit my end caps perfectly. It’s roughly 9-10mm in diameter, and my fabric store sells it for $0.69 a yard.
- 10mm glue-on end caps
- Aleene’s jewelry and metal glue
- Masking tape and scissors
- Clasp of your choice and pliers for attaching it
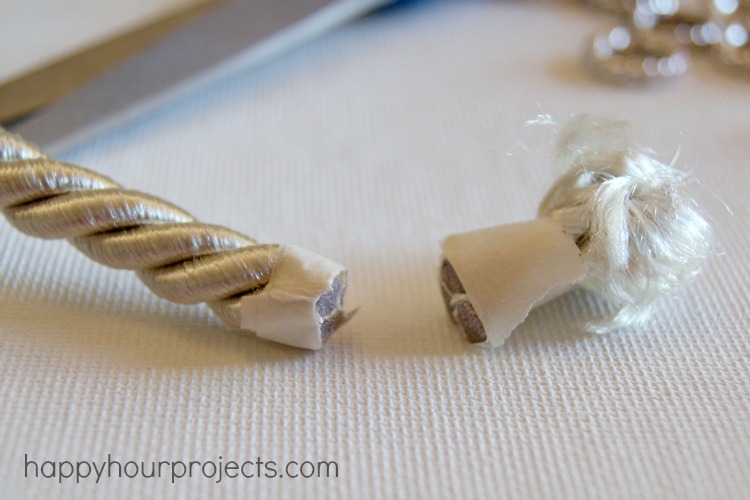
First things first: if your cord is beginning to fray at all, tape it. When it’s nice and secure, cut halfway through the tape to give you a nice, tightly woven end to work with. Because of the size of these beads, we will be cutting the cord a bit longer than for a normal bracelet. If you normally like a 7-inch bracelet, cut 7-1/2 to 8 inches of cord (the variance will depend on how large your clasp is – for larger clasps, you can cut less cord). The beads will take up some space on the inside of the bracelet, so you need to make sure your wrist still fits. You will cut the other end the same way; wrap it with tape and cut it in the middle of the tape.
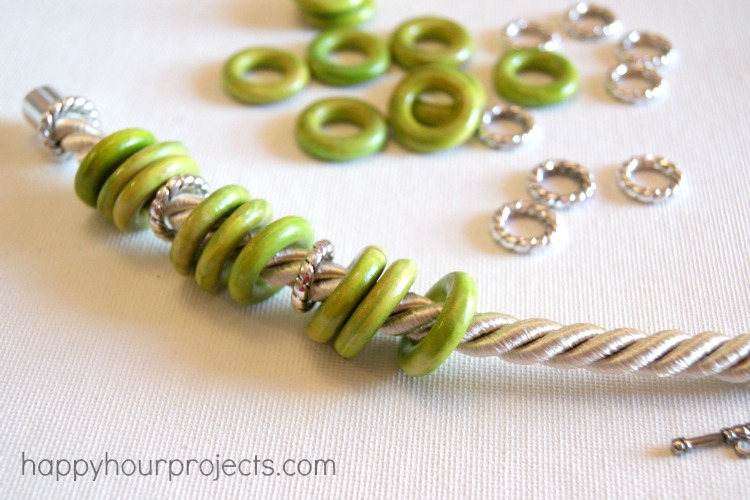
Add some glue to your glue-on cap, and glue it onto one end of your cord.

Now, just thread your beads. You can thread them in any pattern you like. I chose to add three green rings for each pewter one I added, and because I wanted some of the cord to show through, I used 6 pewter rings and 15 green rings total.
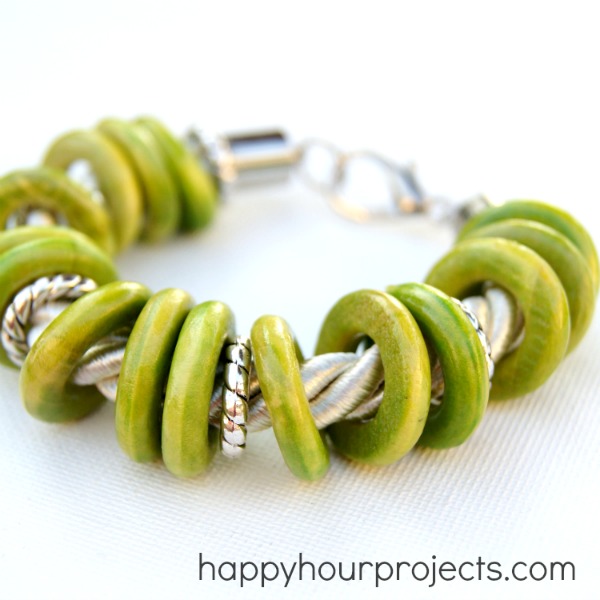
When you’re done adding your beads, glue on your other end cap, and attach your clasp. This particular kit I used does come with a toggle clasp, but because my bracelet was big, I wanted a bigger, more secure clasp. I decided to use a jumbo lobster clasp to finish it off, but any look you like will work just fine!

And it’s ready for wear! I love the natural look of the wood beads, and the green and silver combination!
This was the first time I’ve used Happy Mango Beads for my jewelry and I am really impressed. Not only do they have a TON of natural options (stone beads, lava beads, shells, coral, wood, bone… seriously they have a huge selection!) but they also came packaged in recycled paper with minimal waste. The wrappings protecting my beads went to further good use as large coloring sheets for Raya – I just spread them out on the floor and she got out her crayons and made some art! They certainly carry a lot more than the earthy kinds of beads, but that suits my personal style, so I was really drawn to that section of their store. I will definitely be back for beads for future projects, I LOVE Happy Mango!

I love using the upholstery cord! What a fabulous ideas! Will look at some of your other designs!
Hi Adrienne, I just found your site and LOVE your projects! Question – does the glue on end cap here on the cord really hold up over time? did you pinch it at all? advice!
It’s all about the glue on that question!! I LOVE Aleene’s for this. I have been making jewelry with the glue-on caps for about a year and a half now and I have never had a problem. I can’t speak for say, ten years from now, but I have found them to be very secure with no crimping necessary.
Ohhhhh, I LOVE this!! Those beads are fantastic! I’m totally going to check into that shop more. Thanks for sharing it.:)
Those green beads are so cool! Ordering some!
This is so pretty! I’m pinning to it my Fashion Forward DIY board. :D
This is gorgeous, just like all your other projects! :)
This is a fun one, thanks!!
Thanks Adrianne, we love this tutorial! Such a great idea for using ring beads and easy for the beginner, too!
Love!!!! Just gorgeous Adrianne xxx
Great tutorial, as usual! I would’ve never thought to use upholstery cord for a bracelet, great idea!
So pretty! Great statement piece!
This is beautiful! Love the color!
You’re amazing and brilliant with the jewelry! I adore every piece you do!!!
So pretty! Love the color combination. Green’s my favorite! Pinned!
So happy inspections went well! Plus, I adore this bracelet! Your one talented gal!! xoxo
Pretty! I might even be able to handle this one!
I LOVE this bracelet. I was just saying to my daughter, “I wonder what type of glue to get to add to the stretch rings and bracelets we are making for a festival?” Would you use the same glue as you stated in the tutorial for our project?
Super cute and simple–that’s my kind of project! This would add such a fun pop of color to an outfit. I popped over from the facebook group– I”m looking forward to getting to know you and your blog! Have a great week!
~Abby =)
Adrianne, I LOVE this. I love the chunkiness of the upholstery trim! Well done, my friend!
I’ll take one! The bracelet is beautiful. Green and silver are so pretty together. I didn’t realize the green beads were wooden at first glance. I was wondering what that beautiful color was. Well done! You make it look so easy.