
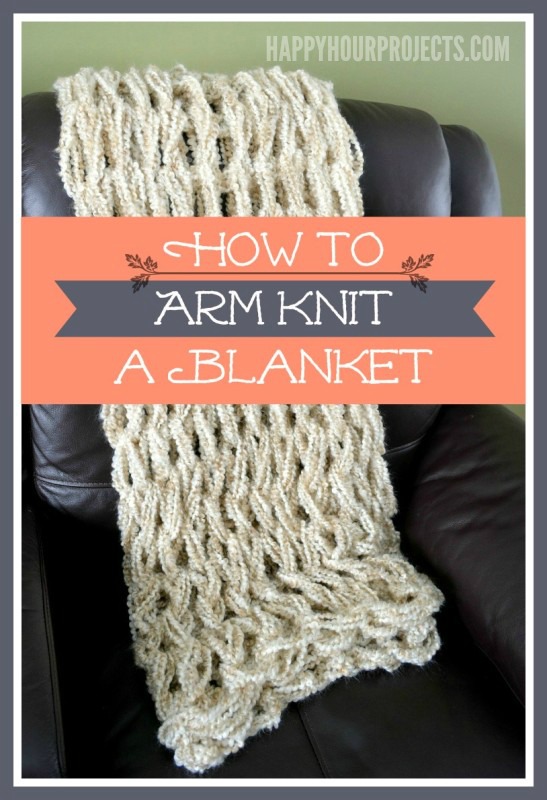
So, how many of you guys out there have gotten into arm knitting? I’ve got a project to share with you today that honestly makes up in one hour, as soon as you get the basic technique down, so it’s a perfect instant-gratification project if you’re just getting into yarn crafts. This arm knitted blanket looks really pretty in your living room, and best of all you can say, I made that. Go you!
This is a project that I originally made for Crafts Unleashed, the Consumer Crafts blog. At the time, I felt like it was maybe a little bit silly, but this ended up being my most-viewed, most-pinned post. Since that crowd enjoyed it so much, I thought I would take the time to share it here with you guys today! It was originally a photo step-out post (because I know that some of you like to print the directions and bring them with you) but I’ve also included a video for an arm knit scarf I also made, so you can see the stitches in action – just scroll to the bottom of the post if you’d like to check that out!
Supplies needed for this arm knitting blanket tutorial:
You won’t be using all the yarn (unless you’re making a really large blanket, of course). To thicken the blanket, you’ll be using three strands of yarn as you go, that’s why you need three skeins. You can also mix and match yarns for a different look!

Arm knitting is a large, chunky weave. That means it goes really quickly. So this is a nice way for beginner yarnies to see immediate progress. I have STILL never knitted or crocheted, and I thought this was a lot of fun! Because the weave IS large, there will be large holes in your finished blanket. It’s soft and squishy, so it’s great for cuddling with – and it’s so pretty draped over your couch! But I wouldn’t count on this arm knitted blanket to keep you warm on a cold night, necessarily. (THAT sort of blanket can’t really be made in an hour, after all.)
But, let’s jump right in! To create your first row of stitches, you will need to measure off some yarn to begin. Stretch out about 12 feet of extra yarn. At that point, make a slip knot. It needs to be just large enough to fit your forearm just below the elbow. Slide it onto your arm. You will now have two strands of yarn: your working yarn, which is coming directly off the skeins, and the “tail.” You will only be using this 12-foot tail for casting on your first row.
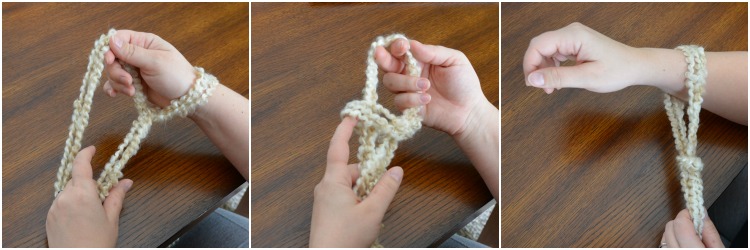
I watched five different arm knitting tutorials to learn how to do this, and I really struggled. I had difficulty figuring out how to hold my yarn to get started, and after a bit of experimentation, I finally found that this worked well for me: holding one strand looped over my thumb, and one strand looped over my fingers. I held both strands in my hand for light tension.
Now, let’s cast on the first row. I made mine 25 stitches (you can certainly do more if you want a larger blanket). Now the dimensions will vary based on how much you stretch it when you use it, and also how big your arms are. So I can’t give you an exact finished dimension except to say, this made for a nice, big, lap sized throw.
It took me a few tries to get the hang of casting on. But don’t sweat it if you have the same experience – because once your first row is started, the blanket makes up really quickly.
Using the arm that’s got your slip knot, take your finger and go under the yarn on your thumb. Stretch that yarn upward, and loop it over the yarn on your finger. Now, pull the yarn on your finger upward, creating a stitch. Once you make it large enough, feed your hand through the loop, casting the stitch onto your arm. Tighten up both strands of yarn once you have it on your arm – you want the stitches to be loose enough to move up your arm, but that’s all the larger they need to be. Again, I created 25 stitches. Feel free to do more. I wouldn’t go with much less, though, or your blanket might end up too small to really enjoy.

The following rows are much easier than casting on. If you have excess “tail” yarn, push it off to the side. You can see from mine, I did not have much tail left at all. I tied it into my blanket at the end.
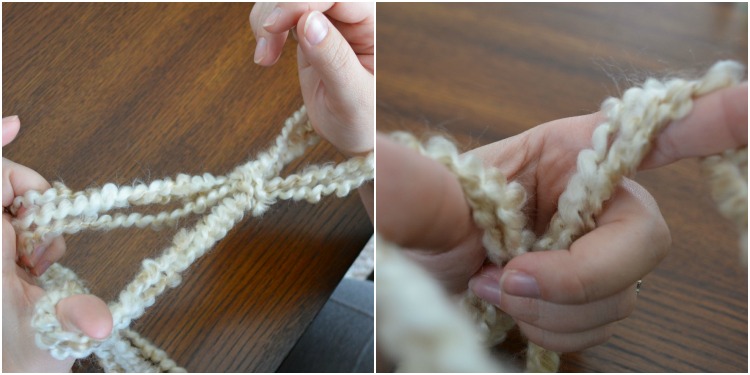
With the arm that has your stitches, grab the working yarn with your hand – the yarn coming off your skeins. Pull one stitch off your hand, pulling the working yarn up through that stitch. Put your opposite arm through this new loop you created – this is the first stitch of your new row.

Repeat this arm knitting process for however many rows you want to complete. I did about 30 rows, using my own lap as a guide for whether it was long enough. When you’ve got the length you want, it’s time to bind of the blanket.
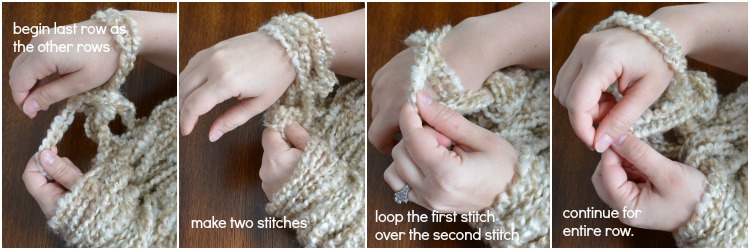
Begin your final row just as all your other rows. When you’ve got two stitches on your arm, take the first stitch (the one farthest from your hand) and pass it over the second stitch and over your hand. Then, knit another stitch onto your arm and repeat the process.
When you reach the end, cut your yarn and tie a knot to secure it. And congratulations – you’ve just knitted a blanket using nothing but your arms!

For you video learners, I’m embedding my YouTube video for how to arm-knit a scarf. The difference in the two projects is minor – for the arm knitted blanket you use more skeins of yarn, and you make it longer. But the process is all the same, and I’m happy to share it with you.
If you’ve noticed I haven’t been posting as frequently as I normally do, it’s because I’ve got big things in the works! One of which was moving my ENTIRE studio due to some flooding (sob). It’s now all dry, and I even moved it to a different room of the house, but MAN was that an undertaking to move and organize everything in a new space. I’ll be sure to show off a few photos this weekend. :) See you guys again soon!

This is a very, very helpful post. Thanks for this helpful information and valuable FAQs. I really appreciate that. Keep up the good work!
Thank you for teaching me something new !! I hope I can finally get the hang of it!! I’m in Michigan too and these would work wonderful for an evening j ut st sitting on the couch with hubby watching a movie!! Your so awesome I wish we could do some classes with your help !! Lol
Thanks for the great new project t!!!
Ernestina
like it
nice post
wow looking good
Hi Adrianne,
Nice to see you again!
I have a question. Since my arms are FAT, could I do this with something like a pool noodle or should I just get more yarn?
I’ve seen this before but hand a difficult times because of my arms… big arms, tiny wrists….
I made it! I made a blanket yesterday and have never knitted ever. Your video is excellent. Thank you so much for sharing. Now my dilemma is to make a bigger one and I guess just tie knot new skein ends to continue. Also, during my arm knitting I somehow must have grabbed an extra line and only had two of the three for the following step and I just kept going. It is very forgiving and you can not even tell where I grabbed four instead of three. Instant gratification is an excellent way to put it! It’s so pretty and soft. It is very warm but I live in Florida so it’s perfect!
For those who’ve tried all these things or you just wish to recover
from her, strive my recommendations on -to-Get-Over-an-Ex-Girlfriend.Thanks for studying!
The new technology offer greater precision in the placement
of implants and better long-term results. If you are contemplating a
dental treatment, there are several questions you could ask your dentist prior
to deciding if a specific procedure is suitable for you.
When teeth become stained with food, drink, smoking
or poor oral hygiene, teeth whitening can enhance your smile and give you additional confidence.
This dentist will take his time with you to explain your procedures and the benefits.
Depending upon the requirement of individual and its budget, one may
choose any one of invisalign Rancho Cucamonga procedure without having any fear about the side
effect or future problems. A dream smile, irrespective of any
physical obstacles that you might have, is possible today.
When teeth are misaligned and the jaw is not in the right position,
the muscles are stressed and can cause chronic pain. After you open your
mouth, you may really feel differences in between a single
side above the other, that is most of the time regular. The procedures used in cosmetic dentistry help people in continuing with a great healthy smile.
Rest assured that your experienced orthodontist or dentist can deliver the most effective orthodontic treatment plan for you.
Of course! The video I shared is actually for a scarf, but the stitches are the same. I want to get some of that ultra-thick yarn and make something new… hmmm. ;)
Hey I could do this. I could make a scarf this way too, right?
wow that is so cool. i have honestly never heard of arm knitting til now.
I learned knitting from my grandmother when i was a teen and loved knitting, I should get back into it. these look really cool and would love to try this :)