
I get quite a few comments about people who enjoy my jewelry projects but don’t make any jewelry themselves. Jewelry was how I first got into crafting, and it’s something I always enjoy. Even when I’m feeling uninspired, a tour through my beads and jewelry supplies usually gives me an idea.

So I was thinking today that this is a project that lots of people can enjoy. If you’ve already got your jewelry-making-basics down – you can just enjoy the simple style (I just love these chunky stone beads!) and won’t need a tutorial to tell you how to make it. But, if you haven’t really tried beading before, I’m going to show you how to get started on one of the most basic styles out there.
What you will need:

- Beads you love! A 7-inch strand of focal beads is generally sufficient.
- Optional spacer beads. These will be smaller beads. I used spacer beads because my focal beads are so large, and they don’t curve well when strung. Small metal or glass beads work well as spacers.
- Crimp beads – 2mm beads are the most versatile.
- Wire guards – these are just what they sound like. They will prevent your wire from fraying from the friction of where it attaches your clasps.
- Toggle clasp set – you can also use a lobster clasp or other type of clasp if you want. You may also need two jump rings, depending on the type of clasp you choose.
- Beading wire – this is 7-strand nylon coated wire.
- Not pictured – small pliers for your crimp beads, and a pair of wire cutters to trim your wire. If you don’t have specific jewelry tools, you can often use pliers from your regular toolbox as long as they are small enough.
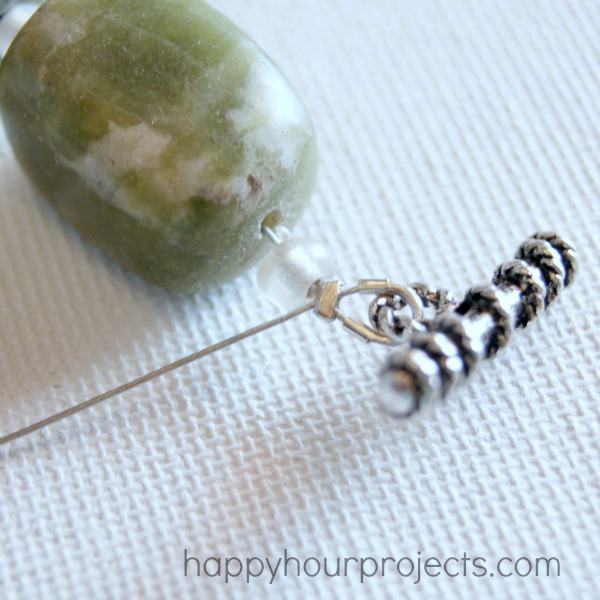
Cut about a 10″ length of wire. This will be more than you need, but a longer length is easier to work with. Thread on a crimp bead, and feed one end of your wire through the guard.
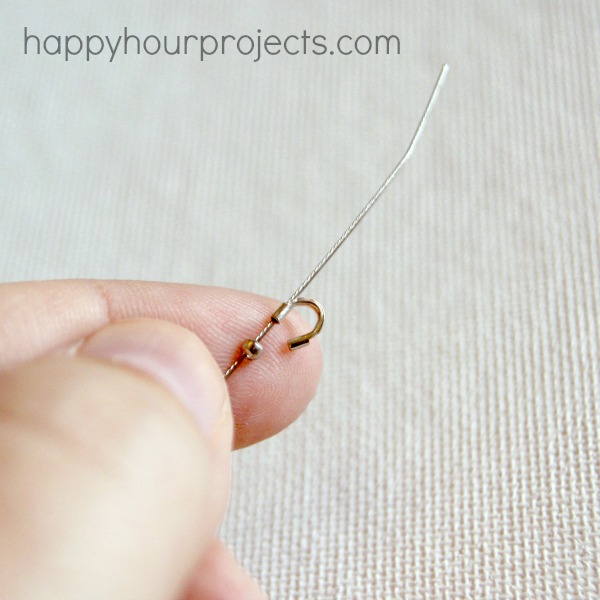
Wrap the wire around the guard, and feed it through the other hole. Add one end of your toggle clasp onto the guard as shown. Then, feed the wire through the crimp bead.
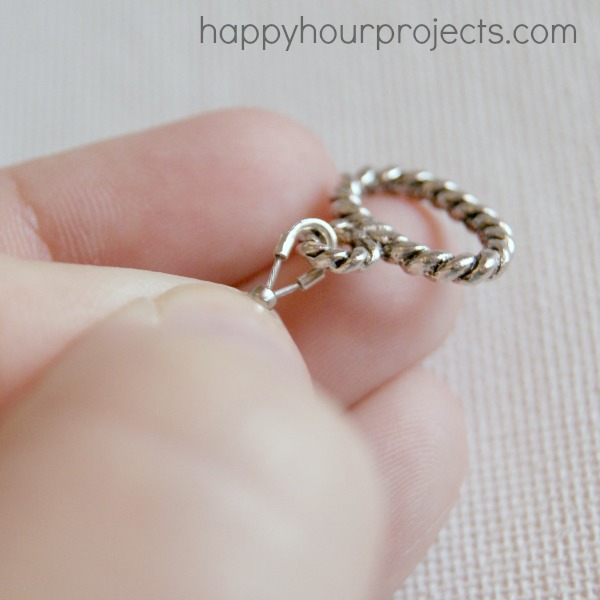
Tighten the crimp bead as close the guard as you can. Then, use your pliers to crimp it. To do this, you just flatten it, securing both wires.
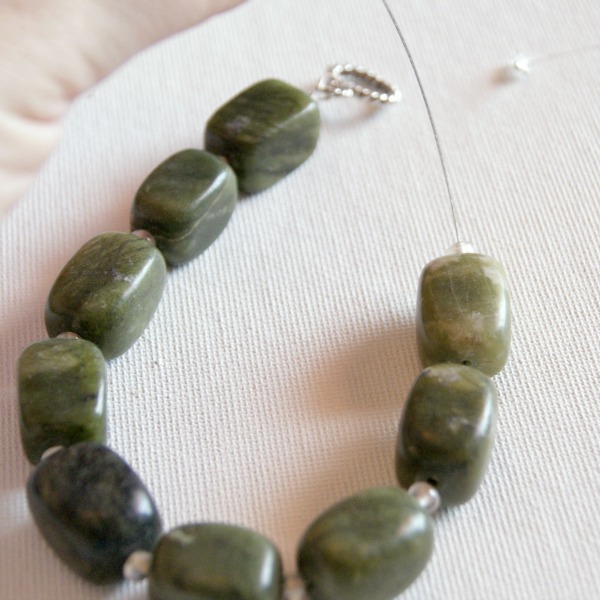
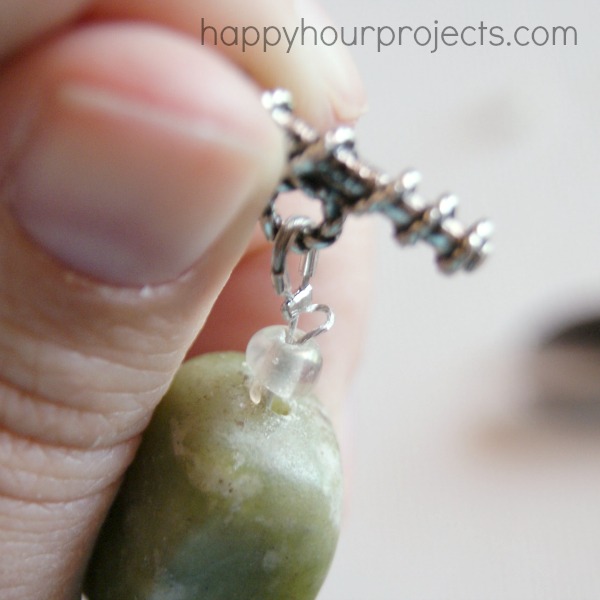
Now, keep that little “tail” of extra wire. Don’t cut it off. You can string your beads onto both wires, and the excess wire will help keep your crimp from coming apart. Then, string your beads. You can create any pattern you can imagine! You want a finished length of approximately 6.5 inches of strung beads (more or less, if your wrist is smaller or larger).
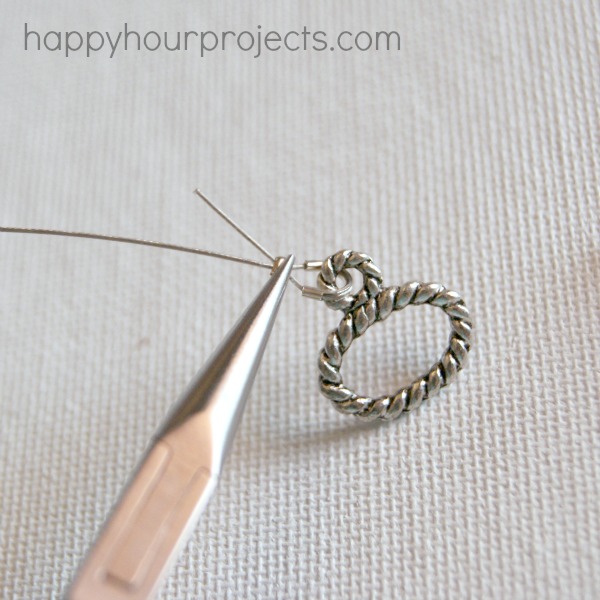
Now, attach your other end of your clasp the same way as you did the first one. It’s often a little more difficult than the first end because you’re working around a strand of beads, so be patient with yourself, and keep your bead strand as snug as possible.
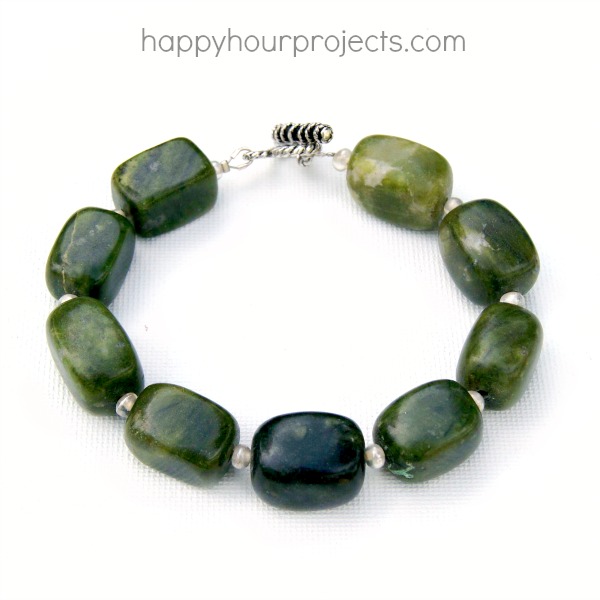
The excess wire will need to be trimmed down slightly – keep about 1/4 – 1/2 inch. Then, use your pliers to tuck it down into your bead strand.
You should now have a nice neat bracelet!

How did yours come out? It might take a few tries to get your strand nice and snug. But you will get better really quickly – it’s like anything, patience and practice both help you get good really fast. Once you get the feel for how to handle it to keep your beads tight, you won’t even have to think about it.
What colors can you envision for your first bracelet?


How beautiful. Thank you so much for your detailed instructions! I tried a few of your bracelet projects and simply love it!
I’m loving the way you presented this information. It’s easy to understand and fun to read.
Your designs are lovely, and your tutorials are so well done! However, I really condone using split rings to attach the strand of beads to the clasp; it facilitates changing out the clasp in the future if that becomes necessary. A split ring (the same concept as used in keychains, but small) provides more security.
Also, when you are using chunky beads, as in this example, you need to account for their bulk when you are measuring for your wrist size.
{ Also, am I the only person that strings on the beads first – then finishes off the two ends? LOL. I guess I just am prone to change my mind on the designs.}
I really like all the jewelry projects that you share. Thanks so much for the clear and concise instructions and the great photos.
I adore your jewlery! I’m pinning this into my rainy day projects to give it a try, thanks!
~Laurie @ Vin’yet Etc.
Love the color of these beads! They are great!
Thanks for this 101 post. I’ve recently started to make bracelets (you’ve inspired me w/ your braded bracelets), and I always have trouble figuring out how to connect “this to that” and what materials to use.
Thank you for the detailed instructions. Making jewelry is on my Summer To Do List. I’ve been wanting to do it for some time, but it is a little intimidating. Thanks for putting it simple easy steps. Can’t wait to make one. Thanks :)
I really enjoy your detailed illustrations on your tutorials. Thanks for taking the time to share your talents with us. The wire guards are a great thing to use…..I will be looking for them. Looking forward to seeing more in the future.
I really needed this! You tutorial and wonderful pics make it look easy. Maybe I can do this, after all. Thanks for a great post!
Your, not you! It’s very early in the morning! Oops
I love your jewelry!!! I need to try out those wire guards.
Adrianne you seriously make this look so easy!
Thank you for this basic tutorial Adrianne! I LOVE visiting the bead section of Michael’s and Hobby Lobby, and love all of your tutorials, but it’s very overwhelming when I have never done it before. I had no idea what to use for just a basic bracelet – crimping beads, spacers, what kind of wire…. Thanks for “dumbing it down” for me :) Can’t wait to make something for myself now!
Very pretty. I am trying to hone my skills at bracelet making using various pieces of my inventory. For some reason I have trouble with stretchy bracelets, I always snap them…lol. So I am making ones with the toggle clasp. I do look forward to having a Happy Hour project like this with my pals. Thanks for all the great ideas.