
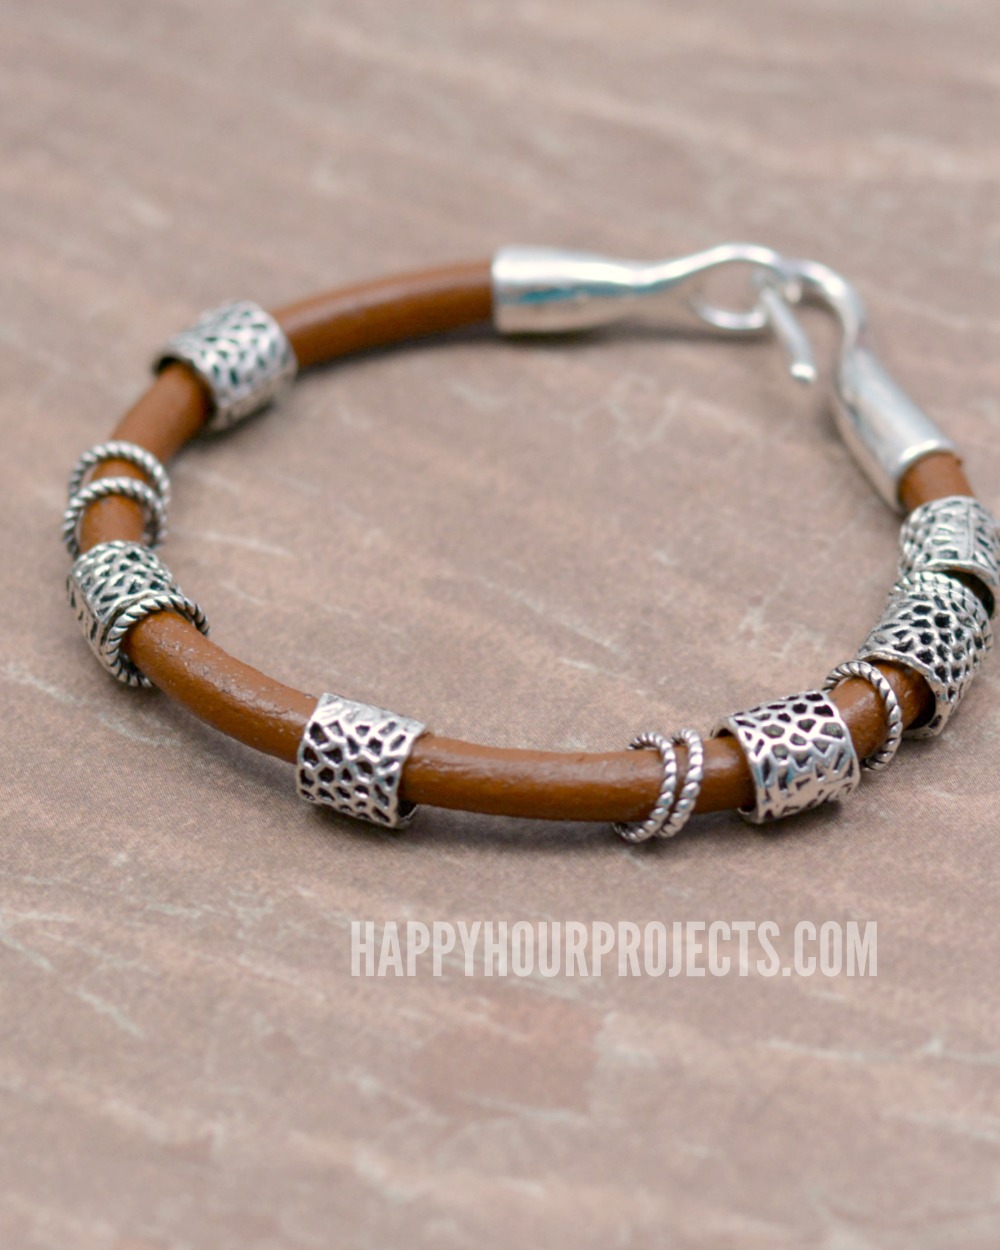
Hey friends! I’ve got a great beginner-friendly DIY leather bracelet design to share with you today that combines pewter bead accents and round leather cord to make a casual boho-chic bracelet. The size of this bracelet and the colors I’m using make it perfect to stack with other bracelets for that eclectic arm-candy look.
Best of all, this project takes less than 10 minutes to complete (you’ll need additional drying time, but it’s definitely an instant-gratification project!) and there are only a few supplies necessary. I got my supplies from today’s post sponsor, Happy Mango Beads, and I’ll leave links in the supply list below so that you can shop and make the look too!
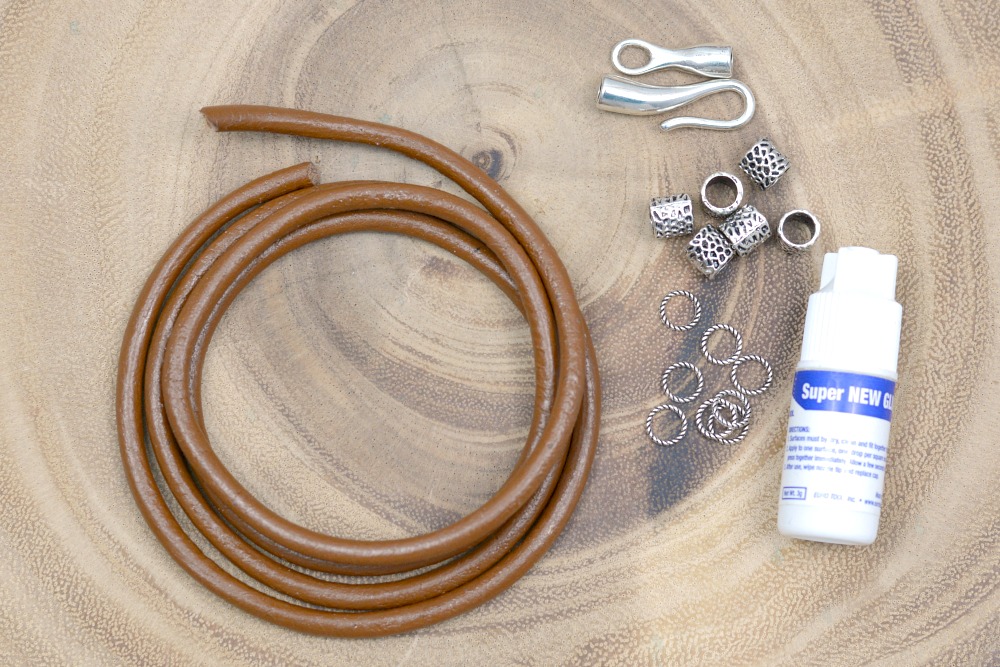
Supplies Used:
- 7 inches light brown 5mm round leather cord
- 6 – 8mm pewter large hole tube-style beads
- 8 – 8mm pewter rings
- 30 mm glue-on hook clasp set
- Super New Glue (or your favorite jewelry glue)
- Scissors

Now if you’re reading carefully about the components, the hook clasp is advertised with an interior hole size of 4mm and the cord is 5mm in diameter. But I found that it DOES FIT, though it is a tight squeeze. A snug fit will give you a secure bond, though, so it’s a good thing!
Cut your cord to approximately 7 inches to make an 8-inch finished bracelet. (If you would like a larger or smaller bracelet to fit your stature, you can lengthen or shorten the amount of cord you will use. The clasp adds approximately one inch to the finished piece.)
Add a few drops of glue into one cap, and fit the leather into the cap. I am using Super New Glue because it’s fairly inexpensive and reliable, but any glue that’s rated to bond both leather and metal will work fine!
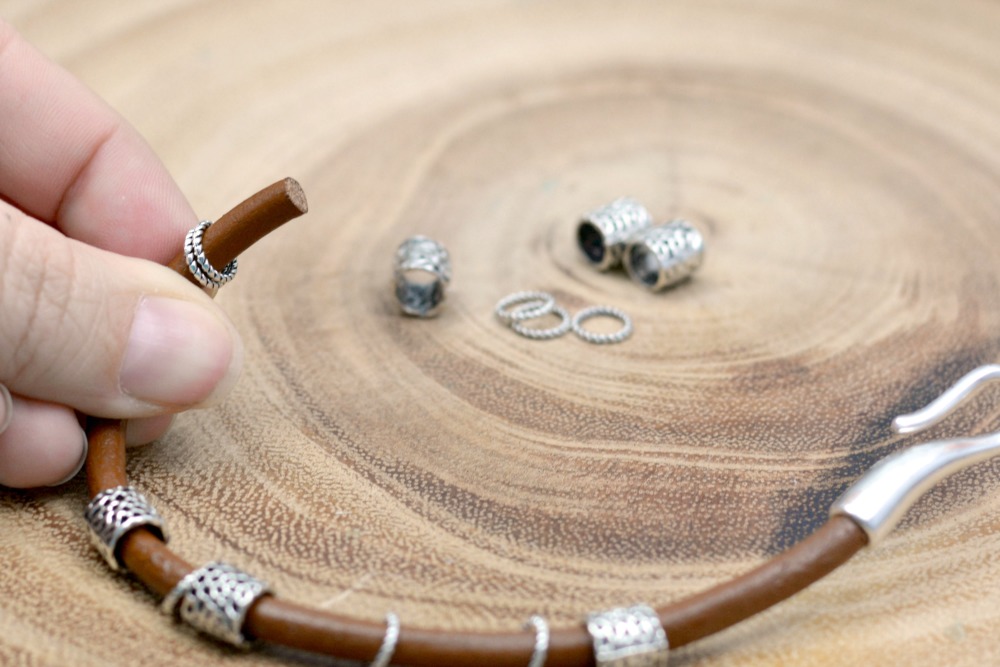
Once you fit the end cap on, thread on your beads and rings. I used a pattern of bead, 2 rings, bead, 1 ring, bead, 2 rings, bead, 1 ring, bead, 2 rings, bead. You can adjust your pattern, or add more or fewer beads to suit your tastes. These pewter accents allow for free movement along the leather, and allow lots of leather to show.
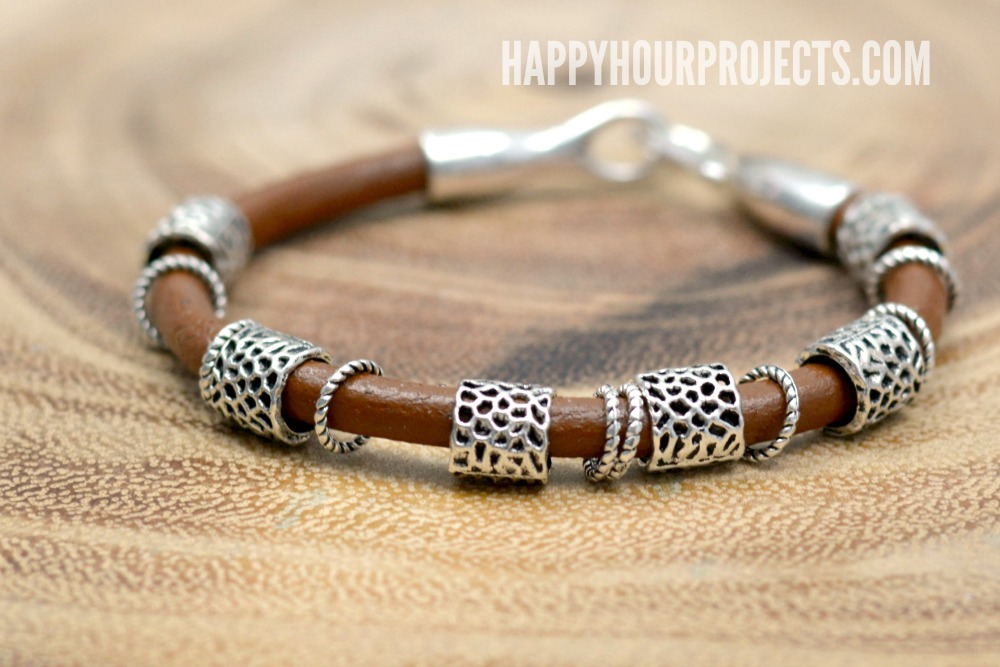
Finally, glue the second end cap onto the cord to finish the bracelet. You will want to wait approximately 30 minutes of drying time before wearing it, but it really is as simple as that!
I hope you enjoyed today’s quick DIY leather bracelet design, and join me again for more fun with accessories!

So creative and great directions . Thanks!
i like it
wow looking good
I just found you and I love your designs. I am going to make two of them