

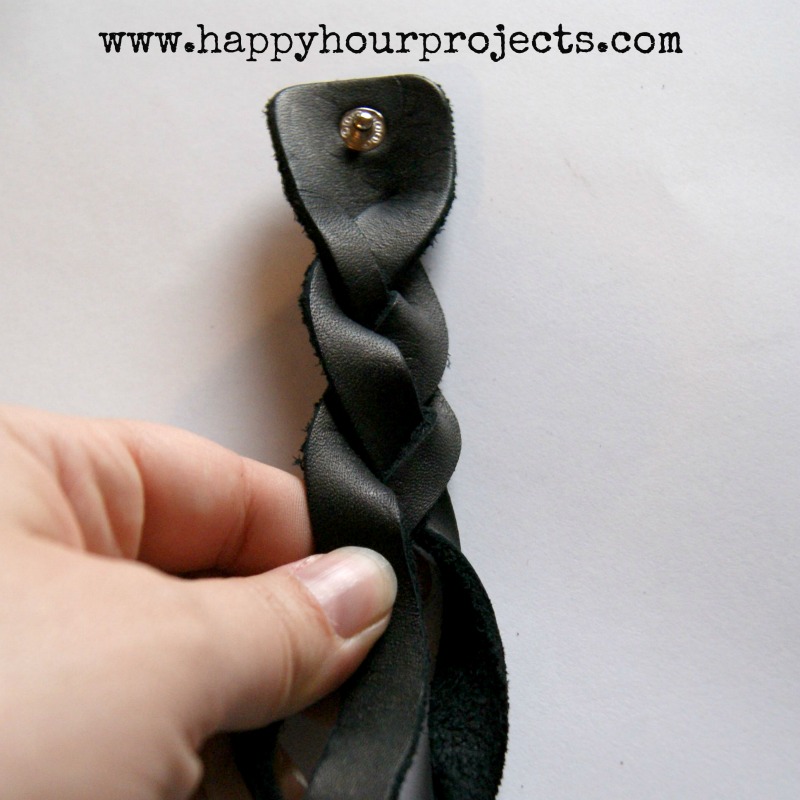
With the same method, you can make either look: a loose braid, like above, or a tighter braid, like below.

It’s made from a single cuff, with slits cut to make it three strands. The very cool effect to this cuff is that yes – you CAN braid something that is already joined! I found these cuffs at Hobby Lobby in the leather section, they came in a 2-pack. If you already work with leather often (I do not) you could easily cut your own cuff and add a snap, but for me, beginning with a pre-made cuff made the most sense – a 2-pack with snaps already attached was only $3, no special supplies required except a utility knife.
Use a sharp utility knife and cut two long vertical slits. I apparently didn’t photograph this step. Use common sense here and be careful when you do this – use a self-healing mat to cut on, or a few layers of cardboard, and for goodness’ sake don’t cut yourself. :) I freehanded mine, then realized I should have used a ruler as a guide. So, learn from my mistake and use a ruler!
Now that you have three strands, start your braid at either end. I’m going to go slow and photo-heavy here to show you how this works. It looks tricky, but if you’re good with spatial relations, once you get your hands on this, you’ll see just how it works.
You can start on the right or left, but pay attention to where your strands are. When you braid, they move from right, to center, to left, to center, to right again. For this to work, you have to complete a full braiding cycle. What I mean by that is at the end, the strand that started on the right will need to be on the right, the left on the left, and the center in the center again.
I’m going to refer to these by number for lack of a better way to explain it. We’re working in threes.
The first strand you move is one:

…two:
…three.

With me so far?
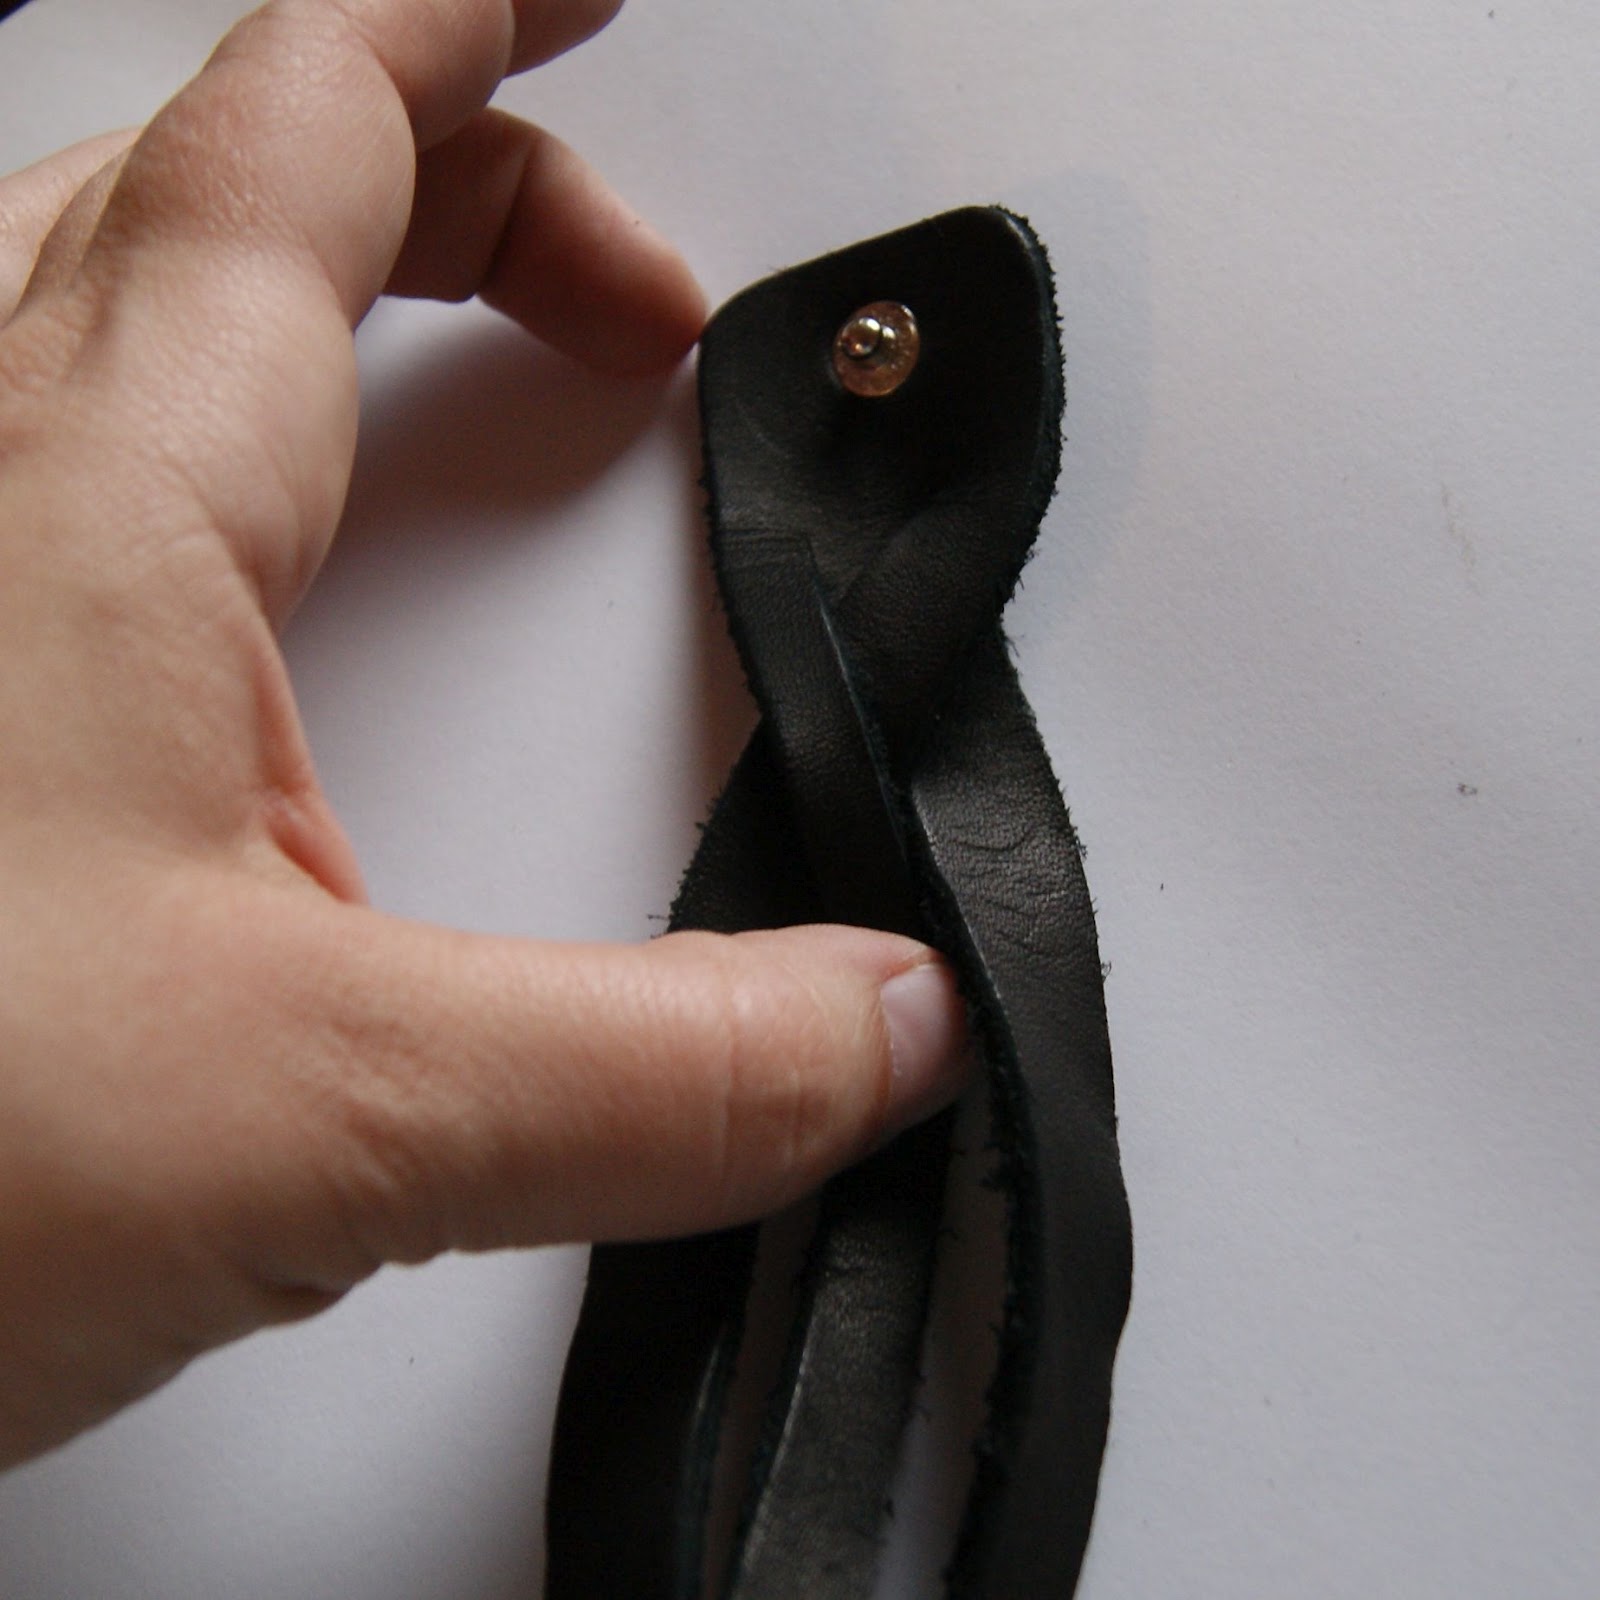
Now the bottom is kind of working itself into a reverse braid. You should have something that looks like this. Straightening the bottom is a two-step process, and here’s where we do the first step, now that we’ve completed half a braiding cycle.

You’re going to take hold of the tail, right at the snap, and push it through the hole where the arrow is showing. You’re just following the strand sitting on top back through. Below is where I’ve pulled the two strands apart, which will naturally tug that end:

And feed it through.
Now… it will look worse, like you’ve made a mess. :) But trust me, it will work itself out when you finish the other half of your braid cycle. This is what the bottom of your braid should now look like.

Now, turn your attention back to the braid at the top of your cuff. We’ve done step 1, 2, and 3. Now we’re going to continue braiding. Four:

…five:

six. This is one full braid cycle. Now your original right strand is on the right, left on the left, and center back to center. So now when we do the second untangling step, the bottom will straighten out.
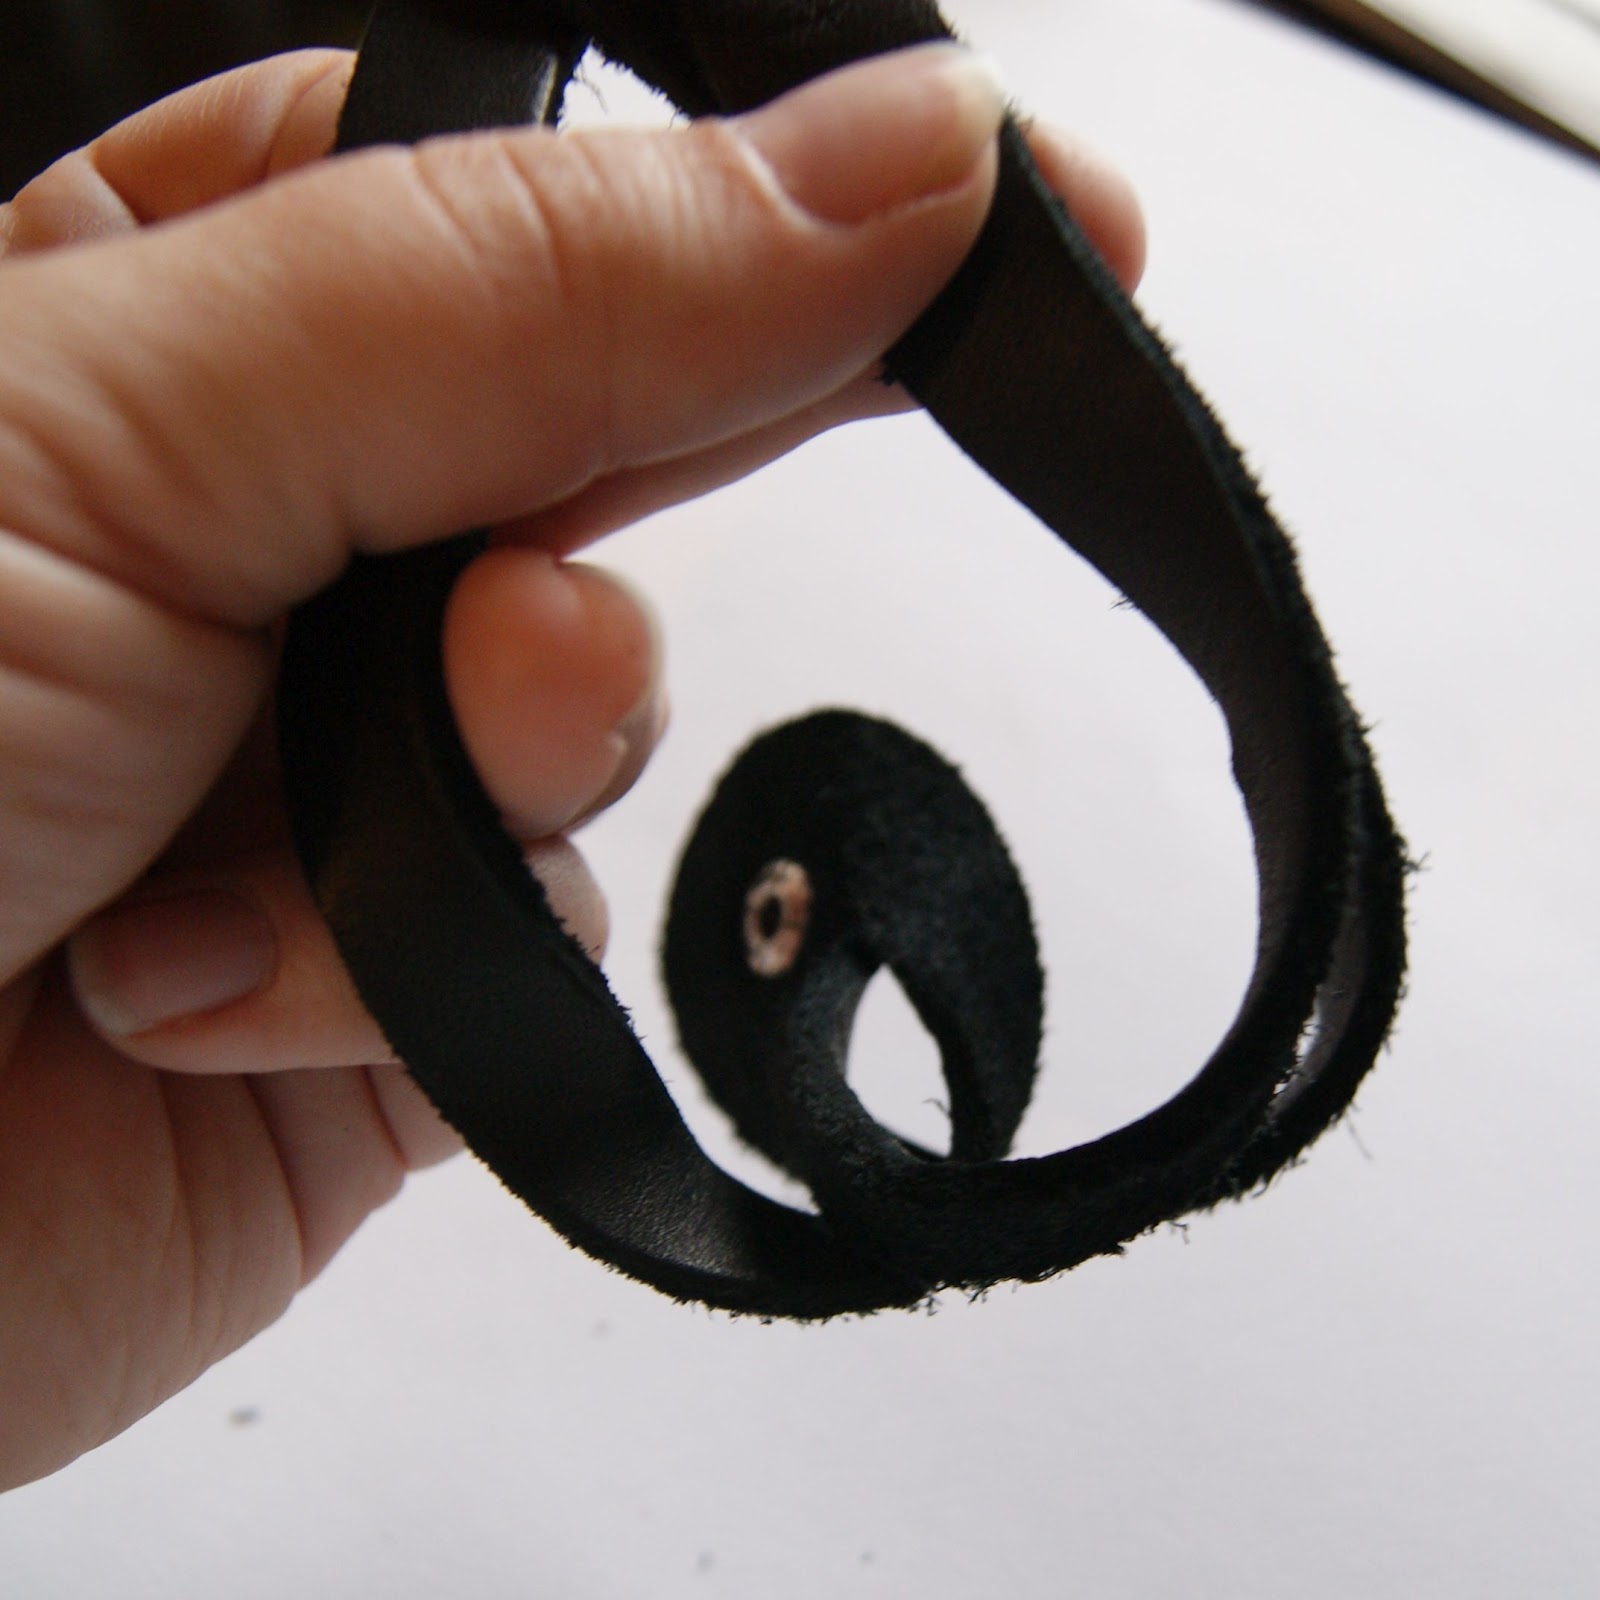
The strand on top is the left strand, so what you’ll do is separate the center and right strands, and feed the tail through that opening.

Like so.

And now the bottom should be straight!!

At this point, you should feel like a fabulous magician. You can do one of two things here: you can leave it at one braid cycle, and just adjust your strands evenly.

Or, if you want a tighter braid, you can do one additional braid cycle, following the same instructions as above, giving you a look more like this:

I like the looser braid, personally. It hangs a little looser on the wrist, because anytime you braid, you lose just a little bit of length, making the tighter version a little more snug. Which one do you like better?
I link up to these great parties!
~ Adrianne
This looks totally cool! I'm going to get me some cuffs and give it a try.
How cool! The tutorial is very clear and I definitely want to give this a try. Thanks so much for sharing at Mom On Timeout!
Great tutorial! I just didn't realize that you could braid something that is still joined but I am planning on trying this. Fun summer projects! I grew up in the seventies, love all leather jewelry:) Thanks for linking this up to Freedom Fridays:)
Oh that is Darling! I love the braid! It adds so much to it! Amazing!!! Thanks so much for sharing this with us at Thursday's Temptation.
Jill
You make everything look so easy! THis looks great!
Carlee
http://www.ladybirdln.com
Thanks for sharing. I’m going to try this.??
They both look great. I wish I was more creative! New follower from What's cooking in the burbs. Have a great day!
http://whatscookingintheburbs.blogspot.com/
Cute! Neat idea for our teen girls group, too!
I like the look of the tighter braid, but I would go for comfort and wear the loose one. As a little girl, I had a leather cuff bracelet with my name engraved on it. As a twentysomething I used to wear thin braided leather bracelets. So, this project brings back find memories. I just may have to make myself a new leather braided bracelet…since they come in a pack of two, maybe one for me and one for my daughter. She'd love to have matching bracelets. Sounds like a good summer project. Thanks for sharing this on at Show & Tell.
Followed you on Linky and liked your facebook page too!
Hi Adrianne,
You must be very creative, the cuff is beautiful!
Now following from Welcome Wednesday.
Blessings!
http://www.ugochi-jolomi.com
You are so clever! I don't think I could figure this out with out photos to help me. I like the look of the loose one. They both turned out very cute, total rocker chic.:)
This reminds me of the braided bracelets where it's so hard to imagine until you get your hands on it and then it's really quite easy. I like the look of the tighter braid, but I see your point about it being tight. I'm not a big fan of tight. Turned out really nice.