
All right, well I have hinted all week that things on the Happy Hour front have not been entirely happy in the kitchen. I’ve certainly had some successes – but I’ve also had a few fails that I am ready to laugh about. :) Care to laugh with me?
First off, the colossal fail: Bacon-Infused Vodka. I know a lot of people will say, that sounds disgusting. I was really intrigued, though – and besides, I’m pretty adventurous when it comes to trying new things (especially new drinks). But if you don’t believe me that there’s an actual following for it, search it on Pinterest! It’s out there!

It turns out that despite all those lovely pin-able photos, it’s probably the grossest thing. Ever. I sincerely mean that. When I was filtering it, I even started gagging on the smell. It did not taste at all like bacon, it tasted like… salty unpleasantries. My aim was to make a bacon-chocolate martini, since another new trend is the bacon-chocolate combination (once again – check Pinterest!) but instead, I had to cleanse the nasty taste in my mouth with a regular chocolate martini. (And then the taste of failure with a second chocolate martini, of course.)
So after I had properly consoled myself and had a good night’s sleep, I woke up the next morning and moved on to a fairly well-researched project that I spotted on Mrs. Fox’s Sweets’ blog: Dipped Cupcake Bites. She was sweet enough to answer several questions I had, because I really wanted to get these cute bites right.
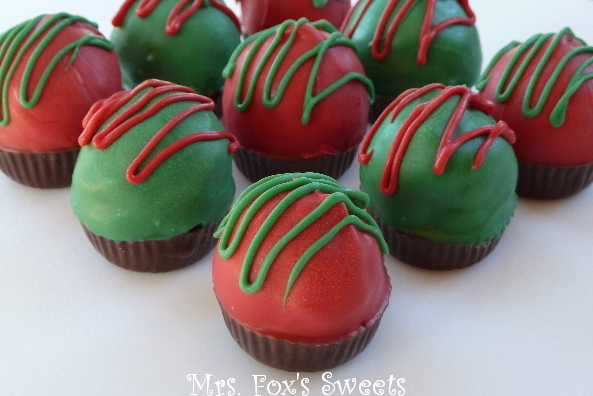 |
| Don’t these look amazing?? |
She said it was easy – and this time I can totally endorse that claim! There are a few separate steps to it, so it seems sort of fussy, but each step is quick and simple, actually. And they turned out beautiful!
And then I ate one.
And then I threw it away.
Full disclaimer here – Mrs. Fox warns you right in the original tutorial not to get too much frosting in your cake mix. But guess what, I got too much frosting. It’s the first time making something cake-pop related for me, so I didn’t realize what sort of texture I was aiming for. My mixture balled well, and dipped well – but then the cake part mushed when I bit into it, and that was the end of it for me. In the future, I will eat a cake ball before I dip it, so I don’t waste my time!
I was still glad I tried the project, though, because I discovered that it really was easy, and now I know where the pitfalls are when I try it again. Yes – you read that right – I believe the method is totally sound. The fail was totally on my end. :P
A few notes if you decide to try these:
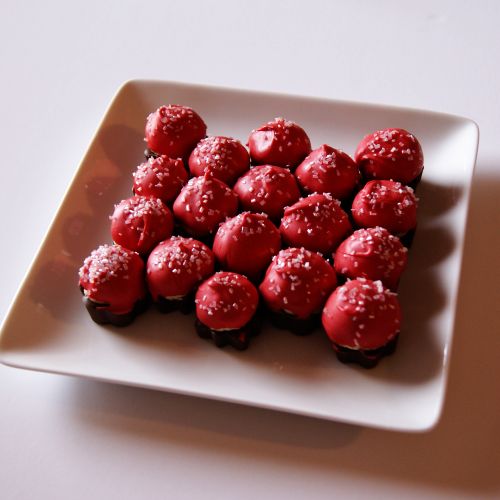
1) If you wait until immediately before a baking holiday, it’s likely that candy molds will be sold-out everywhere. Not to fret – I decided to try silicone ice trays I spotted that were shaped like snowflakes. They worked great!

Check out the cute bottoms:
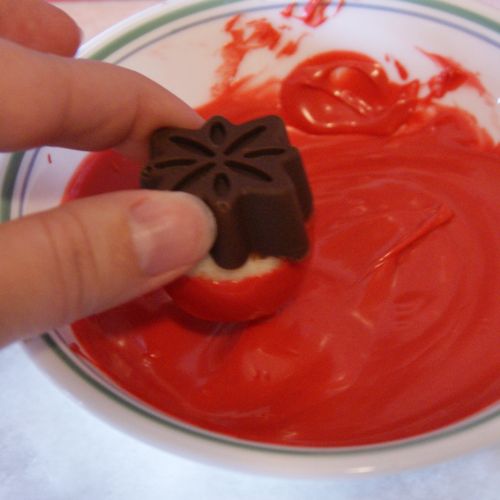
2) You should work quickly. Once your melts are individually portioned in your tray, they will begin to set. So only spoon out one or two, and put your cake balls in right away.
3) 1/2 a cake mix needs about 8 oz. of melted bases and 4 oz. of top-dipping colors, and will net you about 24 bites, assuming you use roughly 1 Tbsp. of cake mix per pop. For those of you who don’t keep these sorts of ingredients on-hand – this is good information to know *before* you shop. Your leftovers will keep just fine, but if you’re anything like me – there’s no sense in over-buying!
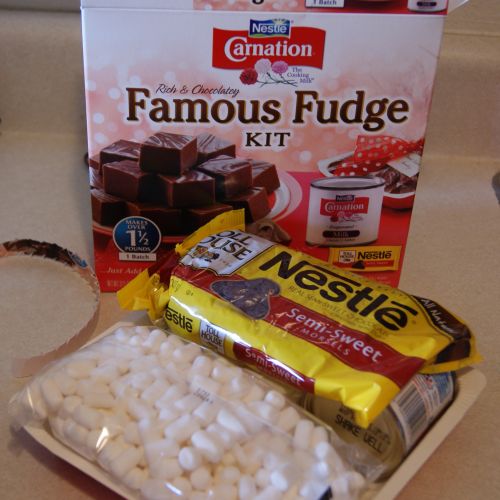
Now – last but not least in my Christmas-in-the-kitchen saga, I did very nearly throw a hissy fit in the store when it came time for Ladybird Ln’s double-decker fudge. Again – that’s totally on me, because who goes to the grocery store for ingredients when you didn’t write them down?? This mama, apparently. So while all the rude people in the baking aisle kept banging into my cart (even with a BABY in it, what the heck, people??) I decided to just give up on the fudge altogether. I fled the baking aisle and all the grinches shopping there, and promptly and got stuck… next to a display of these:
Awesome.
So, I bought – and made – this kit. All you have to add at home is 2 Tbsp. of butter – everything, even the tray, is right in this kit. And it’s good! I subbed half peanut butter chips for the whole bag of chocolate, and recruited my husband to mix up the chocolate half while I stirred the peanut butter (I never knew fudge set so quickly!) and layered them the way Carlee explained in the original recipe.
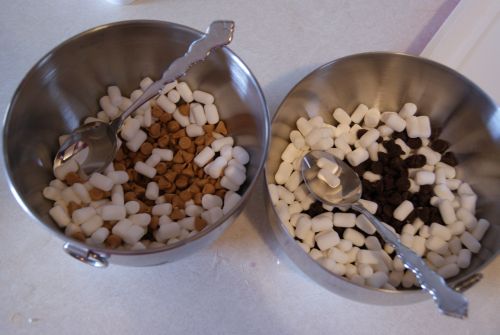
The recipes are very similar (once I was back home and could compare) – the main difference is that the original recipe at Ladybird Ln calls for marshmallow creme, and the kit had actual marshmallows that needed to melt. But by going with the kit, I got my fudge after all without murdering anyone in the grocery store, so I think that’s pretty much a win-win. And fortunately, at least the fudge has a happy ending, even if I didn’t get to make it the way I had intended:
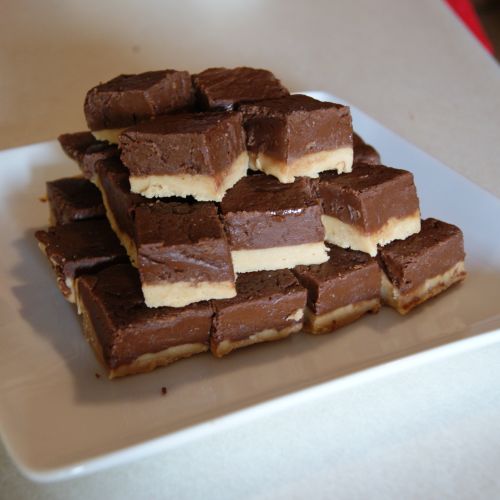 |
| Getting my kitchen mojo back with some great fudge! |
So there you have it. I’m human, and I certainly had a bad run there for a few days. :) Fortunately, I think I’ve recovered! Thanks for reading my lengthy kitchen rant, and I will see you all back here tonight at 5:00 for Freestyle Friday!
~ Adrianne
LOL I too have had my fair share of failures, I do want to say you may like cake balls better in chocolate cake. I like vanilla cake, but in a cake ball it just doesn't taste right. so try again trust me a chocolate cake ball is a great thing.
Bummer on the bacon vodka, I know you were really wanting to try that. :( The cake bites looked awesome so call it a partial win. Fudge, yum! And yay for not killing anyone in the baking aisle!
Ahhh..sorry you had such a rotten time in the kitchen!!!I am the worst baker ever when I am pressured/rushed-I have to do all my Christmas baking well in advance or else I am Queen 'I'll throw this baking sheet at you if you don't get out of my way' baker…LOL…the fudge looks really good though! :)
Merry Christmas!
LOL – thanks for sharing, you poor darling. Glad the fudge worked out for you. I feel the worst for wasting that good vodka, lol.
Sorry you've been on a bad streak, that's so frustrating. I DID however hear something about a bacon coctail on Martha Stewart Radio, and I think it sounded interesting… Brave you for trying it out though!
The bacon doesnt sound very appetizing! I love the bottom of your snowflake bites. I do love the trays you used, very creative! They look great! I have never made fudge, must do that one year! It looks yummy and I love the 2 colors!