• Skip to primary navigation
  • Skip to main content
  • Skip to primary sidebar

Happy Hour Projects

  • home
  • about adrianne
  • buy the books
    • DIY T-Shirt Crafts (2015)
    • DIY Stamped Metal Jewelry (2016)
    • Rock Painting for Beginners (2019)
  • videos
  • crafts
    • diy beauty projects
    • kids’ crafts
    • paper craft projects
    • polymer clay
    • sewing projects
  • jewelry
    • bracelet projects
    • earring projects
    • necklace projects
    • jewelry tools & supplies
  • metal stamping
    • beginners’ tutorial
    • video tutorial
    • project ideas
    • metal stamping supplies
  • recipes
    • cocktail recipes
    • appetizers
    • main and side dishes
    • sweets and treats
  • by season
    • birthdays
    • new year
    • valentine’s day
    • st. patrick’s day
    • easter and spring
    • mother’s day
    • patriotic
    • fall
    • halloween
    • christmas
    • thanksgiving
  • privacy

Coffee Bean Trivet

08/26/2014 by Adrianne Surian 6 Comments

What do you get when you combine coffee beans and recycled bottles?  Fun kitchen accessories!  Today I have one last recycled bottle project to share with you for a little while (until inspiration hits me over a cup of coffee again, I mean).  I made up this durable DIY trivet for protecting your tables from hot pans and dishes using just a couple of supplies.

DIY Coffee Bean Resin Trivet at www.happyhourprojects.com

For this project, you will need:

DIY Coffee Bean Resin Trivet at www.happyhourprojects.com

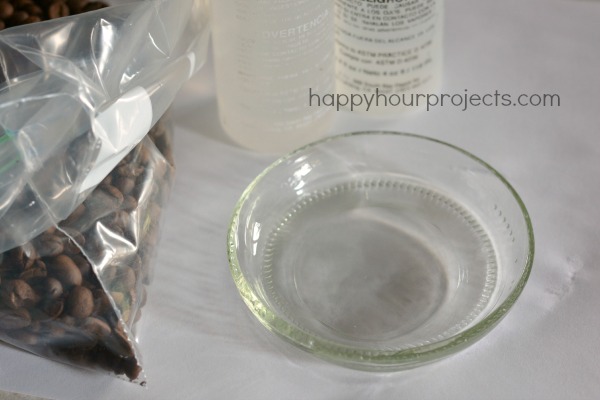
  • A wide glass bottle (mine was a quart bottle that had lemonade in it in its former life)
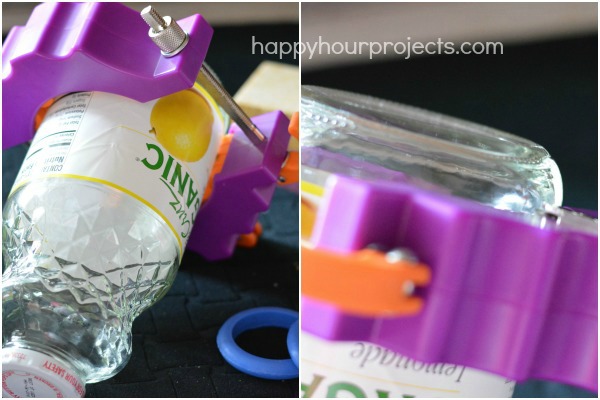
  • A way to cut it – I love my Kinkajou (that’s not an affiliate link, I just want to show you the tool if you’re in the market for one)
  • Epoxy resin (like Ice Resin, and that is an affiliate link to Goody Beads) with cups and stir sticks
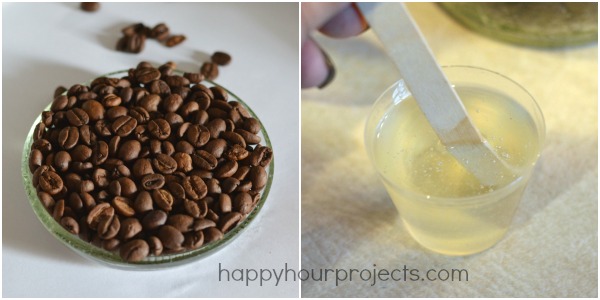
  • Coffee beans, or whatever you want to fill your trivet with

I’ve shown you a couple projects I’ve used my Kinkajou bottle cutter on, and I’ll give you the brief rundown of how it works – you score a line with the tool very close to the bottom on the bottle.  This will be a very shallow dish.

DIY Coffee Bean Resin Trivet at www.happyhourprojects.com

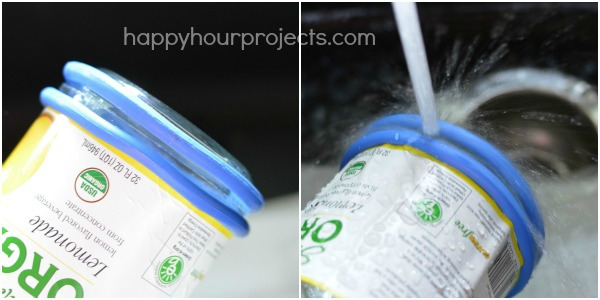
Next, you add the separation rings to concentrate where you’ll run alternating hot and cold water on the scored line.  It will crack and separate – in just a minute or two, many times!  Thicker bottles take a little longer, but this thing is brilliant for getting a clean line.

DIY Coffee Bean Resin Trivet at www.happyhourprojects.com

Sand the edge to be sure it’s not sharp, and mix up equal parts of resin and hardener according to the exact product instructions.  Most resins will require that you mix for a couple minutes in one container, switch to a clean container, and stir for another minute.  Resin is actually really easy.  All you have to do is stir.

Pile your trivet up with coffee beans and cover your work surface.  VERY slowly, pour resin over the beans, allowing it to fill all the cracks.  Be very careful not to let it overflow.  If you spill any, wipe it with a damp paper towel and wash your hands really well.

DIY Coffee Bean Resin Trivet at www.happyhourprojects.com

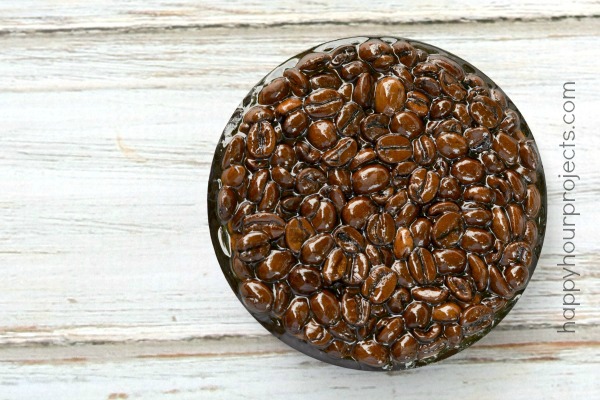
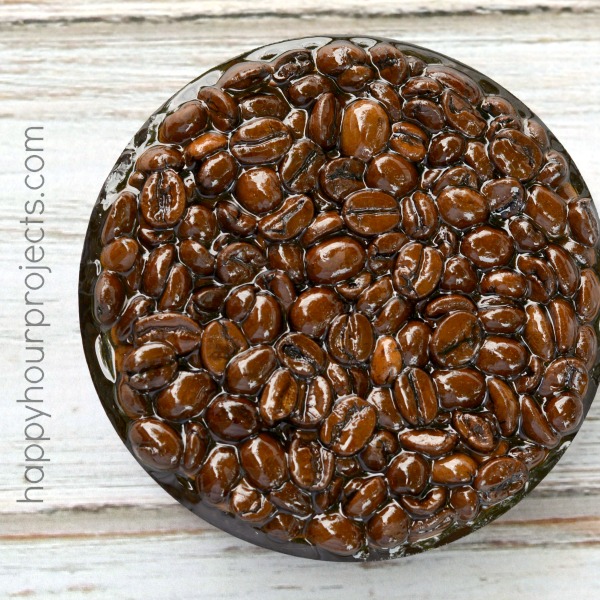
If you get any bubbles on top, you can iften just blow gently on them to get them to pop.  Finally, set it aside and let it sure for about 24 hours.  You’ll have a hard, shiny finish like this when you’re done!

DIY Coffee Bean Resin Trivet at www.happyhourprojects.com

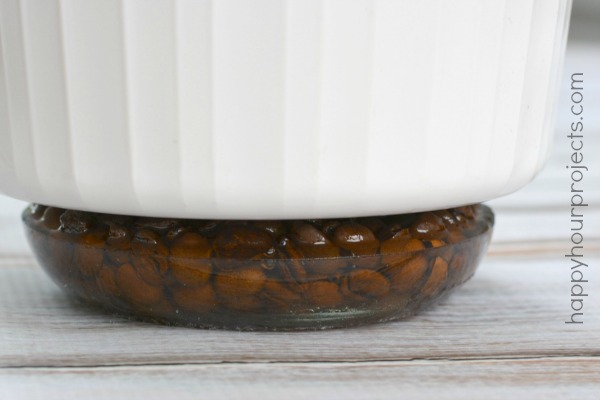
The resin withstands heat quite well, and it looks cool, too!

DIY Coffee Bean Resin Trivet at www.happyhourprojects.com

I LOVE recycling to give discarded items a new life!  What do you think?  What would you fill yours with?

DIY Coffee Bean Resin Trivet at www.happyhourprojects.com

Adrianne Signature


Filed Under: Home Decor, Tutorials Tagged With: baking, bottle, coffee, Earth Day, Glass, Kinkajou bottle cutter, kitchen, recycled, resin, upcycled

copyright policy and terms of use

I love it when you love my work! All tutorials and photos published at Happy Hour Projects are copyrighted. If you would like to feature my tutorial on your website or share it on your social media you may use one photo to feature, as long as you provide a link back to the original post.

If you feature a photo, it may not be accompanied by the project tutorial or recipe, whether in my own words as it originally appears or paraphrased by you. This also includes personal sharing on social media and Pinterest. Publishing multiple photos from a project, or including instructions with an accompanying photo are not permitted and you will be asked to remove them.

I love to share my projects, and my tutorials, recipes, and e-books are ALL free for your personal use. However, photos and ideas that are published to this site are my protected intellectual property. You may print them at home, but please do not copy or distribute them. I also allow all designs to be made and sold at fundraisers, craft fairs, etc. If you are selling a piece made from one or more of my free tutorials in your online shop, I require that you use your own, original photography, and include a link back to my website to credit me as the designer.

I hope you enjoy what you read here, and please be fair when you share!
Previous Post: « Back to School Sharpie Highlighter Teacher Gift
Next Post: Slow Cooker Pulled Pork and Kitchen Claws Giveaway »

Reader Interactions

Comments

  1. chrllrobb.blog

    09/05/2014 at 3:13 pm

    I like the coffee bean idea. Especially if it would give off a wonderful coffee aroma! :-)

    Reply
  2. Ramona Jackson

    08/29/2014 at 12:36 pm

    And every time you set a hot cup of coffee on this trivet, the beans will warm up and give off the glorious fragrance of the coffee. lol That is called AROMA THERAPY! Wow! I am up for that.

    Reply
  3. Ace

    08/27/2014 at 4:38 am

    This is an awesome twist on the otherwise boring old trivet – cool!

    Reply
  4. Kelly Hoyt

    08/26/2014 at 3:13 pm

    I love this idea! You have the most useful posts. Thanks for sharing!

    Reply

Trackbacks

  1. DIY Pebble Trivet says:
    06/22/2016 at 2:27 pm

    […] try to make one from pebbles. Originally, I wanted to try to make one from coffee beans, but I saw a couple that I didn’t love the look of, and opted for pebbles instead.  I was wanting something that looked more rustic and cottagey (not […]

    Reply
  2. CraftCrave | DigiFree | CraftCrave says:
    08/27/2014 at 10:49 am

    […] Coffee Bean Trivet – 1 freebie(s)? […]

    Reply

Leave a Reply Cancel reply

Your email address will not be published. Required fields are marked *

Primary Sidebar

Hello, and welcome! I'm Adrianne, an artist, author, designer, and blogger in mid Michigan. I work from home, chase my two kids, and this once-city-girl is learning how to care for chickens and adjusting to life out in the country. I have a compulsion for daily creativity... sometimes it's jewelry-making, paper crafting, metal stamping, mixing and baking, or giving new life to recycled items. But with 2 young kids, time is short! My goal here at Happy Hour Projects is to share projects and tips that you can do in an hour or less. The ideas you find here are designed to add a little creativity in your day, no matter how much (or how little) time you have!

BUY MY BOOKS!

Copyright © 2021 Happy Hour Projects on the Foodie Pro Theme