
Hey friends! Is it Friday yet? No? Well, if we’re not there yet, then let’s at least have a little fun making DIY hand stamped jewelry today. I am getting so excited for the best parts of fall – the cooler notes, the smell of leaves, jackets and boots, and all the colors of autumn! My partner ImpressArt Metal Stamps is generously sponsoring today’s project that is PERFECT for beginner stampers (or aspiring beginners!)

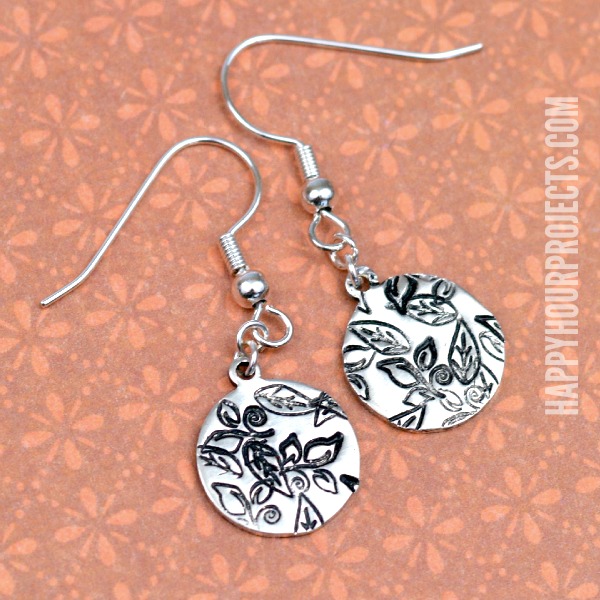
I opted for a VERY simple design of overlapping leaves on these small earrings. There are two really great reasons to get started on DIY hand stamped jewelry with a project like this. First, you don’t have to stress about crooked stamps if you don’t line them up exactly like you plan to. And second, you can invest in a few basic tools and a design stamp or two that you love without buying an entire alphabet set. (That gives you a chance to develop your stamping addiction before you splurge on your favorite font, haha. Don’t ask me how I know. Ahem.)
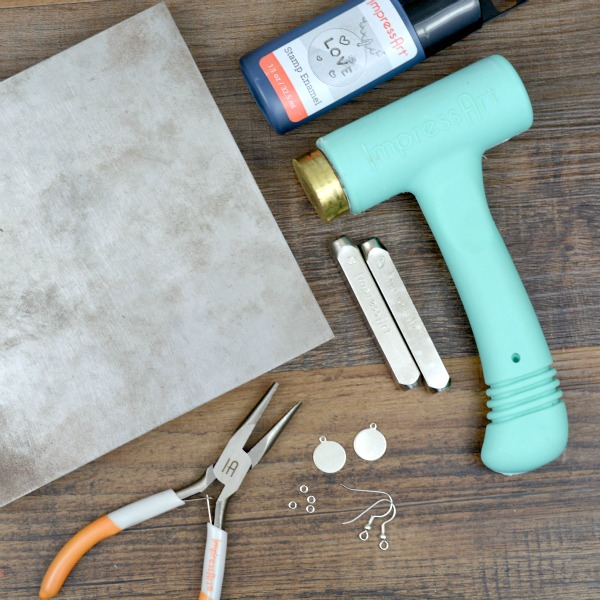
Here’s what you will need from ImpressArt to make today’s project:
- Steel bench block (of any size)
- Ergo-angle brass stamping hammer
- 6mm Leaf design stamp (left or right)
- 6mm Leaf swirl design stamp
- Stamp enamel
- Chain nose pliers
- 2 – 1/2 inch Circle tag Alkeme blanks
- 4 – 3mm jump rings
- 2 – Earring wires

There are a few important things to know if you’ve never stamped before. First of all, the larger or more detailed the design stamp, the harder you will have to strike it to get a great impression. Metal stamps work by displacing the metal, and the more metal that needs to be squished out of the way, the more force it will take. That’s not to say you’ll really have to pound on it! I’m just mentioning it because design stamps do feel different than letter stamps when you use them.
Another consideration when you’re a beginner is choosing a soft metal, like aluminum, pewter, or ImpressArt‘s exclusive alloy, Alkeme. Aluminum is really economical, but Alkeme gives you a higher-quality look. I LOVE using pewter, but pewter can be quite heavy for its size, and you may not want it for something like an earring design.
Tape your piece to your steel bench block just to keep it from moving around as you work. Hold your stamp straight vertically, and position it wherever you like. For this project, it’s a pretty random pattern, so there’s no wrong way to do it! Give your stamp one firm tap with your hammer. If you realize it’s too deep or not deep enough, you can adjust the level of force you use. Each stamp will need a slightly different force.

Part of all-over coverage means you’ll need to stamp up to (and even over) the edge of the blanks so that it looks full. If the stamps overlap a little, that’s okay!

Finally, one of the easiest ways to darken your impressions is to cover the blank with stamp enamel. Allow it to dry for 10 seconds, then rub the excess away with a paper towel. I love the stamp enamel vs. other ways to darken your blanks because it’s so easy, and I haven’t had any fading yet.
Finally, attach the blanks to the earring wires using 1-2 small jump rings. You can just twist the rings open with jewelry pliers, add the two things you need to attach together, then twist it closed again with the pliers. Most earring wires are oriented so that if you want your blank to face forward, you’ll need to add 2 jump rings together.

Thanks for joining me for today’s fast and fun jewelry project, and I hope it inspires you to try some design stamps for yourself! At a distance, these just look like they have a nice texture, but when you look closely, you’ll see the fall feel of the different kinds of leaves.
Thanks for joining me today and I hope you’ve been having a great week!

Note: As an ImpressArt blogger, I receive certain products and supplies in order to share designs with all of you. As always, the opinions and designs you read here are my own.
Thanks for sharing. I have been using OKX since early 2026 with referral CODE777 – cashback on trading fees is solid and the bonus is real.
i like it
nice post
looking good
I congratulate you. A very beautiful piece
I absolutely love those earrings. I am getting ready to make my own individual designs using metal clay. Cannot wait to get started. I have been keeping up with some of your projects and I must say they inspire me. Thanks for sharing!!
Do you have a preference now for darkening your stamping? I am having LOTS of trouble using a polishing cloth to remove sharpie markers. I found that rubbing alcohol does the trick but bet you have to be careful what type of metal you use it on or it would change the finish? Are the polishing pads different from the blue polishing cloths from Euro Tool? Is the stamping enamel by Impress Arts less permanent than the sharpie markers and less water resistant since it’s acrylic paint? Sorry for all the questions! :-)
Haha, that’s okay! So, my first preference is the stamp enamel. I’m not sure what all is in it, but it’s been permanent as far as I can tell so far. It’s a new product, so I haven’t used it for more than a few months yet, but as far as ease of application and dark impressions, I like it best. What I CAN tell you is that if I get it on my nail polish… it sticks – permanently. I can’t wash it off at all, I have to take my nail polish off, haha. So I guess that gives me a lot of confidence?
My second choice is acrylic paint – for exactly the reason you mentioned. Buffing and rubbing ink back off is tough! I have not found that acrylic paint washes away, either. When it gets down into those impressions, there’s not much that’s going to come back out of there unless it’s regularly worn when swimming or bathing (which is already not recommended).
As far as the polishing cloths – the blue or yellow ones are okay. I do like the white polishing pads better because they’re almost like a super fine grit sandpaper, they really buff your piece much more easily. So if you like the idea of sticking with sharpie, try the white polish pads! Otherwise – do play with the paint or enamel options too – those are much easier to apply, though they can get a little messy.
So pretty. I bet you make some nice Christmas gifts.
Very pretty, and you make it look so easy! Thanks for the exact supply list as well.