
Hey friends! How many of you DIY-addicts are selling crafts and jewelry at holiday events this year? I’ve got an easy and inexpensive DIY jewelry display stand idea for you today that you can make by assembling a few wood dowels together. Whether you want to show off your handmade pieces or easily browse your fashion collection at home, these jewelry booth stands come together for less than $5 each and in about 5 minutes. You can choose the length you need to show off bracelets, necklaces, hair accessories, and more. Paint them to match your style, or rock the natural look!

I shared this idea a few months back at the Consumer Crafts blog, and it’s that time of year for many of the makers to attend those holiday craft fairs, so it’s worth sharing here today with all of you!
Supplies needed to make your own DIY jewelry display stand:
Click through to purchase or learn more about the materials used from Consumer Crafts!
- 3.5 x 5.5 inch Rectangle Wood Plaque
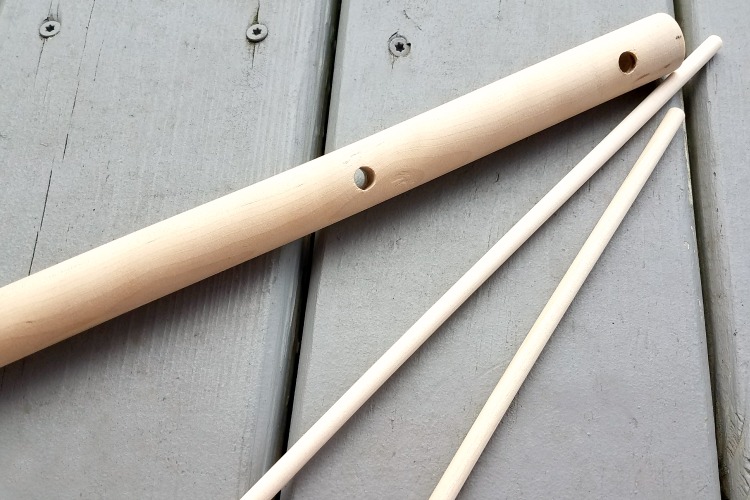
- 7/8 inch Wood Dowel
- 1/4 inch Wood Dowel(s)
- Wood Glue
- 1/8 inch Cork Sheet (alternately, you can use adhesive-backed felt)
- Drill with 1/4 inch Bit (I used my Dremel with the compatible 1/4 inch bit)
- 2 inch or Longer Wood Screw
- Screw Driver

You will need to break out the power tools for this project (or have a kind soul drill a couple of holes for you). Begin by drilling a 1/4 inch hole close to the top of the large dowel. I placed mine about 1/2 inch from the top. Depending what you plan to display, drill additional holes down the large dowel. For bracelets, you can drill your next hole about 4.5 inches down the dowel, and you can add up to three tiers. If you’re displaying hair accessories or something else, just measure how much display space you’ll need, and leave at least 1/2 inch gap between one tier and the next.
Then, drill a pilot hole for your wood screw into the center of the bottom of the large dowel. Also drill a small hole through the rectangular plaque in the center.
Next, assembly is simple! Slide the small dowels through the holes you drilled, adding a few drops of wood glue to keep them secure. Then, screw the rectangular plaque to the bottom of the large dowel (again, adding a few drops of wood glue between the two pieces of wood).

You can stop here, but you will likely want to cover the exposed screw on the bottom of the stand. Gluing cork or felt to the bottom of the stand will ensure it doesn’t scratch your surfaces, or catch on tablecloths.
At this point, you can paint it, stain it, or leave it natural – whatever look best suits your style! It only takes a few minutes to create these sturdy yet budget-friendly stands. You can get back to accessorizing or making more inventory in no time!

Thanks for joining me for today’s quick DIY, and I’ll see you all again soon!

Love this Idea. I been looking for a diy for my daughters braceletts. This one looks like something you bought in a store..Its nice and it looks easy to make. Im gonna start on mine later today. Thanks for sharing this GREAT IDEA!
Been looking for a DIY bracelet display. I priced them and decided I didn’t want to pay $25-$40 for one. Your display looks easy enough, will cost a lot less and will hold more bracelets! I might even make two! Thank you!
Thank you for this.
nice post
looking good
So it can be a great way to get the recycle bin that we want here.