• Skip to primary navigation
  • Skip to main content
  • Skip to primary sidebar

Happy Hour Projects

  • home
  • about adrianne
  • buy the books
    • DIY T-Shirt Crafts (2015)
    • DIY Stamped Metal Jewelry (2016)
  • videos
  • crafts
    • diy beauty projects
    • kids’ crafts
    • paper craft projects
    • polymer clay
    • sewing projects
  • jewelry
    • bracelet projects
    • earring projects
    • necklace projects
    • jewelry tools & supplies
  • metal stamping
    • beginners’ tutorial
    • video tutorial
    • project ideas
    • metal stamping supplies
  • recipes
    • cocktail recipes
    • appetizers
    • main and side dishes
    • sweets and treats
  • by season
    • birthdays
    • new year
    • valentine’s day
    • st. patrick’s day
    • easter and spring
    • mother’s day
    • patriotic
    • fall
    • halloween
    • christmas
    • thanksgiving
  • privacy

Layers of Leather + Pewter | DIY Leather Bracelet

01/09/2017 by Adrianne Surian 4 Comments

Hey friends! Today’s project is a quick and simple design using just a few components.  Use layers of natural cord and a pewter accent connector to create a boho-chic DIY leather bracelet.  The glue-on end caps make this a great beginner project!

Layers of Leather | Multi-Strand Leather + Pewter Bracelet at happyhourprojects.com

I got the supplies for this project from today’s post sponsor, Happy Mango Beads.  Happy Mango Beads is my favorite source for stone beads and other organic beads and components including bone, lava, leather, and more.  They also have unique pewter accents like the square connector I’m using today.  I’ll leave links to all the products I used in the list below for your convenience, in case you’d like to make this piece yourself at home!

Layers of Leather | Multi-Strand Leather + Pewter Bracelet at happyhourprojects.com

You will need:

  • Approximately 32 inches of 2mm natural leather cord (you can adjust the length of the bracelet by using more or less leather)
  • 2 – 11mm pewter end caps with bail (interior hole ~ 5mm)
  • 1 – 18mm square pewter connector
  • 1 – 20mm pewter s-hook 
  • Super New Glue (or comparable jewelry glue designed to bond both metal and leather)
  • Scissors

Layers of Leather | Multi-Strand Leather + Pewter Bracelet at happyhourprojects.com

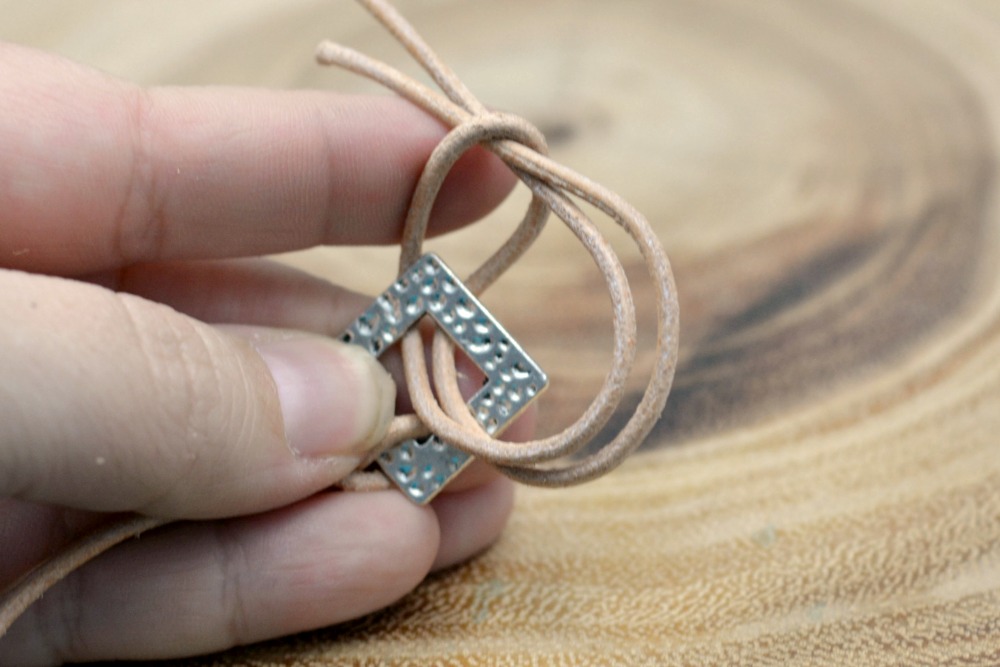
Begin buy cutting two 10-11 inch lengths of leather cord.  Take one of the cords, fold it in half, creating a loop, and pass the loop through the center of the connector.  Tuck the ends of the cord through the loop, tightening it, effectively tying a lark’s head knot on one side of the connector.  Repeat this on the opposite side of the square connector.  You’ll have two strands coming off each side of the connector.  Once you’ve tightened the knots completely, center the square and trim the ends off to create a length of 7 inches.  (You can vary this length if you happen to have a larger or smaller wrist – 7 inches will make a 8-inch bracelet, which will lie loosely on an average woman’s wrist.)

Layers of Leather | Multi-Strand Leather + Pewter Bracelet at happyhourprojects.com

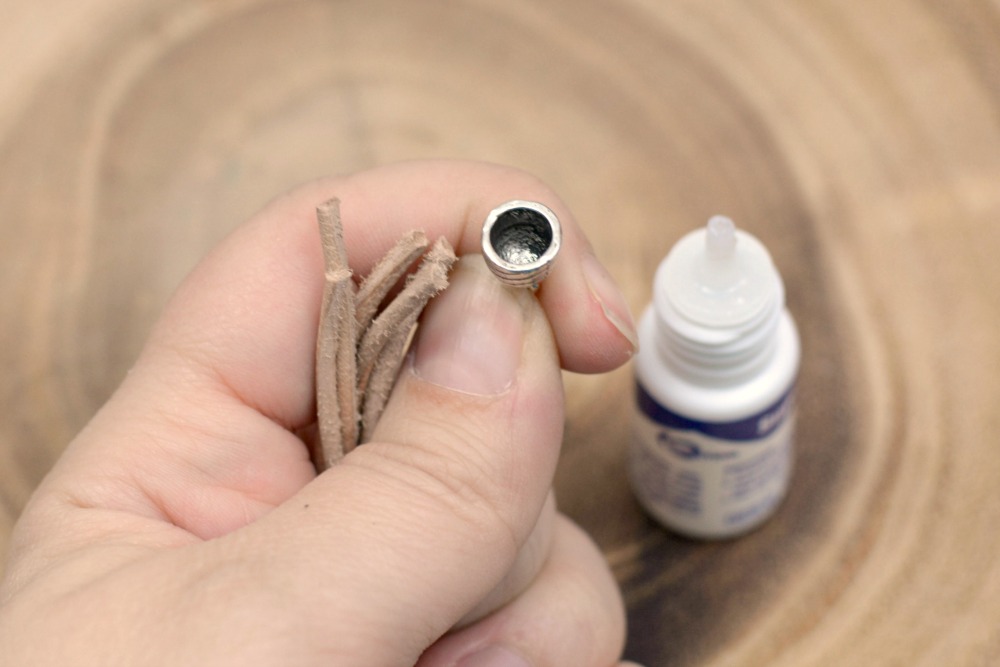
Now, cut three more lengths of leather cord, 7 inches long each (or match the length from the previous step if you’re adjusting the length).  Gather all 5 cord ends together, add a few drops of jewelry glue into one of the end caps, and insert all of them into the end cap.  Hold it in place until the glue dries enough for a light hold – typically this takes 1-2 minutes.

Layers of Leather | Multi-Strand Leather + Pewter Bracelet at happyhourprojects.com

When the glue holds enough to move on without the cords falling out of the cap, straighten the cords and glue the second end cap onto the opposite side.

Layers of Leather | Multi-Strand Leather + Pewter Bracelet at happyhourprojects.com

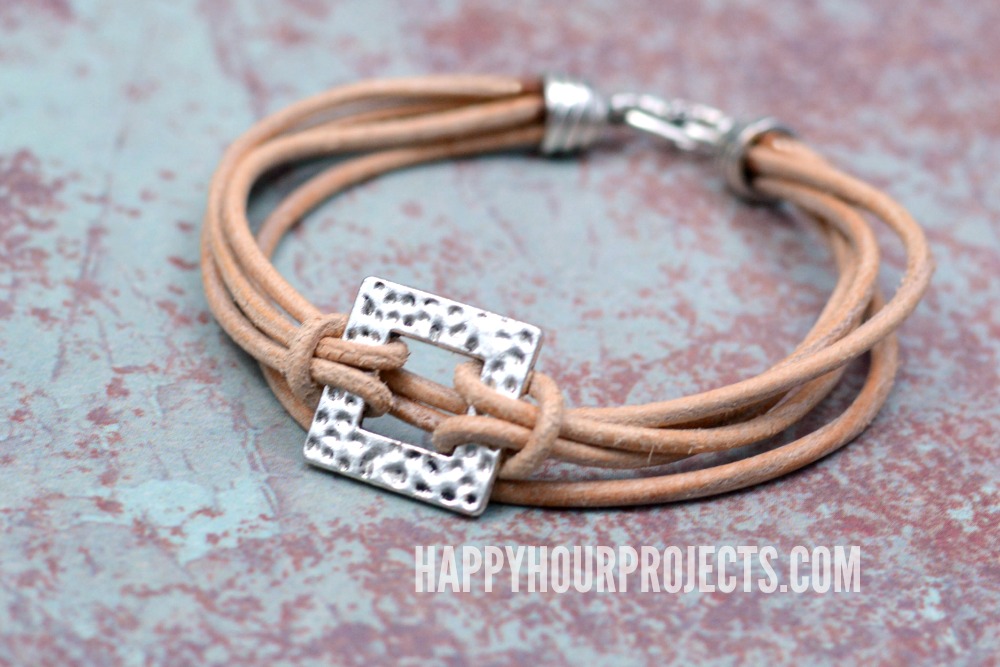
Allow the bracelet to fully dry (this typically only takes 15-20 minutes) and then attach an s-hook clasp, or whatever type of clasp you prefer.  This project should only take approximately 10 minutes to complete before drying time!

Layers of Leather | Multi-Strand Leather + Pewter Bracelet at happyhourprojects.com

I hope you enjoyed this simple bracelet design, and don’t forget that you can modify the design with other colors and connectors, following the same finishing instructions.  Thanks for joining me today!

Adrianne Surian

Filed Under: Bracelets, Fashion, Jewelry, Tutorials Tagged With: 10-minute project, accessories, bracelet, DIY, Happy Mango Beads, jewelry, layered, leather, pewter

copyright policy and terms of use

I love it when you love my work! All tutorials and photos published at Happy Hour Projects are copyrighted. If you would like to feature my tutorial on your website or share it on your social media you may use one photo to feature, as long as you provide a link back to the original post.

If you feature a photo, it may not be accompanied by the project tutorial or recipe, whether in my own words as it originally appears or paraphrased by you. This also includes personal sharing on social media and Pinterest. Publishing multiple photos from a project, or including instructions with an accompanying photo are not permitted and you will be asked to remove them.

I love to share my projects, and my tutorials, recipes, and e-books are ALL free for your personal use. However, photos and ideas that are published to this site are my protected intellectual property. You may print them at home, but please do not copy or distribute them. I also allow all designs to be made and sold at fundraisers, craft fairs, etc. If you are selling a piece made from one or more of my free tutorials in your online shop, I require that you use your own, original photography, and include a link back to my website to credit me as the designer.

I hope you enjoy what you read here, and please be fair when you share!
Previous Post: « Recycled K-Cup Crafts | DIY Gem Necklace
Next Post: Hand Stamped Jewelry | The Sunshine Cuff »

Reader Interactions

Comments

  1. deletebinghistory

    10/30/2018 at 2:10 am

    I suggest everyone to get idea about Bing web browser history through this Online tutorial and learn the different steps to delete records for all time. Thank you for taking your time.

    Reply
  2. kanchipuram sarees

    08/18/2018 at 2:47 am

    i like it

    Reply
  3. golu dolls

    08/18/2018 at 2:46 am

    wow looking good

    Reply

Trackbacks

  1. Happy Hour Projects | Pearltrees says:
    05/17/2017 at 11:09 am

    […] + Starter Set Giveaway – Happy Hour Projects. Stacked Stone + Pewter Pendant – Happy Hour Projects. Layers of Leather + Pewter | DIY Leather Bracelet – Happy Hour Projects. Boho Bangle | DIY Leather Bracelet – Happy Hour Projects. Crystal + Tube Bead DIY Memory Wire […]

    Reply

Leave a Reply Cancel reply

Your email address will not be published. Required fields are marked *

Primary Sidebar

Hello, and welcome! I'm Adrianne, an artist, author, designer, and blogger in mid Michigan. I work from home, chase my two kids, and this once-city-girl is learning how to care for chickens and adjusting to life out in the country. I have a compulsion for daily creativity... sometimes it's jewelry-making, paper crafting, metal stamping, mixing and baking, or giving new life to recycled items. But with 2 young kids, time is short! My goal here at Happy Hour Projects is to share projects and tips that you can do in an hour or less. The ideas you find here are designed to add a little creativity in your day, no matter how much (or how little) time you have!

BUY MY BOOKS!

Copyright © 2019 Happy Hour Projects on the Foodie Pro Theme