
If you enjoy working with wire, then I have an easy jewelry idea that makes a great handmade Valentine’s Day gift, or a fun something to wear on date night. Wire crafting is a pretty inexpensive craft once you have made your initial investment in jewelry pliers and it’s one of my favorite mediums, honestly! You can manipulate wire exactly how you want it. Today, I spelled a simple sentiment:

Nearly anything you can write in cursive can be formed from wire as well. What you will need:

- 16- or 18-gauge wire (I used 18 for this project, but 16 would also make a nice sturdy form). I like using silver plated copper wire for most of my jewelry projects.
- Round nosed pliers
- Wire cutters
- Chain, jump rings, and a clasp (I have a heavy chain pictured above but it didn’t match once I was finish, I ended up using 2mm chain for a more delicate look)
- Flat pliers
First, cut a length of wire. I used about 6 inches for mine, but it will depend on how large you make your letters and how long of a word you want to spell out. It’s always easier to trim your wire down when you are finished; you can’t add more if it’s too short. So cutting off 8-10 inches isn’t a bad idea.
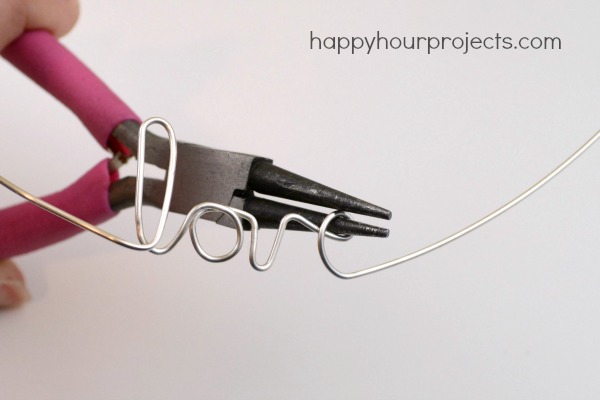
Use your round pliers to help you form your letters. There’s really not a specific technique to this – just start bending! Your pliers are helpful in creating the sharper bends and keeping the wire nice and round.
Once you have it how you like it, you will finish off the ends by looping them around your round pliers, and trim off the ends. Let me show you.
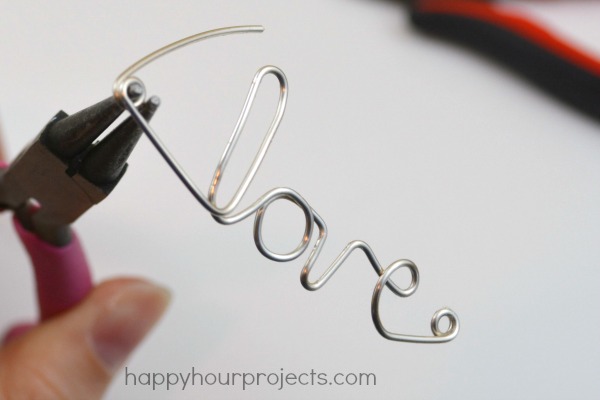
The key here is to make these ends long enough so that they rise up higher than the small letters. That way, when you wear the necklace, it won’t flip upside down – it keeps the bulk of the wire below the level where it attaches to your chain. I just wrapped it twice, then nipped off the end of the wire.

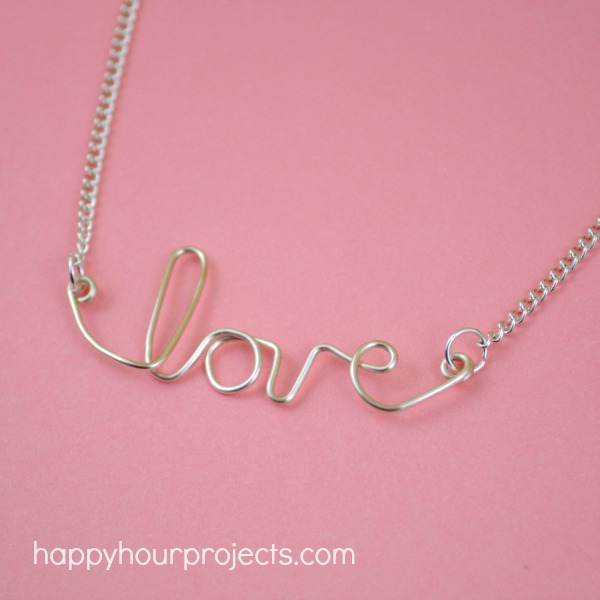
Now, attach the word to the chain. I cut 2 chains about 7-1/2 inches long (to make a short, 16-inch necklace), attached them to each side, and finished them off with a clasp. You can also use a pre-made 16 or 18 inch chain. Just cut a length of chain the same length as your word out from the center of the chain, and attach the ends.
I have to make a quick apology that I haven’t gone into as much detail as I normally do on my tutorials today, I’ve got a toddler sitting here who keeps wanting to press all the letters on the keyboard that she knows, haha. For anyone who knows their way around wire, you probably don’t need much explanation, but if this is your first go with it, you may have questions. If that’s the case please feel free to leave questions in the comments and I’ll be back to answer them – or email me! Wire work is really a lot of fun, and you can do so many things with it!

Perfect for a quick weekend craft project. Took a short break with X Trench Run after reading through your tutorial. Thanks for the clear step-by-step photos
Making these handmade gifts is my favorite way to unwind, right next to gaming Ragdoll Hit.
Your wire-bending tutorial looks so clear and easy to follow.
This information has been highly valuable. I wish to extend my apologies for my overly courteous behavior and for making it accessible to myself and others.
Think I actually have all of the tools to complete this project, so it won’t require a trip to the craft store. Yay! What a great idea. Thanks for Sharing, Adrianne!
I greatly appreciate your generosity and insight, and I am truly delighted by your kindness. I really appreciate the daily membership activations you provide.
I’ve really, really wanted to get into jewelry making. This is absolutely lovely! I had never considered working with wire!
Adrianne, my life is finally settling down so I hope to get some of the great jewelry making goodies I purchased from Consumer Crafts out and create some bling this weekend!
Adrianne – this is beautiful! I’m pinning this ASAP.
I love it! You always have fantastic jewelry tutorials. I think I’ll repurpose this on my blog tomorrow and link back to you! Thanks, lady!
This is beautiful, Adrianne! You always have such awesome jewelry!!
Very pretty! I have all of the supplies, thinking I might do some jewelry making during the next two snow days. YAY Sometimes I have a little “helper” at the keyboard too and I am in “just publish this” mode. lol
Wow, I would love to be able to make these but not sure I could. While I’m crafty wire and I dont always get along. Love it!
Cute! These kind of necklaces seem to be very popular!