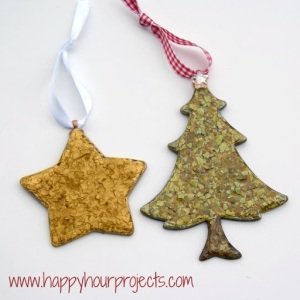
Now if you haven’t checked out the eggshell technique yet, read on! I’ll show you how to make these fun ornaments!
I mostly focus on one-hour crafts and recipes here, so let me make the disclaimer that while there’s less than an hour’s work involved in today’s project, you will have some soaking and drying time to take into account if you make these ornaments. Drying time included, mine were ready in about 24 hours, and just occupied space on my kitchen table throughout the day and overnight.
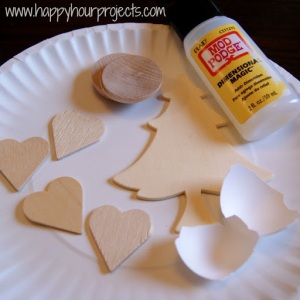
What you will need:
Wood cutouts to use as your bases. If you don’t have any, you might want to try using heavy-duty cardboard
Eggshells – depending on what size ornament you are decorating, I will say you can usually get 2-3 ornaments from the shell of one large egg.
Dimensional Glaze like Mod Podge Dimensional Magic
Alcohol Inks – these are available in the scrapbook and/or stamping aisles of your local craft store.
Toothpicks for arranging your pieces
Bail(s) and Ribbons to hang them
You will need to soak your eggshells for about 30 minutes to soften the membrane. It will need to be removed, or your creation could get really funky after a while. :)
If your eggs are very fresh, you may need to soak them a little longer. To remove the membrane, just break the shell gently, the membrane should stay intact and you should be able to just peel it right off. If it’s not working well, soak it a little longer.
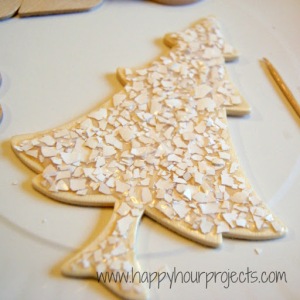
Once you’ve cleaned your shells, they can be broken up into small pieces. Cover your ornament base with a coat of glaze. You can use a toothpick to spread the glaze all the way to the edges. You can tackle the eggshells however you like, but personally, what I find to be easiest with a result I enjoy is just to crumble the shell into tiny pieces between my fingers and just sprinkle them on. Yes, some will be upside down. You can push the sideways ones over. But the ink you’ll be adding in a few minutes will soak in differently to the front and back side of the eggshell. I really like the two different shades within each piece, personally.
You will probably have to add a few extra pieces along the edges. For this, you can just dig the end of your toothpick in the glaze and use it to pick up additional pieces of shell to fit in. You don’t have to cover every tiny crack of your base – the ink will help cover it up.
Once you’re happy with the coverage, let it dry. It may take an hour or two.
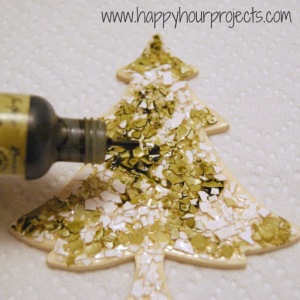
When it’s dry, you can add a few drops of alcohol ink.
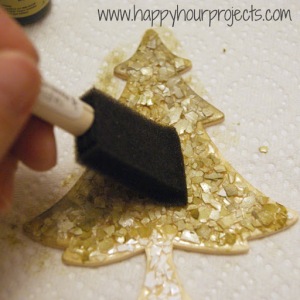
Use a paintbrush or paper towel to spread it on. The more you add, the deeper the color will be, so you can keep adding until you’re happy with the color. Make sure you add ink to the edges, and paint the back as well. It dries fairly quickly. A note – I didn’t ink the backside of my ornament now, and I should have. I will show you in just a few minutes why it makes a difference!
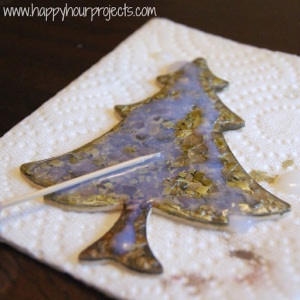
Once you like the color, then add a generous coat of glaze to the top of it. be sure not to shake the bottle of glaze before adding it, because you don’t want bubbles (they will dry trapped in the glaze and drive you forever crazy… or… maybe that’s just me?) If you do get bubbles, you can use your toothpick to pop them or move them off the edges. This will need to dry for at least a few hours – I usually do overnight.
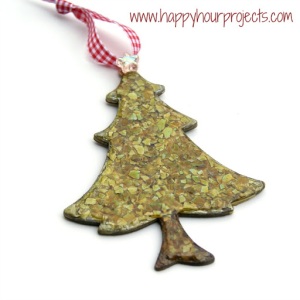
Once it’s dry, you can add a bail to the back with a heavy duty adhesive (I use E6000). Here is where it made a difference that I didn’t ink the backside of my ornament. When I used the Dimensional Magic, it leaked over the side a little. Which is fine! But what that meant was, when I applied the ink later, it didn’t cover evenly. Since it’s the back side, I actually don’t mind! But anything you can do to make it look nicer is of course the smart way. ;)
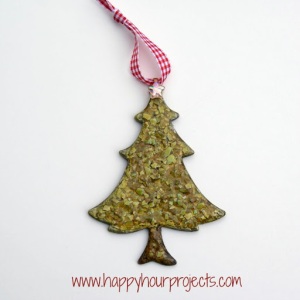
For my tree, I also wanted to add a little star-shaped bead. :) Then just add a ribbon, and you are done!
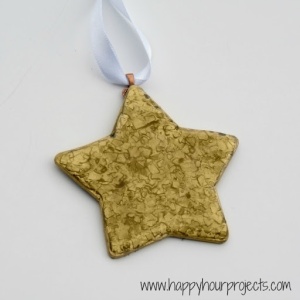
I also made a gold star. The metallic inks are opaque, so the effect is a little different than the colors. But I really like each one!
What kinds of ornaments are you making this year?
I link up to these great parties! 



So I’ve saved, soaked, and peeled a dozen or so shells over the last week. However my shells seemed to have more than one membrane layer, I’m a bit worried that i haven’t gotten enough off yet; is there a sure way to tell or us just getting that first thick layer off enough? Thanks in advance
Hi Renee – if you rub the insides of the shell after soaking them, and nothing comes off, you’re ready to go!
Oh my goodness! I would hve never guessed these were egg shells! Your ornaments are beautiful. Thanks for the inspiration.
Hi, I hope you don’t mind that I shared this post and one of your photos on my blog post at Community Chickens this week. I linked both the post and the photo back to you. Thanks! I love the idea of using eggshells on ornaments! Thanks! You can read the post here: http://communitychickens.blogspot.com/2012/12/diy-decorations-from-found-objects.html
Such an awesome way to achieve texture, never thought or heard of that before. So cool.
Adrianne, I’ve been collecting egg shells so I can try out this technique. It always looks so beautiful in all your projects! Thanks for sharing at the homemade holiday party.
Marilyn
4you-withlove.blogspot.com
Absolutely love this idea & uses all my favourite mediums/paint!! Definitely going to use this for a project :)
Speaking as an Egg Artist for many years – this is a great new idea! Never would have thought of it! Thanks so much for sharing – will pass your post along to other “eggers”. Joining from Inspire me Monday – http://allthoseartsygirls.blogspot.com/
So cute Adrianne – hard to choose which is my favorite – I like them both. I think I better get onto Christmas crafts soon too, this year is running away from me xxx
What a cool idea!
lovely, a few days I did the pendants of eggshell and now everybody want one! hahaha, I would never come up with that idea for christmas! thank you!!
What a great idea Adrianne! They turned out so pretty!
Barbara at Chase the Star
Ohh I'm so happy I found your blog! I really need some good ideas for crafts & I think you're gonna be the perfect inspiration!
I'm your newest follower via the Welcome Wednesday blog hop. Would love it if you checked out my blog & followed back! :)
– Erin xo
365mu.blogspot.co.uk – One girl's attempt at creating 365 different make-up looks in as many days
OMG how I love those ornaments.
You are so clever :o) Love these!
very cute they remind me of sugar covered cookies.
So cute and very creative! Love it!
-Ashley
http://www.ashbeedesigns.com
So pretty! You guys must eat a lot of eggs…lol.
These are amazing…I've ssssooooo got to try out your eggshell technique!
What a great idea!! Love these Adrianne!
I love these so much! I will now be saving my eggshells….{along with all the other things I hoard..umm, i mean, save for crafty projects…hehe!}
Oh I love the dimensional magic, I can not WAIT to try it!
Carlee
http://www.ladybirdln.com
Love these, Adrianne. Your creative mind never ceases to amaze me. I think I'm being creative when I crush the eggshells to use in the garden as fertilizer.
SO, SO ,SO cute!! The little tree is so adorable! I haven't even thought of ornaments yet!! I would kind of like to do some fill~able ones though.:)