
So a fellow blogger started a series this week that’s had me thinking. It’s a hand-written note challenge. At first I thought – who needs a challenge for that? I write notes all the time! But wait… do I? Because aside from thank you cards, the last one I really remember writing was at Christmas time. (My text message log is another story.) So I decided to take the challenge, and hand-write a few notes, just because.
If you would like to check out the series over at It Happens In A Blink, she just started this week so there’s plenty of time to get it on it! And, of course, I couldn’t be restricted to just *plain* notes, I had to make up a few cute embossed greeting cards to send out. I’m not the type to sit down with rubber stamps and glue for card-making, but there are easy ways to get a personal and one-of-a-kind look without a lot of fuss.
Because, what’s really important is what is inside.

I don’t write that often enough. I feel it daily, in the support I get from good friends. I might even close an email that way every so often. But there are people in my life worth sitting down, and taking pen to paper for. People worth a stamp (because it’s always wonderful to get something besides junk mail and bills). People who I need to appreciate “just because”, and not just on special occasions.
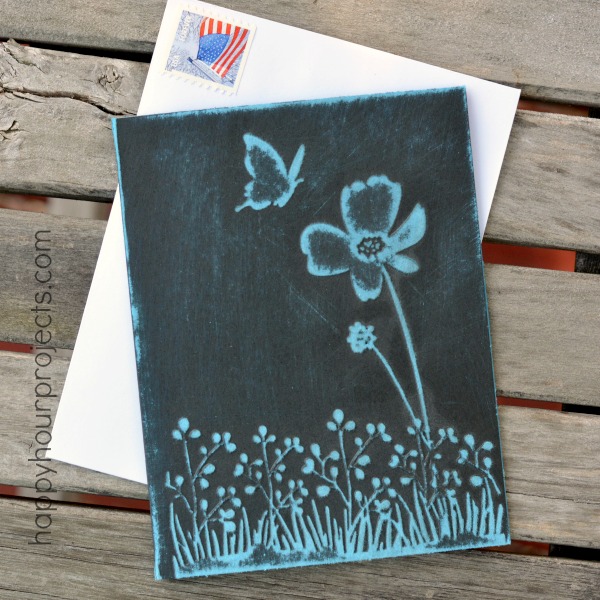
Do you feel the same? Well, handwritten notes aren’t dead – send one! Or leave one for your partner, or your kids. Just because. And if you decide you want to make the card itself a little bit special, I’ll show you how to make a pretty embossed design in just a few minutes.
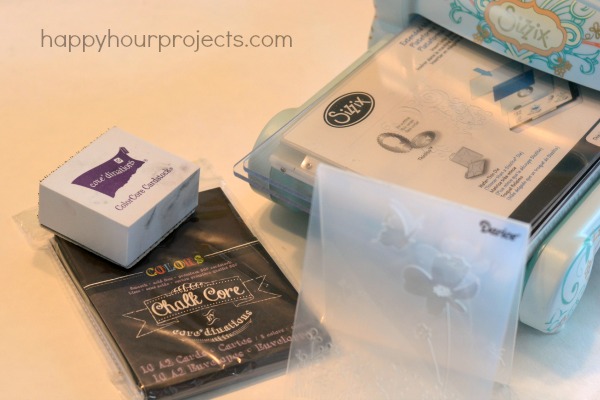
Here’s what you’ll need to make an embossed card (I’ll leave you links to where you can find some of these products where I shop for convenience, or if you want to check out the specs, but these aren’t affiliate link. I just want to be clear that I’m not compensated in any way for today’s post or if you make a purchase):
- An embossing machine, like my Sizzix Big Shot (and now that I have one, I emboss everything, haha)
- Chalk Core Cards – you can make your own, or just buy an assorted pack of A2 sized cards
- Embossing folder that you love, like this butterfly-themed one I used today
- Sandpaper (this is optional, but it really makes an impact on the chalk core paper)
- A pen, a stamp, and someone who deserves a note from you
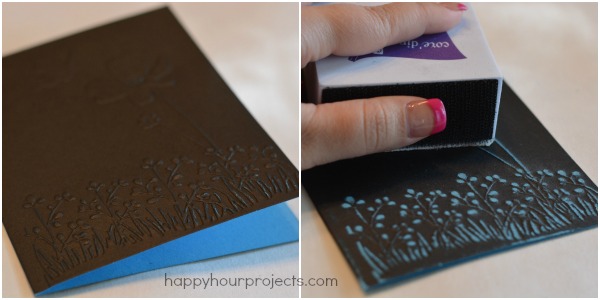
If you haven’t gotten into embossing (it’s a new passion for me, haha) – it’s really easy to do. You just position your embossing folder where you want it on the card, sandwich it between the cutting plates, and roll it through your machine.

It will come out with a raised design, that you can leave as-is (I love the look of white-on-white embossing), or you can use a two-color paper and sand one color away! Just work gently to take off the outer black layer from the raised surfaces.
In less time than it takes to get these supplies out – you can have a pretty handmade greeting card! That’s my kind of project. ;)

All that’s left to do is write a sweet note, and mail it!
When was the last time you hand-wrote a note? Is it a habit for you, or has it been a while?

You said that you can make the chalkboard paper on your own. I would love to know how to do that. This way I could make any color I want. That would be awesome!!
Oh, I just meant you can make your own card in any size from chalk core paper. I’m not sure how you would make the paper – it’s not expensive at all, so I can’t imagine the DIY route makes much sense. :)
Love your card!! Beautiful!!
Your card is absolutely stunning…..Now I have to put a sizzix on my “Want” list! ;)
Very pretty card! I need a Sizzix to add to my stash :)