
This post is sponsored by Waverly but the content and opinions expressed here are my own.
Hey friends! Now that my kids are back to school and we’re all in a great little routine, I’ve finally had time to tackle some of the projects on my to-do list. It has been awesome. One of the bigger projects I’ve been putting off is giving the deck a bit of a facelift. It’s one of our favorite spaces! And, of course, like any well-loved space, the furniture has been sat on, spilled on, and because it’s outdoors, sun-worn and well-weathered. I want to say a huge thank you to the sponsor of today’s post, Waverly Design Series at Joann, for helping us to take this space from “blah” to “ah!”

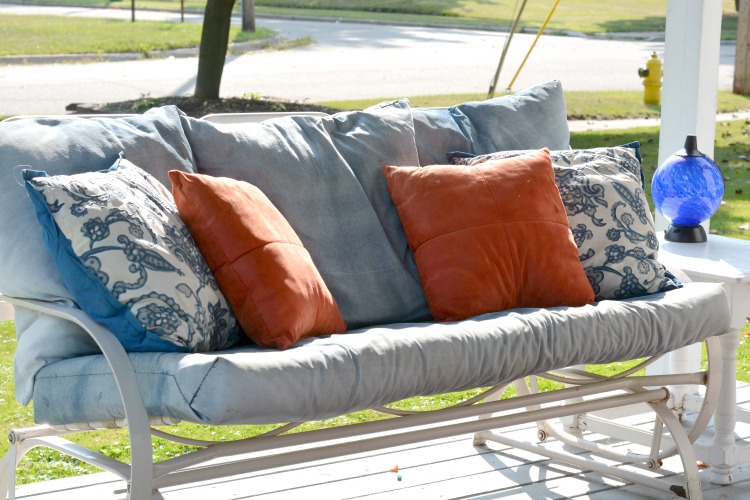
Years back, my cousin stitched up new cushions for the patio set using a sturdy denim, and they worked well for a really long time! They’re super comfortable and while the cushions held up to a lot of use – the sun faded them, and the kids and the weather eventually took their toll. We’ve been talking all summer about re-covering the cushions, and finally the arrival of fall gave us the motivation to get out the sewing machines and make it happen!

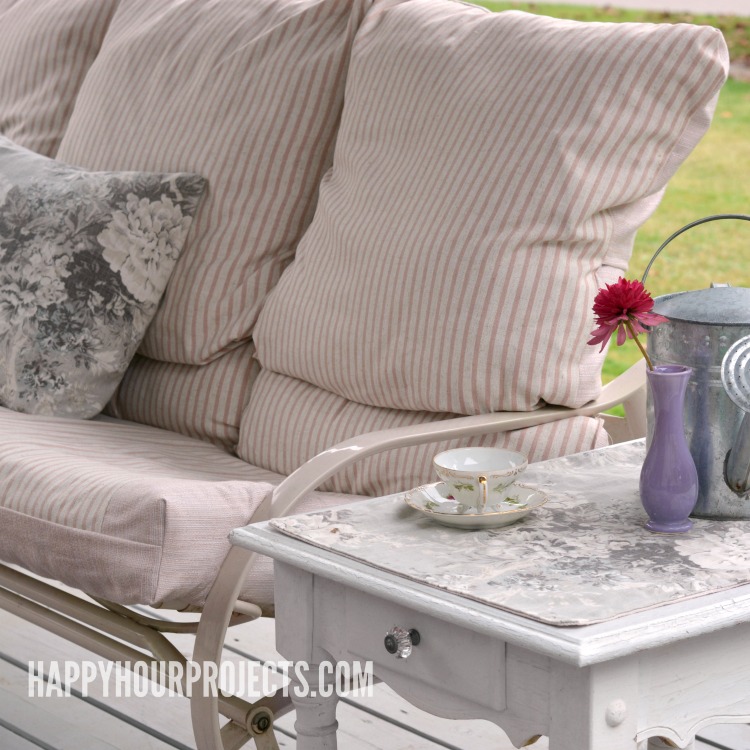
We took two days, about 12 yards of fabric, and some creative engineering to give the space a facelift. Inspired by pinks and grays, we turned the deck from an Americana theme to a shabby chic haven for tea time and good conversation.

I’m happy to tell you a little about how we accomplished the new look and the fabrics we used, though a full tutorial doesn’t make much sense for sharing how to re-cover outdoor furniture, since every set is so different! We stitched up all the covers using envelope-style coverings so that if they get dirty over time, we can remove them and have them cleaned instead of sewing up something new.
One thing we loved about the old coverings was the comfortable, slouchy feel and the thick memory foam seat.
However, the casual back cushions had a tendency to slip down after a social visit, so we were looking for a way to prevent that this time around. We added a 9″ lumbar pillow to the bottoms of the existing cushions, making them taller and firmer. The envelope style cases slip over the backs of the frame, which will keep the new cushions in place more easily.

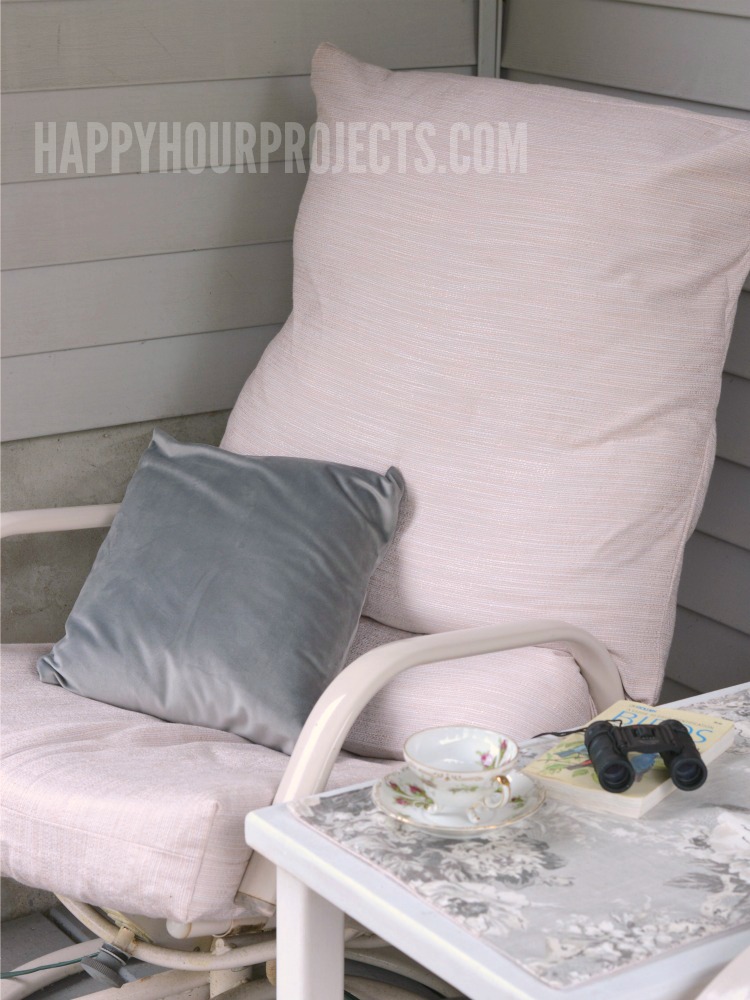
Even the foam seats were made up envelope-style with boxed corners, allowing spills to be cleaned. It is outdoor furniture – and in a well-loved space! We chose a combination of Harlow Stripe Blush, which is a sturdy fabric with a canvas feel, and Abyss Blush, which is a soft pink woven fabric. The addition of a few throw pillows covered in Ballad Bouquet Platinum and Loft Glimmer gave us more patterns and textures to pull the look together. We even stitched up a couple of table runners in the Ballad Bouquet Platinum (which are reversible to Abyss Blush, if we’re looking to change things up). We added knobs, and we’ve got our eyes out for a great coordinating rug now that all the sewing is done.
As you may have noticed from the photos, we are on a corner lot in the city. Comfort is only half the goal – style is so important when neighbors pass by or drop in!
Our house is kind of a gathering spot for a few of our friendly neighbors, so having a welcoming space is really important to us. The new colors and patterns we used from the Waverly Design Series at Joann are feminine and fun – without looking like grandma’s old furniture (which, I’ll be honest, some of it actually IS grandma’s old stuff.) If you’re digging the pinks and grays we used, you can find the Waverly Design Series at Joann Fabrics.
Is your favorite space in need of a little makeover? Do you have some plans this fall to add a fresh new look to your home? Drop me a note in the comments below, and let me know what you’re up to!

My father has always admired traditional craftsmanship. When he discovered the Zahoor Persian Collection, he spent hours showing different designs to everyone in the family. It turned into one of those evenings where decorating the house became a wonderful family activity.
Really good post, I enjoyed reading through it. Music has been evolving so fast lately, and it’s exciting to keep up with everything. I also came across this album recently and thought it might interest others: Fetty Wap Zavier project. It’s been getting some buzz.
This feels like such a relatable and satisfying home refresh story. It’s great that you’re transparent about the sponsorship while still sharing an authentic experience—especially when it comes to transforming a well-loved outdoor space into something fresh and inviting.
Wonderful post. This post is one of the best posts according to my point of view. Your work is so good and impressive. Thanks for it
Looks tasty! One omission — corn (and its amount) is missing from the ingredients listing.
We are so grateful for your amazing idea.
I think I will surprise my sister on her birthday..This is adorable and amazing. We are so grateful for your amazing idea.
thanks a lot
This is adorable and amazing. We are so grateful for your amazing idea. I think I will surprise my sister on her birthday.
They’re super comfortable and while the cushions held up to a lot of use – the sun faded them, and the kids and the weather eventually took their toll…
nice post
looking good
Get online tutorial from here about where are all programs windows 10 online.
Hello,
I’m just now installing a Murphy bed to make space in my crowded, little space. When the bed goes up,( into the wall so to speak.) then on the opposite side has collapsible table attached to the beds base. Basicly a bed on one side, a desk on the other.
It has taken a place that felt cramped and messy, into a truly functional work/live area.
This has sparked up my creative juices. I come from a long line of designers, but will be going back to school to study spacial design in September.
I’m hopping to make a way for multi purpose furniture, for small spaces ,in the low income bracket. Who can finely turn where they have always seen as a space forced apone them, do to no alternative options, into something they can be proud of , to be there home.
Wish me good luck?
I just love it. This is an amazing makeover. Thanks for sharing this post.
This is so cute and wonderful. Thank you very much for sharing such an incredible idea. I think I’m gonna make my sister surprised on her birthday.