
Hey friends! Today’s copper and agate gemstone necklace tutorial is brought to you by Happy Mango Beads and designed by your favorite jewelry blogger (AHEM, that’s me, right? Haha.) I’m going to rate today’s design as an intermediate DIY jewelry project, but it does make up quickly! If you know your way around your pliers, you can re-create this design in about 10 minutes.

This piece was inspired by a strand of agate slab beads that caught my eye when I was shopping Happy Mango Beads, and one of the reasons that I love their selections so much. It’s my go-to happy place when I’m looking for natural elements to incorporate into my designs.

As you can see, each bead is totally different. I even had a few with druzy crystals – like the one I used as my focal bead in this casual necklace. I’ll list the supplies I used for today’s tutorial below with links to click, so you can shop for your supplies if you’re feeling inspired! You’ll be able to choose the exact bead strand you want as you shop, and no two strands will be alike. Are you getting excited yet? Let’s dive in!
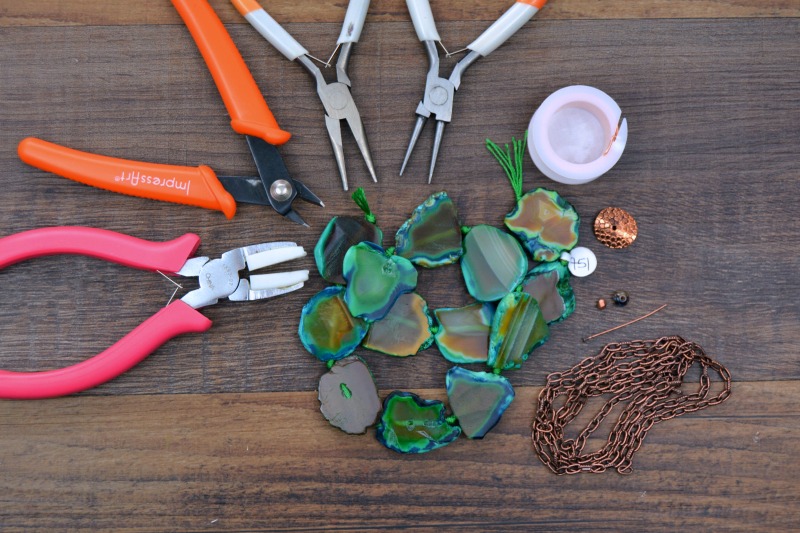
Happy Mango Beads Supplies
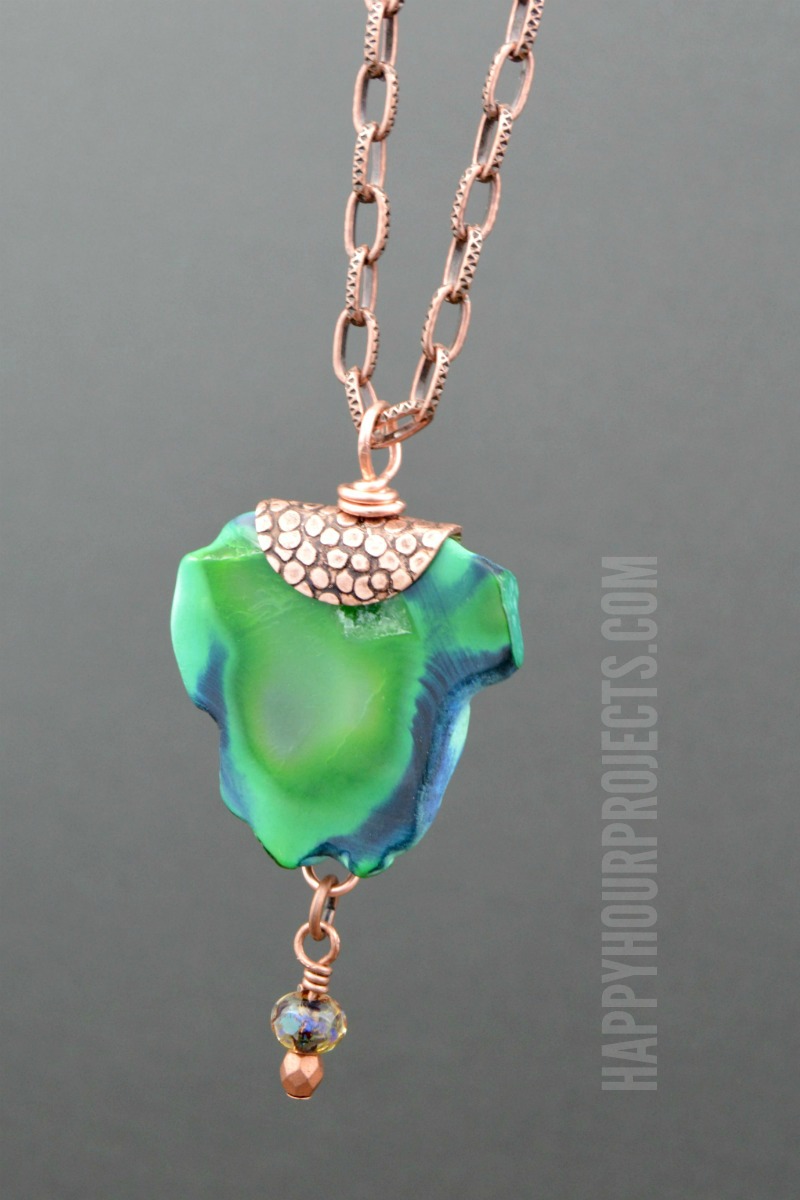
- 1 – Side-drilled Agate Slab Bead, drilled through the center and not the top. I’m using a dyed green and brown color for this piece.
- 1 – Bent Copper Disc Bead
- 1 – 8mm Golden Brown Rondelle Czech Glass Bead
- 1 – 3mm Copper Czech Glass Bead
- 30 inches Copper Finish Chain (pictured here is a 5mm stamped oval link chain, but there’s a suitable copper curb chain alternative here)
Additional Supplies:
- 6-8 inches 18 Gauge Copper Wire
- 1 – 1.5 inch Copper Finish Head Pin
- 1 – 5mm Copper Finish Jump Ring
- Round Nose Pliers
- Chain Nose Pliers
- Nylon Pliers
- Wire Cutters

Prepare the focal piece by choosing an agate bead that has one fairly flat side. The one I selected is almost triangular, but every bead will be different! The bent copper disc bead will need to be bent further so that it slips over the flat side of the agate bead with the holes aligned.
A note about shaping the bent copper beads. I found that wrapping the bead over my round pliers, and squeezing it with nylon plies (so as not to scratch it) to shape it around the bead were the best ways to get the shape I needed. The copper is quite hard and takes a little bit of muscle, but it’s SO worth it for the finished look!
The copper bead is plated with an anti-tarnish finish. Manipulating the metal WILL cause this finish to flake off. While the look is almost exactly the same, over time, the copper will take on a bit of a patina (like an old penny). This is just a caution that you’re not doing anything wrong if the finish comes off. I peeled the plating right off.
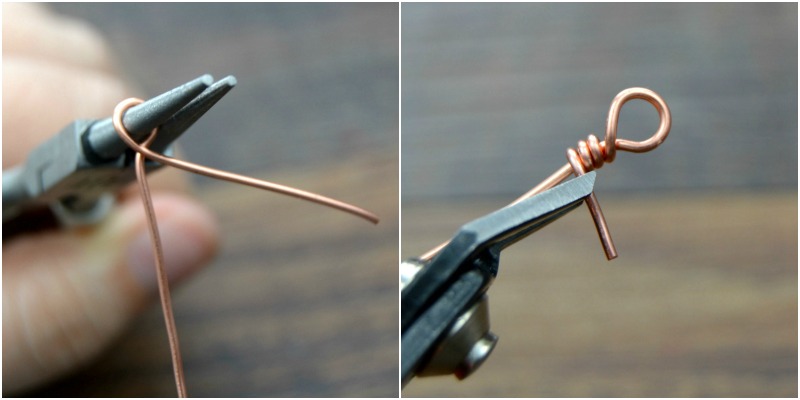
Form your focal bead pendant by first creating a loop that will be at the bottom of the bead (so that you can attach your smaller bead charm at the end). About an inch from one end of a 6-8 inch piece of copper wire, wrap the wire around one side of your round nose pliers. Take the short end and coil it around the longer part of the wire, forming a loop as shown above. Trim any excess wire with wire cutters.
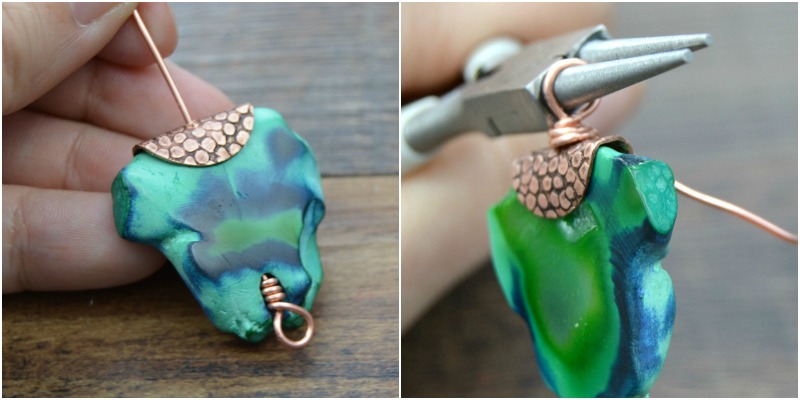
Next, slip the agate bead onto the wire with the loop at the bottom. Align the holes and place the copper disc at the top of the agate bead.
Create one more large loop at the top end of the agate bead, and trim away any excess wire. Tip: try to position the loop at the top so that it can double as your pendant bail! If it’s not oriented that way, you can also add a large jump ring to the pendant before stringing it.

Next, make a small bead charm using coordinating beads – in this case, I’ve used a small gold bead and a medium sized brown rondelle bead. Simply stack them onto the head pin, and make a wrapped loop at the top, just as you did when working with the agate bead. Connect the smaller charm to the loop at the bottom of the agate bead with a 5mm jump ring.
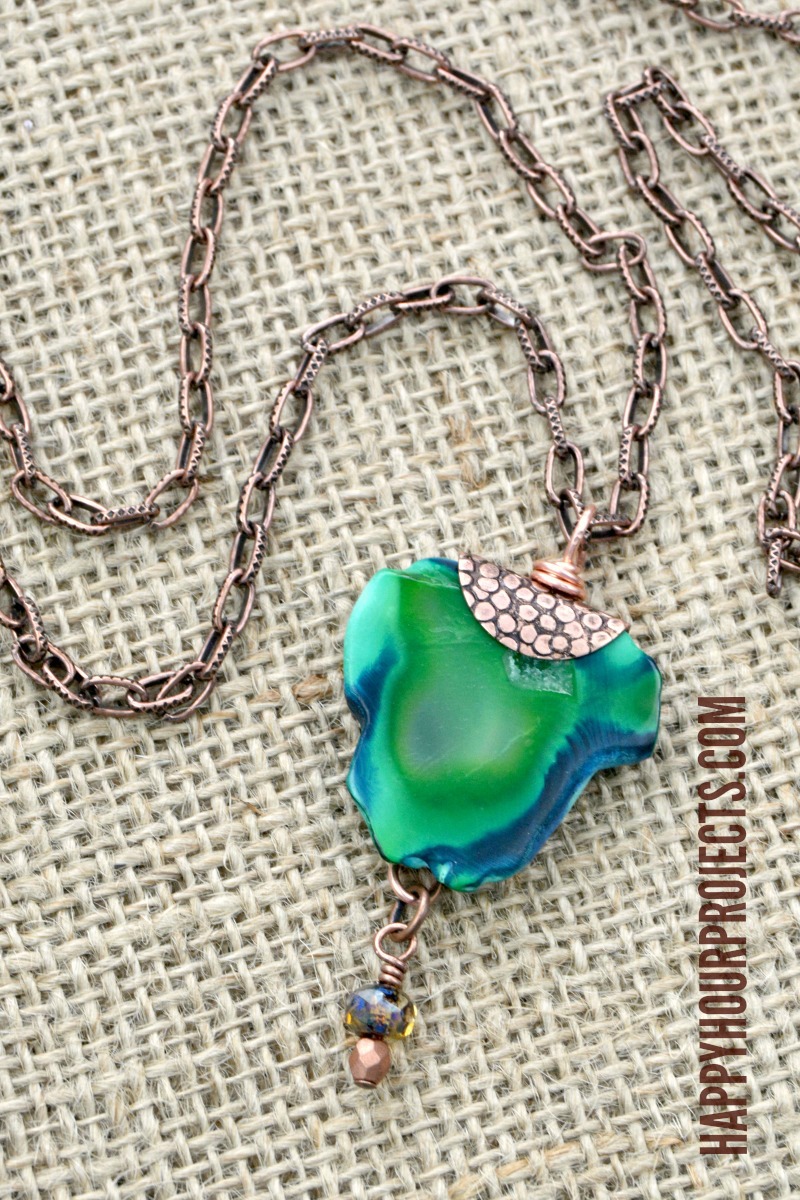
Finally, string your pendant onto a 30″ length of coordinating copper chain. I love the long look for large pendants, but you can of course modify this design to use an 18″ chain – or whatever length you prefer!
Thanks for joining me for today’s gemstone necklace project! Feel free to play with the colors and finishes to get the look that’s just right for you. (In place of the 17mm copper disc bead, a 3/4 in round silver, brass, or gold metal disc with a hole punched in the center can be used if you’re not as into copper as I am!)
See you again soon for another fun DIY ~

nice post
looking good
This is a very artful pendant. Thank you!
Pretty all, just love your collection special this using stone and chain really amazing idea to make it.
I love this design and I have some great shares to use. I can’t seem to find the bent copper beads at Happy Mango. Please help ! Thanks. And keep giving us all your good ideas. They are appreciated as are you.
Chloe
Looks like they are out of stock at the moment, boo! If you can’t wait, this would be a good substitute: http://amzn.to/1rEq9Xm . It’s not textured but you could hammer it with either a texturing hammer, or with a round hammer. With a little bit of searching on Amazon or Etsy for a 3/4 inch disc, you may be able to buy them as singles, but I picked the link that was eligible for Amazon Prime!
If you wait a little longer, Happy Mango will probably restock the bent copper beads as long as they can still get them. I didn’t expect this design to be so popular, haha – I guess they sold out!
Very cute necklace, what a neat idea and gift mother’s day too.
I love druzy. I have a few of them. You always have such cute jewelry that you make. Adorable
You make the coolest things. I wish I had your talent. I’ve heard that mixed metals are going to be big this summer!
Wow, I love that agate! It’s completely gorgeous. I can see why it caught your eye in the bead store. It’s nice that you try to use natural materials so often too.
You have such a good eye for color and design. I really like this one a lot. I think it would make for a nice gift on Mother’s Day too.
Hi. Love the project. The material list says top drilled agate bead, but it does not appear to be top drilled. Can you clarify? Thanks!
Debbie you are absolutely right! You can probably tell from the photos that it should NOT be top-drilled, it needs to be drilled through the center. Gracious, I must have been distracted. I am editing that part now so that nobody buys the wrong thing. Thanks for catching it so soon!
The agate is so pretty. Very clever use!