
I got obsessed with an idea last week. That happens to me on occasion. It’s spring, which means the bright accessories are coming out, and I’ve got a short series of jewelry projects this week that let you wear glitter without getting messy! That’s right – you can sparkle on when I show you how to make glitter bracelets from plastic tubing!

First off, I want to mention my inspiration: I had seen some really cool statement necklaces at Brit & Co using plastic tubing from a while back. But after reading their tutorial, I still had to do some measuring, calculations, and searching to find components that would actually work together. If you read here often, you know I enjoy using leather cord for a lot of my jewelry designs. Since I have a lot of components for working with leather on-hand, I decided to use those findings, and search out the right tubing to fit. While the original post was FABULOUS inspiration for me, it basically just said, shop around until you find the right supplies. So I did. I made a few styles of bracelets that I will be sharing with you this week, and I will also share with you exactly what to use to get the look – in case you see this idea, and start obsessing the way I did, haha! These links are affiliate links, which means if you do decide to jump in and make a purchase, then it does support my blog at no extra cost to you (and thank you, by the way!)

Pictured above are the components I used for a few different projects, but here’s what you’ll need to make today’s glitter bracelets from plastic tubing:
- 3/16″ OD Clear plastic tubing with a 1/32″ wall (sold in 10-foot lengths)
- Extra fine glitter
- Large-hole beads (anything with at least a 5mm hole will work)
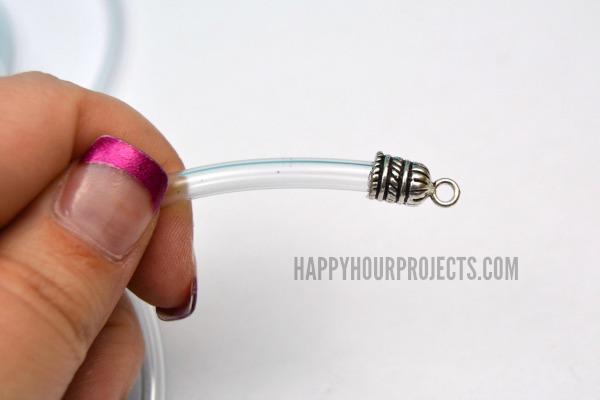
- 2 Glue-on end caps with a 5mm hole
- 7mm jump ring
- Lobster clasp
- Scissors
- Jewelry pliers
- Jewelry glue – I used Gutermann glue
for this project and highly recommend it, though any heavy duty adhesive recommended for bonding metal and plastic would work
- Funnel – you can use a tiny craft funnel, or just do what I did and roll up a scrap of paper and tape it shut
First things first: I put a few glues to the test when making up these bracelet styles. The pros to Gutermann glue are that it’s got a pretty high viscosity. It’s gooey. So when you add it to your end cap, it won’t drip out and it helps hold the tubing in place while it dries – which is quickly. I also used Super New Glue on another piece to experiment, and found that if the tubing is a very snug fit in the end clasp, the Superglue-style liquid glue worked fine, but if there is any looseness at all, the Gutermann glue was a much better choice.
Cut a length of tubing about 21 inches (you can measure against your wrist to get a more custom fit, if you like), and glue one end cap on. It will take a minute or two to dry enough to stay put, so that you can continue with your design. I had to buy a 10-foot length of this tubing, but it was only $7. You’ll be able to make several bracelets from it – so it ends up being a pretty inexpensive component.
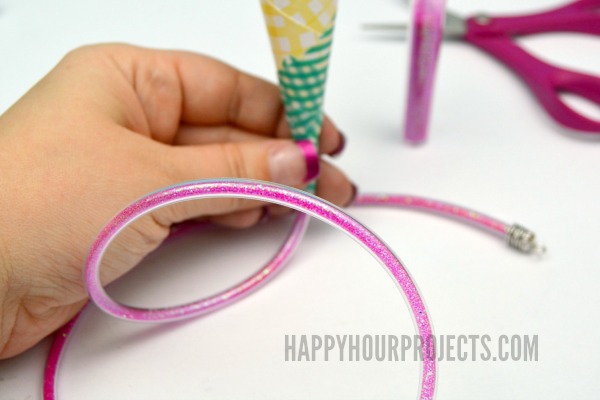
My funnel was just scrap paper rolled up and taped shut with the washi tape I keep at my work station – which is why it looks totally ridiculous. But it doesn’t have to be pretty to work! I used extra washi tape and actually taped the funnel ONTO the end of the tubing as I added glitter.
Fill the tube carefully with glitter through the funnel. It’s okay if you giggle at the thought of a tiny glitter bong. I did. It’s okay if you choose not to fill the tubing all the way, because it will cling to the sides of the tubing to coat it, so you won’t have any empty spots in your tubing. If you’re using something more solid, like seed beads or sprinkles, you’ll need to stretch out the tube and make sure it fills all the way to the end.
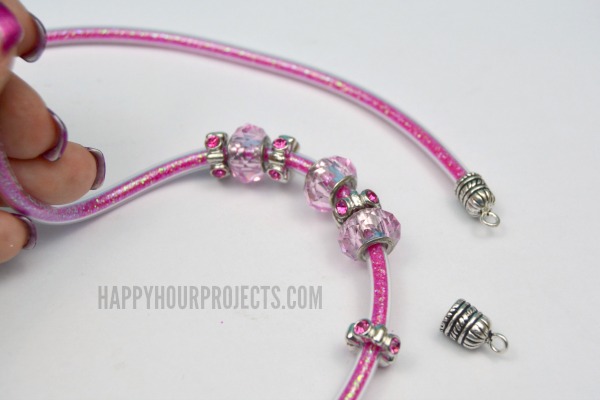
Next, I added my beads. You can totally do this *before* you add glitter, but I wanted to be sure I liked how they looked together with the new color of the tube.
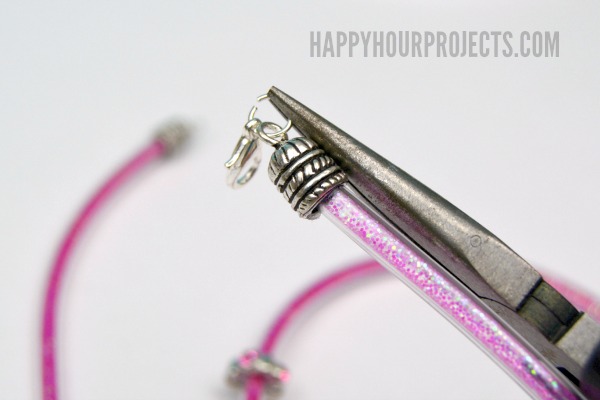
Finally, glue on the other end cap, and once it dries for a couple of minutes, use your jewelry pliers to attach a lobster clasp.
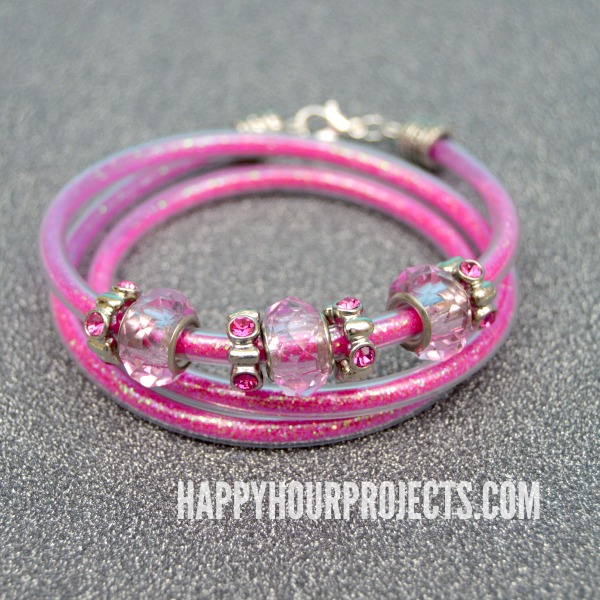
The bracelet is meant to be wrapped three times around your wrist, giving you the look of a stack of glitter bangles. You can actually adjust the length however you like – just use 7 inches of length for each layer (and keep in mind, your end caps and clasp will add at least 1/2 inch to your finished length).
What do you think? SO fun, right? I enjoyed it so well that I’ll be sharing a couple more design ideas in the coming days, so come on back to see what else you can make with your 10 feet of plastic tubing!

Where in the world did you find the plastic tubing?
On Amazon! I shared the link, but here it is again: http://www.amazon.com/gp/product/B00FY9F6GU/ref=as_li_tl?ie=UTF8&camp=1789&creative=390957&creativeASIN=B00FY9F6GU&linkCode=as2&tag=haphoupro-20&linkId=QC5VW4OXQF2OLG22
What a fun bracelet…I love how colorful & sparkly it is!