
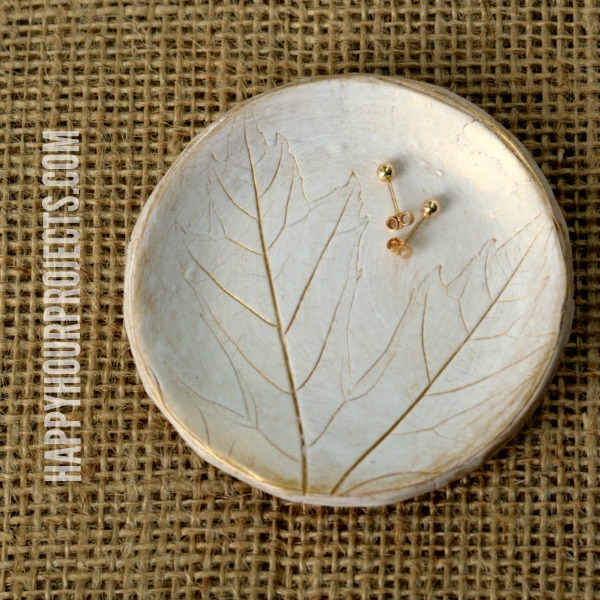
I love leaf and tree motifs (which, you have surely picked up on,if you read here often). I shared a polymer clay project recently over at the ConsumerCrafts.com blog, Crafts Unleashed last month, and in case you didn’t catch it, I want to share with you here today! This simple dish is easy to make and is an idea you can customize in any way! I’ll share a few watch-outs for working with polymer clay, and show you how to make a clay jewelry dish of your own!
You all know I LOVE jewelry projects. So it’s nice to have a special dish at the bedside at the end of the day – a handmade space for my handmade items. Do you keep a special trinket dish at your bedside? I can’t be the only one, right?
I got my supplies from Consumer Crafts, and I’ll leave those links intact for you here in case you’re looking to shop. These links are just for convenience; I don’t benefit if you make a purchase – but you can get just about everything you need in one shopping trip.
- White Polymer Clay – you will need somewhere between 1-2 oz. depending on the size dish you’re making
- Parchment or Wax Paper
- Clay Knife
- Roller (this can be as simple as a large wooden dowel)
- Oven-safe bowl or dish that you use for crafts, and not in the kitchen (try picking one up at a thrift store or dollar store)
- Polymer Clay Press (optional)
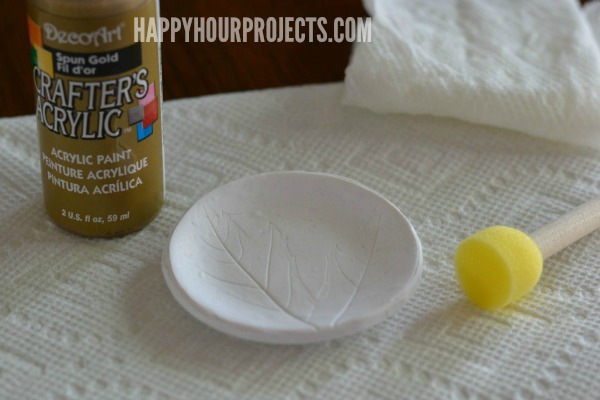
- Gold Acrylic Paint and Small Sponge Brush
- Fresh leaf from outside

A few notes about working with polymer clay, if you haven’t before. You CAN use kitchen tools when you work with it, but it’s not food safe – so that means you should not re-use these tools in the kitchen after working with clay. Some of my favorite tools are cookie cutters and even rolling pins – but be sure to mark them crafts-only so that you don’t end up with polymer clay in your kitchen!
Polymer clay is harder than kids’ clay. It needs to be conditioned before you can roll it out to work with it. You can save time conditioning and rolling by using a clay press – which works just like a pasta roller. You’ll need to knead your ball of clay for a few minutes to get it softened up. I roll mine through, ball it, roll it ball it, a few times before I work with it. It’s also great for a nice uniform sheet. For my clay dish, I used the #1 setting, which is about 1/4 inch thickness.

You don’t absolutely need a clay press if you’re just getting started, though you will find it really helpful if you find that you enjoy polymer clay. You can also roll it out by hand, with a roller. You should aim for about 1/4 inch thickness, which will be sturdy enough, yet not take too long to bake.
Once you have a round shape rolled out for your clay dish, carefully place your leaf, vein-side-down, on your clay. It will help if you use a freshly-fallen leaf or pull one off the tree (I know, I know, it’s not nice to trees to do that, but it’s just one). Roll gently until it’s imprinted fully in the clay, but not so hard that the clay stretches and starts to pull the leaf apart. Then, use the stem of the leaf to pull it off.
Next, use a cookie cutter, or any round form to cut a circle for your clay dish. I actually used a cut glass bottle as my cutter – but anything small and round will work! Now, press it gently into the bottom of a small bowl, so that the edges are raised. Again – don’t use your kitchen bowls for this – but you should be able to find an oven-safe bowl at the dollar store, or even a flea market, garage sale or thrift store pretty easily. It’s totally safe to re-use the baking bowl for craft storage later, you just don’t want to eat out of it after putting clay in there.

Now, bake your clay dish according to the package directions. This will be at a low heat for about 30 minutes – this formula of Sculpey clay bakes at 225ºF for 30 minutes for every 1/4″ of thickness. If you made your dish thicker, like 1/2″ inch, you’ll bake it for an hour. You can bake it right inside the bowl. While it’s still hot, it will feel flexible, so be cautious not to over-bake it. When it cools it should be firm, but not browned or brittle. You can return your clay dish to the oven for a few more minutes if it still bends easily after baking.
When the clay dish is finished and cooled, you can lightly paint it with gold, to bring out all the lines and veins in the leaf pattern! Keep a slightly damp paper towel on-hand; if you get too much paint, you can wipe it off and start over.
I love the gold – it adds just a little bit of shine! When you’re happy with your paint job, just let it dry, and your clay dish is ready for the top of your dresser or night table to hold your rings, earrings, or necklaces before bed.

What sort of fall decor items are you making? Anything inspired by nature?

I was always told not to use my oven for baking clay. I just want to be certain that I do not need a toaster oven dedicated for clay baking. Thanks for the tutorial, btw! I love it and I love the dish. I am making one for my mom in the very near future. :)
Thank you very much for sharing your lovely projects. I picked up some polymer clay at my local resource shop and was wondering how to use it, esp. with school holidays almost upon us. I shall watch your blog with interest
Hi Adrianne- I work for a public library and would like to have the patrons make the leaf jewelry dish. Can I use a picture from your site? During the program I will let everyone know about the site happyhourprojects.com.
Hello Adrianne! I love this and the leaf pendant tutorial. I made numerous homemade gifts this year and featured you on my blog post. I made sure to adhere to your copyright and terms. Please check out my post and feel free to let me know if you do not approve how I linked back to you. healinghomestead.weebly.com/blog/the-big-reveal-my-homemade-gifts