
It’s fall, and oh leather, how I love thee when the weather turns cooler. ;) It was my mission to make a simplified version of a wrap bracelet, bet even though I really liked the look, I thought it was still a little plain. So when leather looks plain, you dress it up with metal, stone, and a bit of bling – am I right?
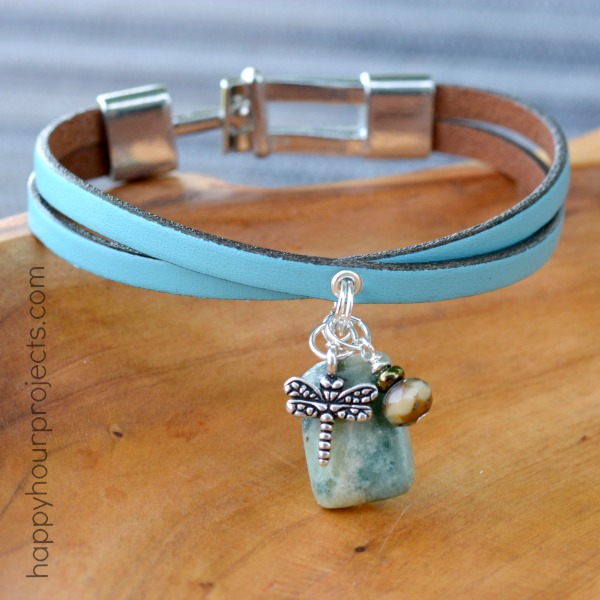
I love all the ways to personalize this piece and so something different than what I’m showing you here. What I’m going to show you is how to get a wrap look and add charms – it’s up to you to make it your own.
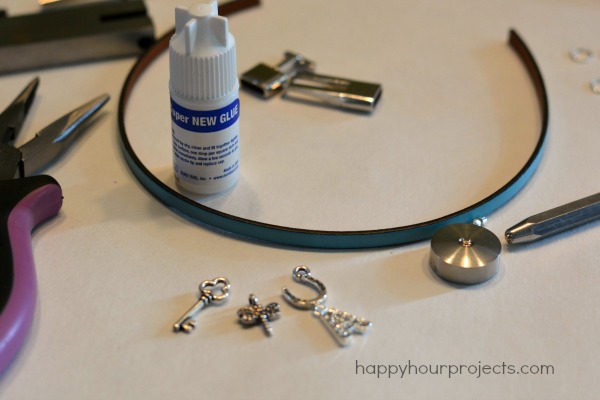
I’m going to leave you links to a few of the supplies I used today. These are affiliate links, which means that if you click through and make a purchase, it helps my blog at no extra cost to you! Here’s what you will need:
- 13 inches (give or take) of 5mm flat leather. It will ultimately depend on the length your clasp adds, and in my case it’s just over an inch in length, making the finished length about 7.5 inches.
- Jewelry glue like Super New Glue
- 10mm clasp like this silver plated toggle
- Eyelet setter
- 3.7mm Eyelets
- Leather punch (or use your metal punch, like I did – it works just fine if that’s what you have on-hand)
- Hammer and bench block
- Jump rings (7mm is a good size)
- Charms – these can be pre-made or handmade. Or a mix of both. I made two of mine and also added a 15mm dragonfly to the mix.
First, assemble your bracelet. Cut 2 lengths of leather, accounting for the length of your clasp. If you’re using the same one as I am, you will want to cut it at 6.5 inches. Smaller clasps will mean you need longer leather. A few drops of jewelry glue will secure your leather pieces side-by side.
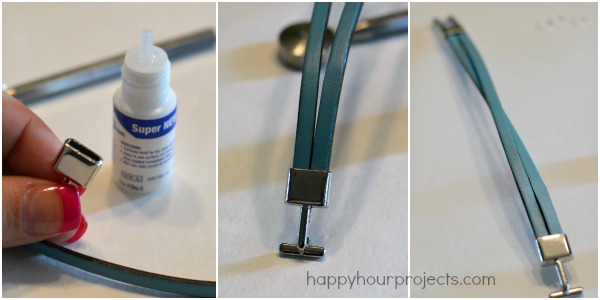
I opted to cross mine before gluing on the other end of the toggle. This will give the wrapped appearance without actually doing any wrapping. This is an optional step, but it’s what I wanted to do!
Next, punch a 3/32″ hole in the center of one of your strands. (I punched the outer strand.) Then, set the eyelet.
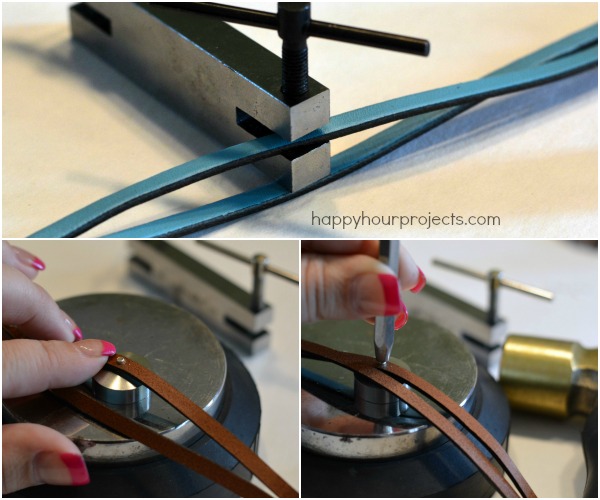
To set an eyelet, put your eyelet setter base on your bench block, and place an eyelet in the hole. Position the setting tool on the unfinished side of the eyelet, and then tap with your hammer on the end of the setter (it will take 5-6 taps). You’ll have a nice, finished hole by adding an eyelet.
Finally, add a jump ring or split ring through the eyelet, and add charms to that! If you haven’t ventured into making your own charms, I have a few posts dedicated to exactly that. Check out this YouTube video of mine that will walk you through exactly how to make your own beaded charms if you’d like to see the process. You can also use pre-made charms – or mix and match! I used a stone bead, a czech crystal bead, and the pewter dragonfly.
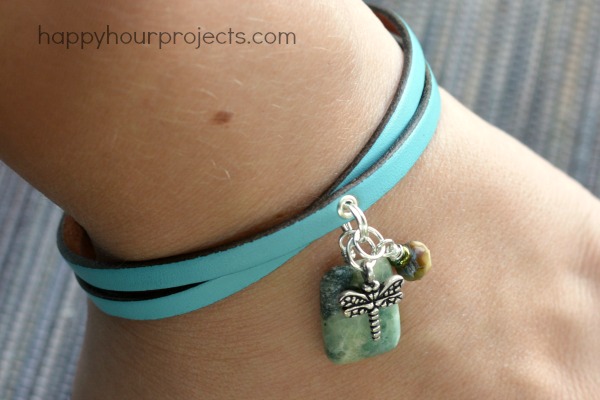
It’s a bracelet that reminds me of our wedding, actually – we got married on the lake, and used dragonflies as our theme. The colors remind me of the lakeshore. We’re celebrating 5 years this week (wow, where does the time go??) so I thought it would be a fun reminder!
I hope you enjoyed this jewelry project, and if you make your own, I’d love to see your style!

What a stylish and creative leather charm bracelet
I love this bracelet!!!
This is so cute. Would love to make this… Thanks for sharing.
What another great jewelry tutorial! LOVE the colors and the charms!
Love the bracelet!!! Super cute :)
I am such a fan of the colored leather!