
Gosh, you guys, I have been a spring cleaning FOOL the past few days. It’s no fun, and it’s certainly not creative, and I can’t even show off some neat and tidy spaces because NOTHING is finished yet, haha. But I took a quick break for some craft time yesterday and whipped up this fun wrap bracelet with charms – and not just any charms, one is a unicorn… making it extra fabulous, of course!

This was another one of those 10-minute projects, where I whipped up a couple of charms, cut and glued, and was happily on my way to another earthy, organic, boho kind of style. Which is pretty much my favorite.

I got my supplies from Goody Beads for this project, and I’ll leave you a few links in case you’d like to buy them for yourself. These are affiliate links, which means if you click to make a purchase, it supports my blog at no extra charge to you – and thank you. But this bracelet is a really flexible style, though, so play around with elements that you love best.
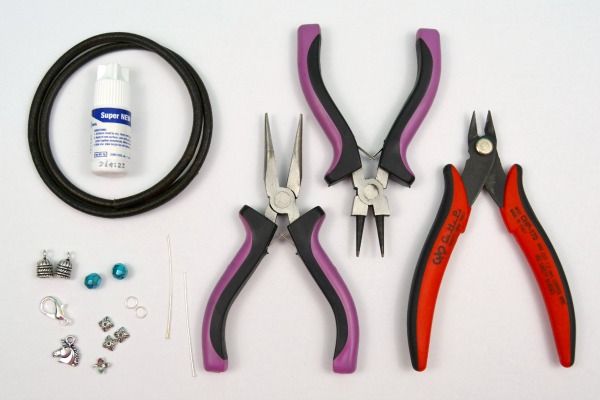
You will need:
- 22-23 inches of 5mm round brown leather
- 2 Glue-on end caps with a 5mm hole
- 15mm lobster clasp (or larger, if you like)
- 2 7mm jump rings
- 2 4mm jump rings
- 2 8mm round czech beads
- 2 bead caps
- 2 22 gauge 2-inch head pins
- unicorn charm
- round nosed pliers
- wire cutters
- jewelry pliers
- Super New Glue
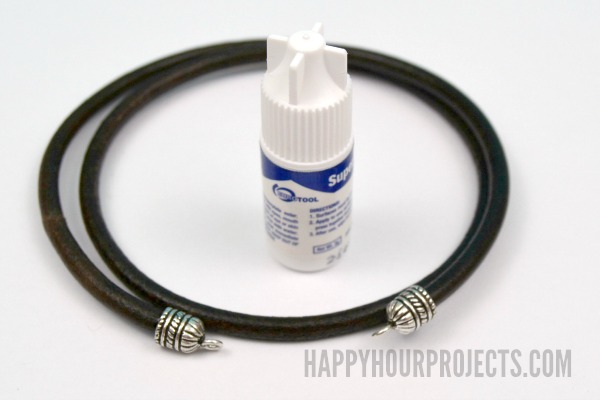
First things first: cut your leather and glue on the end caps. For three wraps, you’ll want 22-23 inches of leather. And a few drops of glue are plenty! Hold it in place for a few seconds, and set it aside to dry while you make your charms.

Charm-making is a simple process, though you might need to practice a couple times before you get the technique down. If you are a visual learner, you can also check out my video on how to make jewelry charms. What you need to do is to string the bead and a bead cap onto a 2-inch head pin. Bend it slightly just above the beads to the left (I work left to right, you can reverse that if you prefer) and then wrap it around the right side of the round pliers, forming a loop. Underneath the loop, wrap the tail end of the head pin around the pin itself, filling the empty space between the loop and the bead with 2-3 wraps of wire. Cut the excess wire, and using your jewelry plies, press the end of the wire in to that it won’t scratch or catch on anything.
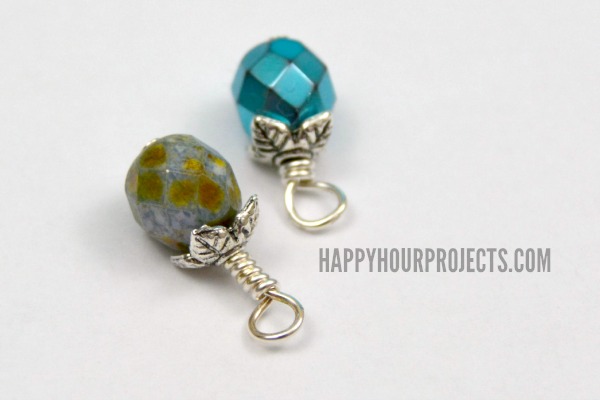
Repeat for the second charm, only instead of starting close to the bead, move up the pin by 1/8 inch or so, and fill the empty space on that with 6-8 wire wraps. This will create charms that have the same size bead, but are 2 different lengths, so that they better nest together when you add them to your bracelet.
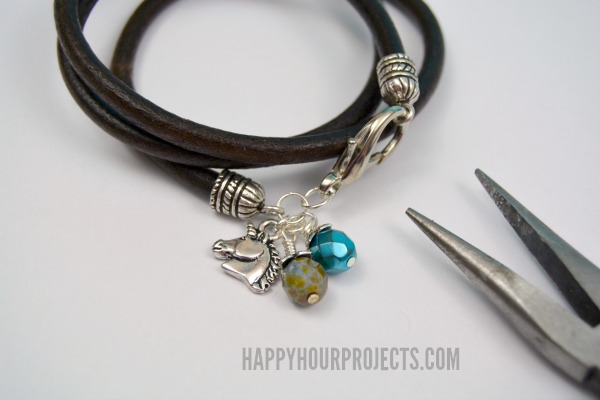
Finally, attach 4mm jump rings to all your charms, and attach a 7mm jump ring to one end of the leather by twisting it open with your pliers. Add the charms to this ring. Add a second 7mm jump ring to the first, and to this ring, attach the lobster clasp. See above for an example.

All that’s left is to wear you new piece with pride! You can adjust the number of wraps by including about 7.5 inches of leather for each wrap – so close to 15 inches for two wraps, and more like 30 for 4 wraps. You can also attach extra jump rings to make the size more adjustable.
And with that, it’s about time for me to go do some more spring cleaning. ;) Wish me luck, and I’ll see you on the other side! Haha.

I do really love the leather wrap bracelets aside from this is durable, it is so cool and nice.
I learned a lot already can I buy from u too?
Hi Jeanie! I don’t officially do any sales, but quite often I’m happy to sell my sample pieces that I make to share the tutorial. I do still have this bracelet, you may email me at happyhouprojectsblog@gmail.com if you’re interested in this (or any) piece. The only thing I’ll say is, they’re exactly as pictured, and I don’t make modifications. Just drop me a note if you’d like to know more!
Thanks for the note!
Wire wrapping just above the bead adds a really nice touch to these charms. Thanks for sharing a great tutorial!