
Hey guys! Today I’ve got some easy jewelry inspiration, and I’m ALSO going to show you how to make the magic braid – which lets you wear layered DIY bracelets two ways! This faux-suede studded cord is perfect for this jewelry project because it comes in several colors, and it’s soft on your wrist. It only requires a couple of supplies, and you can make up a bracelet in about five minutes. Score.

I shared this project earlier this year over at Crafts Unleashed, the blog for Consumer Crafts. I got all my supplies there, and I’ll even leave links to them below in case you’re looking to go shopping!
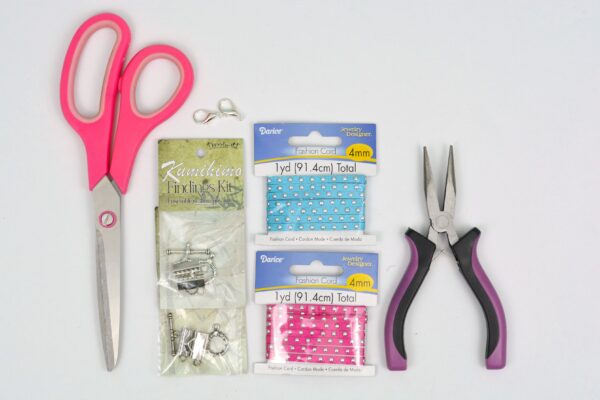
You’ll need:
- Studded Suede Cord (I used aqua and hot pink)
- Crimp-on Ribbon Ends
- 6mm Jump Rings
- Lobster Clasp
- Jewelry Pliers
- Scissors
Now, a quick note. The ribbon end sets I used do come with a toggle clasp, and you can use it! I prefer lobster clasps because they close more securely, and since I think they do a better job, that’s what I’m going to recommend to you. But, if you don’t want to get the extra component, it’s optional.
Now – on to the DIY bracelets! To begin, cut three lengths of cord approximately 7.5 inches long. This will fit an average wrist. If your wrist is a bit smaller or larger than average, make your length adjustments here. Hold all 3 cords side-by-side with the studded side facing you, and crimp a ribbon end onto all three cords using your jewelry pliers. You don’t even need glue – the teeth on the ribbon end grip the cord securely.
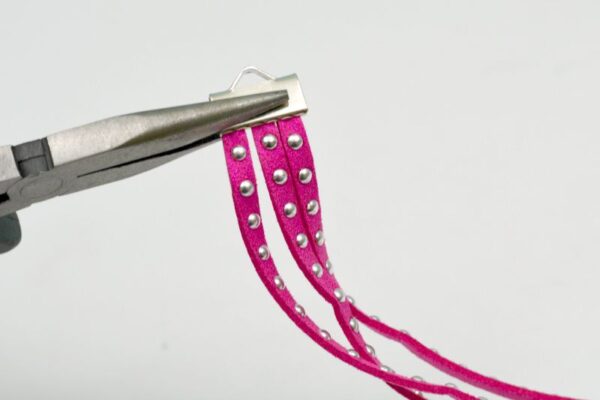
Make sure that your cords are the exact same length, and trim them if necessary at the other end. Make sure your cords are straight, and crimp on the other ribbon end.
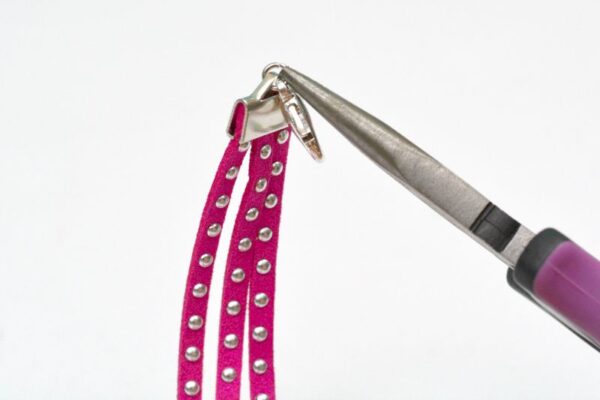
Next, twist open a jump ring and attach it to one end of the bracelet, twisting it closed again with your pliers. On the other end, add the lobster clasp before closing it.
At this point, you have a pretty studded bracelet. You can wear it just as it is!

But you can also braid it – yes, even after you have finished the ends! It’s called the magic braid, and I’ve put together a 2-minute video to show you how to accomplish it. You can even un-braid it when you’re done, so you can always wear these DIY bracelets 2 ways!

I know the obvious question now is, why go through the hassle of the magic braid? Why not just braid it when you make it? And of course, you can! But the magic braid has been on my list to film and share – it works AWESOME on leather. So today’s project is about learning a new skill every bit as much as the project itself. :) Hope you enjoyed!

i like it
nice post
wow looking good
My daughter would love this. I like how easy it is to make.
High five for this magic braid and this seems to easy to make too. I think you always inspire us to make some extraordinary from ordinary things.