
It’s not really magic. I mean, I hope you wouldn’t need that disclaimer, but hey, I just want to be clear that I’m no purveyor of magic wands. But try telling my daughter that – the girl who thinks I can make anything. “I want a magic wand, Mama,” she says to me. “Please make me one?”
Hey, she said please. So, let’s conjure one up.
I freely admit, the first thing I did was tie some ribbon around a dowel, because that’s a 30-second fix to the magic wand dilemma. But it doesn’t work well. No flow. It’s not very magical. So I thought on it and decided it needed some sort of hinge for the ribbons to move more easily. A quick raid of the jewelry supplies and the toolbox yielded a great solution. So we got to work! Here is what you will need:

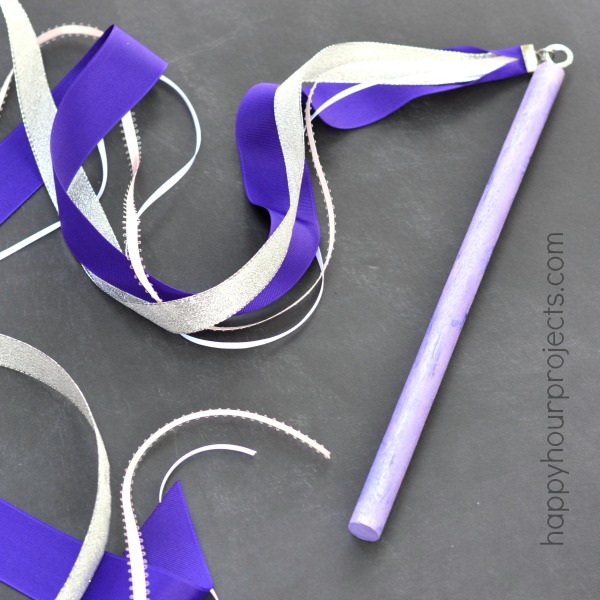
- Dowel rod – this is 12 inches, and 5/8″ diameter. You need something heavy, I wouldn’t go lighter than 1/2″ diameter.
- Paint – I’d call this optional, but really… it’s a magic wand. It must be beautiful.
- 2-4 ribbons about 5 feet long – any width will work. I used all different widths. Try to use light ribbons; the grosgrain is okay but a bit heavy. I’d try organza if I were going out to buy something – but we used what we had.
- Small eye hook – I have no idea the exact size of this, but it can definitely be small.
- Ribbon end (I find mine at ConsumerCrafts.com)
- Split ring (like a jump ring, only it’s split, like a keychain)
- Pliers
First things first, put your magician to work. I covered our table and let Raya paint her own wood dowel.

While that’s going on, prep your ribbons. I just stretched out a big arms’ length and cut it there, close to 5 feet. And let me remind you, too that this is definitely a toy that you supervise your kids while playing with so they don’t tangle themselves up in it. To prep the ribbon, I just barely singed the edges with a candle flame, to keep them from unraveling. That little bit of melt will keep it intact.
My widest ribbon was over an inch wide, and the end caps were only 16mm. So I did have to fold them to get them to fit, but you could save yourself this step by getting 1/2″ wide ribbons. Crimp securely down on the ribbon end to hold the ribbons.

When your little artist is done decorating and the paint is dry, screw the eye hook into the end of the wood dowel. With a split ring, attach the ribbon end to the eye hook.
The photo below only shows a jump ring, and that was a mistake. That only lasted about 15 minutes before it got separated during play. I swapped out for the split ring, and no issues since!

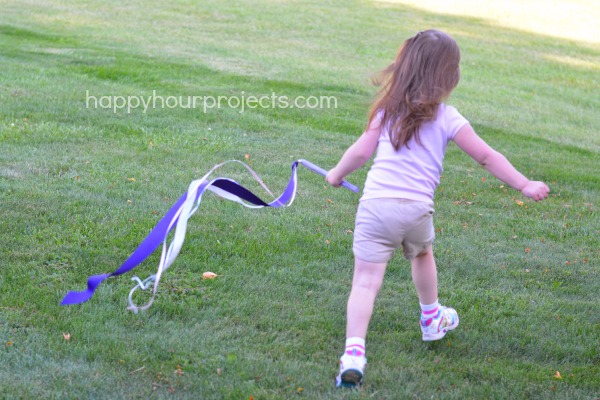
Now, just send your magician out to play! The ribbons will flutter on the breeze and are long enough to capture movement. The eye hook allows the ribbons to fly without getting wrapped around the wand. Lighter ribbons do work best – an organza would be ideal, or a lightweight satin. The wide grosgrain I used still worked, but there’s a lot less lift to that one vs. the thinner ribbons I added.

Ahhhh, to be a kid again. That’s joy, right there, over a couple bucks’ worth of ribbon.
I’m just hoping she doesn’t try asking for something I really *cant* make one of these days… I’m a sucker for that girl, I tell ya!

Fantastic idea, thank you for sharing.
love this!!! I had these when I was a kid and I think even my boys would enjoy. pinned to make soon!!!