• Skip to primary navigation
  • Skip to main content
  • Skip to primary sidebar

  • home
  • about adrianne
  • buy the books
    • DIY T-Shirt Crafts (2015)
    • DIY Stamped Metal Jewelry (2016)
    • Rock Painting for Beginners (2019)
  • videos
  • crafts
    • diy beauty projects
    • kids’ crafts
    • paper craft projects
    • polymer clay
    • sewing projects
  • jewelry
    • bracelet projects
    • earring projects
    • necklace projects
    • jewelry tools & supplies
  • metal stamping
    • beginners’ tutorial
    • video tutorial
    • project ideas
    • metal stamping supplies
  • recipes
    • cocktail recipes
    • appetizers
    • main and side dishes
    • sweets and treats
  • by season
    • birthdays
    • new year
    • valentine’s day
    • st. patrick’s day
    • easter and spring
    • mother’s day
    • patriotic
    • fall
    • halloween
    • christmas
    • thanksgiving
  • privacy

Happy Hour Projects logo

10/01/2012

Mummy Action Figure

Well, October is upon us!  I know that in blog-time, that means I am WAY late to busting out the Halloween crafts, but I just can’t bring myself to really get started in September.  Anyone else out there like me?

Anyway – now that I’m finally getting into the spirit of things (the pun was a total accident there, but hey, I’ll go with it), I have a fun Halloween craft today for the young and young-at-heart: a mummy action figure!  This project will take less than 30 minutes.  Older kids can even help with this one.


What you’ll need:
  • Craft wire – you don’t need anything specific, here.  I just used the cheap copper stuff.  It’s just going to make up the “bones” and will all be covered.
  • Scraps of muslin – I used about a fat quarter’s worth, maybe less, and this guy is around Barbie sized.  These are actually scraps from an old sheet my mom picked up at a garage sale.
  • Scissors, wire cutters, and possibly some fabric glue

I didn’t measure anything here, just started pulling some wire off the coil and forming a body.  I just eyeballed it – I formed the torso and legs first, then added arms, and eventually a base for his head.  If anything looked a little short, I added another bit of wire, or if it was long, I trimmed it or folded it over.  It doesn’t need to be pretty, it’s just the base.

Surely you could do better on the head, but frankly it didn’t matter at all.  You’ll be making it round by wrapping it with fabric in the next step – this is just to have something to attach it to (and to make sure his head won’t fall off).
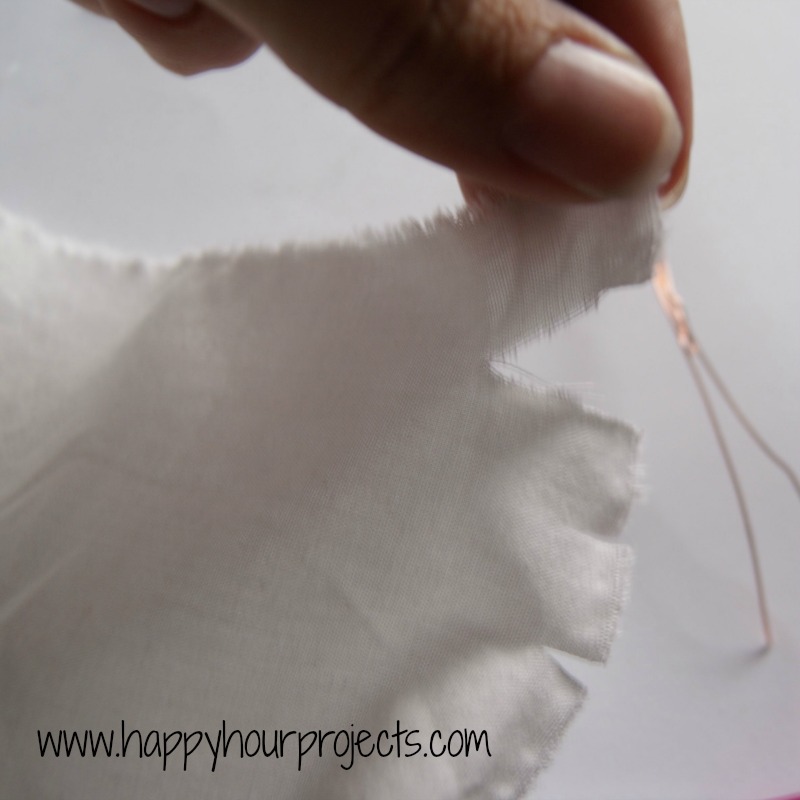
Then, I cut some 1/4″ to 1/2″ wide strips from my fabric.  I just cut a notch to get it started, and ripped it the rest of the way to save time.  A rough look works just fine for this project!

Then, I just wrapped.

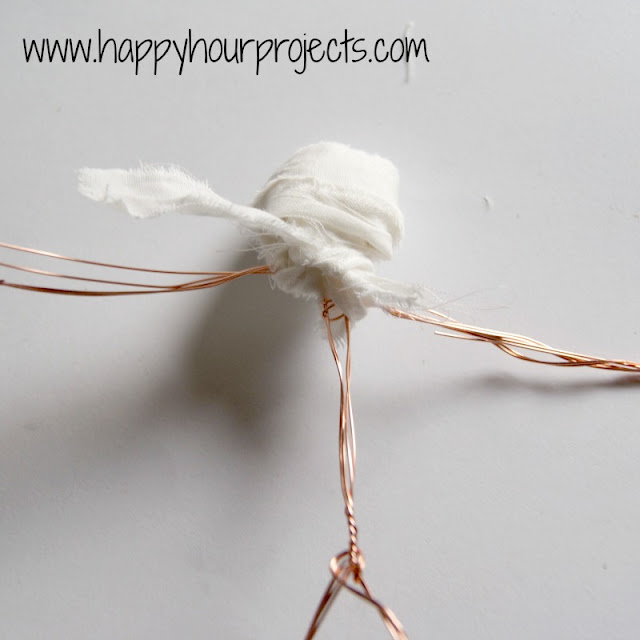
And wrapped and wrapped, until the body looked full enough.  When I joined new piece, I just wrapped it in tight, or if it was in an inconspicuous place or a place that needed more fullness, I tied a little knot.  When I got to the outer layers, I tucked the ends in and secured them with a dot of fabric glue, just to make sure he wouldn’t unravel.

When I was done, I had a mummy!

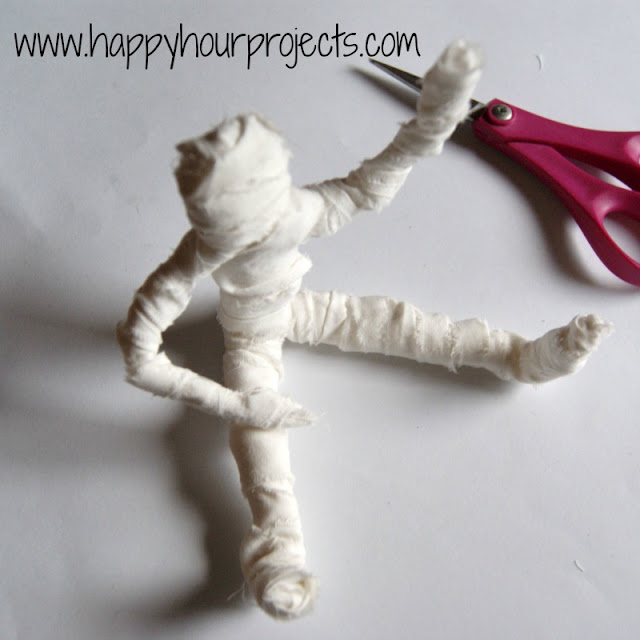
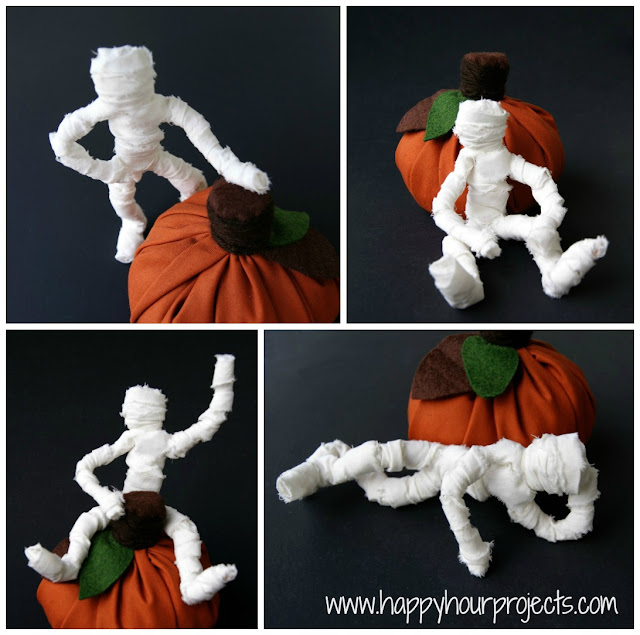
And he is bend-able and pose-able, like any good action figure.

Be sure to join me for the Handmade Halloween Link Party – it starts today!

Filed Under: Halloween

copyright policy and terms of use

I love it when you love my work! All tutorials and photos published at Happy Hour Projects are copyrighted. If you would like to feature my tutorial on your website or share it on your social media you may use one photo to feature, as long as you provide a link back to the original post.

If you feature a photo, it may not be accompanied by the project tutorial or recipe, whether in my own words as it originally appears or paraphrased by you. This also includes personal sharing on social media and Pinterest. Publishing multiple photos from a project, or including instructions with an accompanying photo are not permitted and you will be asked to remove them.

I love to share my projects, and my tutorials, recipes, and e-books are ALL free for your personal use. However, photos and ideas that are published to this site are my protected intellectual property. You may print them at home, but please do not copy or distribute them. I also allow all designs to be made and sold at fundraisers, craft fairs, etc. If you are selling a piece made from one or more of my free tutorials in your online shop, I require that you use your own, original photography, and include a link back to my website to credit me as the designer.

I hope you enjoy what you read here, and please be fair when you share!

Reader Interactions

Comments

  1. Mila says

    10/27/2013 at 2:30 pm

    It is really cool project and I added it to my Halloween Craft Collection! You can find it in my Sweet Garden

    Reply
  2. Bejus70 says

    10/16/2012 at 5:31 pm

    What an idea! Thank you for the mummy!

    Reply
  3. Wendi Galczik says

    10/12/2012 at 3:25 pm

    This is a great tute- combines simplicity with a very satisfying result…and an original idea for Hallowe'en, too..a rare thing..thanks so much for sharing this..definitely gonna bookmark this idea!

    Reply
  4. Mary ~ says

    10/10/2012 at 10:20 pm

    I love your mummy action figure – adorable and hilarious at the same time! Just pinned the little guy! Thanks for sharing!

    Reply
  5. Jill says

    10/08/2012 at 2:21 pm

    Thanks for sharing at the Pomp Party! =)

    Reply
  6. Lindsay says

    10/07/2012 at 10:46 pm

    Can't say it enough. Love, love, love! :) I featured you on my blog today, come on over and check it out: http://www.artsyfartsymama.com/2012/10/pinteresting-features-n-shtuff-52.html

    Reply
  7. Katie Adams says

    10/05/2012 at 1:31 pm

    I love this little guy! He is so stinkin cute! I have featured him on my fb page. https://www.facebook.com/TheCraftyBlogStalker Don't forget to stop by and grab a feature button! Thanks for sharing on Blog Stalking Thursday!

    Reply
  8. Kelly Biedny says

    10/05/2012 at 3:03 am

    This mummy action figure project is super adorable! It looks like something that would be great to make with older kids, AND, since our Linky Party this week is Halloween themed, we'd love it if you'd stop by and share it: Show and Tell: Boo! A Ghostly Linky Party…

    We hope you stop by!

    Thanks!

    Reply
  9. Jessi says

    10/03/2012 at 9:49 pm

    What a great idea, and super cute too! Thanks for sharing at The Fun In Functional!

    Reply
  10. paperscissorsink says

    10/02/2012 at 11:57 am

    Great idea! My boys are 9 and I know they are going to love doing this as a weekend craft project. Thanks for sharing!

    Reply
  11. nicolette {momnivores dilemma} says

    10/02/2012 at 3:49 am

    I love that your mummy action figure is riding the pumpkin, I nearly spit out my wine! He could be like elf on a shelf, right?

    Hilarious…

    I'm hosting a linky for Halloween too. I wish I would have known about yours, because we could have had a massive one! :) Next year or for Christmas…

    Reply
  12. Lindsay says

    10/01/2012 at 5:32 pm

    This is pretty much my favorite project – EVER. Makes me happy. I think I need one… :)

    Reply
  13. Julie says

    10/01/2012 at 4:49 pm

    I love this…I love how you can have him do any pose you like…great idea! ~ Julie

    Reply
  14. Nicole says

    10/01/2012 at 4:03 pm

    This is Super Cute! Great idea – and a cheap & easy project … perfect :)

    Reply
  15. Annie says

    10/01/2012 at 2:42 pm

    This is so fun and cute! I love his poses!

    Reply
  16. Kadie says

    10/01/2012 at 1:57 pm

    Oh my he is so cute! He would be a great addition to our Halloween wreath. I think we might need one.:)

    Reply
  17. Morena Hockley says

    10/01/2012 at 1:05 pm

    My boys would love this!

    Reply
  18. Melanie says

    10/01/2012 at 12:50 pm

    These are so cute! My little one would like this.

    Reply
  19. Jill says

    10/01/2012 at 12:23 pm

    That is adorable! I can't believe that is just craft wire under there!

    Reply
  20. Danni Baird says

    10/01/2012 at 12:03 pm

    Oh I am so doing this! That is the cutest Halloween decoration I have seen yet! Love it!

    Reply
  21. Robin says

    10/01/2012 at 10:56 am

    Super cute! I love the pose with his arms behind his head. :0)

    Reply

Trackbacks

  1. Pringle Can Mummy: recycle a potato chip can this HalloweenFun Family Crafts says:
    10/18/2015 at 9:54 am

    […] even more imaginative fun, make a mummy action figure and have some adventures […]

    Reply
  2. It’s a Handmade Halloween – Link Party! says:
    02/17/2015 at 8:01 am

    […] morning I have a fun tutorial for a Mummy Action Figure!  Now, I attempted to share the tutorial in this post but it got WAY too long with the link party, […]

    Reply

Leave a Reply Cancel reply

Your email address will not be published. Required fields are marked *

Primary Sidebar

Hello, and welcome! I'm Adrianne, an artist, author, designer, and blogger in mid Michigan. I work from home, chase my two kids, and this once-city-girl is learning how to care for chickens and adjusting to life out in the country. I have a compulsion for daily creativity... sometimes it's jewelry-making, paper crafting, metal stamping, mixing and baking, or giving new life to recycled items. But with 2 young kids, time is short! My goal here at Happy Hour Projects is to share projects and tips that you can do in an hour or less. The ideas you find here are designed to add a little creativity in your day, no matter how much (or how little) time you have!

BUY MY BOOKS!

Copyright © 2023 Happy Hour Projects on the Brunch Pro Theme