
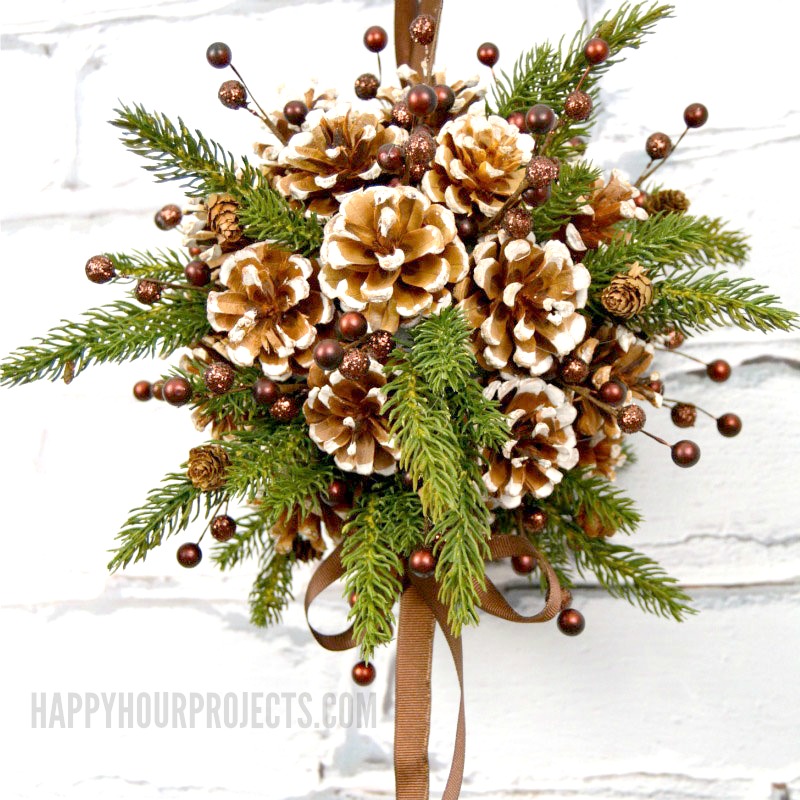
Hey friends! How many of you are starting to work on your DIY Christmas decor? Or just decorating for winter in general? I have a fun wreath alternative to share with you today, a DIY kissing ball designed with pinecones and faux greenery that’s easy to make and hold up well to the weather. I created this project for Consumer Crafts a couple of winters ago, and it’s still going strong.

You will often see kissing balls in weddings, but I love that it’s being adapted more and more to other occasions, like the winter holidays! (Maybe it’s just that any excuse to share some love and affection appeals to me!)
How to make a Pinecone DIY Kissing Ball:
The following list contains affiliate links for your convenience when shopping for supplies or viewing more detail about the products I use. I do earn a small commission when you make a purchase through these links, and I thank you for supporting Happy Hour Projects! I only link to products I genuinely recommend.
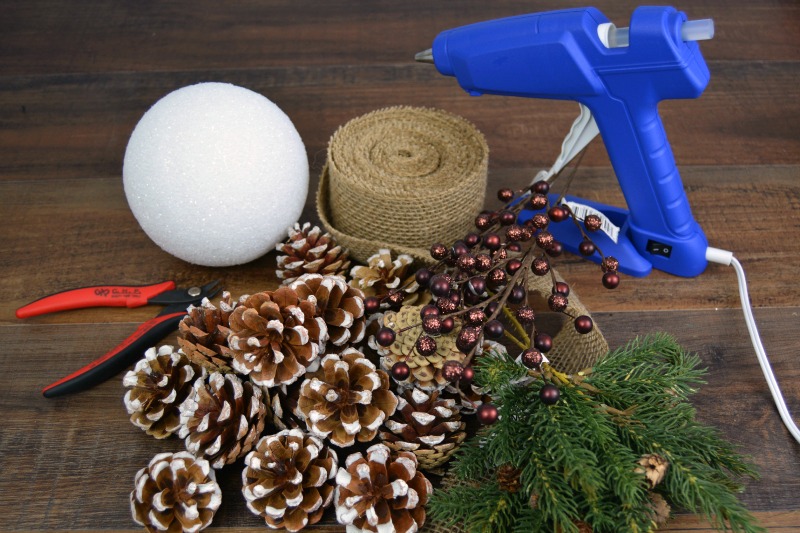
- 6-inch Foam Ball
- 5/8 inch Coordinating Ribbon
- White Tipped Pine Cones, 20-30 depending on size (approx 1 lb.)
- Greenery Picks (4-6)
- Brown Berry Picks (4-6)
- Hot Glue Gun and Glue Sticks
- Wire Cutters

First, cut a length of ribbon 3 feet long (longer is ok! you can always start with more and trim it down.) Double the length in half, and about 8 inches from the fold, tie an overhand knot to create the hanging loop. This is where you can adjust the loop’s length, if you need to.
Then, tie the long ends around the foam ball. Secure them in place with hot glue or even pins. This will be covered in the next steps, so it’s ok if this gets messy.
Now, begin gluing your pine cones onto the foam ball. You may find as you work that they leave some gaps, or don’t fit snugly against each other. This is okay! We will be filling in the gaps with the picks in the next steps.

When your ball is covered with pine cones, clip your greenery and berry picks apart with wire cutters, so that you are working with stems 1-2 inches long. You can see in this photo that the picks are grouped into 2-3 pine sticks, with a wire connecting it to more pine sticks. You will want to use these smaller groups to fill your empty areas. Fill the gaps in first with your greenery, angling the picks mainly toward the sides and bottom (this will make it look more natural, giving it more of a heavy, drooping effect, rather than having greenery sticking straight up). Continue adding greenery until the ball looks full, and you’re happy with the effect. You can move picks around as necessary until you’re satisfied!

Finally, add in the berry picks anywhere you like. My berry picks stick straight out, so that they’re more visible, but this is where you make it your own! All of the pick wires should push right into the foam, but for extra security you can always add a dab of glue when you place it. When you’re finished, tie a loose bow at the bottom of the ball, and it’s ready to hang!
I hope you enjoyed this DIY kissing ball project. Are you already working on your DIY Christmas decor? I’d love to hear your favorite things to make in the comments!

The flow of the writing made it simple to stay engaged. I never felt lost while reading.
A fantastic and simple approach to make a homemade kissing ball is with pincone.
Pinecone DIY Kissing Ball is adorable. I love to know that it can be made by myself in my spare time according to my taste and need.
Informative post thanks for sharing!
This pinecone DIY kissing ball is so festive perfect for adding a charming handmade decoration to your home
The decorations are beautiful and very cute.
National Techtools is an online supplier of tools and machinery founded in 2014, based in Junagadh. They cater to both professionals and DIY users, offering a wide selection of products including power tools, hand tools, welding equipment, and accessories. The company has a large inventory and sells products online, providing options like cordless tools and various welding machines with a one-year warranty.
Ragdoll Hit is an action game; if you stop, you will lose, thus you must act continually to get through the stages.
It’s exquisitely crafted and has a striking design. It’s not only beautiful, but it also instantly elevates the atmosphere of your home.
The greenery and handmade decorations complement each other beautifully, creating a vibrant and artistic look that’s truly soothing.
The Pinecone DIY Kissing Ball is so beautiful and so creative, I love DIYs like this.
very creative
thanks, those helpful
Great ideas!!!
Great ideas
relly gooood, thanks
Thanks for sharing
Still no time to try something like that
I looks very beautiful and I like that it is quite simple to recreate
goood
What size pinecones did you use?
I genuinely wish that a greater number of people will take use of the wonderful and significant venue that you provide.
I really like it, thanks for the idea
I sincerely value the time and information you have shared with me. We truly value your resolute assistance and inspiration.
Be a smart consumer when using smart directions
Excellent work, looks great. Thanks for sharing.
I love this. Thanks so much for sharing.
Thank you, it was great
Thank you for sharing this wonderful DIY project for a Pinecone Kissing Ball! It sounds like a delightful and festive decoration for the winter holidays.
Happy Hour Projects!
I love this. Thanks so much for sharing.
This is the prettiest kissing ball I’ve see. Can’t wait to make one!
I had a lot of harvest after seeing this post of yours! Before, I used to play games, this is a fun game for entertainment, but now I will follow you, read your articles will have more knowledge.
Informative post thanks for sharing
Fabulous writing style
It is such a nice post thanks for it
I’m grateful for this informative piece.
Thank you very much dear teacher for this nice sharing.
It looks great and looks simple. Thanks for sharing.
I love the idea of DIY Christmas decor!
This DIY kissing ball made of pinecones and faux greenery is a fantastic alternative to traditional wreaths. It’s a great project for those who enjoy crafting their own Christmas decorations or want to add a touch of winter charm to their home. The combination of natural elements and durable materials ensures that this kissing ball will withstand the weather and last for seasons to come. Kudos to the creator for sharing this enduring DIY idea!
You have a great site, I wish you success
best helmet mororcycle store
very nice motorcycle helmet
thanks for sharing this article *_*
very good article, I’m from Indonesia enjoy reading your article, waiting for the latest update. Thank You
It really makes my Christmas tree more attractive and beautiful. Thank for your guidances.
your blog is amazing thank you i like it
Thank you for sharing your experiences and insights on this topic. Your story is really inspiring and it’s great to see someone who is so passionate about their work.
I love this kissing ball I haven’t started my Xmas crafts yet but with reading ur design I’m pretty sure I’ll be starting after work this evening Cheers and thank you
Word Hurdle is an excellent ready you to educate your brain as well as unwind completely totally free. In word hurdle, you will experience various sensations that you never ever have in the past. This game is a guess, you can produce any word you desire.
I love this. Thanks so much for sharing.
Pincone is a great and easy way to create a DIY kissing ball.
It’s amazing, it looks very nice, I really like your idea.
Beautiful!
I love this. Thanks so much for sharing.