
Hey friends! I’m on a mission to do a little recycling today, and I needed to look no further than my kitchen for unique components that I could turn into fun jewelry. Recycled K-Cup crafts are a great way to keep plastic out of your trash. Today I’m sharing how to make a DIY gem necklace using K-Cup filters!

Ever since I got home delivery for my coffee and water from today’s post sponsor, Absopure, I am always looking for ways to re-use and recycle the old K-Cup pods. Their delivery service means I never run out of water or coffee, and saves me the trip to the store! You can get delivery to your home or office on an automatic monthly schedule. It’s the best!

Now, today is about recycling and using what you already have. So while I am excited to show you how I designed my gem necklace, I’ll also offer suggestions for alternate products that you can use to reduce or even eliminate the need to shop for any supplies to complete this project!
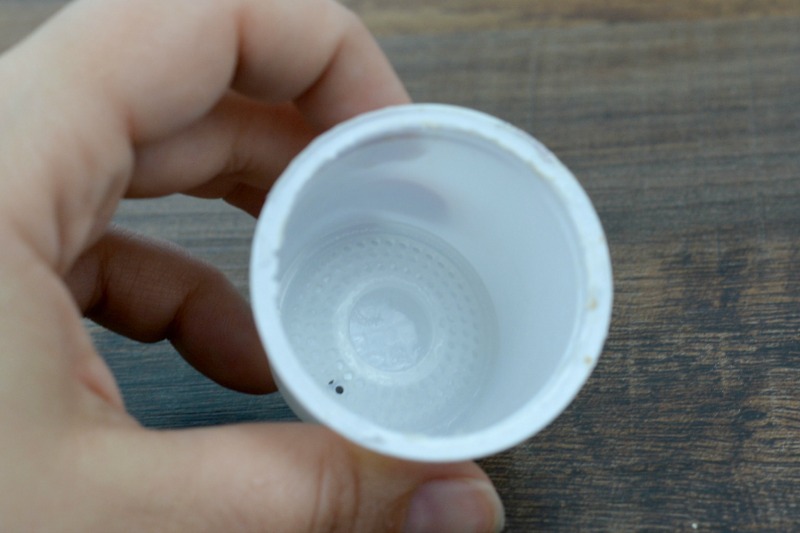
Begin by emptying two K-Cups with filters. Not all the cups have filters, but from my personal experience here at home, I have found that the Starbucks blends and the Hot Cider both have filters, which you can see in the bottom of the cup pictured above. To get to the filter, you’ll need to remove the paper filter that contains the grounds and dispose of it. The plastic filter lifts right out.

For jewelry projects, I like to use products that withstand heavy use, like Ranger patinas designed for use on metal. They work great on plastic, too, but you can use any kind of ink or paint to color the frame of the necklace. I blended shades of blue, but use what you like best!
If you are using acrylic paint or a non-permanent ink, you’ll need to add a protective coat over the colors so that they don’t rub off on your clothing. Resin, glaze, or even hard coat Mod Podge would all work well for this.
I wanted to add a coppery shine to mine, so I used some cold enameling powder for a permanent bond. You can also use a metallic leaf paint for a permanent color, or again – acrylic paints or inks in metallic colors, as long as you seal them afterward!

Next, I got a 14mm blue glass faceted bead from my stash. Because I create a LOT of jewelry, I typically have all shapes, sizes and colors at the ready. Check for what you may have, or try something unusual like a marble or even a stone!
Sandwich it inside two filters, and glue around the edges of the filters to fuse them together. I am using a modeling adhesive specifically created for permanent bonds on plastic, but check the labels of what you have on-hand! Most heavy duty adhesives like E6000 or Gorilla Glue will bond plastic. You can also check Krazy glue, or whatever is handy, but you will need something with a stronger bond than typical craft glues.

While your glue dries, you’ll need to ensure that it forms a strong seal. A few clothespins to hold it closed did the trick for me!
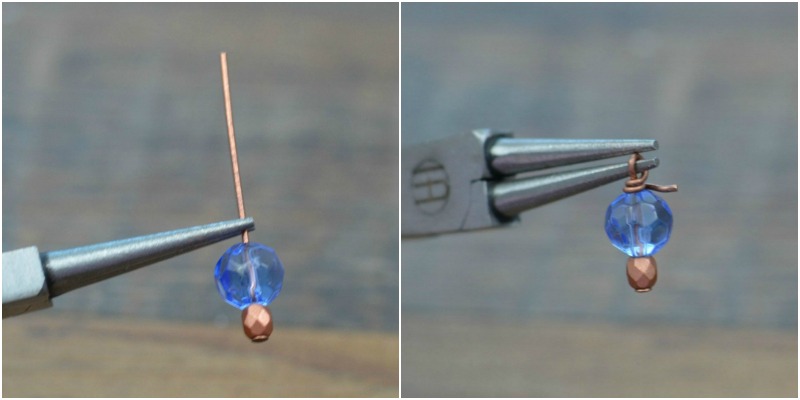
Finally, I decided that the disc needed a coordinated bead charm. If you’re not familiar with charm-making, it’s a good skill to develop because charms can be made inexpensively and work in so many different types of projects. You slip a bead or two (this is a 4mm copper bead and a 8mm blue bead) onto a jewelry head pin, and loop the wire end of the pin over a pair of round nose pliers to form a loop. Wrap the excess wire around the pin between the top of the bead and the loop you just created. Trim away any excess, and you’ve got a quick matching embellishment!
(If you need a little practice making charms, or would like to see it on video, I recommend my quick video on how to make jewelry charms! You can find it on my YouTube channel here.)
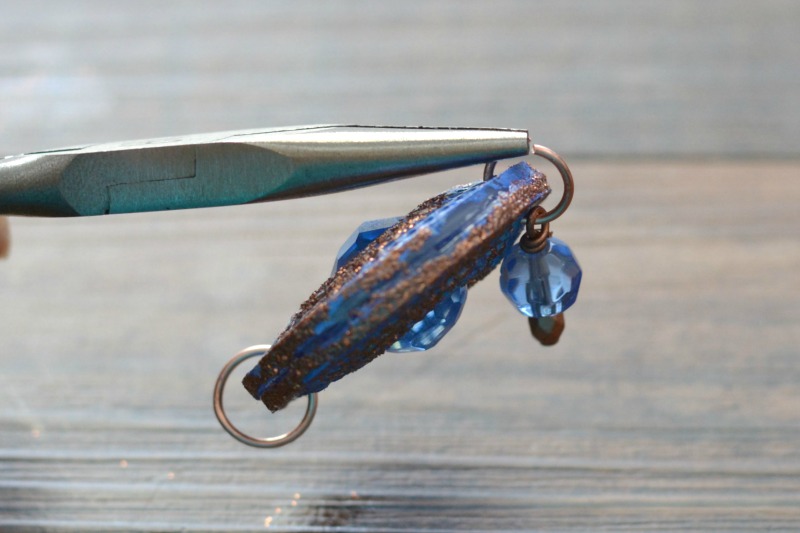
Finally, use a large jump ring (12mm or larger) at the top of the disc once it’s dried to string a chain through, and at the bottom of the disc to connect the bead charm. I added this pendant to a long 30″ chain to that it rests just below my ribcage – I find that I prefer large pendants on long chains (but that’s completely up to you)!

The beauty of recycled k-cup crafts is that no two will be quite alike, and you can use this basic design to create a variety of looks!
I hope you enjoyed this recycled craft project, and that you’ll join me again soon!

Note: This was not a paid post, though as an Absopure blogger I have been provided with home delivery service in order to share my experience and ideas with you. As always, all opinions and ideas in this post are my own.
Wow, that is a great idea. I like it
i like it
wow looking good
What a great idea! Thank you :)
I am really loving this idea!
Way to go.
Love your idea using coffee pod inserts..I have about 150 saved and my busy mind is already thinking Christmas crafts!!I have three craft ideas for making ornaments and two for making angles.
I also have been saving and using the perforated disks from k cups. Since I don’t have a Keurig machine, my cousin saves them for me. But they don’t come in all cups, and I’m running out. Any suggestions where I could get more?
Just found you. Great to see hand made items ((earrings).