• Skip to primary navigation
  • Skip to main content
  • Skip to primary sidebar

  • home
  • about adrianne
  • buy the books
    • DIY T-Shirt Crafts (2015)
    • DIY Stamped Metal Jewelry (2016)
    • Rock Painting for Beginners (2019)
  • videos
  • crafts
    • diy beauty projects
    • kids’ crafts
    • paper craft projects
    • polymer clay
    • sewing projects
  • jewelry
    • bracelet projects
    • earring projects
    • necklace projects
    • jewelry tools & supplies
  • metal stamping
    • beginners’ tutorial
    • video tutorial
    • project ideas
    • metal stamping supplies
  • recipes
    • cocktail recipes
    • appetizers
    • main and side dishes
    • sweets and treats
  • by season
    • birthdays
    • new year
    • valentine’s day
    • st. patrick’s day
    • easter and spring
    • mother’s day
    • patriotic
    • fall
    • halloween
    • christmas
    • thanksgiving
  • privacy

Happy Hour Projects logo

06/25/2012

Red, White & Blue Wrap Bracelet

I love July 4th.  It’s really my favorite.  It’s fireworks and parades and barbecues, seeing family, taking a day off work… popsicles and watermelon – everything that embodies summer!  And over the weekend, I was picking up a cute little flag top for Raya when I realized I don’t have anything patriotic to wear.  So I thought I’d remedy that with a patriotic wrap bracelet.

I opted to use seed beads and waxed cotton twine – I know it doesn’t sparkle and shine the way some people make their wraps, but it keeps the cost way down, which I think is important for seasonal pieces.  Depending on what you keep on-hand, this should be something you can make for $5 or less.

I did a tutorial on making this style bracelet last month, so if anything looks confusing, then definitely check out the tutorial on the stone and leather bracelet I shared.  But it’s a very simple thing to make – it only looks complicated.  Let me show you!

What you’ll need:
Size 6/0 seed beads
Twine – cotton, hemp, or even leather all work well
Button for closure
Thread and a needle with a narrow eye

First, I decided on three wraps, one for each color.  My wrist is 6 1/2″, and I strung 7″ of beads for each color.  If you want more wraps, or if your wrist is smaller or larger, you may want to make an adjustment.  With 21″ of beads and the closure, plus a little extra length to work, I cut a string of twine 50″ long to start.

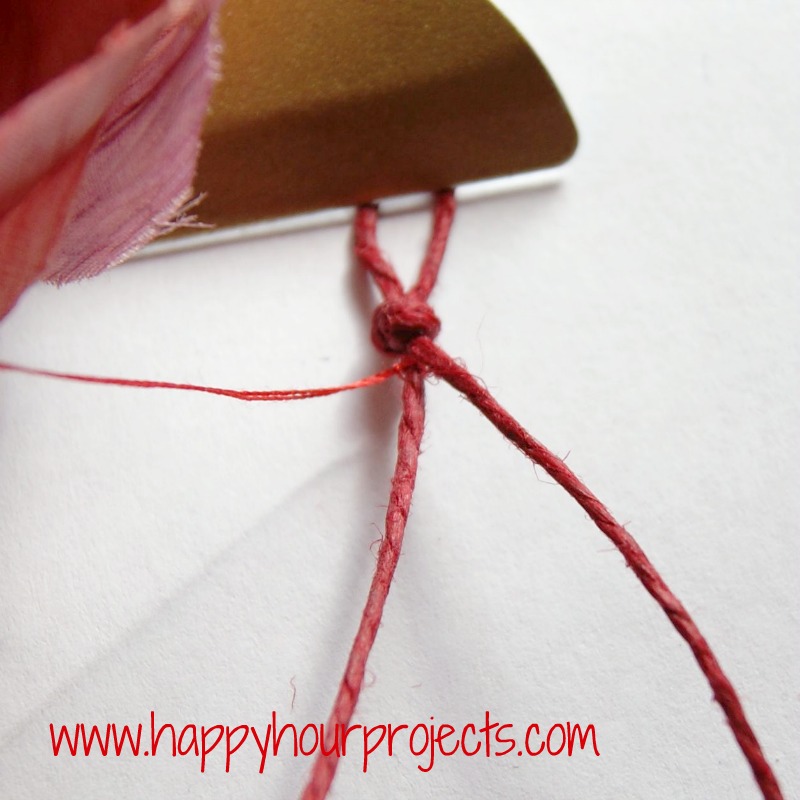
Double your twine, so you are working with a 25″ doubled piece.  Tie an overhand knot in the center to fit your button closure.  Make sure the button fits through before continuing.

The easiest way I have found to work is to clip the end on my clipboard.  You could also pin it on a pillow or the arm of the couch – wherever you like to work.

Tie your thread onto your twine.  I just tied it to one side, using a lark’s head knot, although do what you’re comfortable with.  You will want to work with doubled thread so that it’s strong enough.  I like to work from the left to the right, so I tied it to the left.  If you’re more comfortable starting on the other side, then you’ll want to reverse my directions.

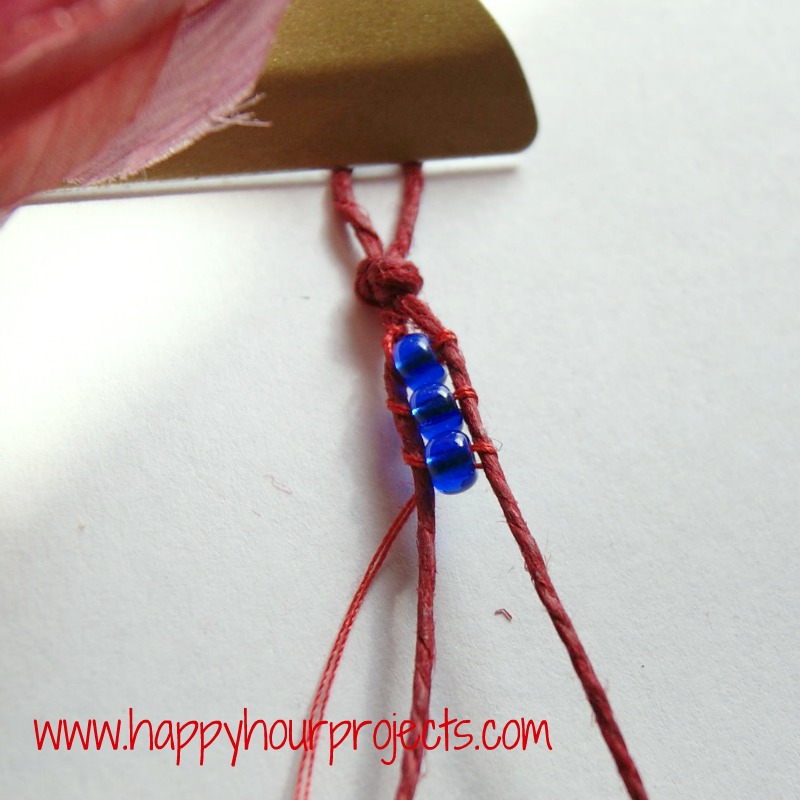
Thread a bead on, and pass your needle under your right strand of twine.

Pass your thread over the top of the right strand, and pass the needle back through your bead, going under the left strand now.  It’s sort of a figure eight.

You’ll be going under each strand and over the top, passing through each bead twice before moving on to the next bead.  Once you get a couple of beads threaded, you will find they line up pretty evenly between the two strands of twine.

Now – keep going until you have 7″ of your first color (if you’re planning to do a tri-color, three layer wrap). For me, that was 46 beads – not many at all if you have some seed beads on-hand.  If you run out of thread, all you have to do is tie a new piece to your old piece – the seed beads should have a large enough hole to accommodate your knot.

After 7″, change colors.  I did white next.  Then, 7″ later, switch to red.  Once you have 21″ of beads, tie the thread securely to the right strand.

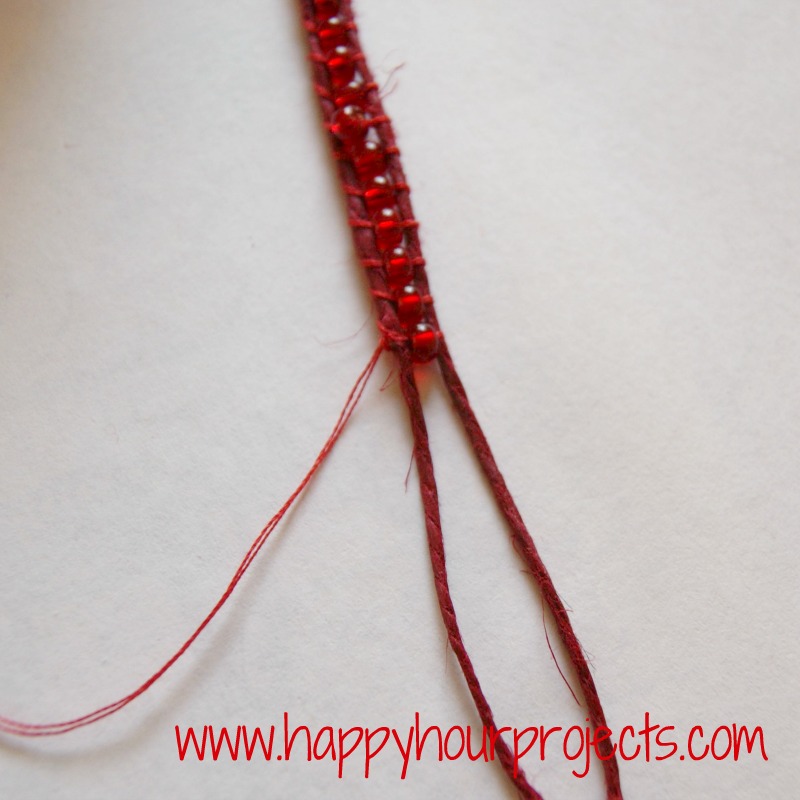
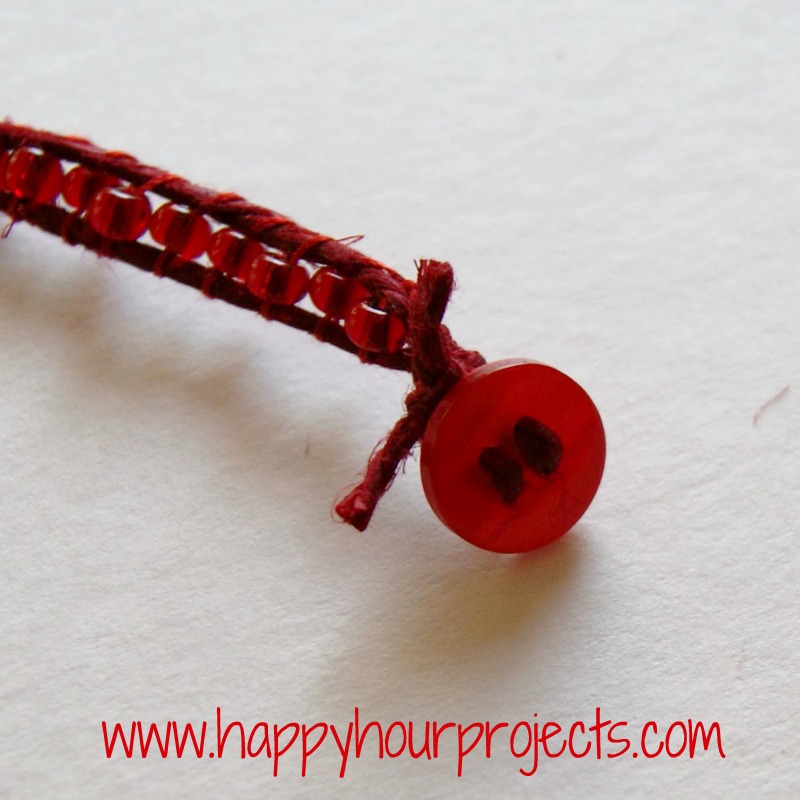
Now, tie off the ends of your twine with an overhand knot.  I tied my thread into this knot before trimming it off.  It may not be necessary, but it seemed like the best way to secure and hide my thread.

Now, thread your ends through your button for the closure.

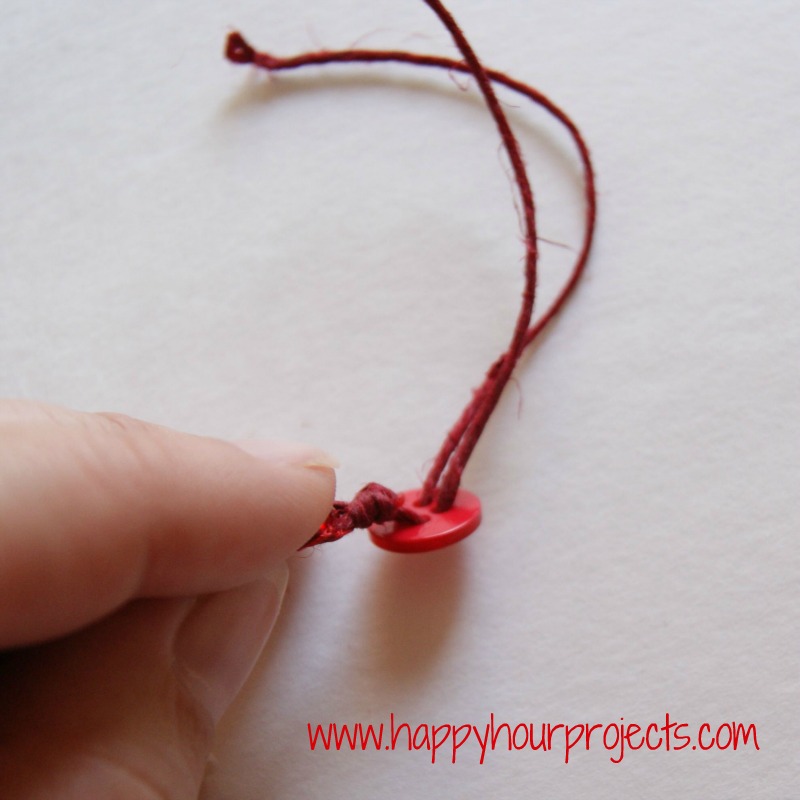
I triple-knotted it to secure it.  You can also add a dot of glue if you are nervous about it coming undone.  I left some short tails to keep it from coming undone, but you could trim it off if you would rather.

Then, just wrap it up – and it’s ready to wear!  It’s a super easy bracelet once you get the hang of threading it, and it’s a really impressive piece for how little work it takes.  I know I’ll be making more. ;)

I link up to these great parties!
~ Adrianne

Filed Under: Jewelry, Patriotic, Tutorials

copyright policy and terms of use

I love it when you love my work! All tutorials and photos published at Happy Hour Projects are copyrighted. If you would like to feature my tutorial on your website or share it on your social media you may use one photo to feature, as long as you provide a link back to the original post.

If you feature a photo, it may not be accompanied by the project tutorial or recipe, whether in my own words as it originally appears or paraphrased by you. This also includes personal sharing on social media and Pinterest. Publishing multiple photos from a project, or including instructions with an accompanying photo are not permitted and you will be asked to remove them.

I love to share my projects, and my tutorials, recipes, and e-books are ALL free for your personal use. However, photos and ideas that are published to this site are my protected intellectual property. You may print them at home, but please do not copy or distribute them. I also allow all designs to be made and sold at fundraisers, craft fairs, etc. If you are selling a piece made from one or more of my free tutorials in your online shop, I require that you use your own, original photography, and include a link back to my website to credit me as the designer.

I hope you enjoy what you read here, and please be fair when you share!

Reader Interactions

Comments

  1. Jennifer says

    06/29/2013 at 7:30 pm

    I saw this on a 4th of July roundup and just had to pin it. I hope you’ll share your best post of the week on my Friday Flash Blog Linky Party going on ALL weekend at The Jenny Evolution.

    Jennifer

    Reply
  2. Heaven's Walk says

    09/03/2012 at 12:22 am

    This is so cute, Adrianne! Thanks for the great tut! :)

    xoxo laurie

    Reply
  3. Molly says

    07/04/2012 at 3:47 pm

    I love how you made these trendy yet patriotic. Great tutorial also!
    Thanks for linking up at the Summer Fun Party, I wanted to let you know that as a Co-Hostess I featured you today on my blog. Head over and check it out, and be sure to grab your “I've Been Featured” button :)

    http://www.justalittlecreativity.com/2012/07/patriotic-projects-inspiration-round-up.html

    Have a great 4th of July!
    -Molly

    Reply
  4. Carri says

    06/29/2012 at 3:15 am

    This is just adorable… I love this… gonna hafta pin this one…

    Thank you for linking up to the ALL STARS BLOCK PARTY!!!

    Carri
    simplydonewright.blogspot.com

    Reply
  5. Lindy says

    06/28/2012 at 6:21 pm

    Love this. These bracelets are so popular right now. Simple and festive! I hope you'll add this to my Patriotic Project Parade. I would love to see them there.

    http://www.itsybitsypaperblog.com/2012/06/patriotic-project-parade-linky-party.html

    Reply
  6. Full Circle Creations says

    06/28/2012 at 2:26 am

    I really like this! Thanks for sharing!

    Holly

    Reply
  7. Jessica Duncan says

    06/27/2012 at 1:20 am

    So adorable! I always wondered how to do these! I'll be making a ton of them now for cute summer stacking bracelets! <3

    Reply
  8. Natalie says

    06/26/2012 at 9:46 pm

    Adrianne – I love this. I may just be making a bracelet like this today!!! Thank you for sharing how – I'll let you know when I have posted pics of mine – or if its a huge hot mess. lol. Take care Nat
    http://northshoredays.blogspot.co.nz/

    Reply
  9. (Queenmothermamaw) Peggy says

    06/26/2012 at 7:41 pm

    Wonderful. As I have told everyone that I have learned from today, I make all my families Christmas gifts. With lots of granddaughters this is perfect to add to my new things to make. I keep all these items in my stash box. Thanks.
    QMM

    Reply
  10. Candace Jedrowicz says

    06/26/2012 at 2:26 am

    It's lovely!

    Reply
  11. Kara at Petals to Picots says

    06/25/2012 at 6:12 pm

    What a fun bracelet!

    Reply
  12. Kadie says

    06/25/2012 at 1:43 pm

    I always safety pin mine to the knee of my pants.:) I love this, perfect for the 4th!

    Reply
  13. Terry says

    06/25/2012 at 1:14 pm

    I need a clipboard, lol. This turned out so cute. I could totally get into a red and white one for Canada Day. Great tutorial.

    Reply

Trackbacks

  1. Pinterest Projects: Red, White, and Blue Wrap Bracelet : Felt With Love Designs says:
    07/10/2014 at 10:19 am

    […] came across this bracelet tutorial while browsing Pinterest for 4th of July projects and decided to make one to match Monkey’s […]

    Reply
  2. 45 Patriotic Project Ideas! - Do Small Things with Love says:
    10/07/2013 at 11:36 pm

    […] Small Things with Love Red, White and Blue Candy Coated Marshmallows from Just Us Four Red, White and Blue Wrap Bracelet from Happy Hour Projects Patriotic Filigree Earrings from Seven Alive Clothes Line Art […]

    Reply
  3. Christmas in July Gift Exchange – My Exchange and LINKY! says:
    09/23/2013 at 2:27 pm

    […] of seed beads.  If you’d like to view my tutorial on wrap bracelets, you should check out my red, white, and blue wrap bracelet or the stone and leather wrap bracelet I […]

    Reply
  4. 45 Patriotic Project Ideas says:
    09/15/2013 at 3:24 pm

    […] 12. Red, White and Blue Wrap Bracelet from Happy Hour Projects […]

    Reply

Leave a Reply Cancel reply

Your email address will not be published. Required fields are marked *

Primary Sidebar

Hello, and welcome! I'm Adrianne, an artist, author, designer, and blogger in mid Michigan. I work from home, chase my two kids, and this once-city-girl is learning how to care for chickens and adjusting to life out in the country. I have a compulsion for daily creativity... sometimes it's jewelry-making, paper crafting, metal stamping, mixing and baking, or giving new life to recycled items. But with 2 young kids, time is short! My goal here at Happy Hour Projects is to share projects and tips that you can do in an hour or less. The ideas you find here are designed to add a little creativity in your day, no matter how much (or how little) time you have!

BUY MY BOOKS!

Copyright © 2022 Happy Hour Projects on the Brunch Pro Theme