
I wanted something simple, so I got my scraps together and made this:

It took me about 10 minutes (after I hauled out my appropriate scraps, I mean). I like that it’s not super girly, yet it’s still handmade. That suits me and my business – which is all about things handmade, of course. (If were the type to wear a suit, then surely I’d want something different to represent myself.) Here’s how I put it together.
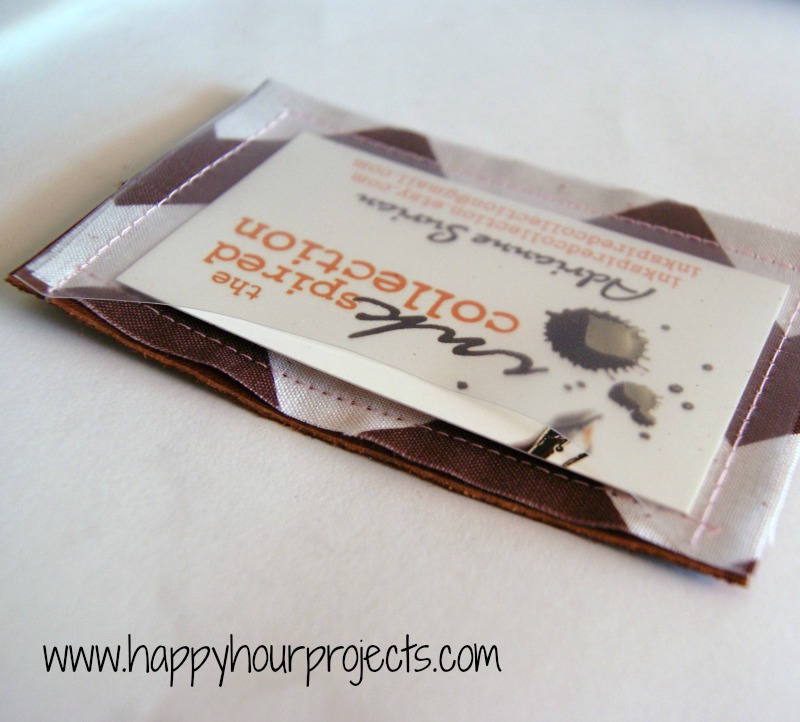
I used a scrap of leather, a scrap of fabric, and some 8 mil frosted vinyl to make it. I did have to pop in the fabric store for the vinyl – it was in with the outdoor fabrics. 1/4 yard set me back a whole 92 cents. I had the option of clear vinyl, but things can stick to that (like your sewing machine feet, for one) so I opted for the frosted. The leather provides some durability (and I love leather), the fabric serves as a nice smooth inner liner for the leather, and the vinyl provides protection with visibility.

Cut all three layers to 2-5/8 inches x 4-1/2 inches. A note here – you’ll want to use pinking shears if you don’t want your fabric to fray. Personally, I want to see what a frayed edge looks like, I think I will like it, so I left my edge rough. I also cut a rounded recess along the top edge of my vinyl so that I can get a thumb on a card really easily. Layer your leather with the nice side down and the rough side up, then your fabric, right side up. Your vinyl will go on top of this, but first, you want to secure your fabric liner to your leather.

I didn’t want to put pinholes in my vinyl or my leather, so I lined things up and secured them for sewing with a clothespin. I adjusted the stitch length on my machine to the longest possible stitch – it just looks better that way! I also switched to a denim needle, just in case. Then I chose a lightly contrasting color thread (I thought a light pink would be a nice touch with the brown?) and then ran a line of stitching along the top edge so that the liner is attached to the leather.

Then, I added my vinyl on top of that. I wanted to make sure I was leaving enough room for my cards, so I actually pinned a card in there for quick reference.

Then, I stitched from the top of the vinyl on one side, around the bottom, and up to the other side. You won’t stitch directly next to the card – you’ll want to leave some room, so that a few cards will fit.

That’s it! Super easy, and a simple look unlike anything else I’ve seen people carrying.
Now, I just need my blog cards to get here, LOL! What about you – do you have business cards for your blog? Why or why not?
I link up to these great parties! 
Just wanted to let you know I featured this on my blog today! You can check out the feature here: http://practicallyfunctional.net/2012/09/the-fun-in-functional-link-party-15/
So cute- I should totally do this.
BTW, thanks for sharing at The Fun In Functional!
Great idea. Love it!
How smart to doublecheck that the card actually fits in there. That would be the step I would omit at my own peril, lol.
Love it!!
As you know I am looking into getting some cards for the blog. I really like your card holder!! Things in my purse don't usually come out looking the same as when they go in either.:)
Super cute! My business cards for my blog just showed up in the mail yesterday, I'm so excited!
Great bussiness card holder! Love it!!
Judy@
Judys Handmade Creations