
You see, it’s my birthday. So today’s theme will be to have some fun around here! I have a fun birthday craft to show you this morning, and be sure to come back at noon for the Pick Your Plum giveaway! Then. we’ll wrap it up with a little link party (because Thursday evenings are of course the kickoff of the Happy Hour Friday link party).
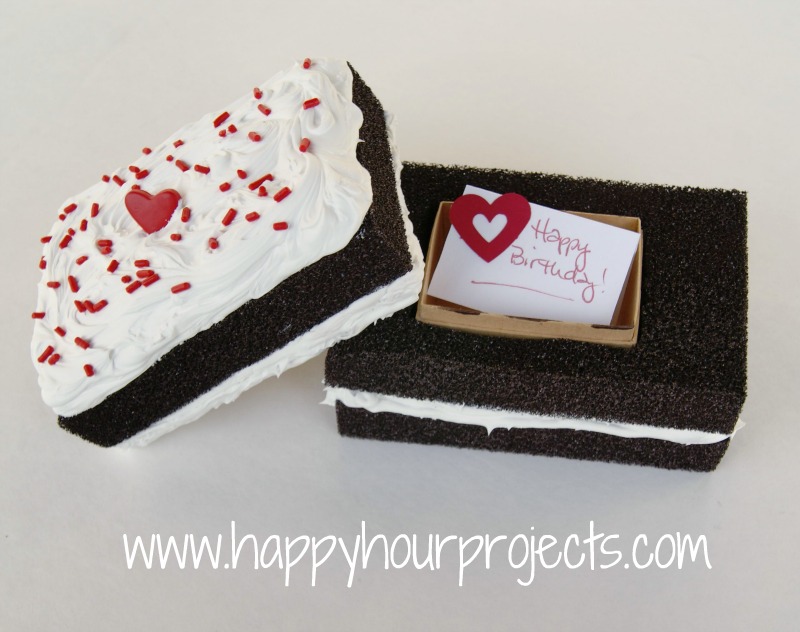
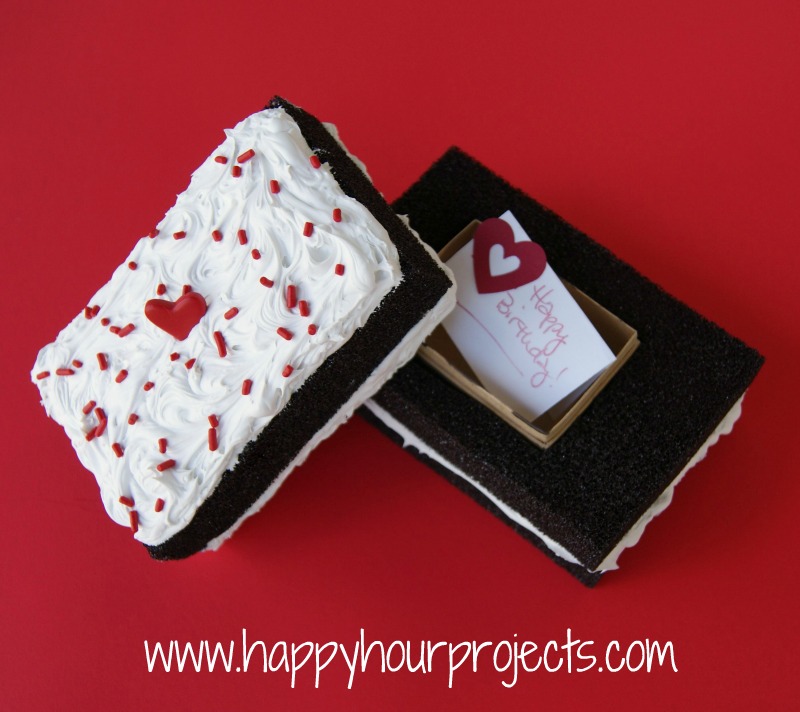
But first, a little project for you with a birthday “flavor” (oh yeah, I’m not above puns): The Secret Birthday Cake Box.

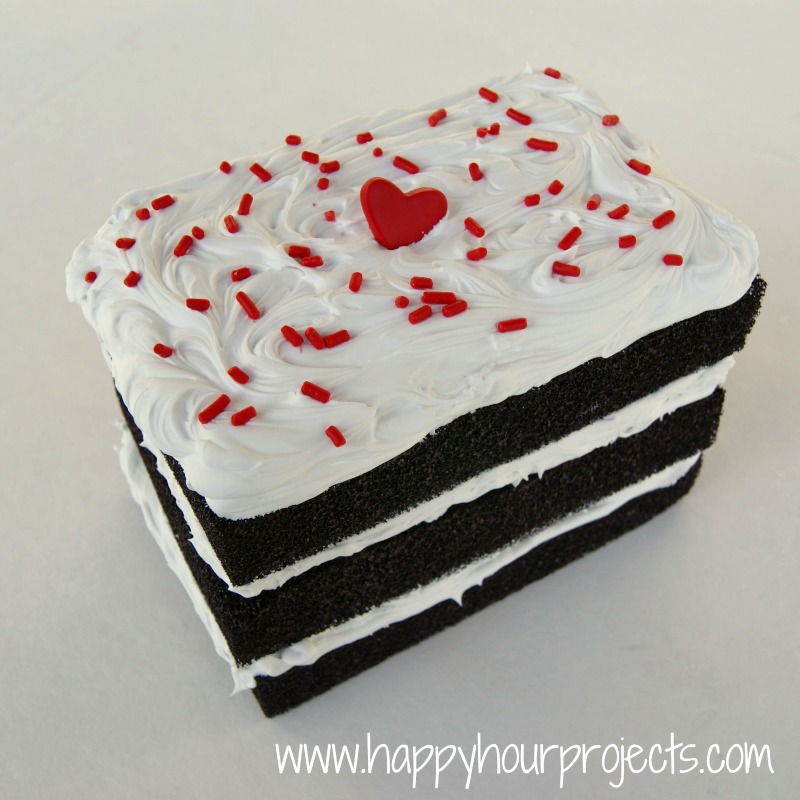
Does it look yummy? Well, it may look like cake, but it’s a secret box – great for small gifts (like handmade jewelry) or birthday notes and wishes.
This little box requires some drying time, so while it will take you an hour or less to work on it, you won’t want to wait until the last minute to make this for your special birthday girl or boy. I’d give this project 2-3 days to fully dry and cure.
What you’ll need:
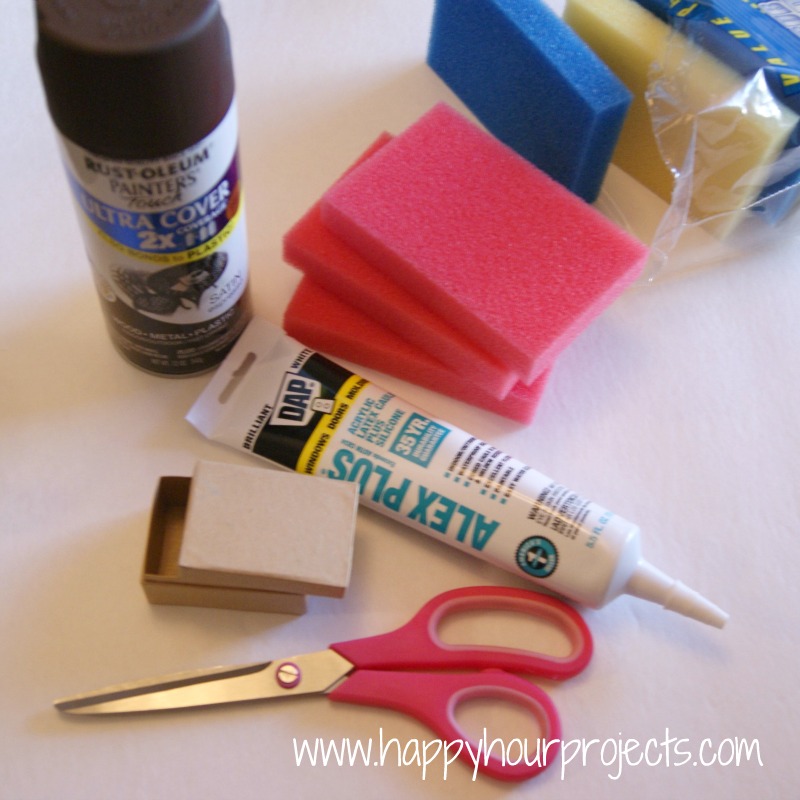
- Sponges – I used three, but you may need more for a bigger/taller box
- Small Cardboard Box (mine is an inexpensive paper mache-type box)
- Scissors & a Marker
- Hot glue (optional, but it made my job easier)
- Spray Paint
- Caulk – get the bigger tube, or two small ones. I ran short at the end, and had to buy another small tube like this. The small tube has the advantage of being easy to handle, but the larger tubes are more cost effective AND come in all different colors. :)
- “Toppings” like sprinkles – you can use real sprinkles, or clay – I used a combination of both
- Toothpicks/paintbrushes/plastic knife/etc. for smoothing out your caulk

First of all, let me share where the inspiration for this box came from. I’d love to say I had this idea ll on my own, but alas – another project got my wheels turning. :) She Knows Living had a Cake Postcard Tutorial recently. I loved the looks of it, but I could help thinking… “But, what else does it do? Nothing? It’s just a postcard?” Which is how I happened on the idea of changing the shape and hiding a secret box inside – I had to make such a cute idea practical, if I was going to go to all the trouble of making it.
Not that it’s a troublesome project, though – the only trouble once I’d settled on my design idea was waiting for it to dry (patience… not my strong suit). You need a few hours for it to set, and 2-3 days for it to completely dry. The project itself is super easy. So let’s get started!
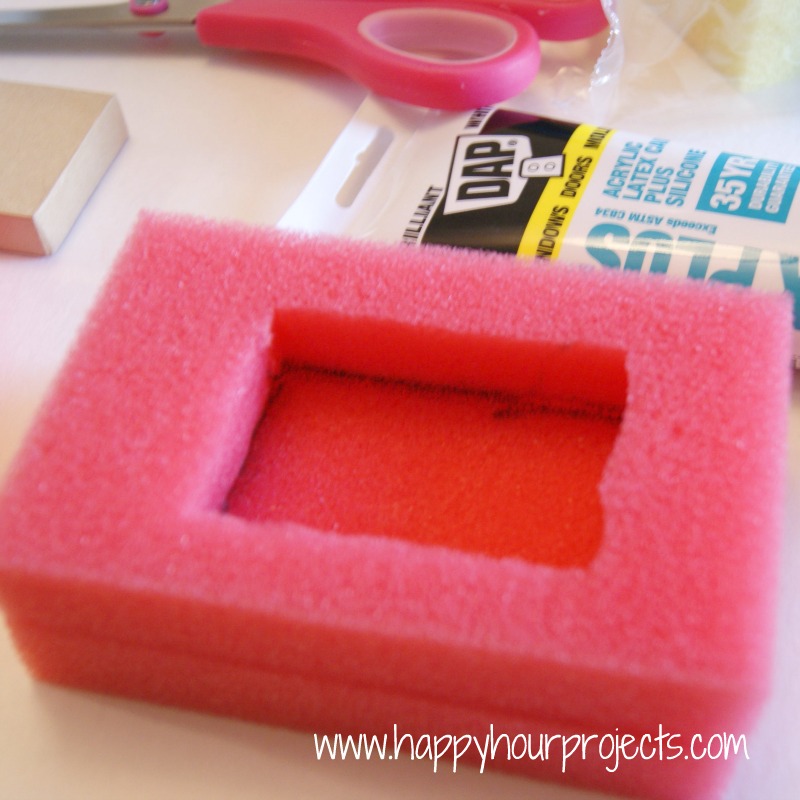
First of all, trace your box out onto one of your sponges (which, by the way, were from the dollar store – a pack of 12!) You may want to measure it to center it, I thought mine was centered, but I discovered later it was slightly off. No big deal, unless that sort of thing bugs you. Ahem.
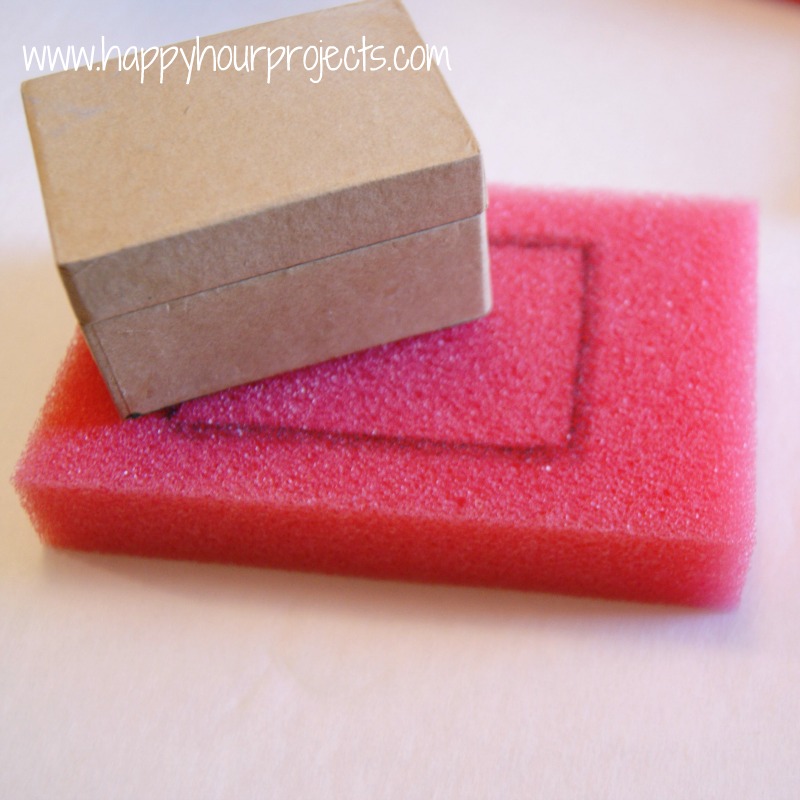
Cut the middle out of your sponge. Fortunately, it doesn’t need to be highly precise – sponges are flexible. Make sure your box fits before moving on.
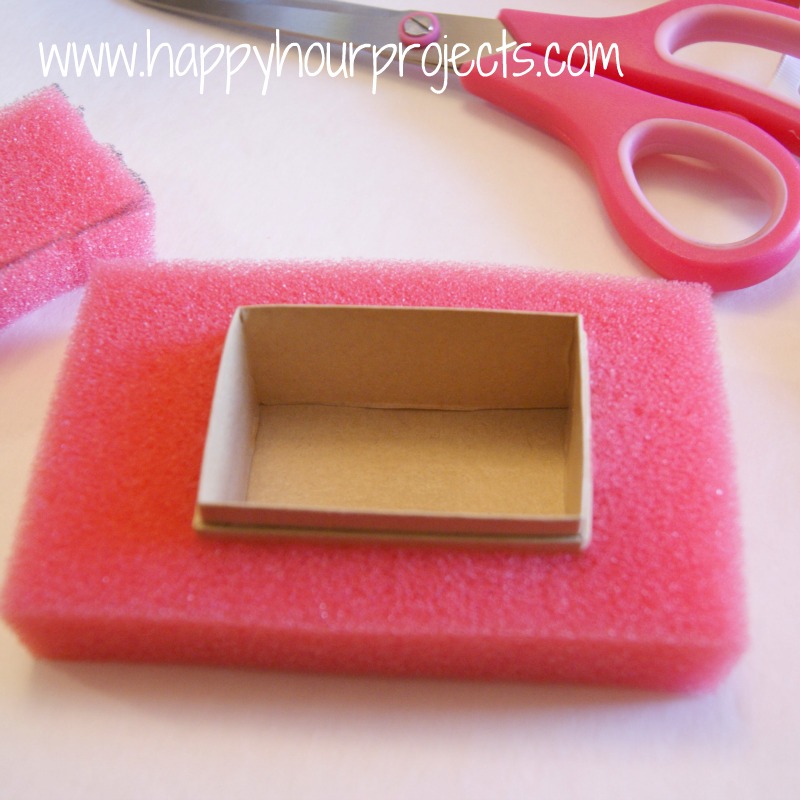
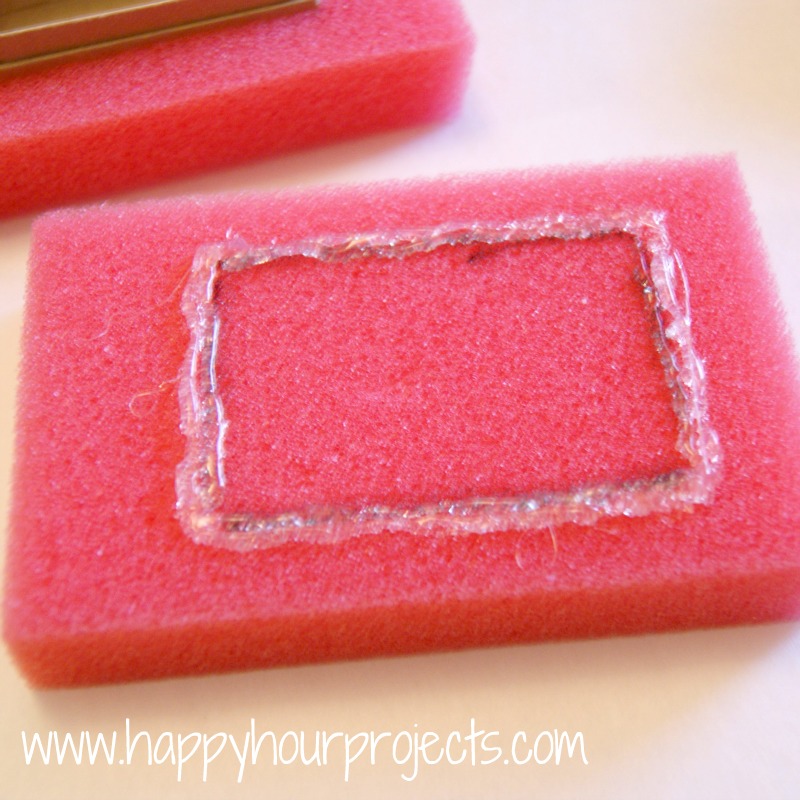
Now, trace out your box again onto another sponge. Or in my case, I just traced the inside of the hole I just cut.
Now, this step is totally optional but I’d recommend some way of marking off where you need to center your box lid. I ran a line of hot glue on it, so that the surface would be raised after I spray painted it. If you’re going with a light color “cake”, you may be able to just trace it out once your paint is dry.
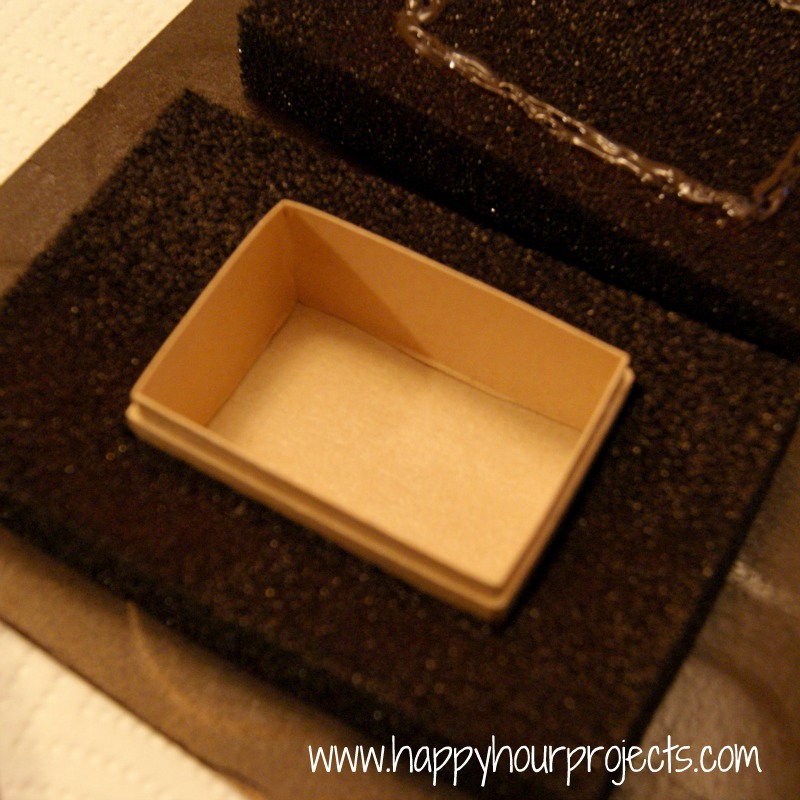
Now, spray your sponges the color of your cake. I chose chocolate. Obviously. :) Make sure you get the edges really well, because that’s what will show the most.

(Pardon the lighting the next few photos – the daylight was gone by the time my sponges dried.) Anyway, you now have your three pieces.

Take the middle piece and put your box in it.
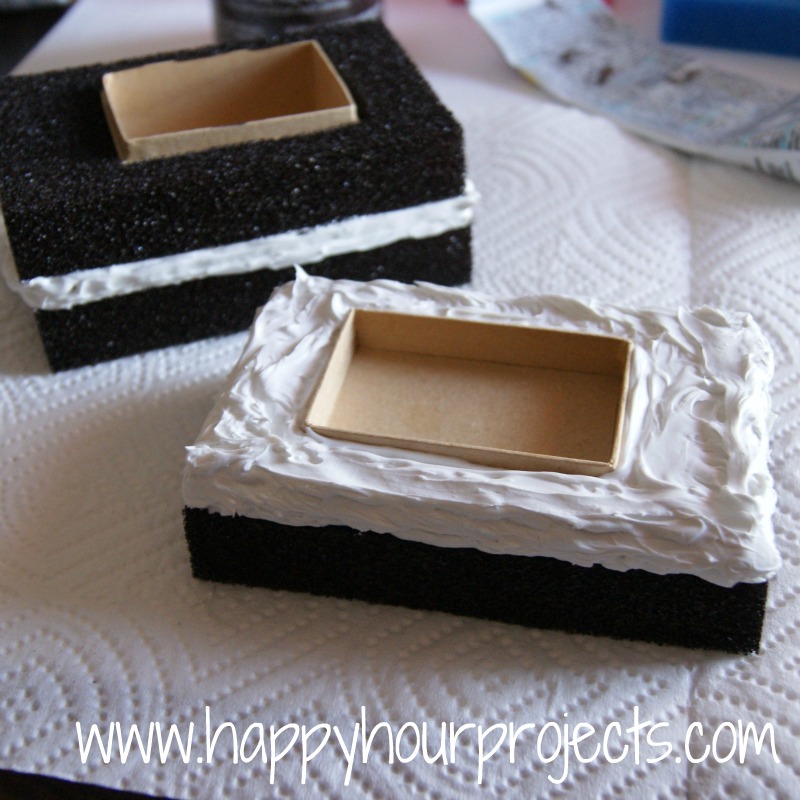
Take the bottom piece and run a nice, heavy line of caulk all around the outside edge, and then some in the middle to secure the box, too. You may want to use a toothpick or paintbrush to even up your caulk. Get it as close to the edge as you can, without going over.
Now, place your middle piece on top of the bottom piece. Tadaa. Sandwich-ey.

Now, the top piece is slightly more complicated (though still not hard). You want to place your lid in the outline you marked out, and caulk it in. Fill the caulk all the way to the edges. This part will show whenever the box is opened, so make an effort to get it nice and even. A note here: LEAVE YOUR BOX OPEN to dry. If you close it, you run the risk of sealing it shut!
This is actually my morning shot after letting it set overnight, so I could add the top frosting the next day. This layer needs to set before you can add the top “frosting”. It’s okay if it’s still a little soft, as long as it has a nice firm “skin” on it. You can turn it over and get to work as soon as it has a good set.
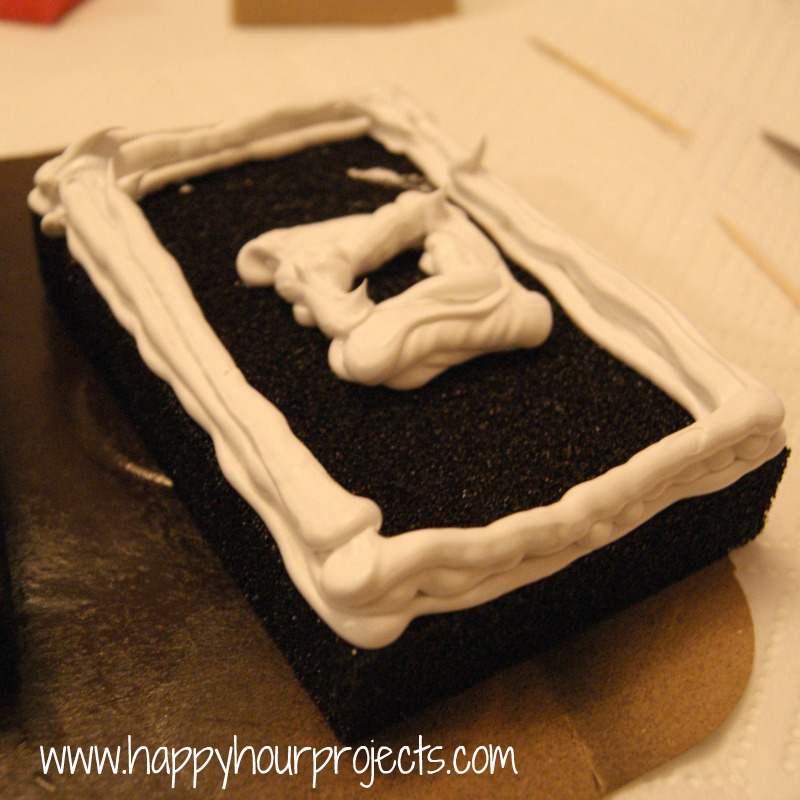
I did the top frosting in 2 layers (partially because I ran out). But also, it seemed to set more quickly in layers – I’d recommend doing it that way – even if you don’t run out. :P
I swirled the top around with a toothpick until it looked sufficiently creamy. Then, I added sprinkles (real sprinkles), and a little polymer clay heart I cut out. When it looked delicious, I knew I had a winner!
I link up to these great parties! 
Hey, thanks for sharing this wonderful art
My lil one’s birthday is approaching i will make one for her.
I have featured your birthday cake box at the All Star Block Party features. Stop by and grab a featured button.
Holly
http://fullcirclecreations.blogspot.com/2012/08/its-feature-time_20.html
That is so great! Totally love it.
Such a clever idea! Great job. And happy belated birthday! Thanks for sharing at the All Star Block Party.
Holly
This is really cute.. and really looks good enough to eat! My mouth is watering! what a great idea! Definitely gonna have to bookmark this one!
Found you on the Inspire me monday hop. THanks for posting!
Diane
ATA Girls (SteamPunk Egg)
Treasuring Grace (God Speaks)
I totally was excited to read on and find the recipe!! HAHA Hope you had a great birthday!!!!!
Thanks for joining the Keep Calm and Link Up party! Hope to see you there again next week!
Barbara @ Chase the Star
Wow! I totally thought this was a real cake … awesome idea!
This is such a cool idea! Thanks for sharing at The Fun In Functional!
This is soooo cute! I love it!
Hey I was gonna make one of those postcard cakes and mail it to myself just so it would be postmarked-LOL But I L<3VE your idea better! I'm gonna make one to put by my bed for my watch and earrings. hehe Thank you for the bday present-HA
That's really cute! My daughter's 13th birthday is in a couple weeks and this would be perfect!
This project is amazing!!!
Happy Birthday to you! Have a wonderful day!
wow, this is so cute!
This would be so fun to package a gift card or jewelry. Definitely pinning this. Hope you have a wonderful birthday. :)
Happy Birthday and thanks again for the giveaway bracelets! Hope you have a great day!
So, soooo adorable! Thanks for sharing this fun craft!
Happy Birthday wishes to you!!
happy birthday! this is so cute! :) stopping by from link it up thursday.
hope you’ll come visit me at jugglingactmama.blogspot.com
I honestly thought it was cake at the first glance. It is so cute!
WOW I love it!! My 12 year old walked by while I was looking at the last photos and he said, ooooo that looks so good, you need to make that cake mom! ha,ha No he thinks I need to make him that box and some cake.
Happy Birthday girl!!:)
Happy Birthday. I can't believe that cake isn't edible. Wow. It's gorgeous.
Happy birthday! Have a great day!!
Happy Birthday! That box looks so yummy!!
OMG that might be the cutest thing I've ever seen! Pinned it…
http://pinterest.com/pin/157626055678857398/
Thanks!!
Happy Birthday, friend! Enjoy your day and I hope you get a secret box with something special in it today!
This is so great (and so is the postcard link you shared).
I have to make this for my mother's birthday in October. I was going to make her an Altoid tin birthday card (something I've already done for my sister) but this will surprise them BOTH.
Thank you for sharing!