
One thing Raya has always cried for was her blanket, or even a burp cloth. Ever since the very beginning, she really wants the security of having it. So early on, I made her this security blanket, which I still love. It turned out so pretty! But, it’s not her favorite, despite how cute *I* happen to think it is.
But you DIY-mamas know my aggravation at having my daughter haul around something store-bought, right? :)
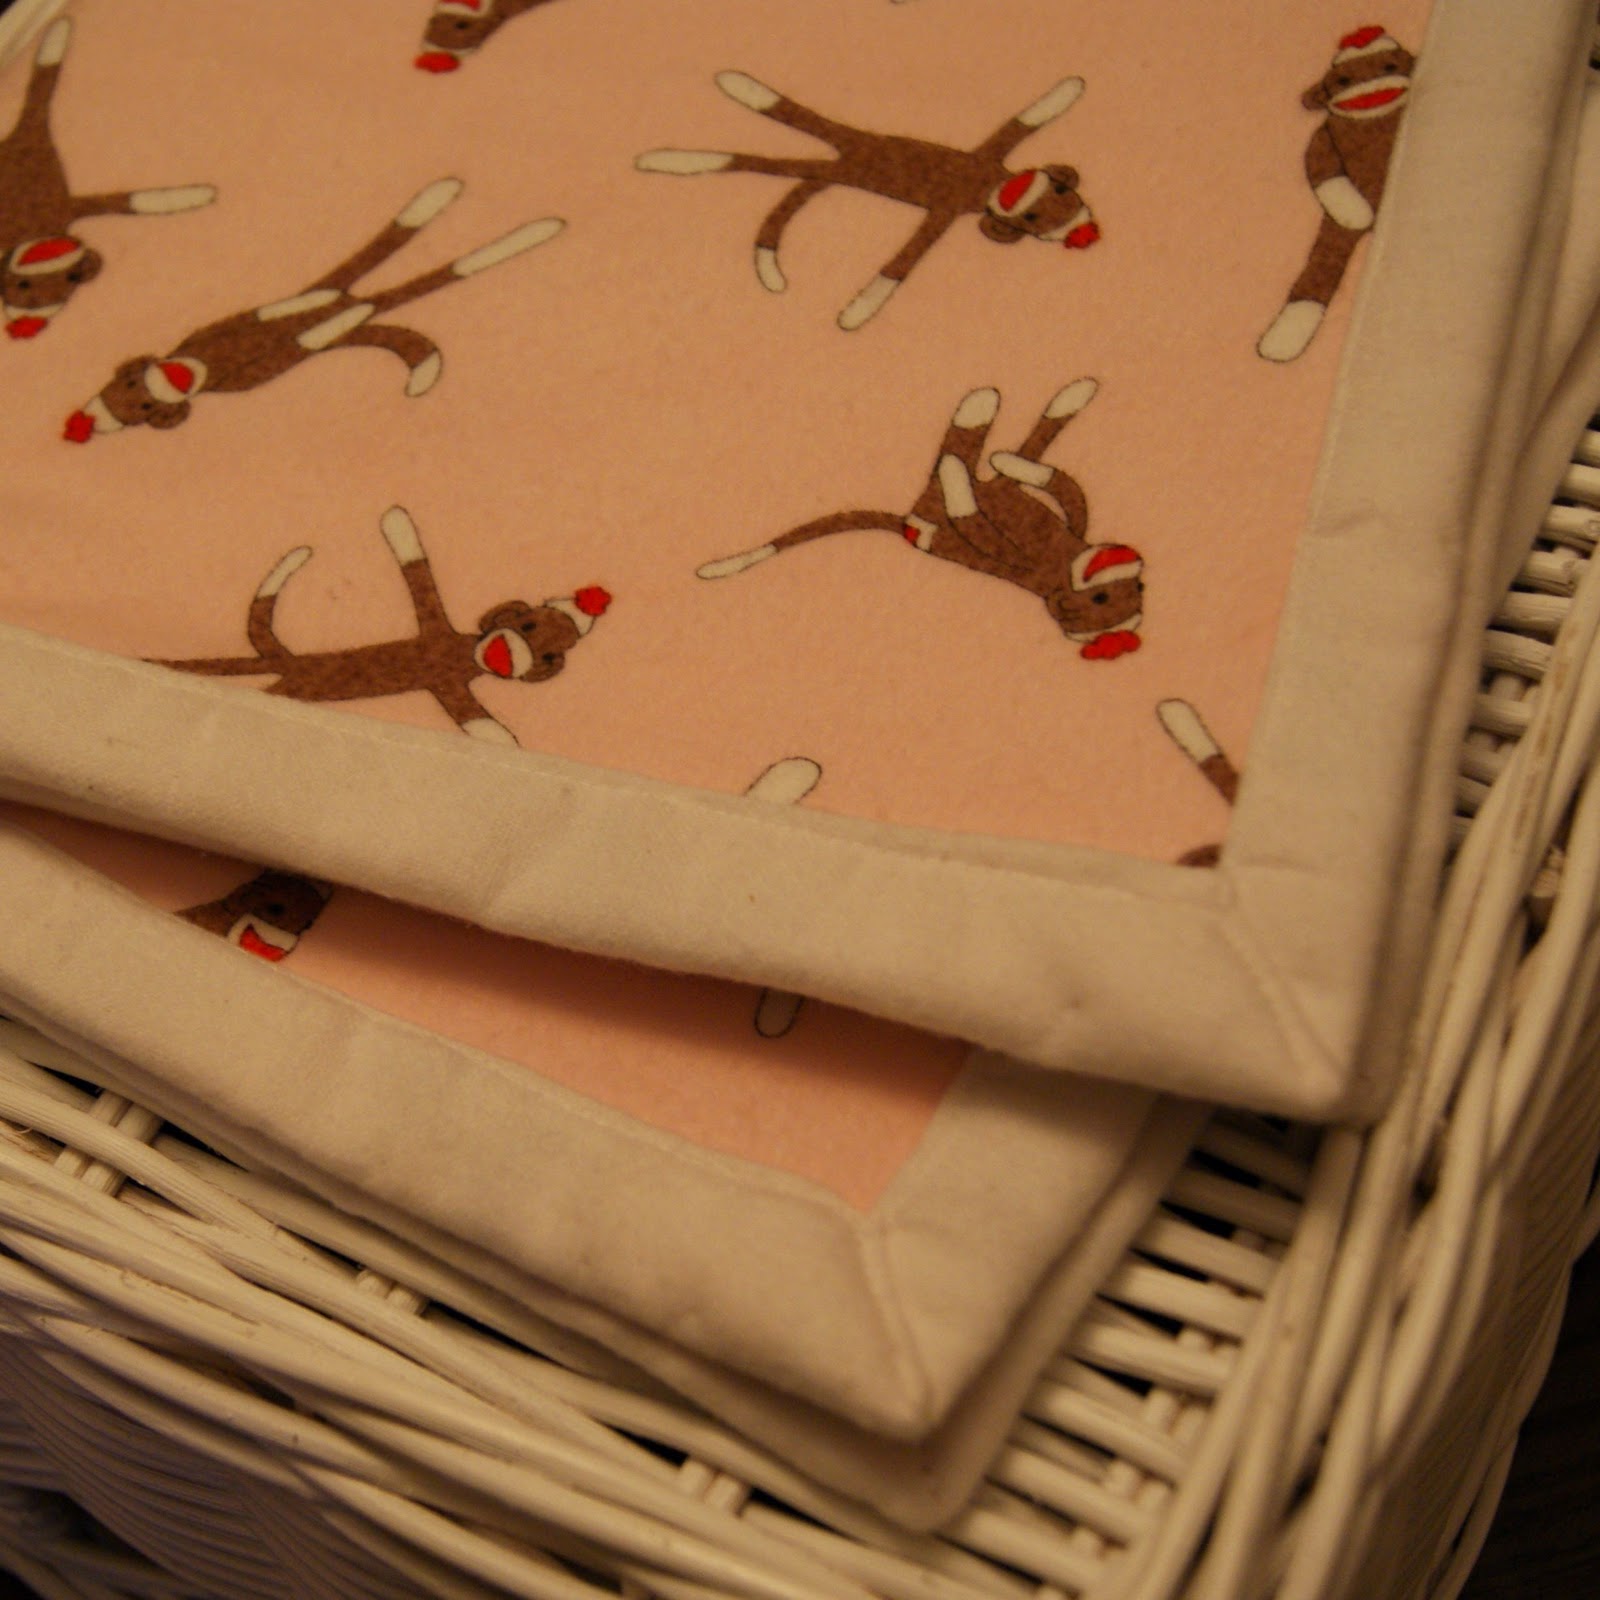
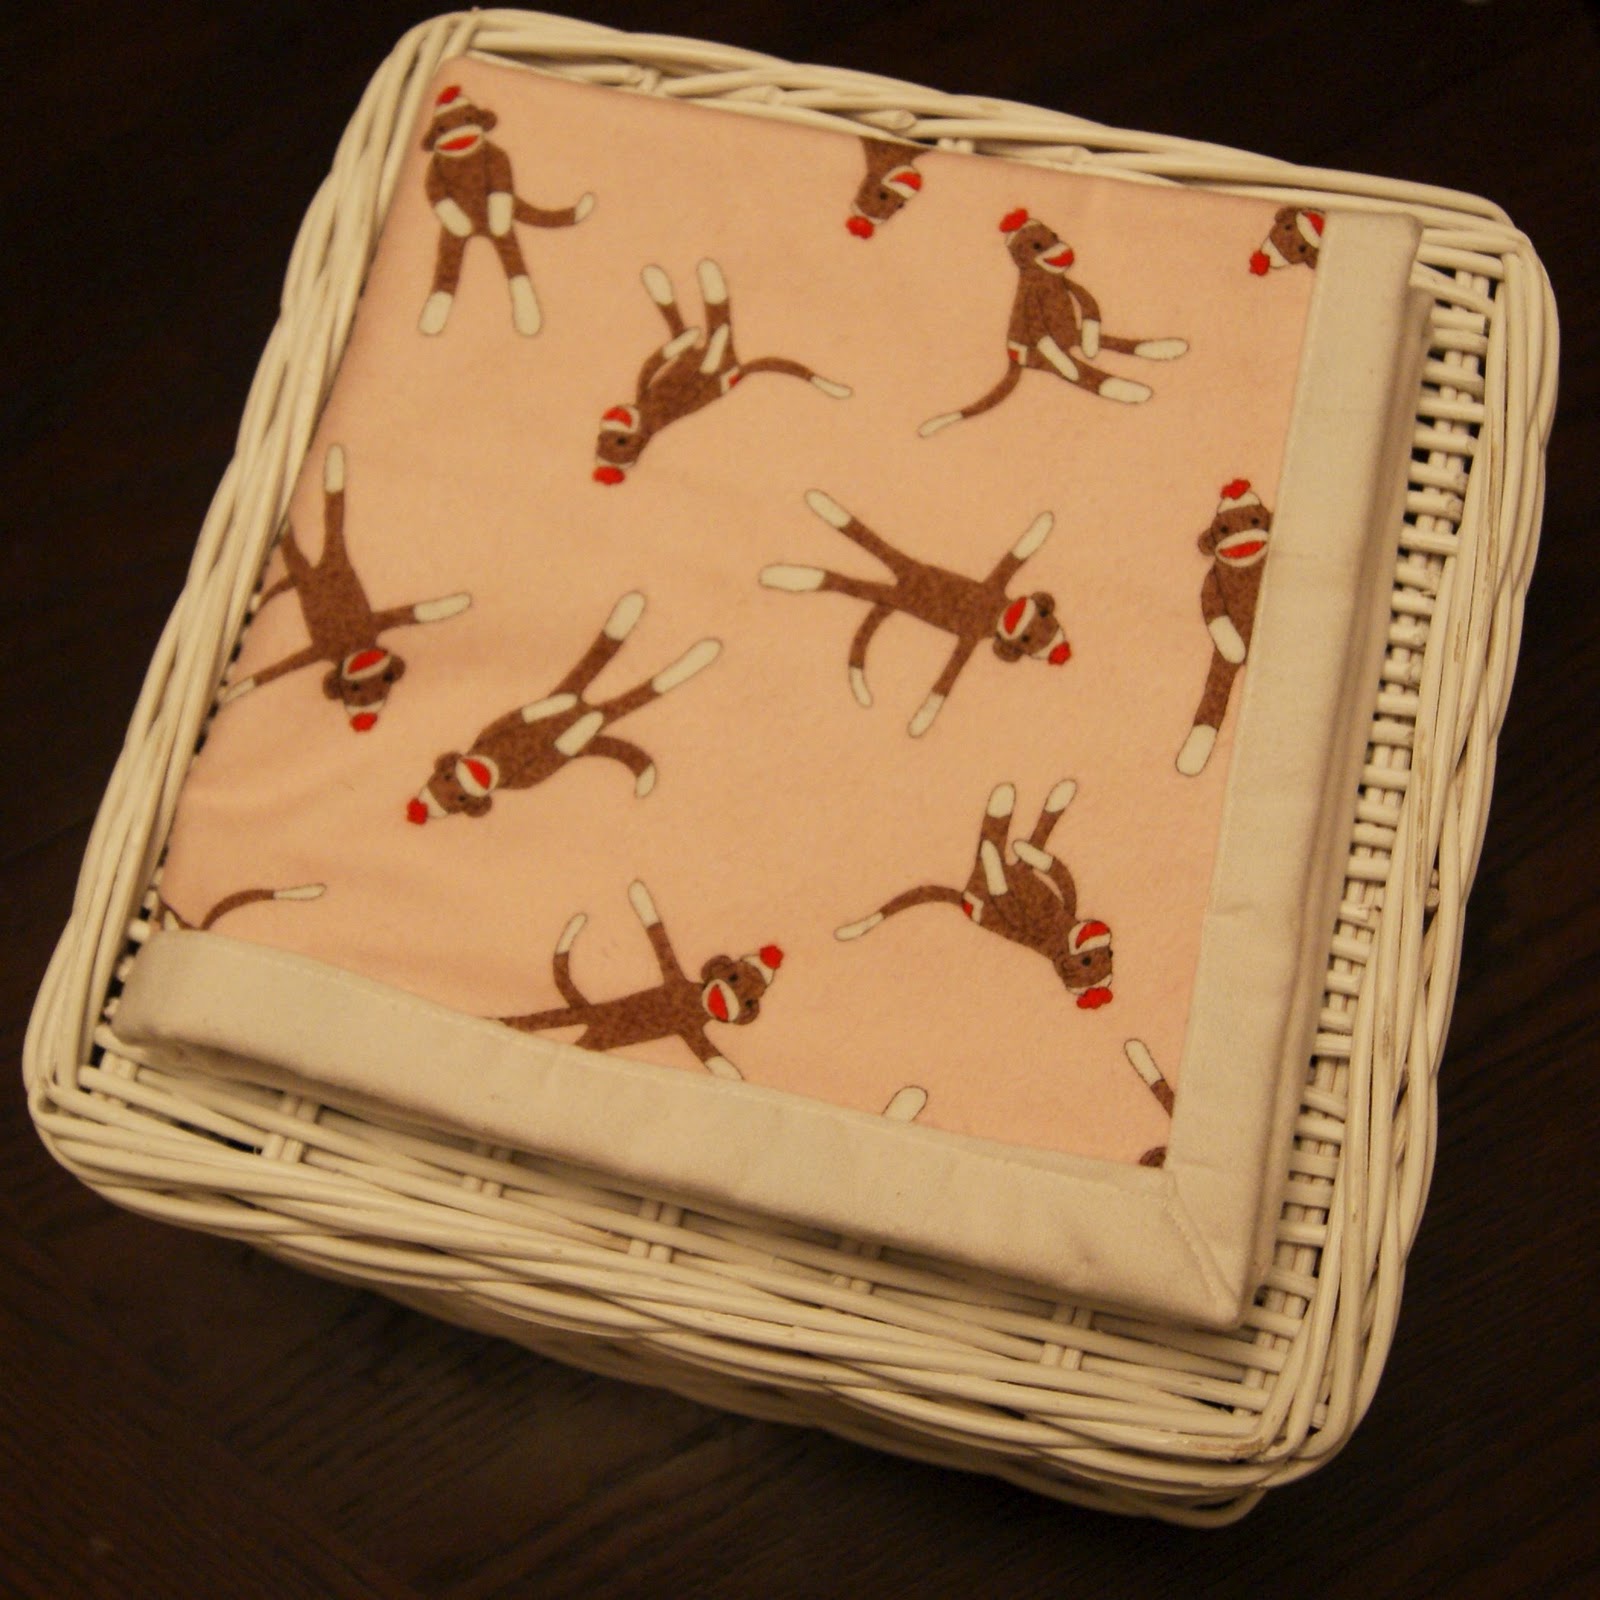
Determined, yesterday I decided to give it another shot. She definitely prefers flannel, so I picked up a cute sock monkey print in the hopes that her go-to comfort is something handmade by me this time.
I don’t think it’s going to work. But, I will give it a few days, because you never know. I’ll still show you how I made a simple little blanket, which can be made any size, and might just be your kiddo’s favorite, even if it’s not mine!
First of all, I chose two flannels. A) Because she really seems to like flannel, and B) because flannel has a natural cling to it so I don’t need to worry so much about quilting.
I cut my squares to 18″ to be security-sized. You can do anything, though – a nice gift size for a new baby is a yard of 45″ wide fabric.
First of all – re-wash your fabrics. Especially if you’re using cottons. Once you’re done, trim up your fabrics, and lay them out how you want your blanket. The fuzzy side of the white backing was face-down, and the print side of the print was face up. Line up the edges. It’s okay if your backing is up to 1/2 inch or so bigger, but you don’t want the top bigger than the bottom. Trim if necessary.

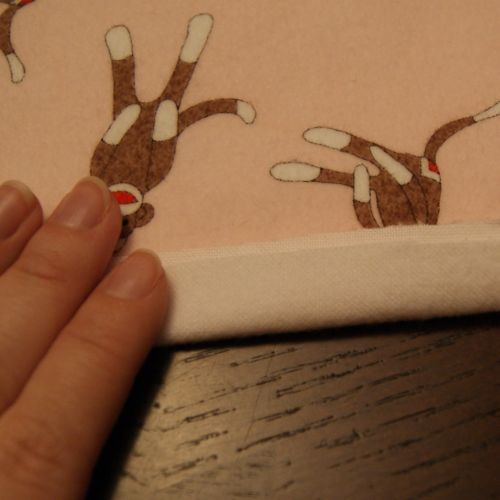
Now we’re going to do a really simple binding. You can use a separate binding fabric – that would be the “proper” quilters’ method, but I feel this works just as well and goes so much more quickly. I had this small size finished (and photographed) in 30 minutes!
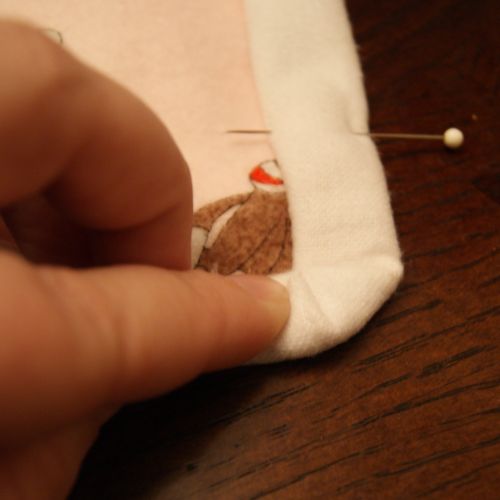
First of all, fold your edge up by 1/2 an inch.
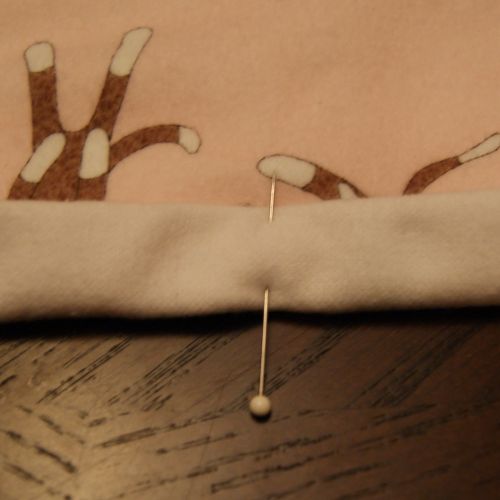
Now fold it up again. Then pin it. That’s it – we’ll be doing this all the way around. Easy, right?
When you get to the corner, this is tougher to explain than it is to do. Work with only one side bound. If you’ve bound each side already, just be sure there’s enough room to evenly work on your corner.
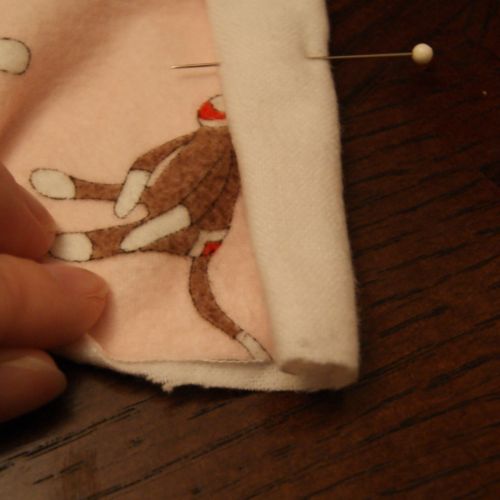
Fold the bound edge (on the right side in the photo) by 45 degrees, so that it makes a triangular shape like this:

Now fold the bottom up half an inch, like we did the binding for the egdes:
And fold up up one more turn, to create your corner. It may take you a couple tries to get it right, but that’s ok. Once you like how it looks, pin it in place.
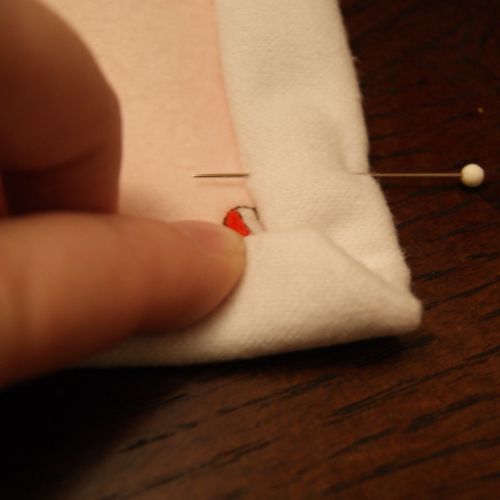
When you’ve got it pinned all the way around:

It’s time to stitch the binding. Sew as close to the edge as you can while staying in the binding. If you have any spots where you accidentally get only blanket, you’ll need to go over them again. Take your time. We’re actually nearly done!
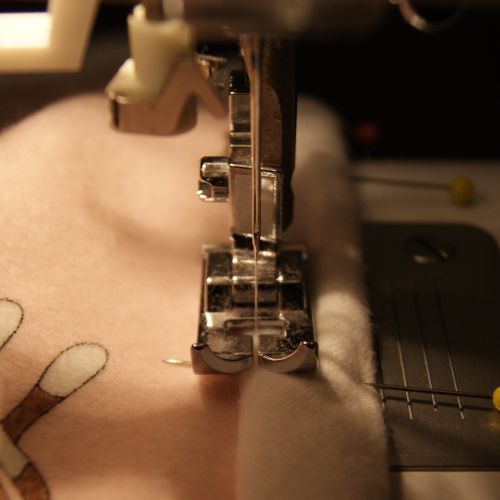
When you get to the corner, leave your needle down (in the fabric) and pivot 45 degrees.

Stitch down the corner.
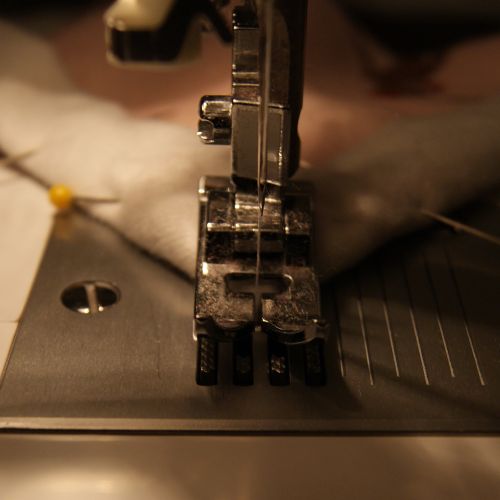
When you get to the end, stop. Run your stitching in reverse back up to where you started your corner. If you’re not quite comfortable stitching in reverse, you can also leave your needle in, turn your blanket all the way around, and stitch straight until you’re back at the intersection of your binding. Stop with your needle down.
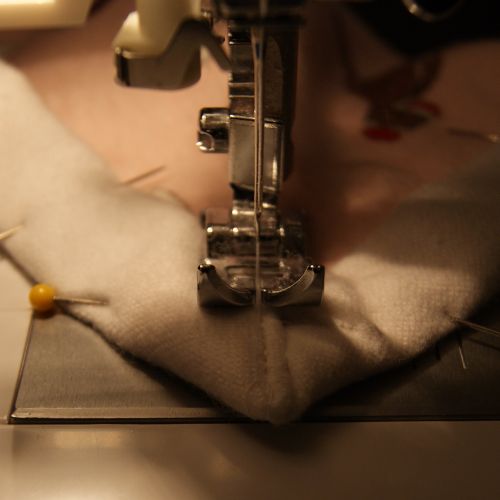
Now pivot your fabric another 45 degrees, and move on to stitching your next side, until you’ve stitched the biding down all the way around.
Admire your handiwork, because that’s all there is to it, mama!
In my case – this was all the easy part… Raya didn’t exactly embrace it. We’ll try it for a few days, but I sense round three sometime in the near future. *sigh* It’s funny – they want what they want, don’t they? :)
I link up to these great parties!
~ Adrianne
Perhaps you could sew a pocket on the blanket to hold her old security blanket. Maybe after she's carried it that way for a while she will decide she loves the new security blanket. Cute blanket.
Noreen
http://www.make-homemade-gifts.com/
Hey Adrianne, just wanted to let you know that your blankie will be featured tomorrow on Link It Up Thursday – grab a featured button if you like. :)
Wonderful tutorial and that sock money fabric is too cute! Thanks so much for sharing at Taking A Timeout Thursday!
So cute! My daughter would LOVE this blanket because of that cute sock monkey fabric! Love it! Thanks for linking up to the Tuesday Talent Show! I hope to see you again next week!
-Nikki
Chef in Training
http://www.chef-in-training.com
Love the sock monkey fabric!!
Thanks for the great binding idea!
You already know how much I love this (and the tutorial that I will definitely get to use). Thanks for sharing at our Link It Up Thursday party. :)
So great! Your details and pictures are very helpful, especially how to make the corners, that is always the hardest part for me. Thanks for sharing!
The blanket looks great! My daughter saw the pictures and loved it! Hopefully Raya will too soon!
What a great little project!! I love anything that is quick and easy. :) Great tutorial…thanks for sharing.
that is really cute! and this post is really helpful
It is so cute!! I would use it if she won't lol. Great tutorial although I have never attempted to use my sewing machine. It sits in its box in the basement untouched! Much more comfortable in the kitchen. But I love to look and I bet it is so soft. She doesn't know what she is missing!
that is awesome! i still have my blanket from my crib, that my mom made for me! well, i guess she has it. :)
hope you can check out my blog for some +vibes and inspiration!
Check out the unique hand tailored apron I am giving away
here
I made both my kids flannel blankets, using much the same method as you did, when they were newborns. Their's are 45″ squares, but they loved them and brought them everywhere. I think it wasn't until the oldest was ten that I was allowed to pack it away for good. The other one is still in use. Very threadbare, but still in use. ;)
Satin ribbon also makes a great edging. Little kids love to rub satin between their fingers.
Great tutorial. I especially love your explanation and photos of the corner. You make it looks so easy.
Adorable! Love that print! And your tute is very easy to follow! :) Good luck!
I'm not your kid, Adrianne, but *I* wanna have it as my “go-to” blankie :)
Very cute (just visiting from my Dashboard this morning, 'Cuz I Can)
Oh, if you wear a special perfume, spritz it with it, or snuggle it yourself when you are wearing that smell. Baby will love it cuz it smells like Mommy!
Learned that trick from my own Mom when my daughter was born. She wore simple “Charlie” perfume, and she became “Grandma Charlie”. Every time Sarah got a gift from her she “sniffed” it and said “Oh this one is from Grandma Charlie!!”
Smiles,
Suzanne in NW IL at WhyCuzICan