• Skip to primary navigation
  • Skip to main content
  • Skip to primary sidebar

  • home
  • about adrianne
  • buy the books
    • DIY T-Shirt Crafts (2015)
    • DIY Stamped Metal Jewelry (2016)
    • Rock Painting for Beginners (2019)
  • videos
  • crafts
    • diy beauty projects
    • kids’ crafts
    • paper craft projects
    • polymer clay
    • sewing projects
  • jewelry
    • bracelet projects
    • earring projects
    • necklace projects
    • jewelry tools & supplies
  • metal stamping
    • beginners’ tutorial
    • video tutorial
    • project ideas
    • metal stamping supplies
  • recipes
    • cocktail recipes
    • appetizers
    • main and side dishes
    • sweets and treats
  • by season
    • birthdays
    • new year
    • valentine’s day
    • st. patrick’s day
    • easter and spring
    • mother’s day
    • patriotic
    • fall
    • halloween
    • christmas
    • thanksgiving
  • privacy

Happy Hour Projects logo

08/28/2013

Simple Statement Bracelet

Sometimes simple is the best way to go, right?  So today’s project should be a fun one for those of you who enjoy dabbling in jewelry making!  A simple statement piece makes a great addition to any wardrobe, and it is probably easier than you think.  Today’s bracelet can be made in 10 minutes or less if you have some basic wire techniques mastered already (and if not – I can show you how it’s done!)

Simple Statement Bracelet Tutorial at www.happyhourprojects.com

What you will need:

Simple Statement Bracelet Tutorial at www.happyhourprojects.com

  • 18 gauge wire
  • Focal bead(s) you love – these are dyed magnesite beads
  • 5mm round leather
  • Glue-on end caps, clasp, jump rings, and jewelry glue
  • Round-nosed Pliers
  • Wire Cutters

First, you will need to form the wire to support your beads.  Cut a length of wire that is about 2 inches longer than your bead(s) so you can make end loops.  Bend one end around your round nose pliers, and wrap it around the “neck” you formed from that loop.

Simple Statement Bracelet Tutorial at www.happyhourprojects.com

Add your beads.  Make another loop on the opposite end.  I like to add my clasp in right here to eliminate the need for an extra jump ring, but that’s up to you.  You can attach it separately as well if that is easier for you.

Simple Statement Bracelet Tutorial at www.happyhourprojects.com

Now, determine how much leather you will need.  You should aim for a bracelet length about 6.5 to 7 inches – depending on the size of your wrist.  I needed 4 inches of leather, but it will vary depending on how large your focal beads are. Then, just add a it of jewelry glue to the cap, and glue it onto the end of your leather.

Simple Statement Bracelet Tutorial at www.happyhourprojects.com

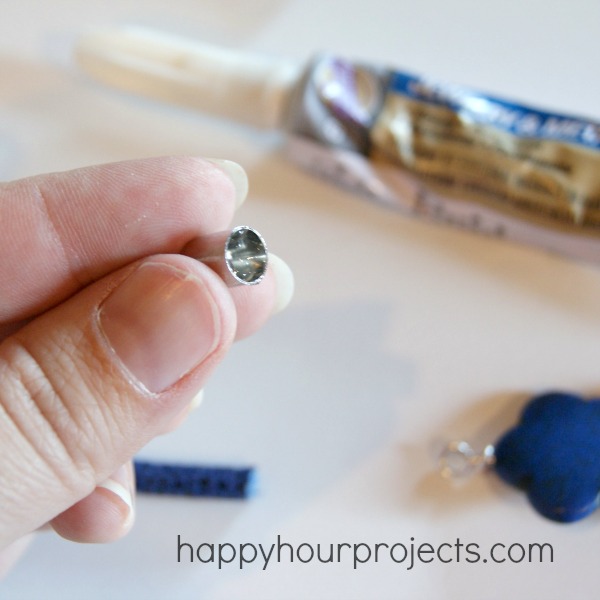
Add a jump ring to either end of your leather segment – you will attach your bead bar to one end, and you will clasp your bracelet with the other.  Your glue will need about 20-30 minutes to dry as well.

Simple Statement Bracelet Tutorial at www.happyhourprojects.com


And that is all there is to it!  I love the blue and orange together – what colors are you wearing this fall?

Simple Statement Bracelet Tutorial at www.happyhourprojects.com


Adrianne

Filed Under: Bracelets, Fashion, Jewelry, Tutorials Tagged With: 10-minute project, beads, bracelet, easy, jewelry, leather

copyright policy and terms of use

I love it when you love my work! All tutorials and photos published at Happy Hour Projects are copyrighted. If you would like to feature my tutorial on your website or share it on your social media you may use one photo to feature, as long as you provide a link back to the original post.

If you feature a photo, it may not be accompanied by the project tutorial or recipe, whether in my own words as it originally appears or paraphrased by you. This also includes personal sharing on social media and Pinterest. Publishing multiple photos from a project, or including instructions with an accompanying photo are not permitted and you will be asked to remove them.

I love to share my projects, and my tutorials, recipes, and e-books are ALL free for your personal use. However, photos and ideas that are published to this site are my protected intellectual property. You may print them at home, but please do not copy or distribute them. I also allow all designs to be made and sold at fundraisers, craft fairs, etc. If you are selling a piece made from one or more of my free tutorials in your online shop, I require that you use your own, original photography, and include a link back to my website to credit me as the designer.

I hope you enjoy what you read here, and please be fair when you share!

Reader Interactions

Comments

  1. elisabetta says

    09/12/2013 at 9:30 am

    i like so much!

    Reply
  2. Denyse says

    09/05/2013 at 8:50 am

    Adrianne, I just love the jewelry you make. This bracelet is so cute and would be a great addition to all the fall wardrobe we will be wearing soon.

    xoxo
    Denyse

    Reply
  3. Michelle says

    09/03/2013 at 2:41 pm

    Very pretty bracelet, Adrianne. Printed it out to take to Michael’s so that I can gather the needed supplies. Thanks!

    Reply
  4. Kara says

    09/02/2013 at 9:44 pm

    So pretty! Love the beads :)

    Reply
  5. Rebecca, Soap Deli News says

    09/02/2013 at 3:45 pm

    How sweet! These would be perfect for a girls only craft night.

    Reply
  6. Dria says

    09/02/2013 at 1:45 pm

    This is beautiful! I love the colors you used, you are so creative!

    Reply
  7. Kristin says

    09/02/2013 at 1:09 pm

    Beautiful! Love the colors!
    K-

    Reply
  8. Kathy says

    09/02/2013 at 12:06 pm

    Cute, cute, cute! I do a little jewelry making myself, you will be great inspiration for me. ;)

    Reply
  9. Alli says

    09/02/2013 at 5:42 am

    I always enjoy clicking on your link to see what beautiful jewelry you have created. And I’m never disappointed. Your tutorials are always spot on. Thanks!

    Reply
  10. Crystal says

    08/29/2013 at 4:46 pm

    I love it!! You are so creative! Love your jewelry! Thanks for the tutorial :)

    Reply
  11. Debra Bryant says

    08/28/2013 at 10:54 pm

    Love your posts! You are extremely talented. Keep the projects coming please!

    Reply
  12. Lorraine Morales says

    08/28/2013 at 10:24 pm

    I absolutely love all your projects. I am not that crafty but your instructions, as well as giving the links to the exact items to purchase, are awesome. I have actually made some bracelets and they have come out just perfect. You are so clever.

    Reply
  13. Lynne says

    08/28/2013 at 10:18 pm

    As a University of Illinois alum, I applaud your color choice! : ) I also really appreciate how you give very clear and simple directions, with lots of photos, as I am artistically challenged, shall we say. Good thing I married a crafter……. Seriously, I do so enjoy your blog, thank you for all your great posts.

    Reply

Trackbacks

  1. Unique Birthday Cakes Blog says:
    10/18/2013 at 2:55 am

    With A Simple Statement

    […] py Hour Projects, it’s my goal to bring you tips and tricks you can do in an hou […]

    Reply

Leave a Reply Cancel reply

Your email address will not be published. Required fields are marked *

Primary Sidebar

Hello, and welcome! I'm Adrianne, an artist, author, designer, and blogger in mid Michigan. I work from home, chase my two kids, and this once-city-girl is learning how to care for chickens and adjusting to life out in the country. I have a compulsion for daily creativity... sometimes it's jewelry-making, paper crafting, metal stamping, mixing and baking, or giving new life to recycled items. But with 2 young kids, time is short! My goal here at Happy Hour Projects is to share projects and tips that you can do in an hour or less. The ideas you find here are designed to add a little creativity in your day, no matter how much (or how little) time you have!

BUY MY BOOKS!

Copyright © 2026 Happy Hour Projects on the Brunch Pro Theme