
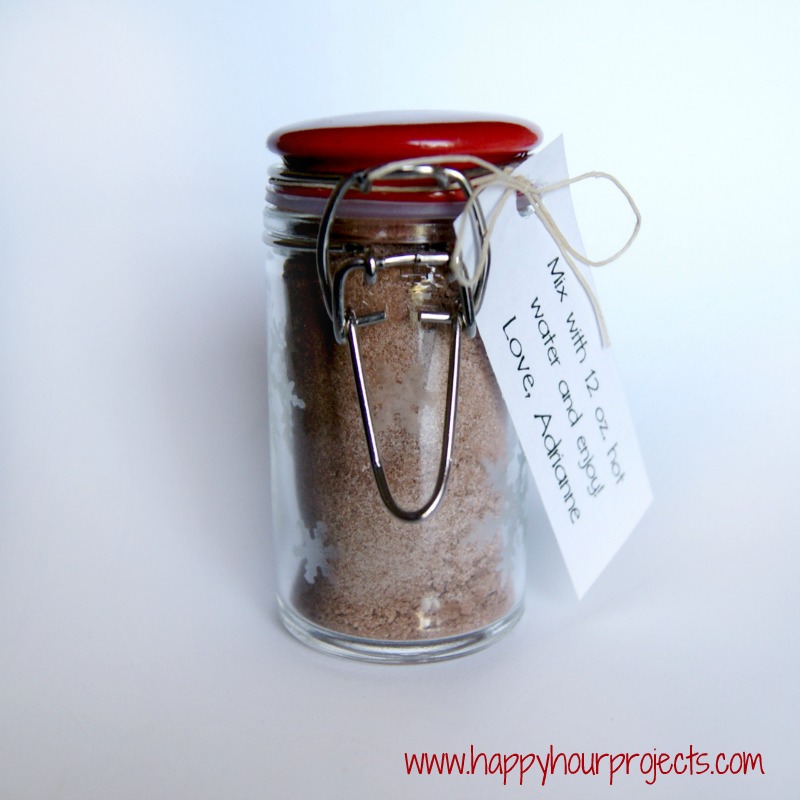
This is a great little gift-able to add to all those cookie trays you’ll be making in just a few months. You probably won’t want to fill your jars with hot cocoa just yet, but you can certainly watch the sales and thrift stores for your jars, and do a little Christmas crafting early! (And of course, be sure to pin this post to your Christmas inspiration boards so that you don’t lose this fantastic homemade cocoa recipe at the end of the post!) ;)
What you will need:
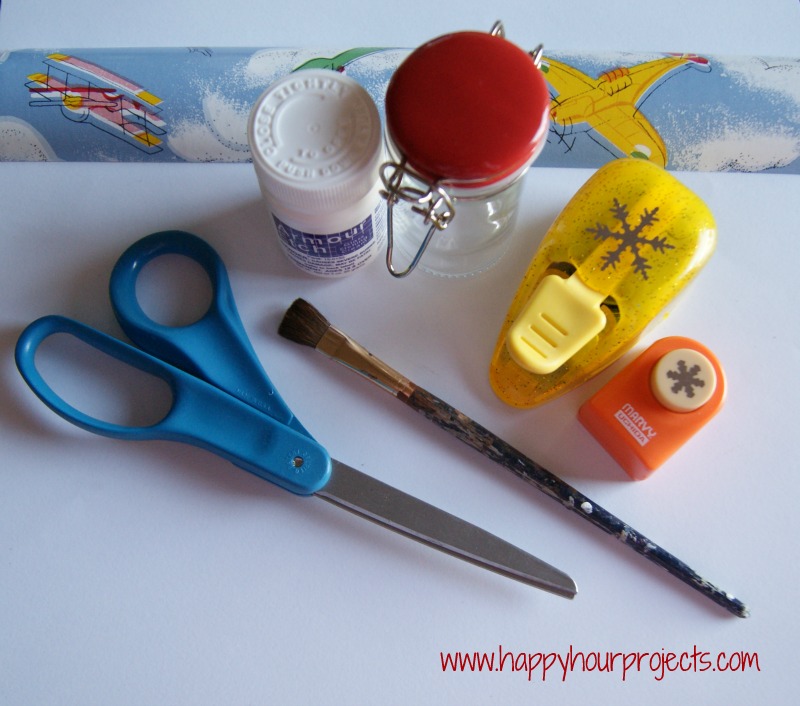
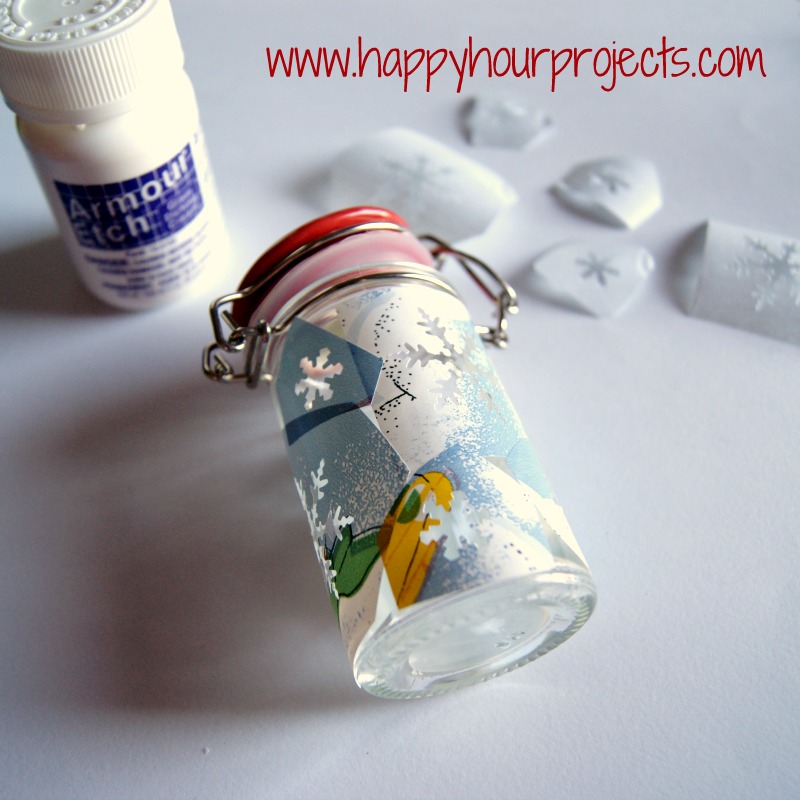
- 3 oz. spice jars
- Contact paper or vinyl
- Snowflake paper punches
- Armor Etch and a paintbrush or sponge
- Rubber gloves
- Cocoa to fill your finished jar (I have a great homemade recipe below!)
I have talked about glass etching a couple of times now, but in case this is the first post you happen to catch on it, I’ll explain it again. It’s very easy! If you already know the technique, you can just browse the photos and skip ahead to the cocoa recipe at the end. ;) I will recommend you use rubber gloves for this project, especially if you have sensitive skin, and of course, work in a well-ventilated area near a sink.
Wash your jars. You’ll need to wash them again after you etch, so you only need to make sure the outside is clean for now.
The first step is to create your stencil. The options are endless for those of you lucky enough to own a silhouette machine, but it’s definitely not necessary if you’re still waiting for Santa to bring you one (like me). For my stencils, I used contact paper from my dollar store (which is why it has airplanes on it – don’t mind that). You will only be applying it temporarily, so looks aren’t important here – the only thing you need to be sure of is that you buy the kind with the paper backing, and not the kind that peels directly off the roll. I haven’t tried any of the more expensive vinyls because there’s no need – but if you have some on-hand, any kind of removable vinyl will work!
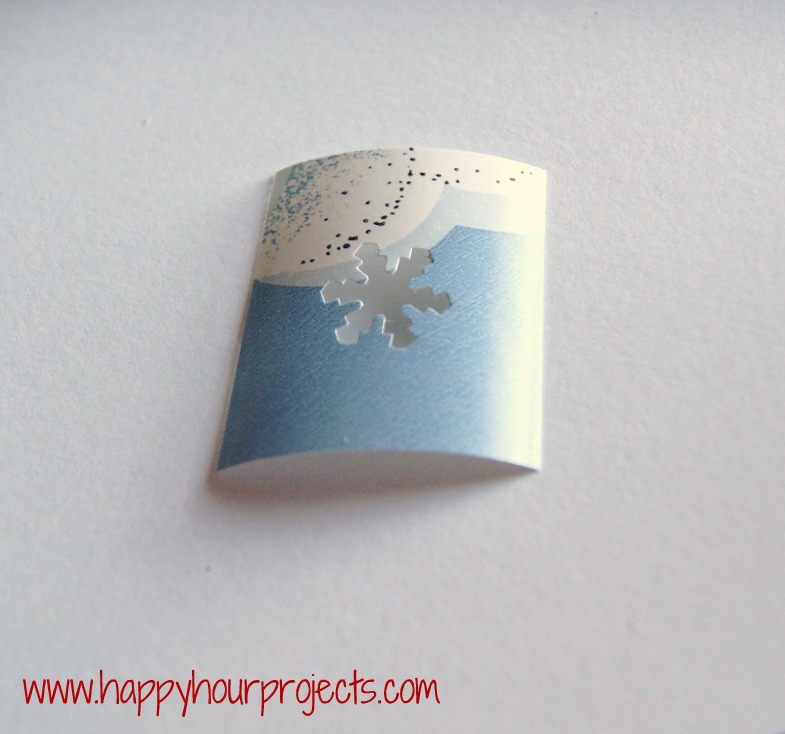
It works best if you trim your vinyl to individual pieces. Make sure there’s about 1/2 inch all the way around your design, just to make sure your Armor Etch stays contained within your design. I used two different sizes of scrapbook punches, and made about 8 little stencils.
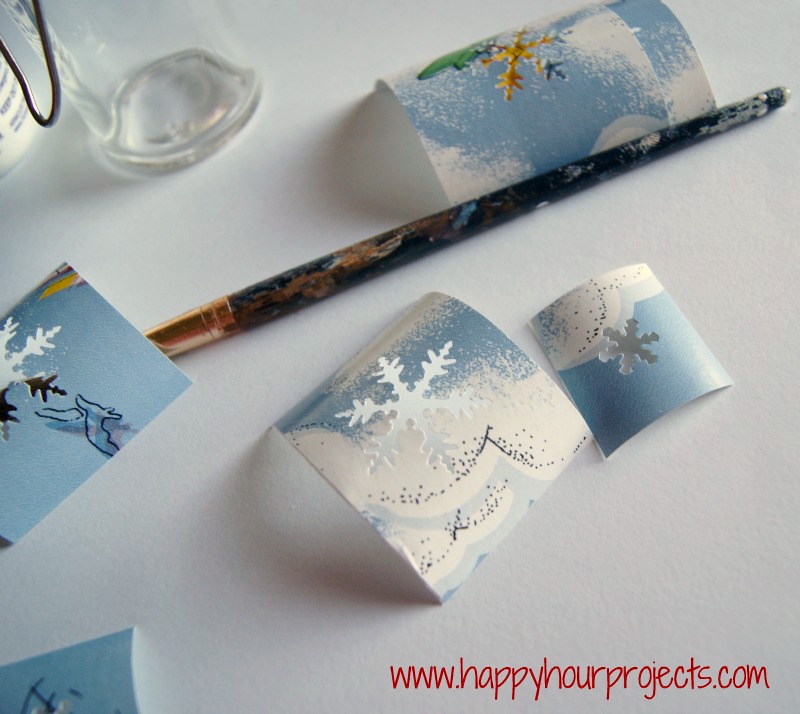
Now, peel the backing off each stencil (go gently – the snowflake details can be tricky and you don’t want to stretch your vinyl) and stick it on the outside of your jar in whatever pattern you like. I made mine random. It’s okay if the edges of your stencils overlap, but just be sure the snowflake details aren’t covered by any other stencil. If you need to trim any down to make sure of that, that’s fine.
When you like the looks of it, it’s time to etch! Make sure all the edges of your stencil are pressed down firmly before you begin. I would recommend putting on gloves at this point, just in case. Use a paintbrush or sponge to add a thick layer of Armor Etch (I found mine at Michael’s, but most craft stores should have this).
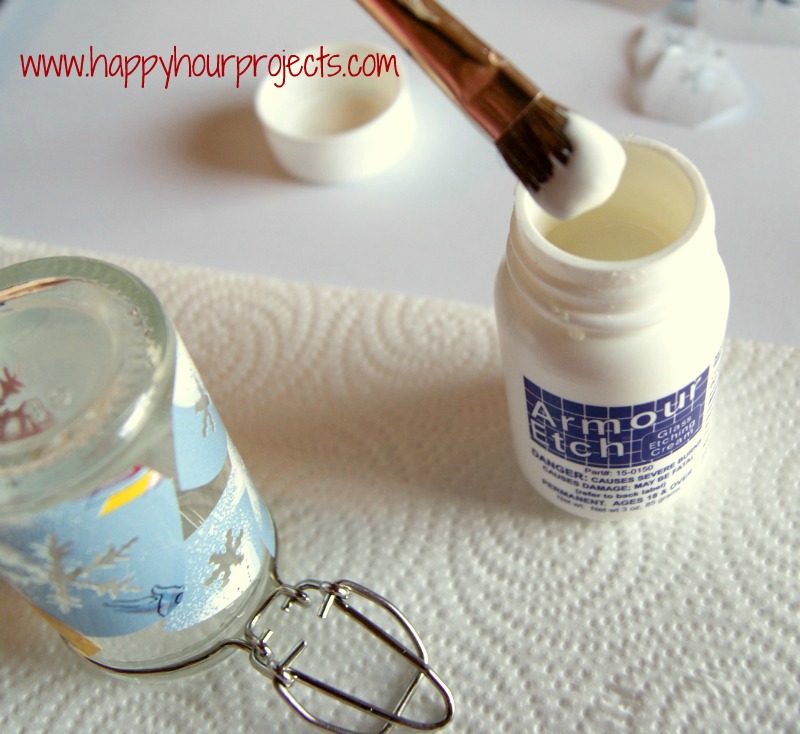
The bottle will tell you to let it sit for 60 seconds, but I found my designs looked much better if I let it sit for 5-10 minutes. Test it out and see what works best for your glass, though!

When you set your jar aside, make sure that the Armor Etch doesn’t drip onto any other area of your jar. If it does, you can wipe it off with a damp paper towel.
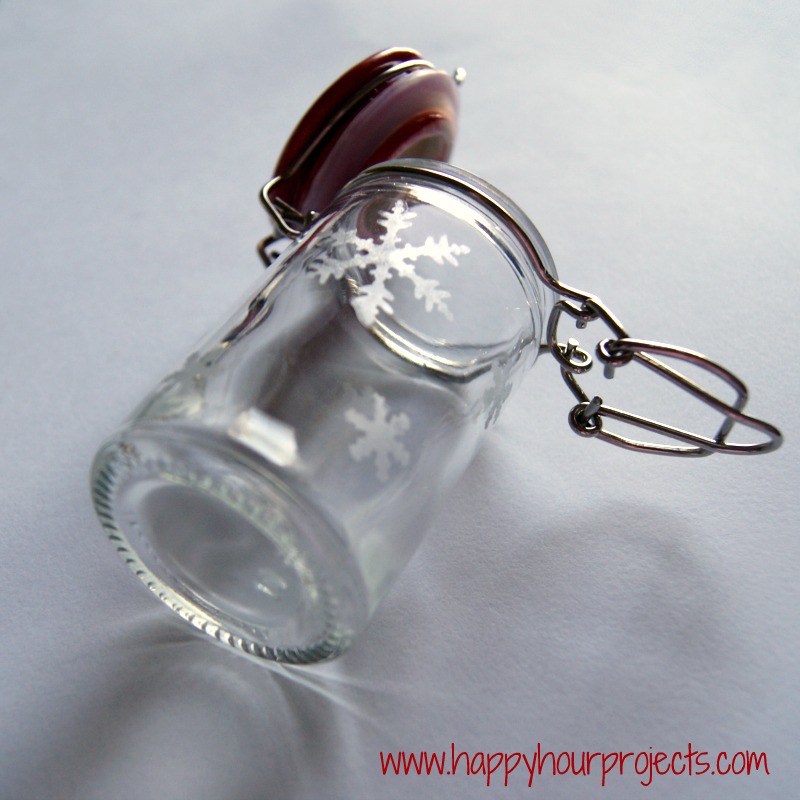
After you’ve let it set, just rinse it off really well in the sink. If you’re using contact paper like I am, your stencils may try to come off too, so be sure they don’t wash down the sink (vinyl+garbage disposal=not good, I’m sure!)

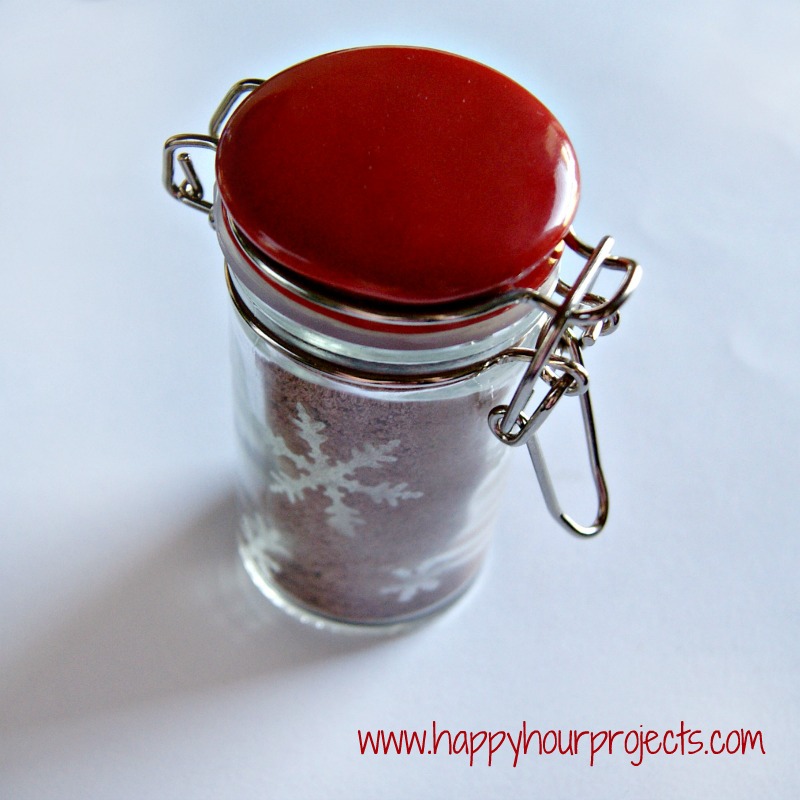
Now, wash your jar inside and out, and let it dry completely. If you’re going to be putting dry cocoa inside, there can’t be any water left before we start. Admire your handiwork. You can even insist that your husband come admire it too. I did.
While your jar is drying, you can mix up some yummy cocoa mix. Depending on how many jars you are making up, you will want to multiply this recipe. But for each jar, use these measurements:
- 1 Tbsp. nonfat dry milk
- 1 Tbsp. non-dairy creamer
- 1 Tbsp. sugar
- 1 – 1/2 tsp. cocoa powder
Sift all ingredients together – and that’s it! This will give you slightly more mix than the jar can hold – you will have about 1-1/2 tsp. mix that won’t fit. Mix 1 jar of cocoa mix with 12-16 oz. (you know, a real mug full) of hot water, and enjoy!
If you don’t have most of these ingredients already, you may find it to be more cost-effective to use a commercial brand cocoa instead for smaller quantities – there’s no shame in keeping it inexpensive. Or, you can make a up a really large batch for the family:
- 2 c. nonfat dry milk
- 2 c. non-dairy creamer
- 2 c. sugar
- 1 c. cocoa powder
If your cocoa doesn’t fill your jar all the way (like if you’re using a commercial cocoa, or if you found a larger jar), here’s a trick: fill it up the rest of the way with marshmallows to top it off! You can also add crushed candy cane or chocolate chips – both of which will melt in very hot water.
I hope you’re enjoying Christmas in July! Don’t forget to enter the huge giveaway going on all week, if you haven’t already! There are six different prize packs up for grabs from these great sponsors – each worth over $100!


I just picked up a clearance ($1.50 if you can imagine) kit of this glass etch (sort of) look stuff. Apparently it paints on an etch-like finish so it looks similar (the same?) as etching. I'm sure this would work just the same. I'll let you know, 'cause I'm gonna try it.
hi! found you on link it up thursday – this is so cute! :)
Very cute, and I'm excited to try that cocoa recipe. Yum! The first time I used Armour Etch I left it on for 60 seconds and it was hardly etched at all. So I re-stuck my contact paper, did it again, and left it for like five minutes and I agree, definitely better that way :-) Thanks so much for sharing this at The Fun In Functional!
Such a great idea, thanks for sharing.
Very pretty! I am loving these etching crafts!
So darling. I am so doing this for the holidays this year. Great little stocking stuffers. Thanks for sharing at the All Star Block Party!
Holly
This is going to be great for teacher gifts this year! I dropped by to let ya know that I liked your blog so much, I nominated you for the “Versatile Blogger” award! Stop by my post at the link below to get the image and rule, and become a part of this award blog hop! Congrats :-)
http://lesliemarquezdesigns.blogspot.com/2012/07/versatile-blogger.html
How cute!! What a great idea for gifts!:)
Very pretty! Makes a great gift!
What a super cute idea!